
Getting Started
The document describes how to use Magento. The Magento website data is for reference only. By default, this solution does not install Magento sample data. If you need sample data, install it after the environment is successfully deployed by referring to (Optional) Installing Sample Data. The sample data cannot be automatically deleted from the database, so if you need to delete it, manually delete it on the Magento management system. You can learn how to use Magento by referring to Magento product documentation.

- By default, this solution uses Magento 2.4.5, PHP 8.1.27, Nginx 1.20.1, and Composer 2.6.6.
- Port 80 is used for accessing the Magento website.
(Optional) Modifying Security Group Rules
A security group is a collection of access control rules to control traffic to and from cloud resources, such as cloud servers, containers, and databases. Cloud resources associated with the same security group have the same security requirements and are mutually trusted within a VPC.
You can modify security group rules, for example, by adding, modifying, or deleting a TCP port, as follows:
- Adding a security group rule: Add an inbound rule and enable a TCP port if needed.
- Modifying a security group rule: Inappropriate security group settings may cause serious security risks. You can modify a security group rule to ensure network security of your ECSs.
- Deleting a security group rule: If the source or destination IP address of an inbound or outbound security group rule changes, or a port does not need to be enabled, you can delete the security group rule.
Using Magento
The basic usage is the original status of Magento after the solution is successfully deployed. In this status, Magento sample data is not installed.
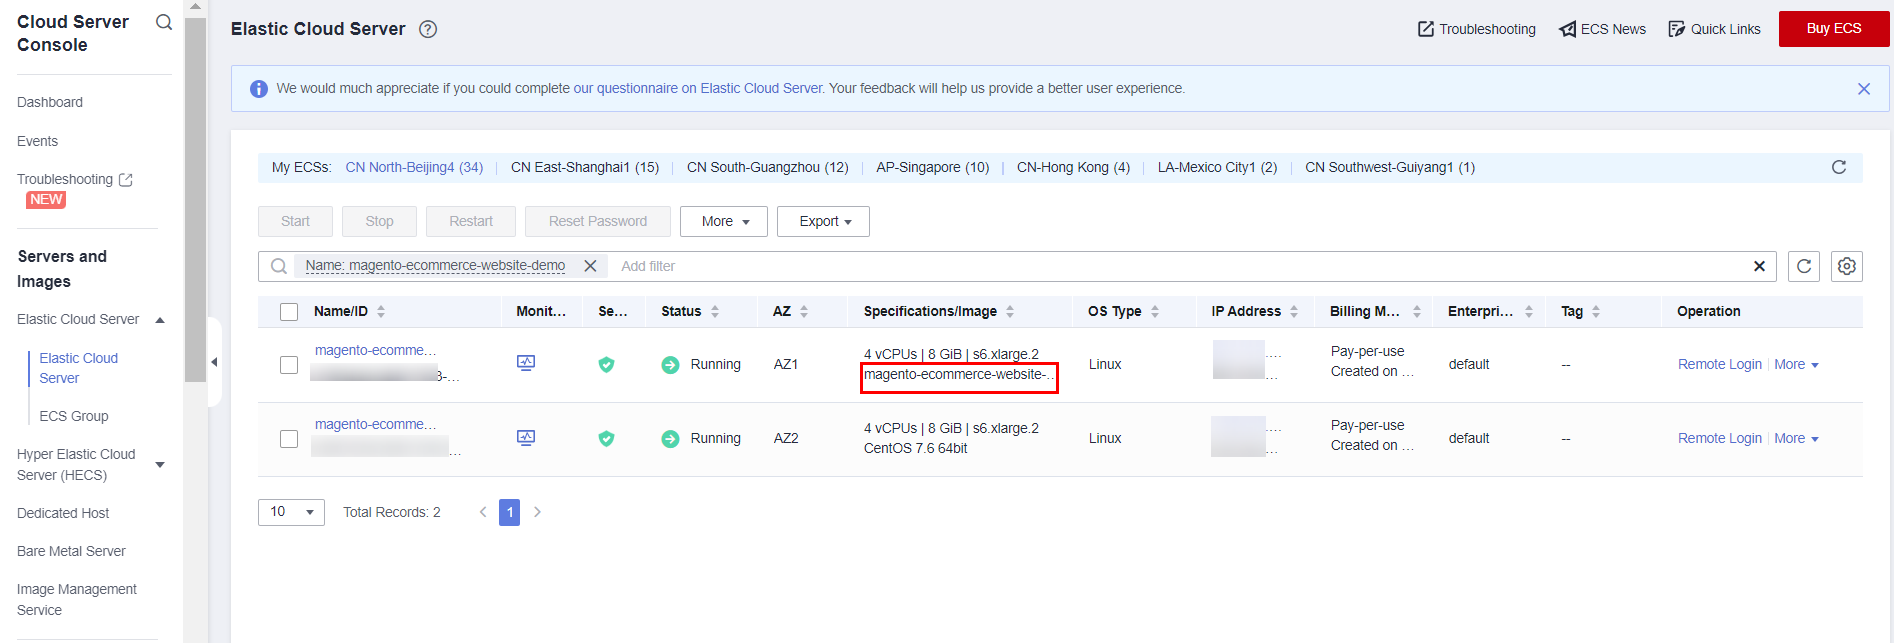
- Log in to the ECS console, locate the Magento servers created for this solution, and check whether the images of all servers except magento-ecommerce-website-demo-1 are var.magento-ecommerce-website-demo-ims. If yes, all server environments are successfully deployed. Figure 1 ECS image
- On the Outputs tab page of the stack, copy the address for accessing Magento. Figure 2 Address for accessing Magento

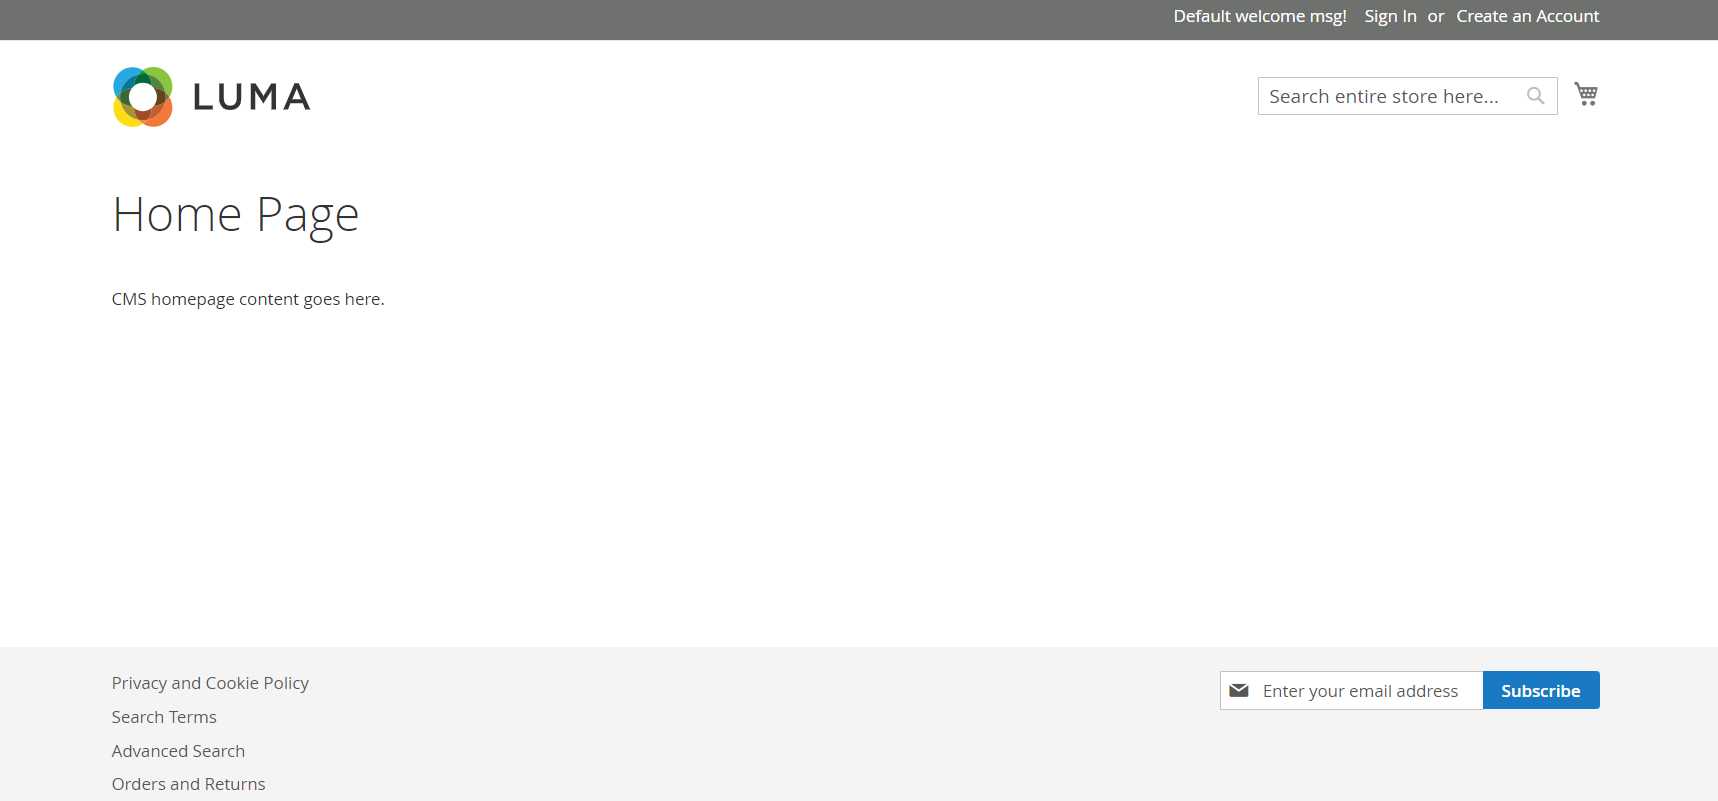
- Open the browser, paste the copied address into the address box, and press Enter. The following figure shows the client page of Magento. Figure 3 Magento client
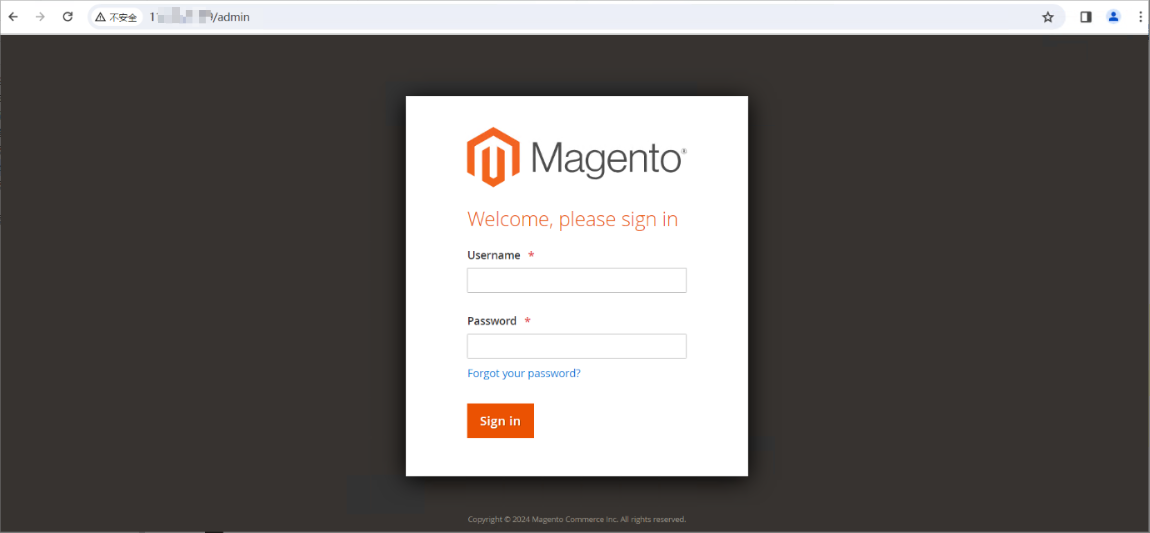
- Open the browser, add /admin to the end of the copied address in the address box, and press Enter. The following figure shows the administrator login page of Magento. Figure 4 Administrator login screen

The login username is admin, and the password is the value of magento_admin_passwd specified in the deployment template Table 1.
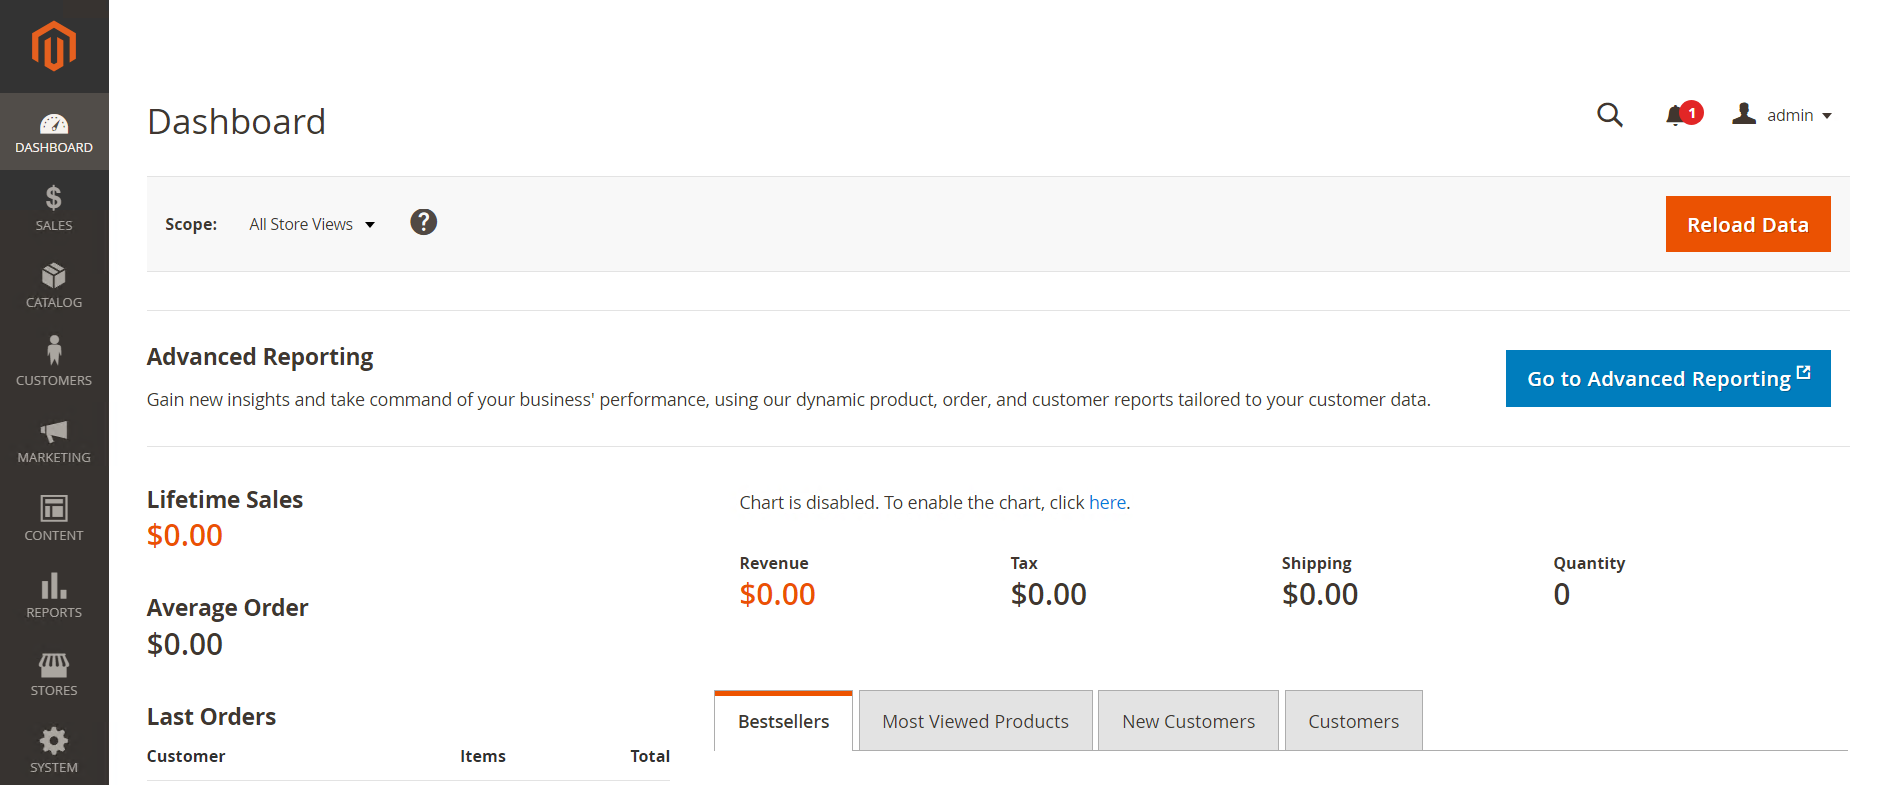
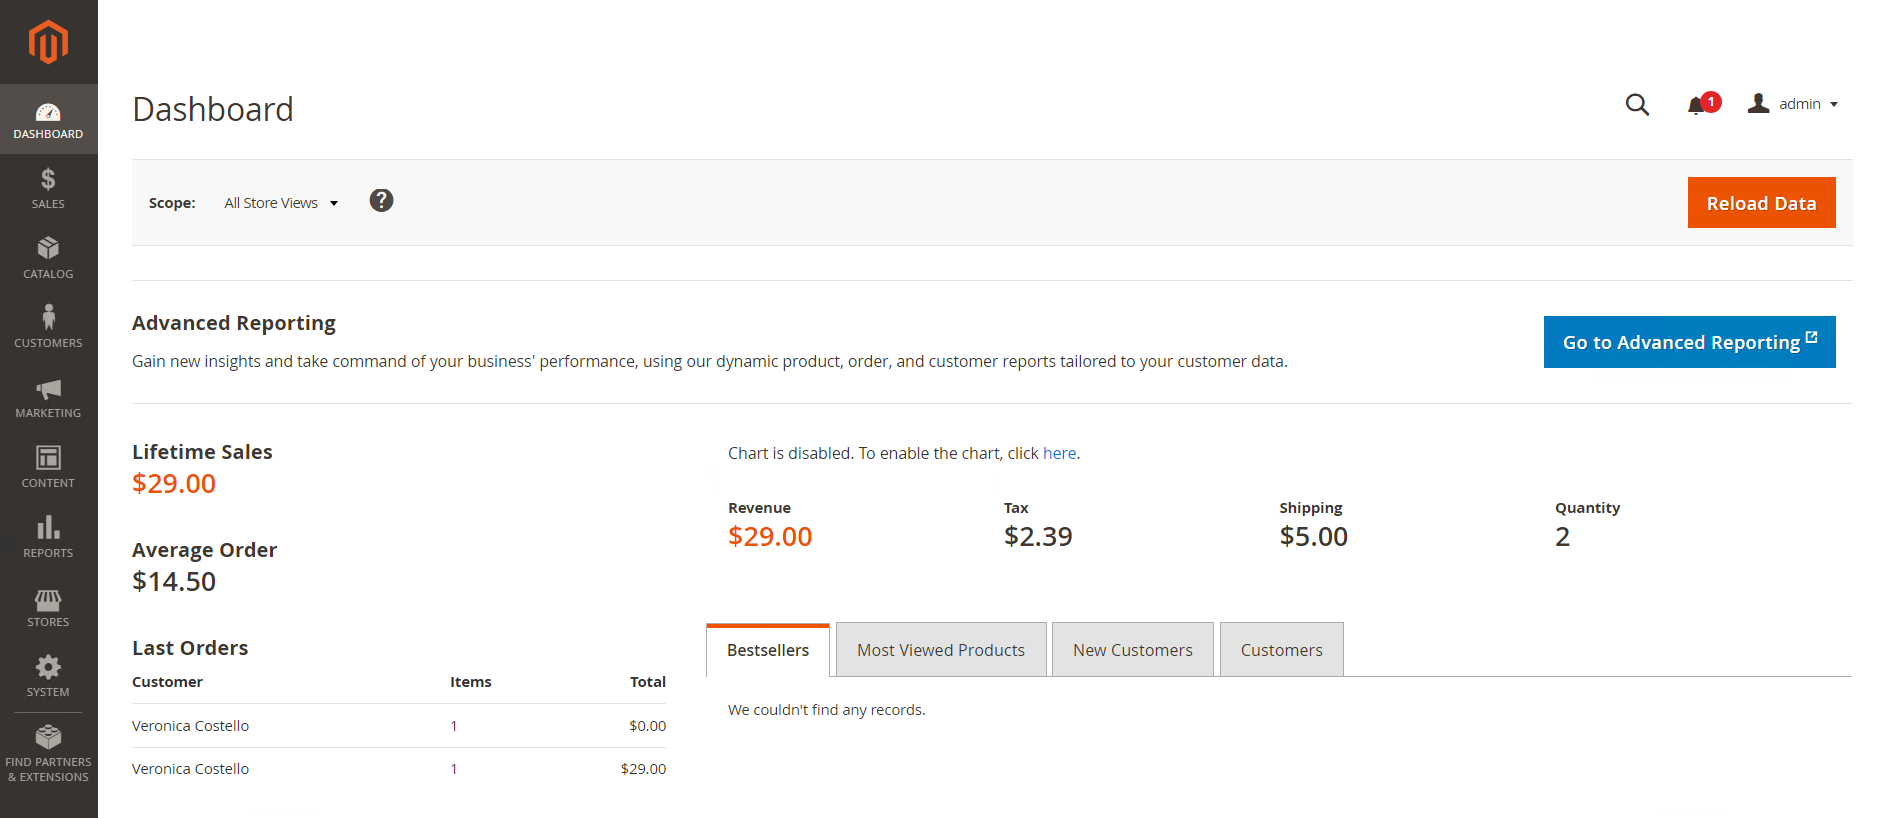
- On the backend management page, perform routine O&M on your online store. Figure 5 Magento backend management page
(Optional) Installing Sample Data
- Log in to magento-ecommerce-website-demo-1 and run the sampledata.sh script. Enter deploy for installing sample data and remove for deleting sample data. For details, see Sample data overview.
[root@magento-ecommerce-website-demo-1]sh /tmp/sampledata.sh
Figure 6 Installing sample data
- To delete the sample data, run the command in the previous step and enter remove.
Releasing EIPs
If the Magento website is successfully deployed and can be accessed from the Internet, you can release the EIPs bound to all servers to avoid unnecessary fees.
- Unbind EIPs. Log in to the ECS console, locate the ECSs you want to unbind the EIPs from. In the Operation column of each ECS, choose More > Manage Network > Unbind EIP. On the displayed dialog box, click Yes. Figure 7 Viewing an EIP
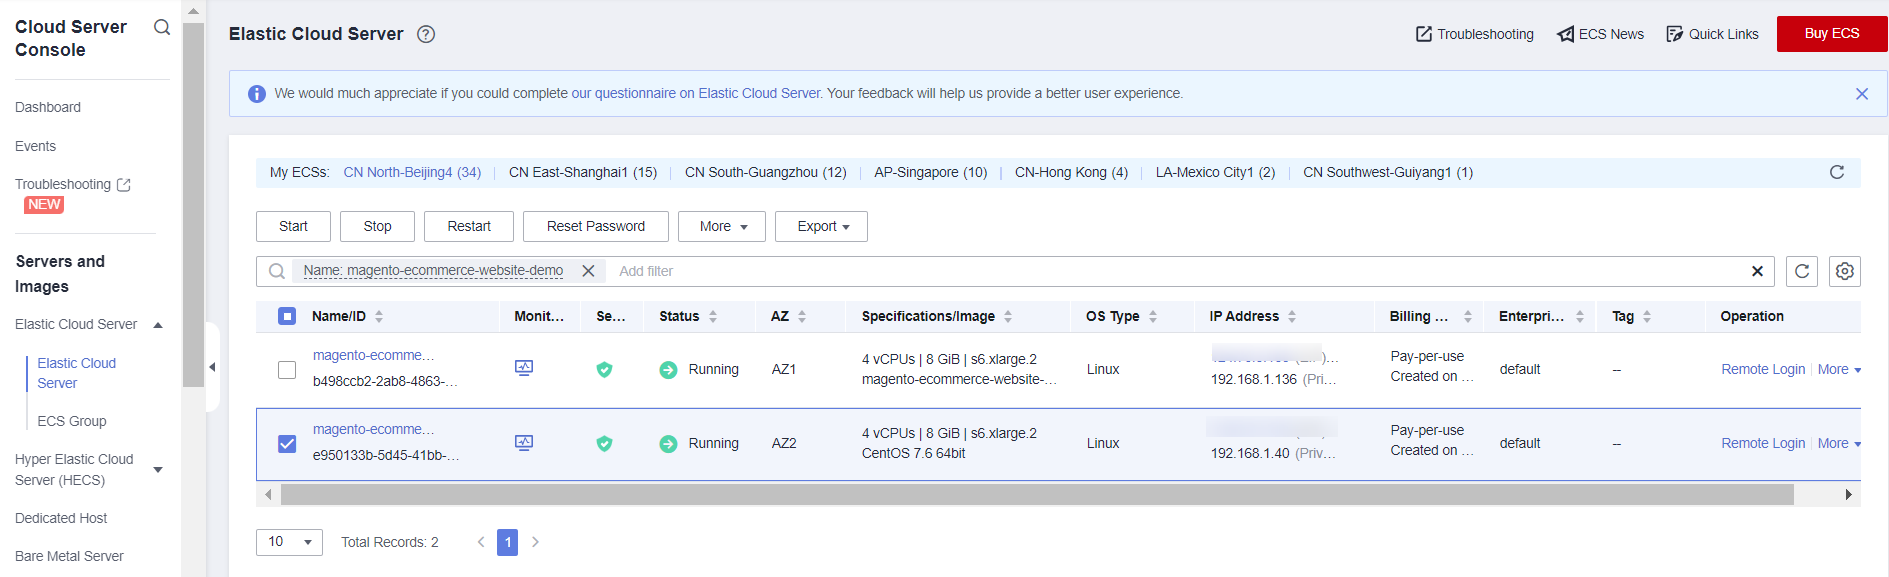 Figure 8 Unbinding an EIP
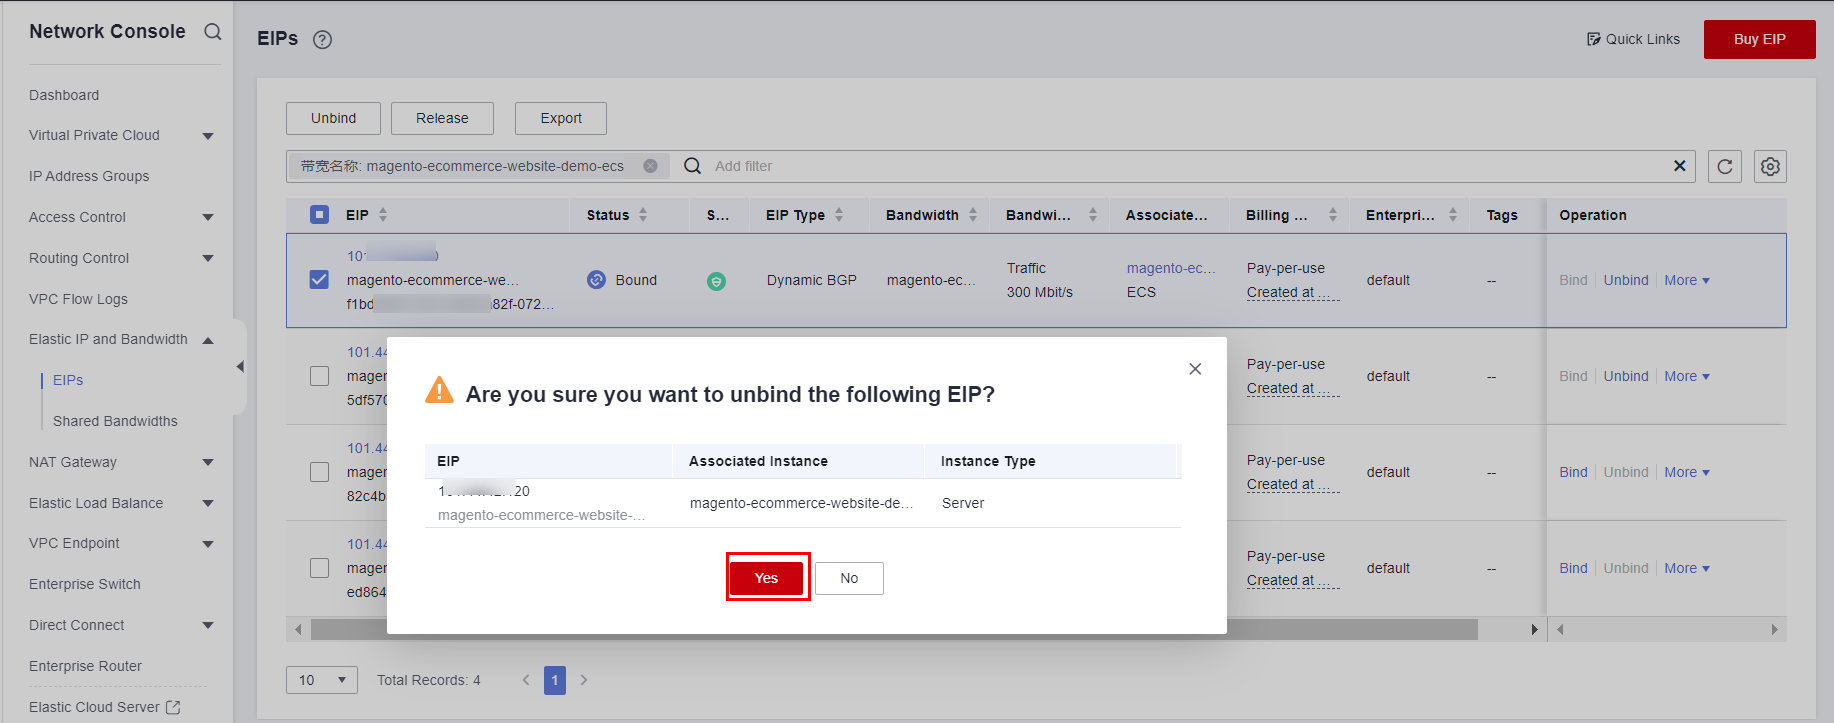
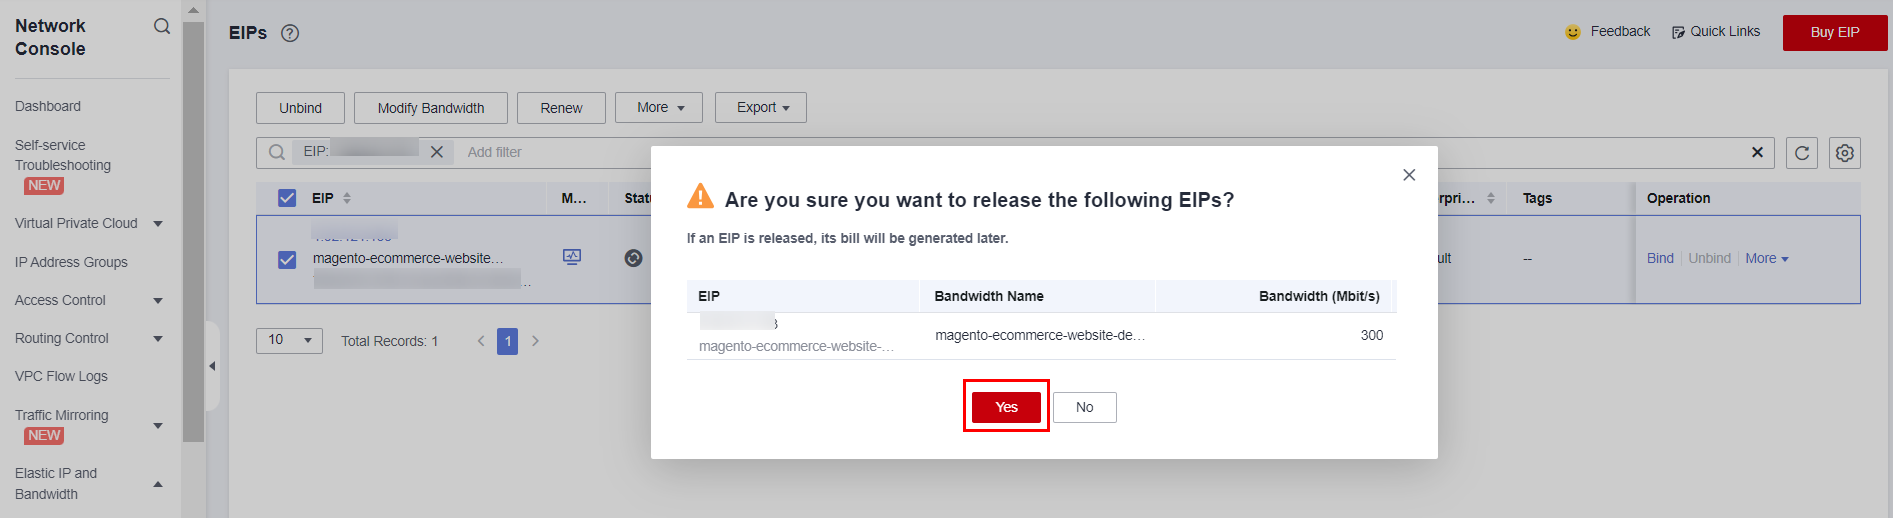
- Release EIPs. Log in to the EIP console, locate the EIPs you want to release, and choose More > Release in the Operation column of each EIP. On the displayed dialog box, click Yes. Figure 9 Releasing an EIP
User Operations on Magento Client
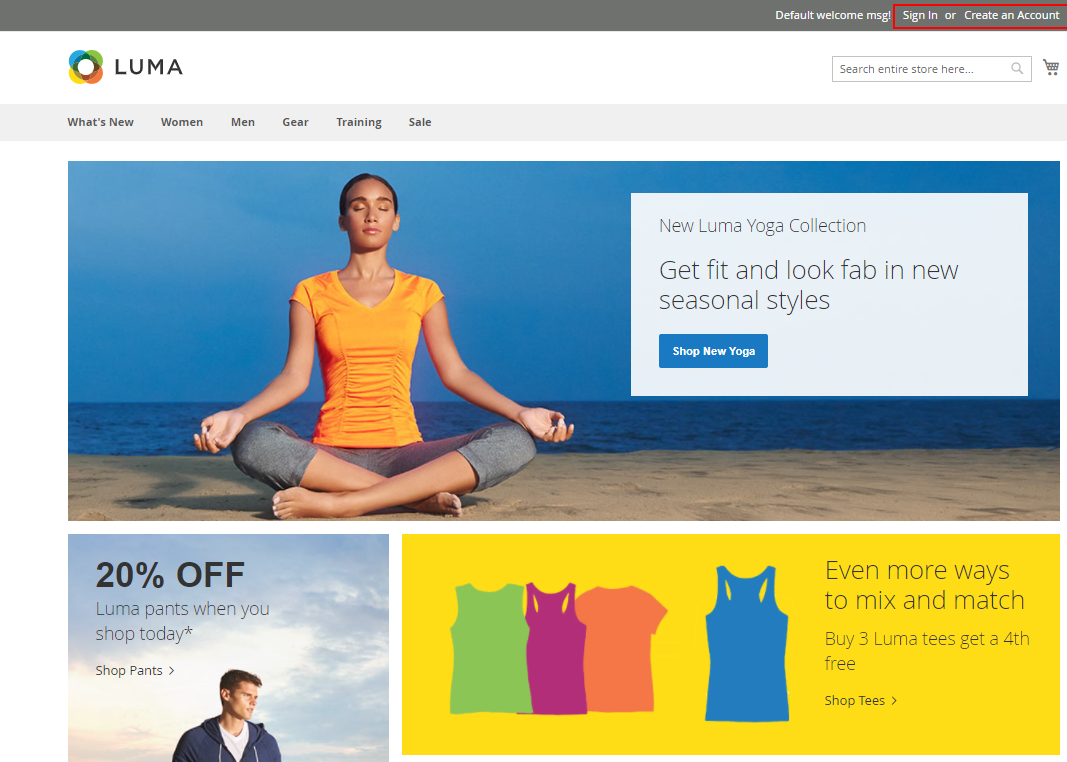
Open a browser, enter http://EIP in the address box, and press Enter.
- Click Sign In or Create an Account in the upper right corner. Figure 10 Login page
- Click Create an Account to register an account if you are a new user or Sign In if you already have an account. Figure 11 Login demonstration

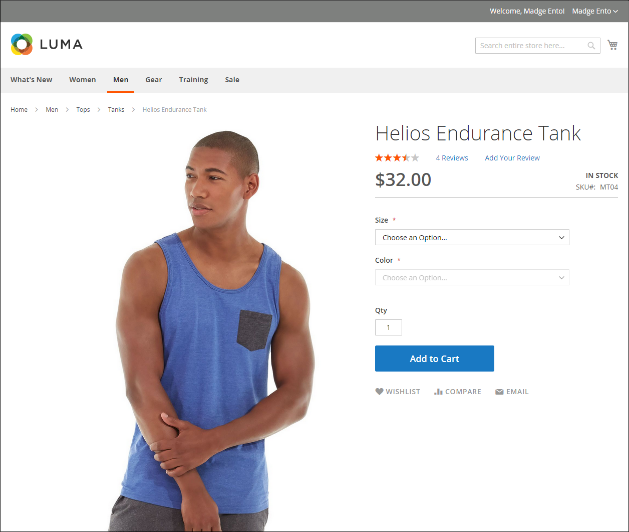
- Log in to the e-commerce platform, you can browse offerings and their details, reviews, quantity, and add them to the cart. Figure 12 Browsing the offerings
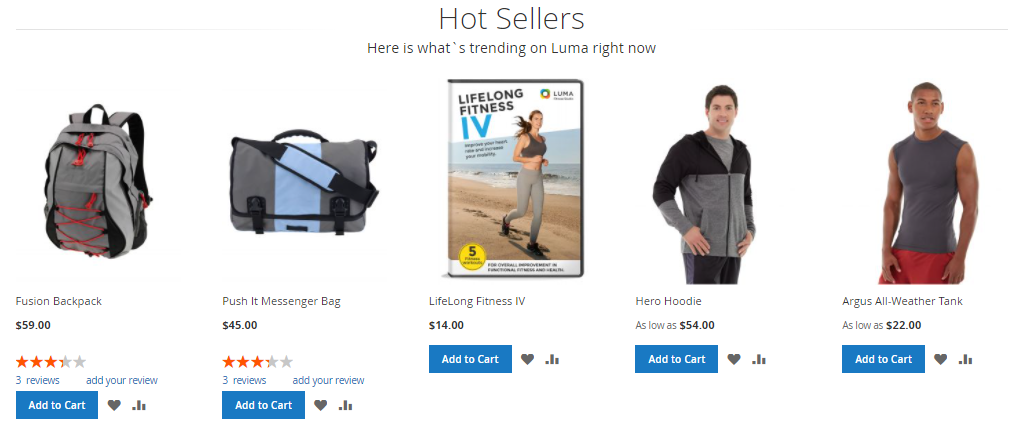 Figure 13 Viewing details
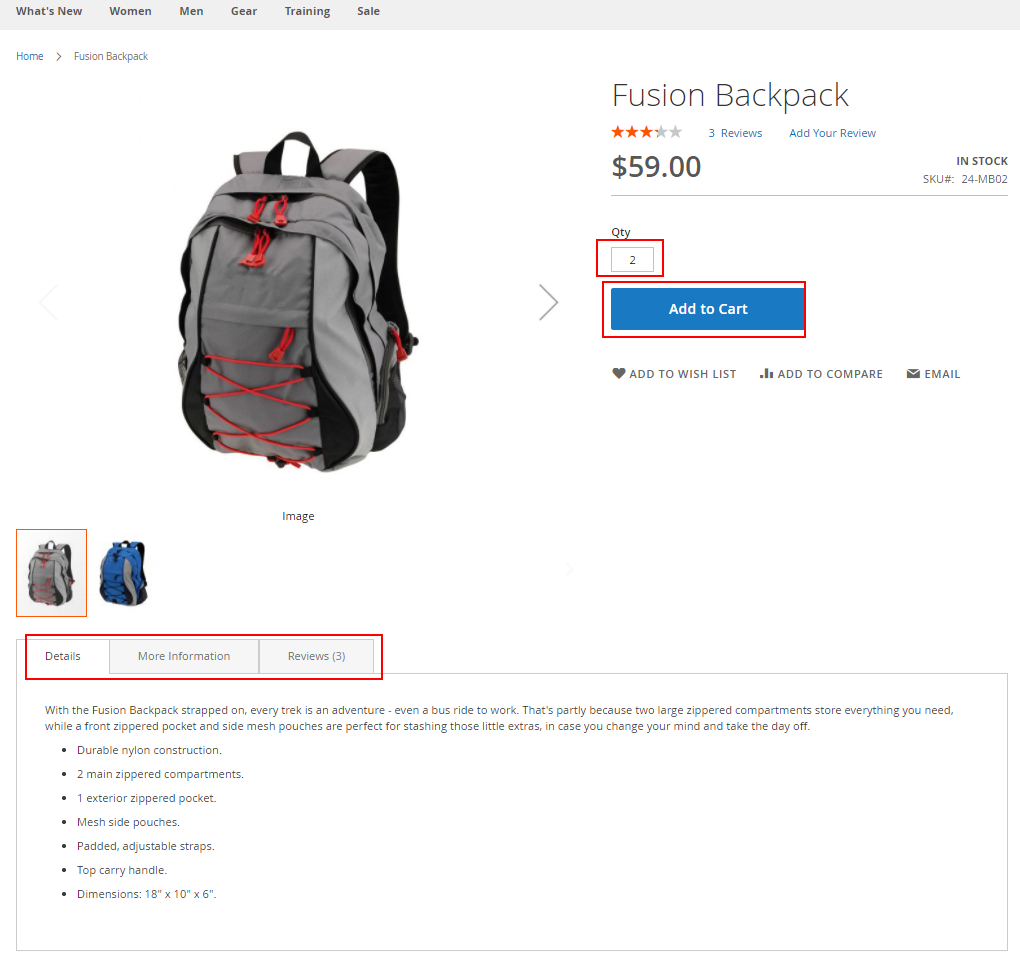
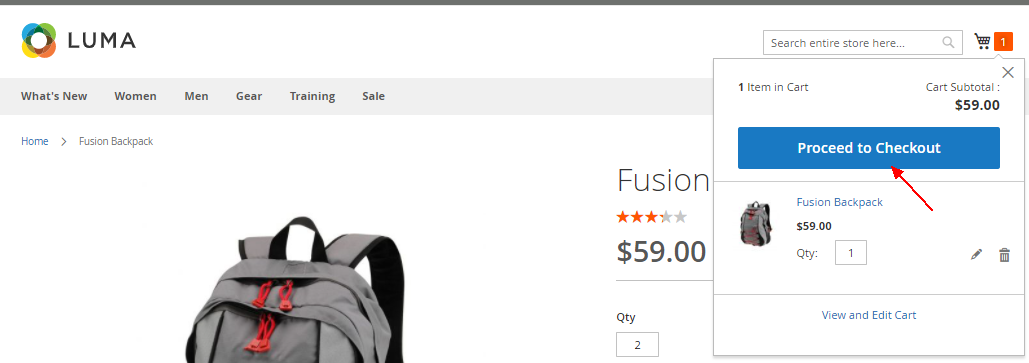
- Click Proceed to Checkout to place an order. Figure 14 Placing an order
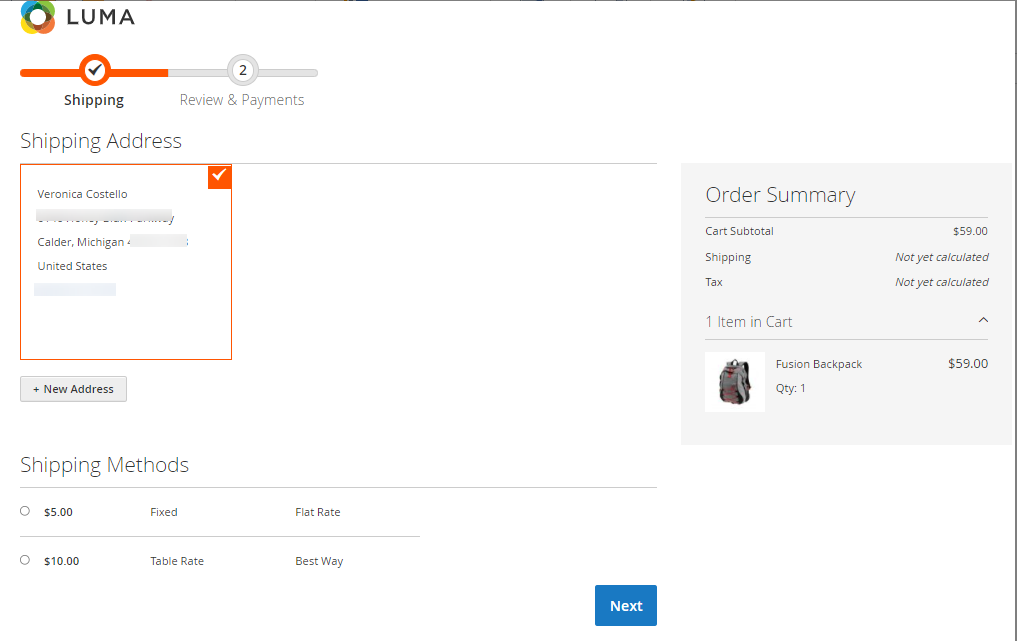
- Enter logistics information and pay for the order. Figure 15 Entering logistics information
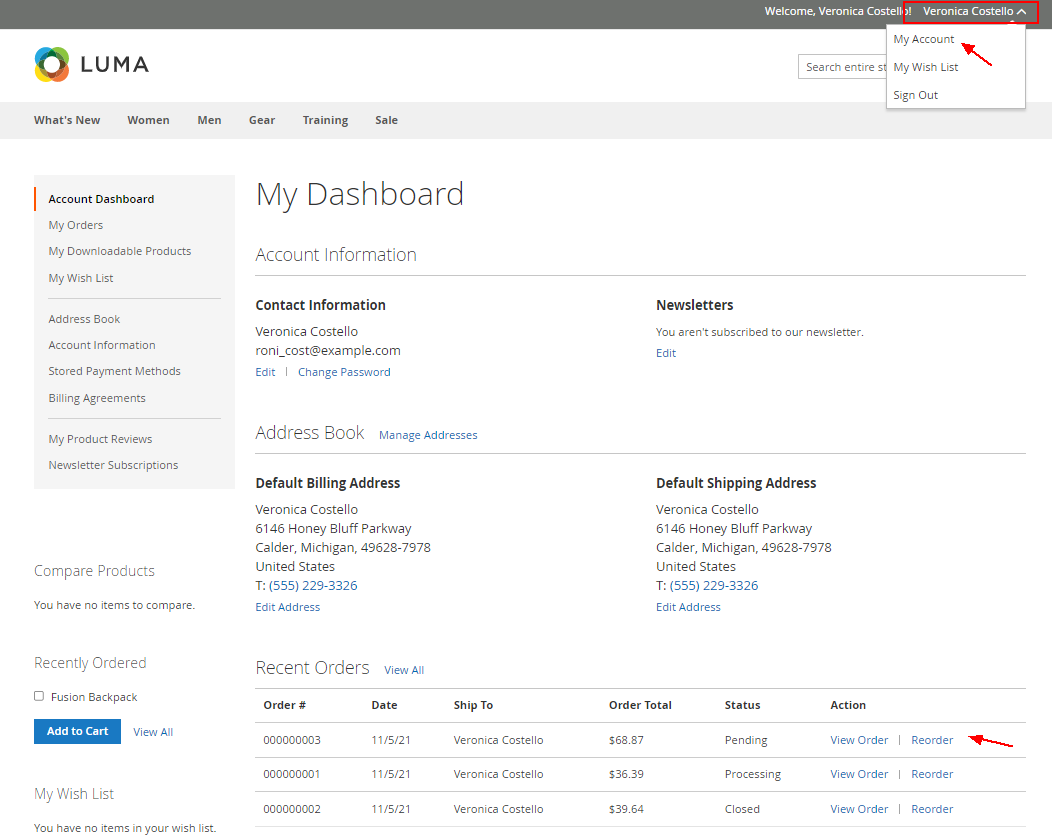
- Go to your account to view the order information. Figure 16 Your account
Administrator Operations on Magento
Open a browser, enter http://EIP/admin in the address box, and press Enter. Enter the username and password as shown in the following figure to manage your online store.
Management Console
- Dashboard shows a brief overview of sales and customer activities, and is usually the first page you will see on the management console. Figure 18 Dashboard
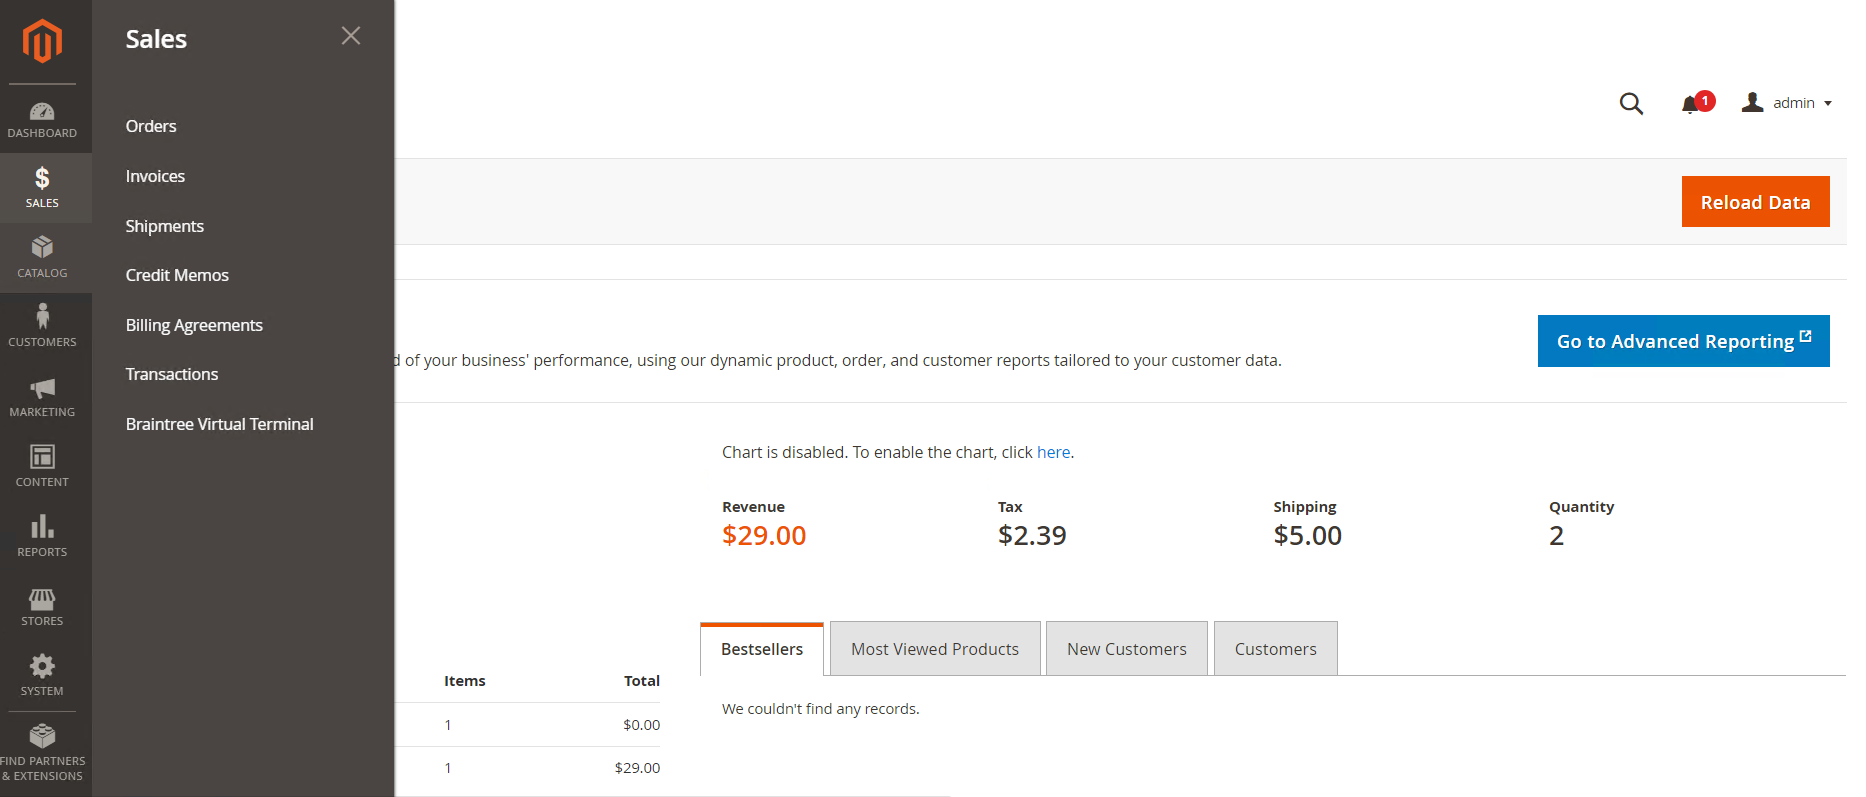
- On the Sales tab page, you can find anything about orders, including invoices, shipments, credit memos, and transactions. Figure 19 Sales tab page
- On the Catalog tab page, you can manage catalogs and inventory. Figure 20 Catalog tab page

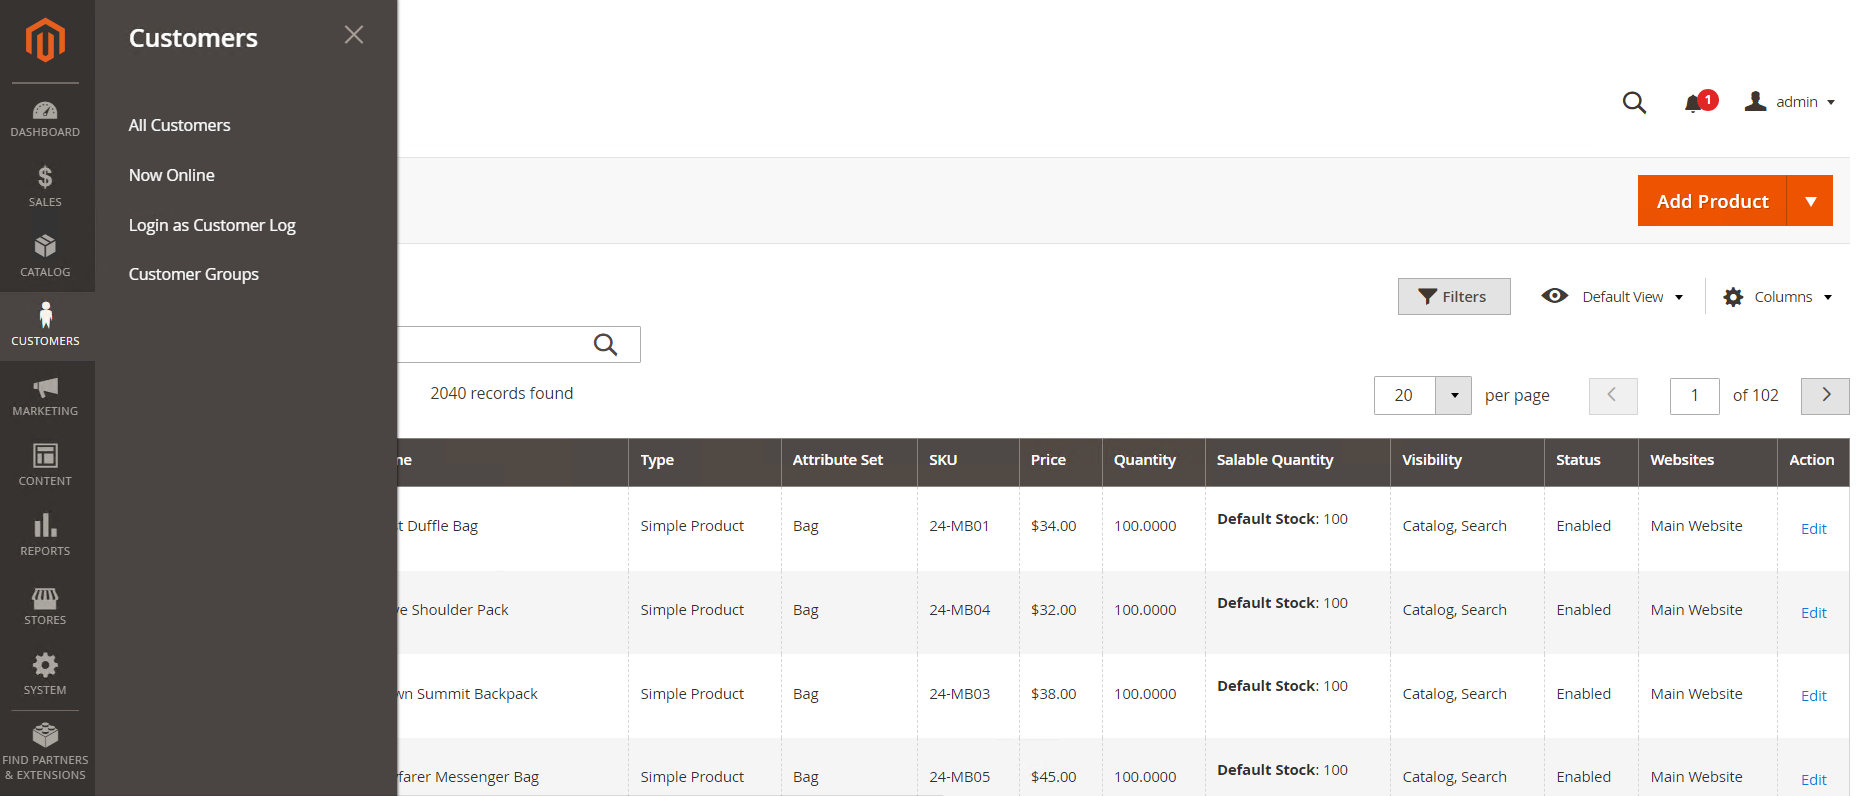
- On the Customers tab page, you can manage their accounts and view online customers. Figure 21 Customers tab page
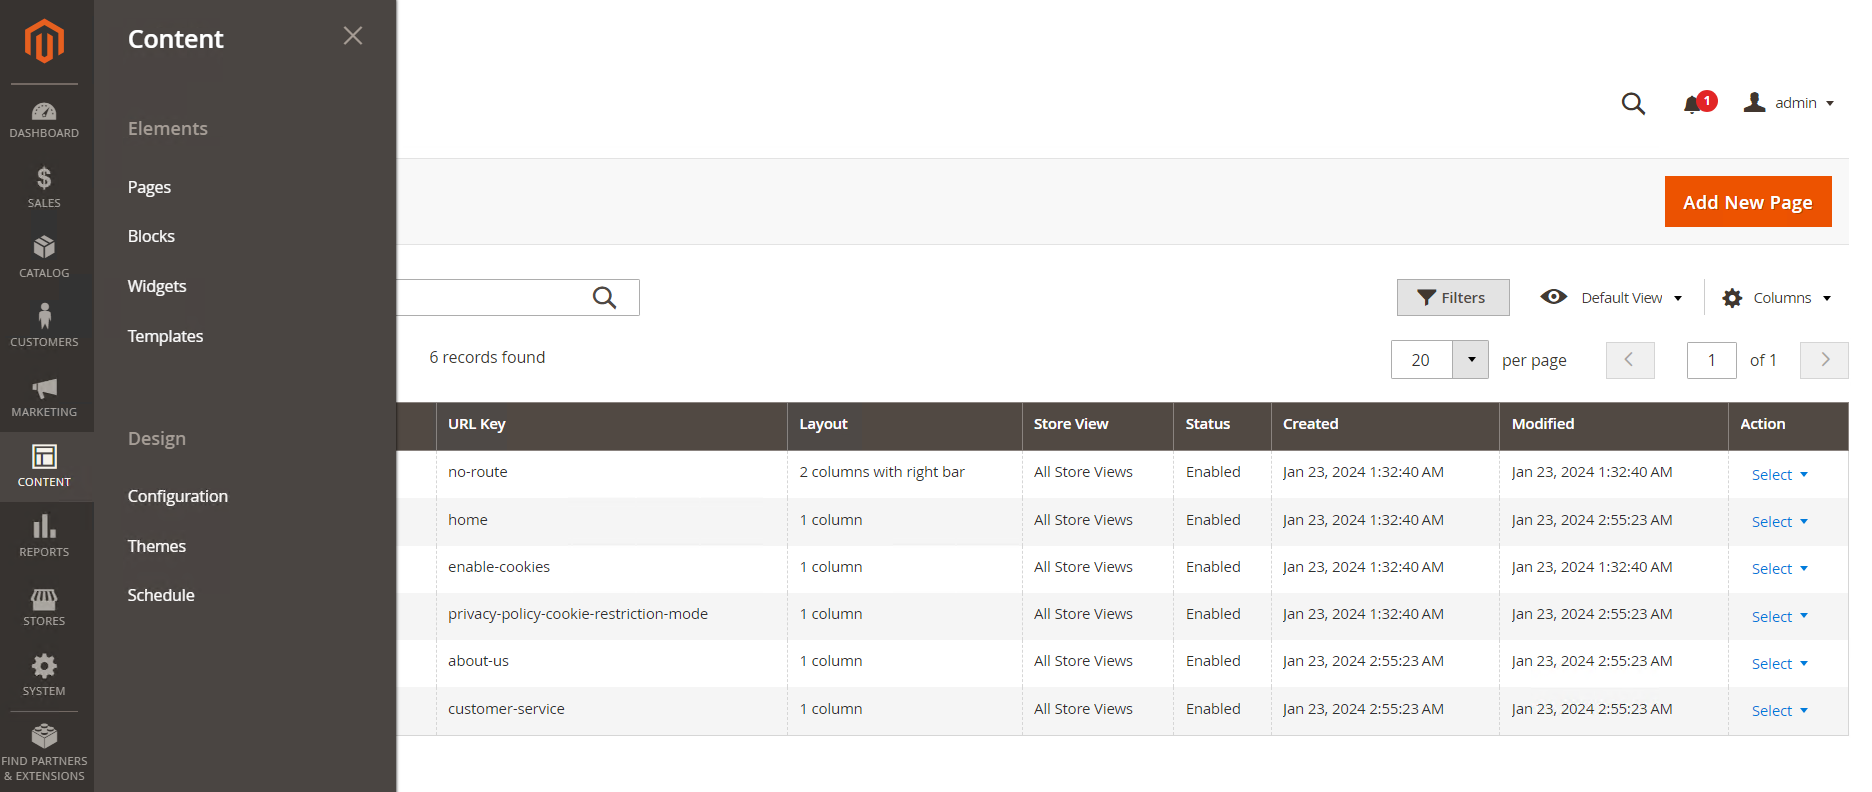
- On the Content tab page, you can manage store contents, including designing a page, arranging content blocks, and displaying frontend applications. Figure 22 Content tab page
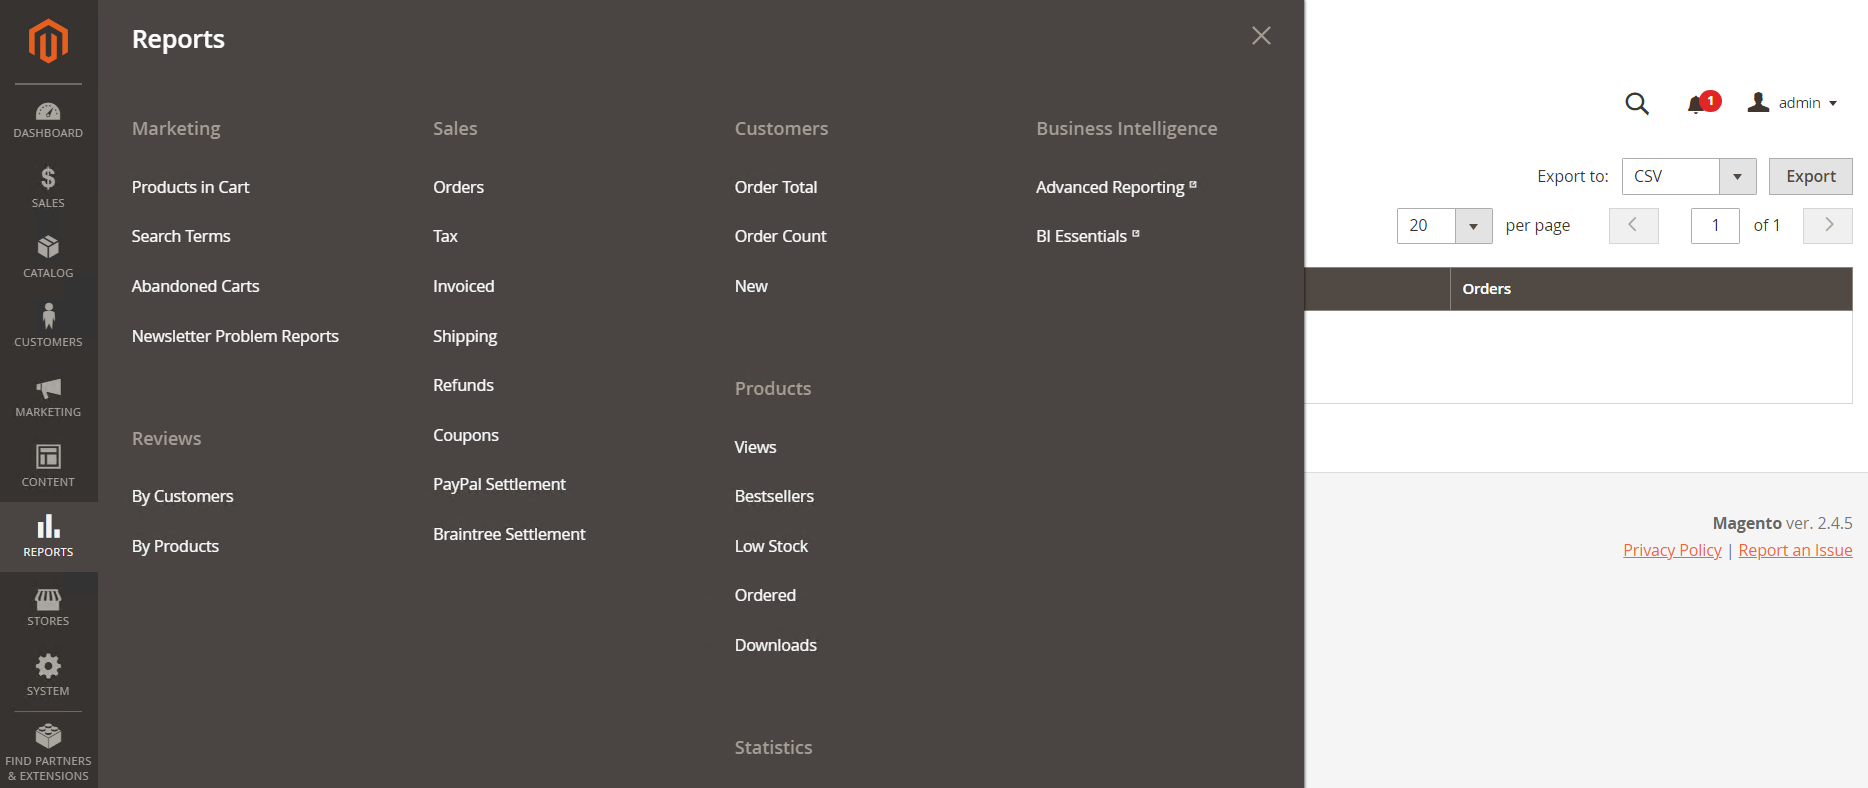
- On the Reports tab page, you can check on details into your stores, including reports on sales, products in cart, offerings, customers, tags, comments, and search terms. Figure 23 Reports tab page
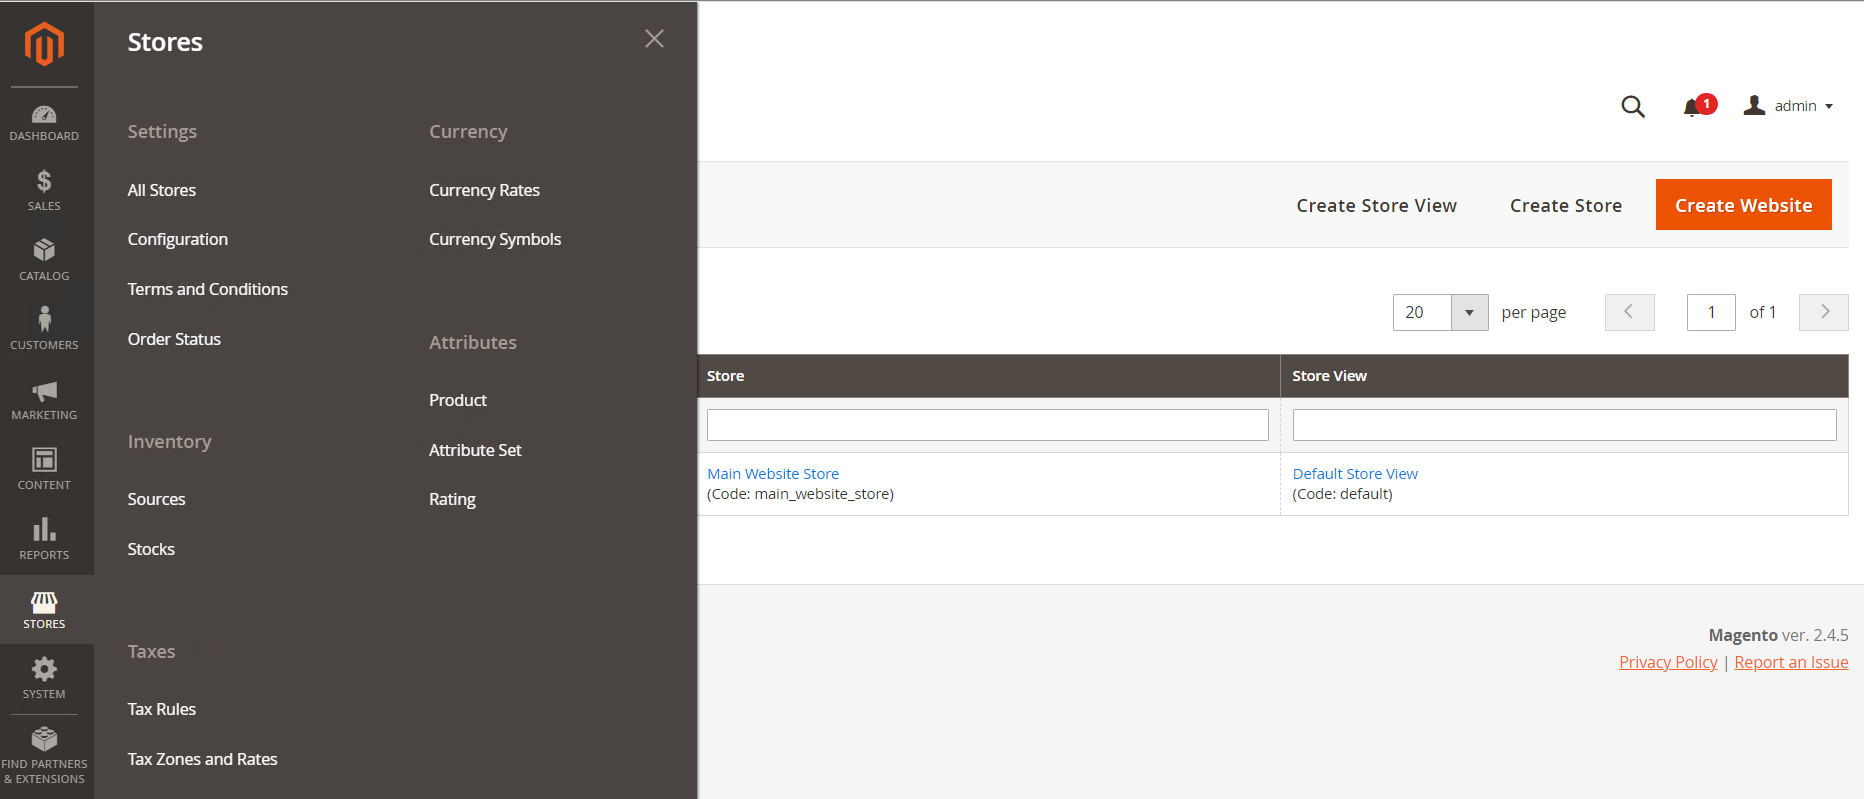
- On the Stores tab page, you can change settings to manage your stores. Figure 24 Stores tab page
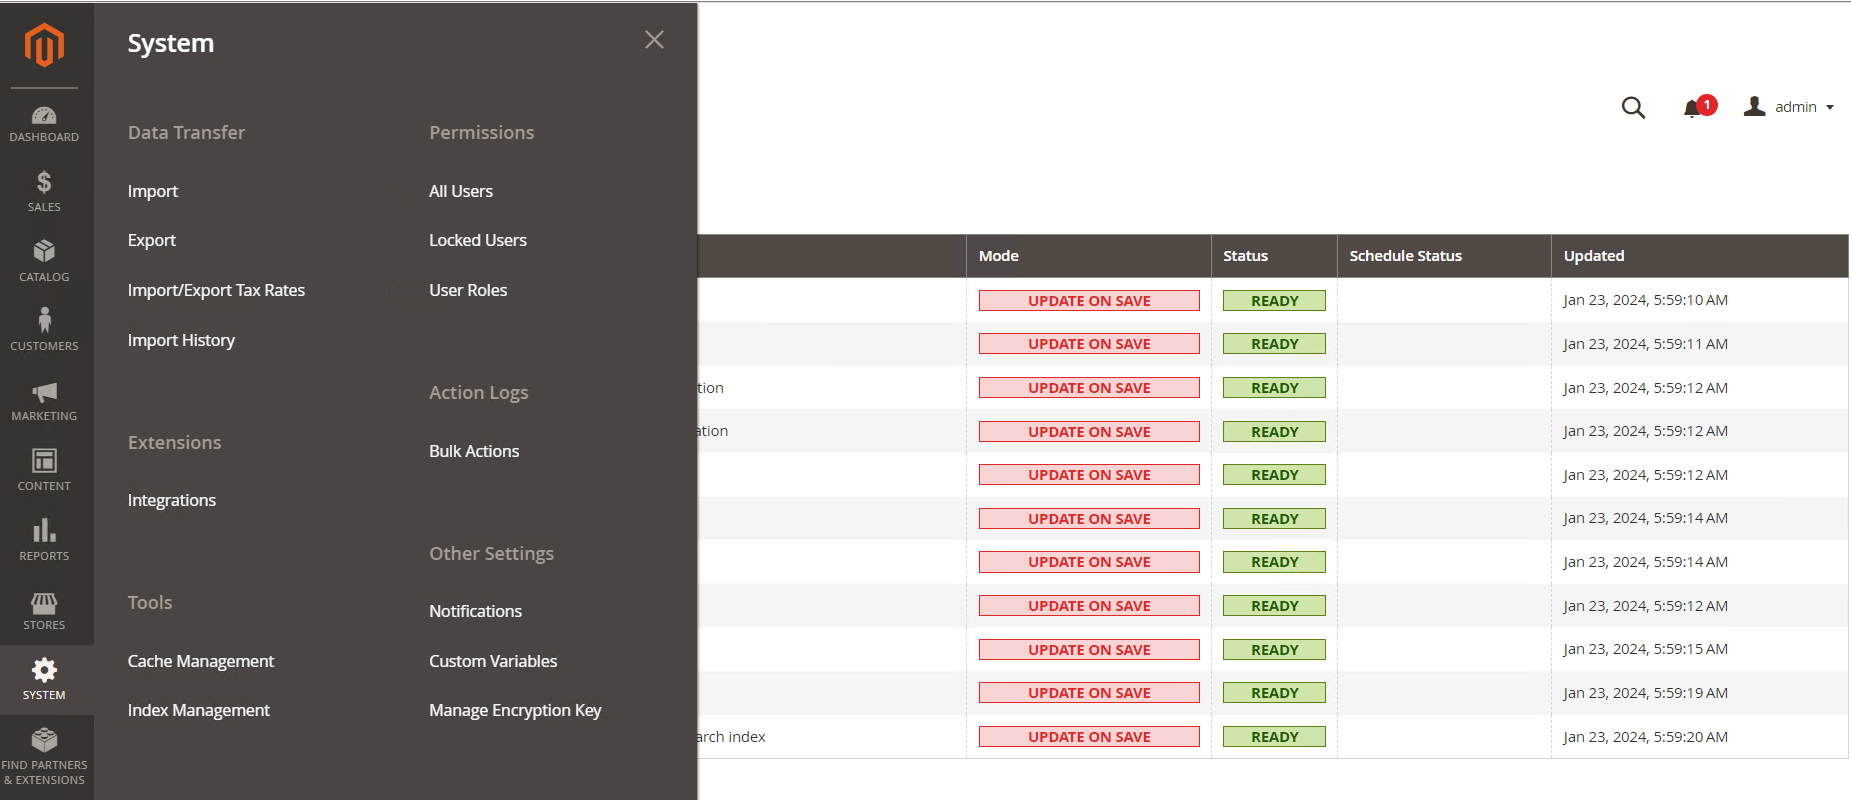
- On the System tab page, you can install extensions and manage web services tools required for integration with other applications. Figure 25 System tab page
- On the Find Partners & Extensions tab page, you can find partners on Magento Marketplace for your stores. Figure 26 Find partners & extensions tab page

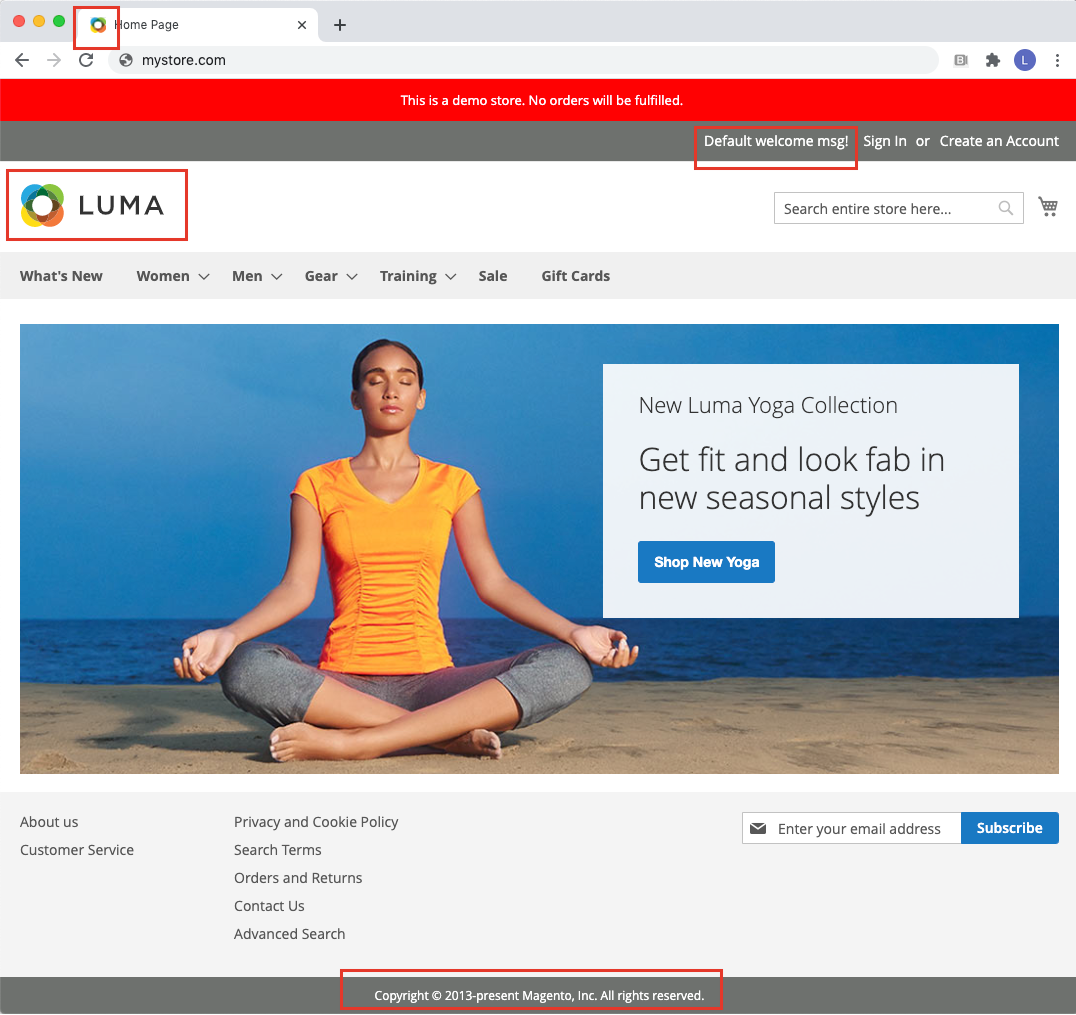
Storefront Branding
One of the first things you need to do is to change the logo in the header and upload a favicon for the browser. You also need to add your welcome message and update the copyright notice in the footer. For details, see Storefront branding.
Creating a Product
The first thing you need to do is to choose a product type. For details, see Create a product.
If you are just beginning to create your product catalog, you can create a few sample products to experiment with each product type. For more information, see Catalog Management Guide on the Magento official website.
The most efficient way to add products to a catalog is to import them from a CSV file. For details, see Import data.
Feedback
Was this page helpful?
Provide feedbackThank you very much for your feedback. We will continue working to improve the documentation.See the reply and handling status in My Cloud VOC.
For any further questions, feel free to contact us through the chatbot.
Chatbot


