Configuring FineBI to Connect to DLI for Data Query and Analysis
FineBI is an intelligent, visual tool that focuses on data analysis and visualization. It can connect to various data sources and transform intricate data into intuitive charts and dashboards to swiftly gain data insights.
This section describes how to configure FineBI to connect to DLI to access and analyze data in DLI.
Preparations
- Environment requirements:
Make sure that your system environment meets the following requirements:
- Operating system: Only Windows 10 and Windows 11 (64-bit) are supported.
- Toolkits:
- DLI JDBC driver: dli-jdbc-x.x.x.jar
- FineBI installation package: FineBI installation package
- Preparing connection information
Table 1 Connection information Item
Description
How to Obtain
DLI AKSK
AK/SK-based authentication refers to the use of an AK/SK pair to sign requests for identity authentication.
DLI's endpoint address
Endpoint of a cloud service in a region.
DLI's project ID
Project ID, which is used for resource isolation.
DLI's region information
DLI's region information
Step 1: Install FineBI and Configure Data Connections
- Download and install FineBI.
- Download the FineBI installation package.
- Find the downloaded FineBI installation program file.
- Double-click the installation program.
- Follow the installation wizard to perform installation operations, including accepting the license agreement, selecting the installation type (typical or custom), and setting the installation directory.
- Configure FineBI to support custom drivers.
- Open the script for editing custom drivers.
Locate the edit script /webapps/webroot/WEB-INF/embed/finedb/db.script in the root directory of FineBI installation.
- Add the following content to the script:
INSERT INTO FINE_CONF_ENTITY VALUES
- Change the value of the following configuration item to true:
'SystemConfig.driverUpload','true'
- Restart FineBI for the modifications to take effect.
- Open the script for editing custom drivers.
- Integrate the JDBC driver with FineBI.
- Download the data driver.
Click dli-jdbc-x.x.x.jar to obtain the JDBC driver, named huaweicloud-dli-jdbc-xxx-dependencies.jar.
- Obtain Log4j-related JAR files.
Download the following log4j dependency packages from the official Maven repository:
- log4j-api-2.xx.jar,
- log4j-core-2.xx.jar,
- log4j-slf4j-impl-2.xx.jar
- Integrate the DLI driver into FineBI.
- Open FineBI.
- Choose Data Connection > Data Connection Management.
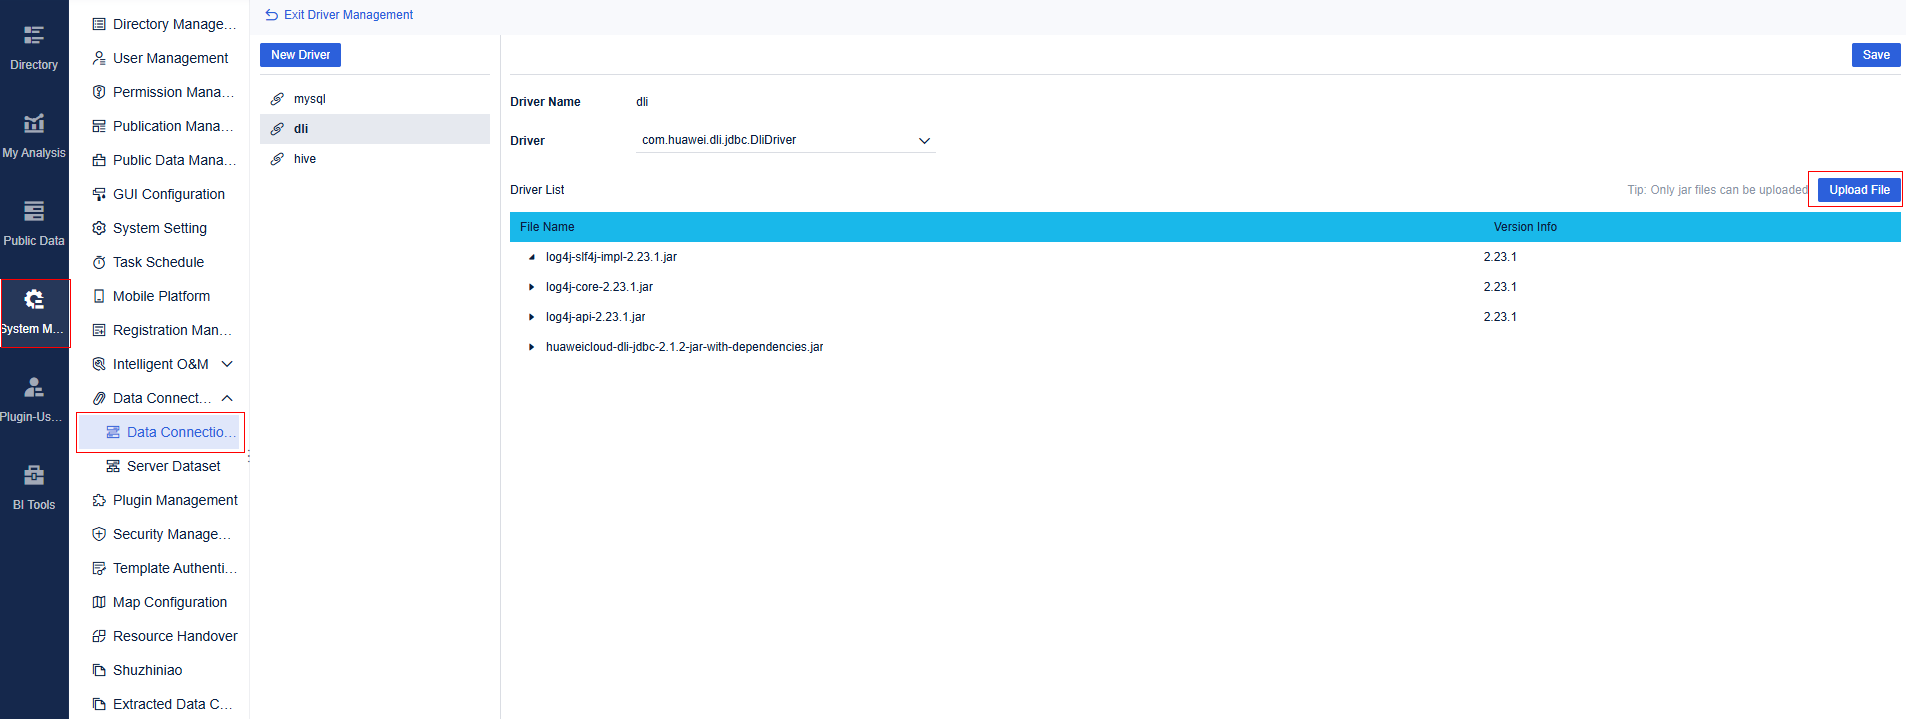
- Click New Driver. On the displayed page, select the DLI JDBC driver from the Driver list box, and click Upload File to upload the Log4j JAR files.
Figure 1 Installing a data connection driver for FineBI

- Download the data driver.
- Configure database connection.
- Choose Data Connection > Data Connection Management.
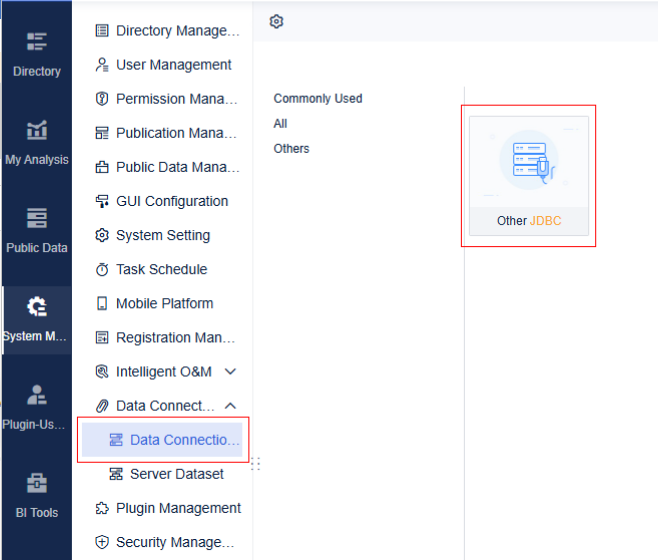
- Click New Driver and click Other JDBC.
Figure 2 Clicking Other JDBC

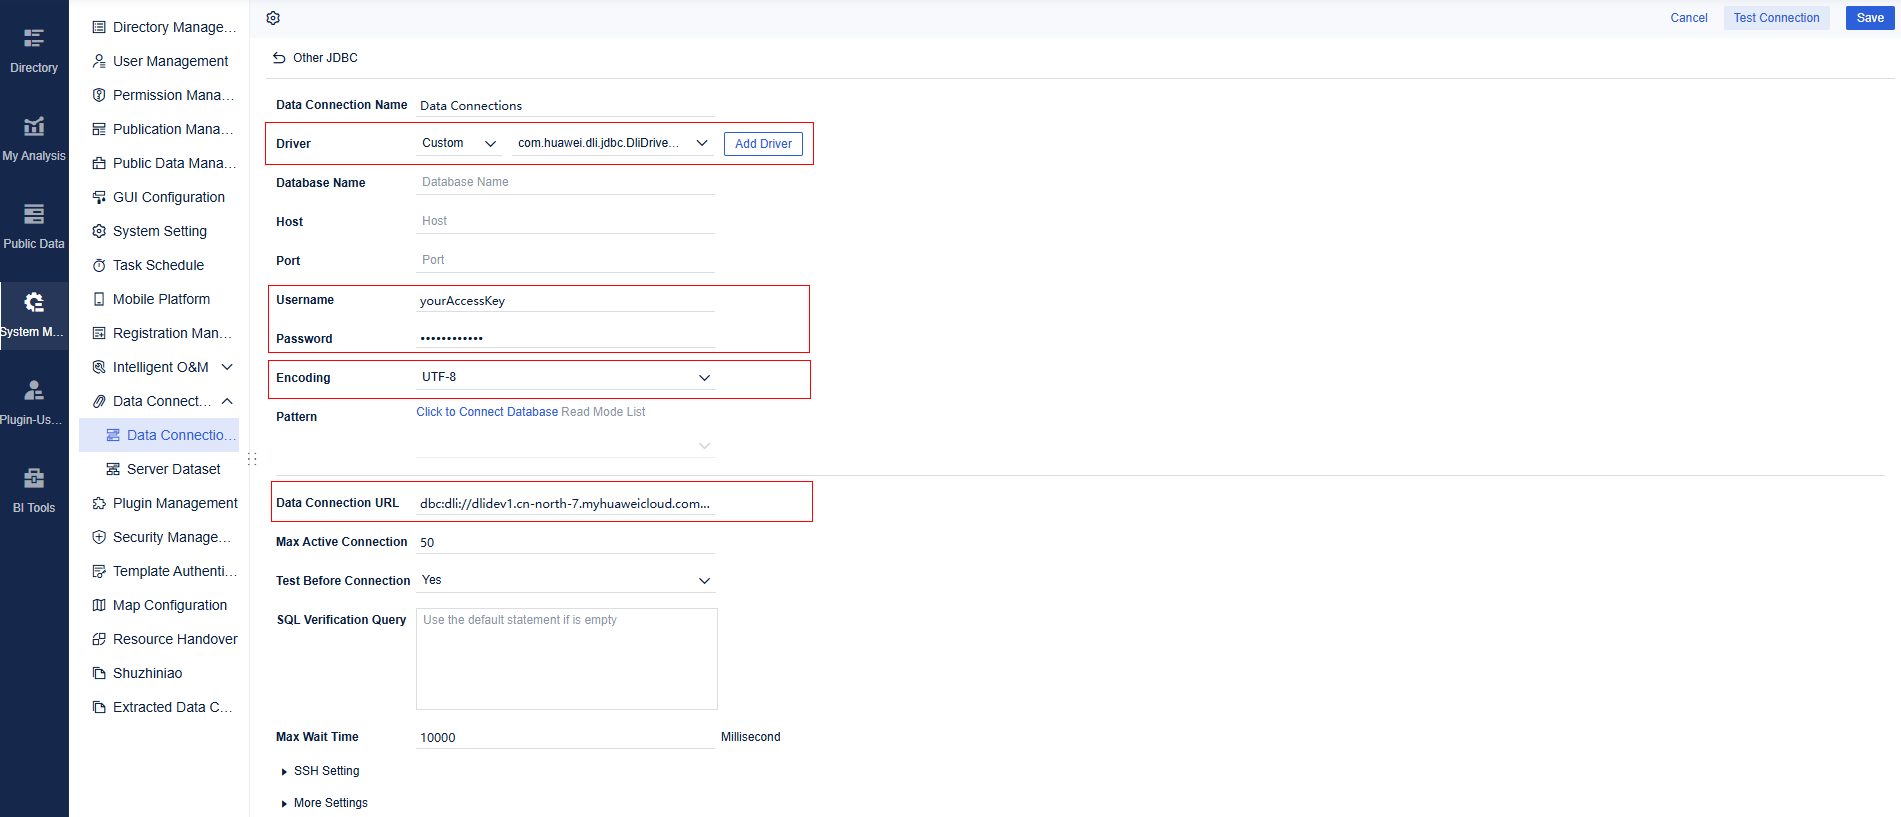
- Set connection parameters.
Figure 3 Setting connection parameters

Table 2 Parameters for connecting FineBI to a database Parameter
Description
Example Value
Data Connection URL
JDBC connection string
Format: jdbc:dli://<dliEndPoint>/projectId?<key1>=<val1>;<key2>=<val2>. For details about the parameters, see Table 3.
jdbc:dli://dli.xxx.myhuaweicloud.com/0b33ea2a7e0010802fe4c009bb05076d?databasename=tpch;queuename=auto;regionname=xxx;obs.endpoint=obs.xxx.myhuaweicloud.com
Encoding
Mode in which FineBI interacts with the target database.
Set this parameter to URF-8 in this example.
_
Username
Username used to log in to the server. Enter an AK in this example.
_
Password
Password used to log in to the server. Enter an SK in this example.
_
Table 3 URL parameters Parameter
Mandatory
Description
Example Value
databasename
Yes
Database name
_
queuename
Yes
Queue name of DLI
_
regionname
Yes
Region name of DLI
_
obs_endpoint
Yes
OBS endpoint
_
enginetype
No
DLI queue type. The options are:
The default value is spark.
spark: Spark queue
hetuEngine: HetuEngine queue
spark
catalog
No
Metadata catalog name
Spark metadata is used by default.
· It is mandatory when a LakeFormation catalog is used. In this case, it indicates the name of the LakeFormation catalog used.
When querying the LakeFormation catalog, there must be a default database under the catalog.
· If left unset, a DLI catalog is used by default. You do not need to set this parameter when using the DLI catalog.
For example, if you use a LakeFormation catalog named lfcatalog, the configuration is as follows: catalog=lfcatalog.
Step 2: Create a Custom SQL Query
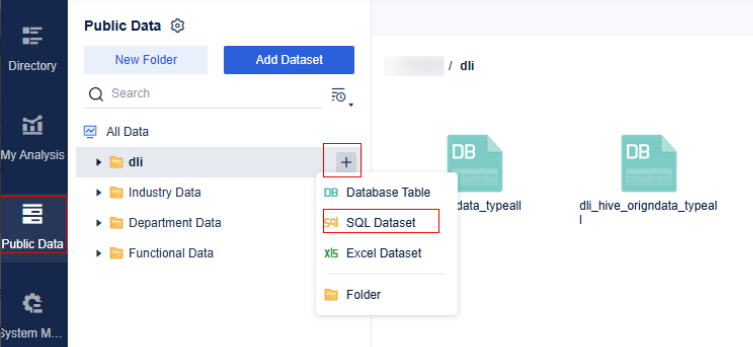
- Choose Public Data. Click Add Dataset and select SQL Dataset.
Figure 4 Opening a data connection

- Select Data from Data Connection.
- Enter a custom SQL query statement to start data analysis.
Figure 5 Custom SQL query statement

Feedback
Was this page helpful?
Provide feedbackThank you very much for your feedback. We will continue working to improve the documentation.See the reply and handling status in My Cloud VOC.
For any further questions, feel free to contact us through the chatbot.
Chatbot


