Enabling IP Addresses of Shard and Config Nodes
Scenarios
A cluster instance of Community Edition consists of dds mongos, shard, and config nodes. When your services need to read and write data from and into databases, connect to the dds mongos node. In certain scenarios (for example, data migration and synchronization between clusters), you need to read data from the shard or config node and will need to obtain the IP address of the corresponding node.
This section describes how to obtain the IP addresses of the shard and config nodes.
Before You Start
- DDS supports cluster instances of Community Edition 3.4, 4.0 and 4.2.
- DDS creates two connection addresses for the primary and secondary nodes in a shard group or config group.
- The network type of the connection address is the same as that of the current dds mongos node.
- Once the shard or config IP addresses are assigned to your nodes, they cannot be changed.
- If IPv6 is enabled in a subnet, you cannot enable IP addresses of the shard and config nodes for DB instances created using the subnet.
- After the shard IP address is enabled, restart the corresponding shard node for the configuration to take effect.
- After you enable the connection address, you can connect to an instance using Mongo Shell.
Enabling shard IP Address

- The button for showing shard IP address can only be enabled. It cannot be modified.
- Once the shard IP address is enabled, DDS automatically applies for connection addresses for all shard nodes in the current instance.
- After the shard IP address is enabled and new shard nodes are added, you need to manually locate a newly added shard node and choose More > Show shard IP Address in the Operation column to show the shard IP address.
- After the shard IP address is enabled, the database user sharduser is created. For details about how to reset the password, see Resetting the Password of User sharduser.
- Log in to the management console.
- Click
 in the upper left corner and select a region and a project.
 - Click
 in the upper left corner of the page and choose Databases > Document Database Service.
 - On the Instances page, click the instance name. The Basic Information page is displayed.
- In the Node Information area, click the shard tab.
Figure 1 shard nodes

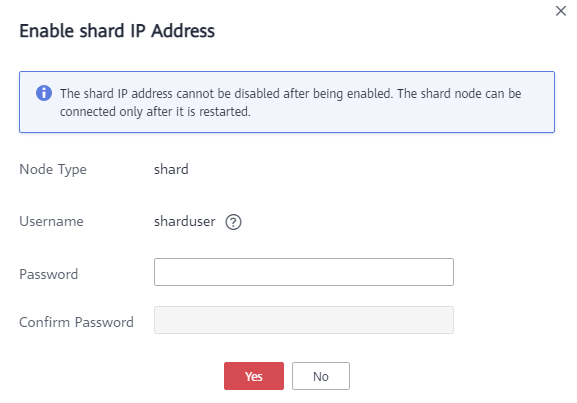
- Click Show shard IP Address. In the displayed dialog box, enter and confirm the password for connecting to the node.
Figure 2 Enable shard IP Address

After the shard IP address is enabled, restart the corresponding shard node for the configuration to take effect.
In the Node Information area, locate the row that contains the shard node and click Restart in the Operation column to restart the shard node.
Figure 3 Restarting a shard node
- View the private IP address of the shard node.
After the shard IP address is enabled, you can click
 next to a shard node on the current page to expand the node drop-down list or click Connections in the navigation pane on the left, and then obtain the private IP address.
Figure 4 Private IP addresses of shard nodes
The connection address of the current shard node is as follows:
mongodb://sharduser:<password>@192.168.xx.xx:8637,192.168.xx.xx:8637/test?authSource=admin&replicaSet=shard_?

- sharduser is the username of the current shard node.
- **** is the password of the current node.
- 192.168.xx.xx and 192.168.xx.xx are the private IP addresses of the primary and secondary shard nodes.
- 8637 is the port of the shard node and cannot be changed.
- shard_? is the name of the shard node to be connected, for example, shard_1.
Resetting the Password of User sharduser

This function is available only after the shard IP address is enabled.
- Log in to the management console.
- Click
 in the upper left corner and select a region and a project.
 - Click
 in the upper left corner of the page and choose Databases > Document Database Service.
 - On the Instances page, click the instance name. The Basic Information page is displayed.
- In the Node Information area, click the shard tab.
Figure 5 shard nodes

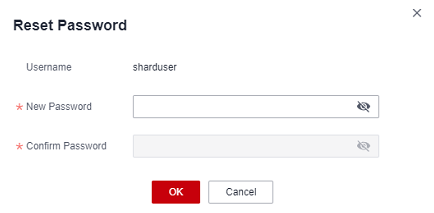
- Click Reset Password.
Figure 6 Resetting a password

- Enter the new password and click OK.
Enabling config IP Address

- The button for showing config IP address can only be enabled. It cannot be modified.
- Once the config IP address is enabled, DDS automatically applies for connection addresses for all config nodes in the current instance.
- After the config IP address is enabled, the database user csuser is created. For details about how to reset the password, see Resetting the Password of User csuser.
- Log in to the management console.
- Click
 in the upper left corner and select a region and a project.
 - Click
 in the upper left corner of the page and choose Databases > Document Database Service.
 - In the left navigation pane, choose Instances. In the instance list, click the instance name to go to the Basic Information page.
- In the Node Information area, click the config tab.
Figure 7 config nodes

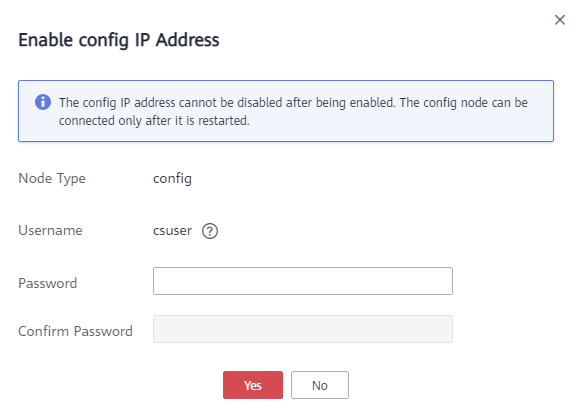
- Click Show config IP Address. In the displayed dialog box, enter and confirm the password for connecting to the node.
Figure 8 Enable config IP Address

After the config IP address is enabled, the corresponding config node needs to be restarted for the configuration to take effect.
In the Node Information area, locate the row that contains the config node and click Restart in the Operation column to restart the config node.
Figure 9 Restarting a config node
- View the private IP address of the config node.
After the config IP address is enabled, you can click
 next to the node on the current page to expand the node drop-down list or click Connections in the navigation pane on the left, and then obtain the private IP address.
Figure 10 Private IP addresses of config nodes
The connection address of the current config node is as follows:
mongodb://csuser:<password>@192.168.xx.xx:8636/test?authSource=admin

- csuser is the username of the current config node.
- **** is the password of the current node.
- 192.168.xx.xx is the private IP address of the primary config node.
- 8636 is the port of the config node and cannot be changed.
Resetting the Password of User csuser

This function is available only after the config IP address is enabled.
- Log in to the management console.
- Click
 in the upper left corner and select a region and a project.
 - Click
 in the upper left corner of the page and choose Databases > Document Database Service.
 - On the Instances page, click the instance name. The Basic Information page is displayed.
- In the Node Information area, click the config tab.
Figure 11 config nodes

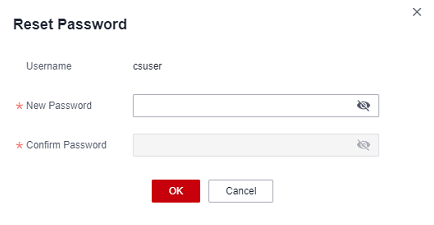
- Click Reset Password.
Figure 12 Resetting a password

- Enter the new password and click OK.
Follow-up Operations
After the connection addresses of the shard or config nodes are enabled, you can connect to the shard or config nodes using Mongo Shell. The procedure is similar to that for connecting to a dds mongos node. For details, see Connecting to a Cluster Instance Using Mongo Shell.
Feedback
Was this page helpful?
Provide feedbackThank you very much for your feedback. We will continue working to improve the documentation.


