Editing a DR Task
For a DR task that has been created but not started, DRS allows you to edit the configuration information of the task, including the source and destination database details. For DR tasks in the following statuses, you can edit and submit the tasks again.
- Creating
- Configuration
Prerequisites
You have logged in to the DRS console.
Method 1
- In the task list on the Disaster Recovery Management page, locate the target task and click Edit in the Operation column.
- On the Configure Source and Destination Databases page, enter information about the service and DR databases and click Next.
- On the Check Task page, check the DR task.
- If any check fails, review the failure cause and rectify the fault. After the fault is rectified, click Check Again.
For details about how to handle check failures, see Solutions to Failed Check Items in Data Replication Service User Guide.
- If the check is complete and the check success rate is 100%, go to the Compare Parameter page.

You can proceed to the next step only when all checks are successful. If there are any items that require confirmation, view and confirm the details first before proceeding to the next step.
- If any check fails, review the failure cause and rectify the fault. After the fault is rectified, click Check Again.
- Compare the parameters.
The parameter comparison function helps you check the consistency of common parameters and performance parameters between service and DR databases and show inconsistent values. You can determine whether to use this function based on service requirements. It mainly ensures that services are not affected after the DR task is completed.
- This process is optional, so you can click Next to skip the comparison.
- Compare common parameters:
- For common parameters, if the parameters in the service database are different from those in the DR database, click Save Change to make the parameters of the DR database be the same as those in the service database.
Figure 1 Modifying common parameters

- Performance parameter values in both the service and DR databases can be the same or different.
- If you need to adjust the performance parameters, enter the value in the Change to column and click Save Change.
- If you want to make the performance parameter values of the source and destination database be the same:
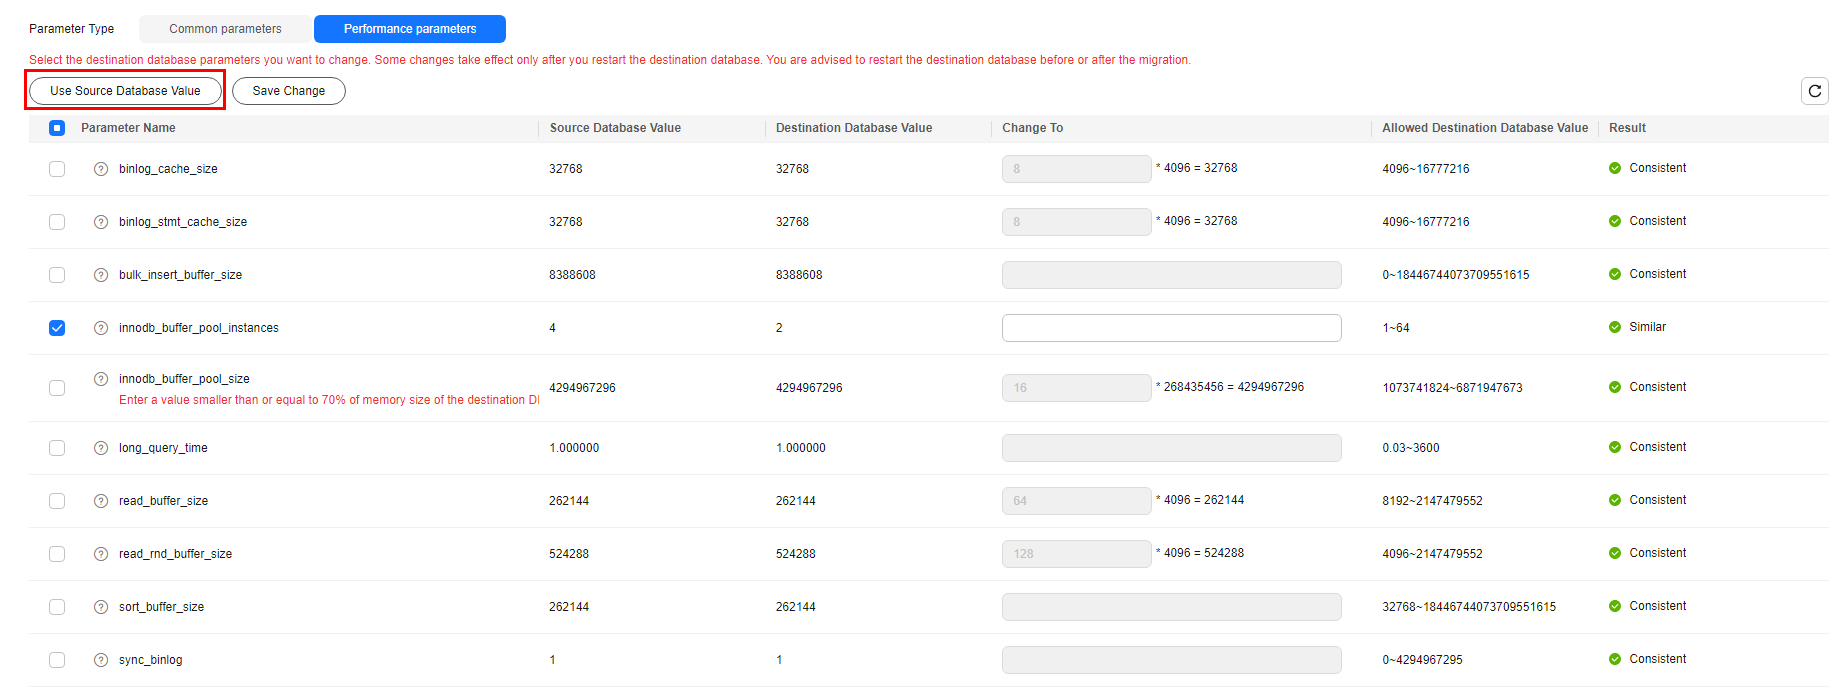
- Click Use Source Database Value.
DRS automatically makes the DR database values the same as those of the service database.
Figure 2 One-click modification

You can also manually enter the value as required.
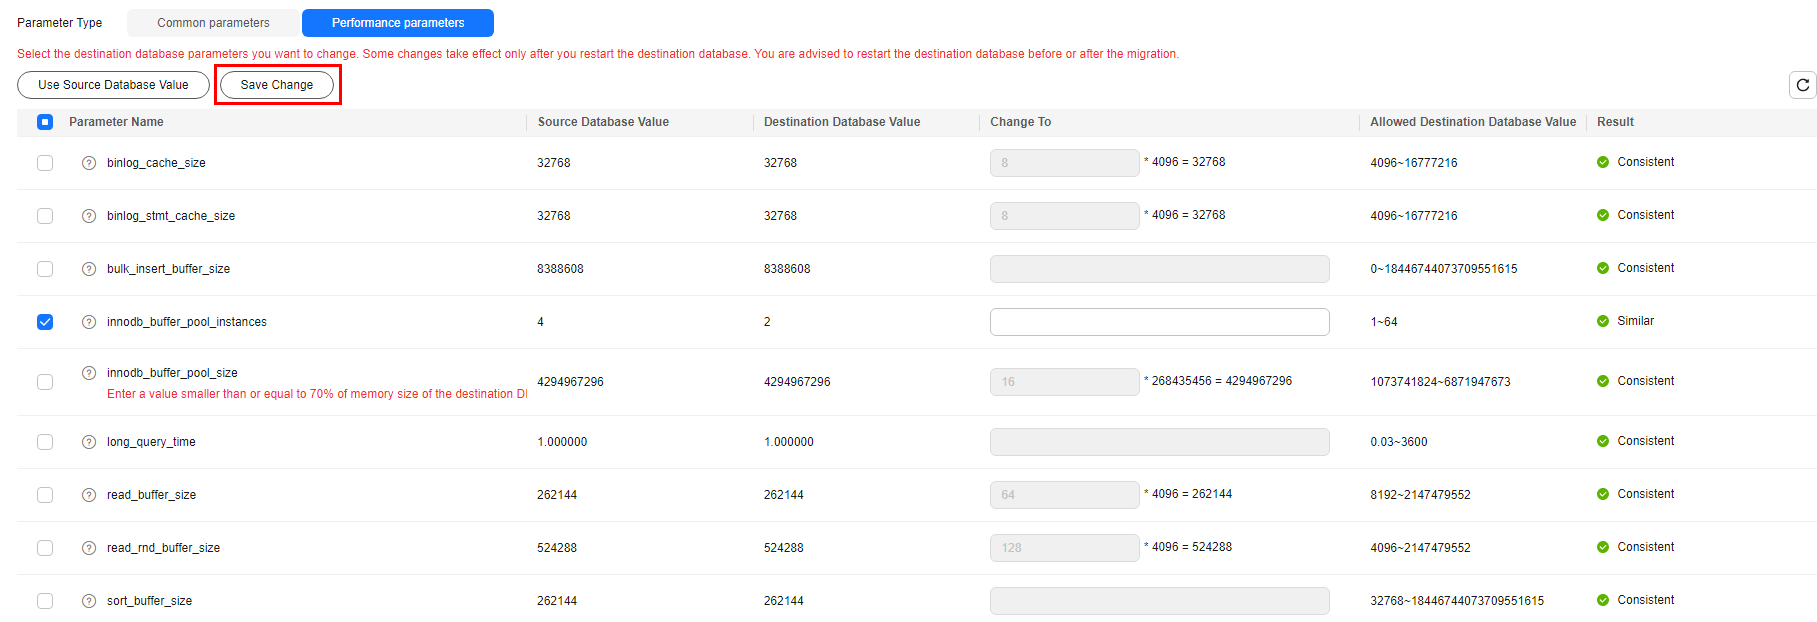
- Click Save Change.
DRS changes the DR database parameter values based on your settings. After the modification, the comparison results are automatically updated.
Figure 3 One-click modification
Some parameters in the DR database cannot take effect immediately, so the comparison result is temporarily inconsistent. Restart the DR database before the DR task is started or after the DR task is completed for the modification to take effect. To minimize the impact of database restart on your services, restart the DR database at the scheduled time after the disaster recovery is complete.
For details about parameter comparison, see Parameters for Comparison in the Data Replication Service User Guide.
- Click Next.
- Click Use Source Database Value.
- For common parameters, if the parameters in the service database are different from those in the DR database, click Save Change to make the parameters of the DR database be the same as those in the service database.
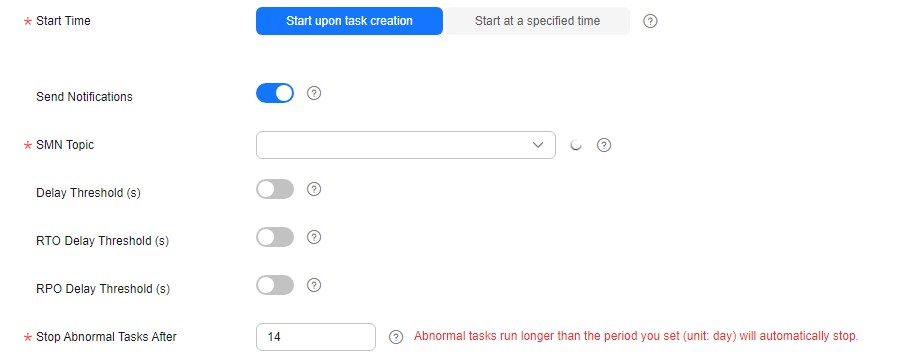
- On the Confirm Task page, specify Start Time, Send Notifications, SMN Topic, Delay Threshold, RPO Delay Threshold, RTO Delay Threshold, Stop Abnormal Tasks After. After confirming that the configured information about the DR task is correct, click Submit.
Figure 4 Task startup settings

Table 1 Task settings Parameter
Description
Start Time
Set Start Time to Start upon task creation or Start at a specified time based on site requirements.
NOTE:Starting a DR task may slightly affect the performance of the service and DR databases. You are advised to start a DR task during off-peak hours.
Send Notifications
This parameter is optional. After enabled, select a SMN topic. If the status or latency metric of the DR task is abnormal, DRS will send you a notification.
SMN Topic
This parameter is available only after you enable Send Notifications and create a topic on the SMN console and add a subscriber.
For details, see Simple Message Notification User Guide.
Delay Threshold (s)
During disaster recovery, a synchronization delay indicates a time difference (in seconds) of synchronization between the service and DR database.
If the synchronization delay exceeds the threshold you specify, DRS will send alarms to the specified recipients. The value ranges from 0 to 3,600. To avoid repeated alarms caused by the fluctuation of delay, an alarm is sent only after the delay has exceeded the threshold for six minutes.
NOTE:- Before setting the delay threshold, enable Send Notifications.
- If the delay threshold is set to 0, no notifications will be sent to the recipient.
RTO Delay Threshold (s)
If the synchronization delay from the DRS instance to the DR database exceeds the threshold you specify, DRS will notify specified recipients. The value ranges from 0 to 3,600. To avoid repeated alarms caused by the fluctuation of delay, an alarm is sent only after the delay has exceeded the threshold for six minutes.
NOTE:- Before setting the RTO delay threshold, enable Send Notifications.
- If the delay threshold is set to 0, no notifications will be sent to the recipient.
RPO Delay Threshold (s)
If the synchronization delay from the DRS instance to the service database exceeds the threshold you specify, DRS will notify specified recipients. The value ranges from 0 to 3,600. To avoid repeated alarms caused by the fluctuation of delay, an alarm is sent only after the delay has exceeded the threshold for six minutes.
NOTE:- Before setting the delay threshold, enable Send Notifications.
- If the delay threshold is set to 0, no notifications will be sent to the recipient.
- In the early stages of an incremental DR, more delay is normal because more data is waiting to be synchronized. In this situation, no notifications will be sent.
Stop Abnormal Tasks After
Number of days after which an abnormal task is automatically stopped. The value must range from 14 to 100. The default value is 14.
NOTE:- You can set this parameter only for pay-per-use tasks.
- Tasks in the abnormal state are still charged. If tasks remain in the abnormal state for a long time, they cannot be resumed. Any task in the abnormal state that has run for longer than the period you set here (in days) will automatically stop to avoid unnecessary fees.
- After the task is submitted, view and manage it on the Disaster Recovery Management page.
- You can view the task status. For more information about task status, see Task Statuses.
- You can click
 in the upper-right corner to view the latest task status.
 - By default, DRS retains a task in the Configuration state for three days. After three days, DRS automatically deletes background resources, but the task status remains unchanged. When you reconfigure the task, DRS applies for resources again.
- For a public network task, DRS needs to delete background resources after you stop the task. The EIP bound to the task cannot be restored to the Unbound state until background resources are deleted.
- For a task that is in the Disaster recovery in progress state, you can use data comparison to check whether data is consistent before and after the disaster recovery.
Feedback
Was this page helpful?
Provide feedbackThank you very much for your feedback. We will continue working to improve the documentation.


