
Using CNAD Basic for Free
If you have purchased Huawei Cloud EIPs, you can use CNAD Basic for free.
CNAD Basic offers EIPs Layer 4 protection against DDoS attacks and real-time alarm notifications, enhancing bandwidth utilization and ensuring the stable operation of user services.
CNAD Basic monitors the service traffic from the Internet to elastic public IP addresses (EIPs) to detect attack traffic in real time. It then scrubs attack traffic based on user-configured defense policies without interrupting services. It also generates monitoring reports that provide visibility into the network traffic security.
CNAD Basic automatically activates protection for EIPs on Huawei Cloud. You can simply configure alarm notifications and protection policies to access the protection features of CNAD Basic.
Procedure
This section describes how to quickly configure CNAD Basic protection for an EIP. Figure 1 shows the process.

| Step | Description |
|---|---|
| Register a Huawei ID, enable Huawei Cloud, grant CNAD Basic permissions, and prepare protected objects. | |
| Check whether the protected objects are synchronized to the CNAD Basic console and whether the default protection is enabled. | |
| Set traffic scrubbing alarm notifications for protected objects. | |
| Configure traffic scrubbing policies for protected objects. | |
| View the protection status and traffic details of protected objects. |
Prerequisites
- Before using CNAD Basic, register a Huawei ID and enable Huawei Cloud. For details, see Registering a Huawei ID and Enabling Huawei Cloud Services and Real-Name Authentication.
If you have enabled Huawei Cloud and completed real-name authentication, skip this step.
- Ensure that the account has been assigned related permissions. For details, see Creating a User Group and Assigning the Anti-DDoS Access Permission.
- Create an ECS and bind an EIP to it. For details, see section Purchasing an ECS.

If you have an ECS that meets the requirements, you do not need to create one again.
Step 1: Viewing the EIP Status
- Log in to the Anti-DDoS console.
- On the Public IP Addresses tab, ensure that the EIP prepared in Prerequisites has been synchronized to CNAD Basic and the default protection has been enabled for it. Figure 2 Viewing public IP address

Step 2: Enabling Alarm Notifications
- Click the Alarm Notifications tab.
- Enable the alarm notification function, set alarm parameters, and click Apply. Figure 3 Setting alarm notifications
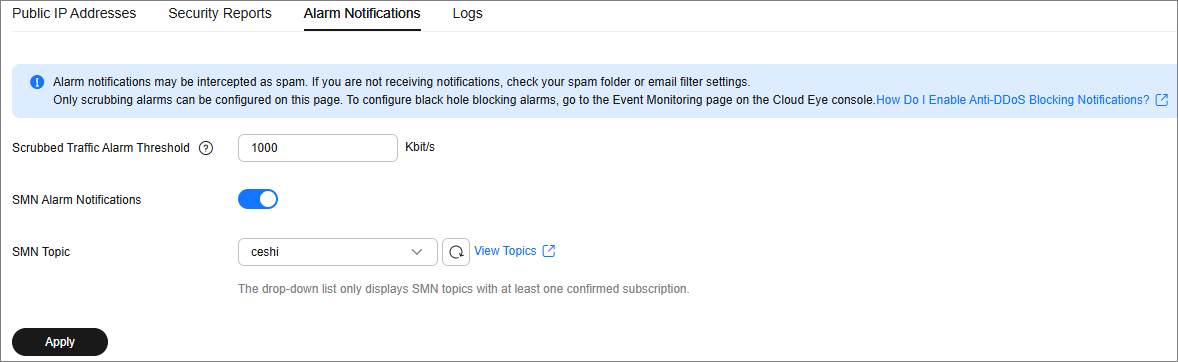
Table 1 Parameter description Parameter
Example Value
Description
Scrubbed Traffic Alarm Threshold
1000Kbit/s
When the volume of scrubbed traffic reaches the threshold, an alarm notification is sent. Set the threshold as required.
Alarm Notifications

Set the alarm switch to
 to enable the alarm function.
You will receive notifications (by SMS or email) if a DDoS attack is detected on your EIP.
SMN Topic
-
You can select an existing topic or click View Topic to create a topic.
For details about how to create a topic, see Creating a Topic.
Step 3: Configuring a DDoS Protection Policy
- Click the Public IP Addresses tab, locate the row that contains the target public IP address, and click Set Protection. Figure 4 Set Protection

- Modify the protection settings as required and click OK. Figure 5 Modifying protection settings
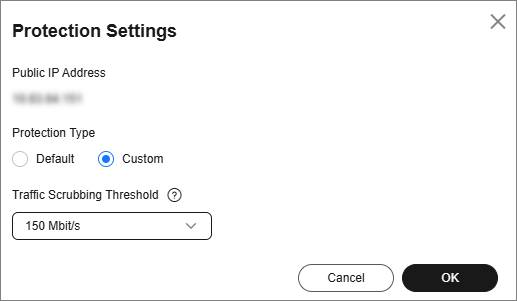
Table 2 Parameter description Parameter
Example Value
Description
Set Protection
Custom
The default protection level is 120 Mbit/s, but you can manually adjust to higher levels if needed.
Traffic Cleaning Threshold
150 Mbit/s
You are advised to set a value closest to, but not exceeding, the purchased bandwidth.
CNAD Basic scrubs traffic when detecting that the inbound traffic of an IP address exceeds the threshold.
Step 4: Viewing a Monitoring Report
- Click the Public IP Addresses tab, locate the row that contains the target public IP address, and click View Monitoring Report. Figure 6 Viewing a monitoring report

You can view the protection status, traffic details, and attack events of a public IP address within the last 24 hours.
Figure 7 Monitoring details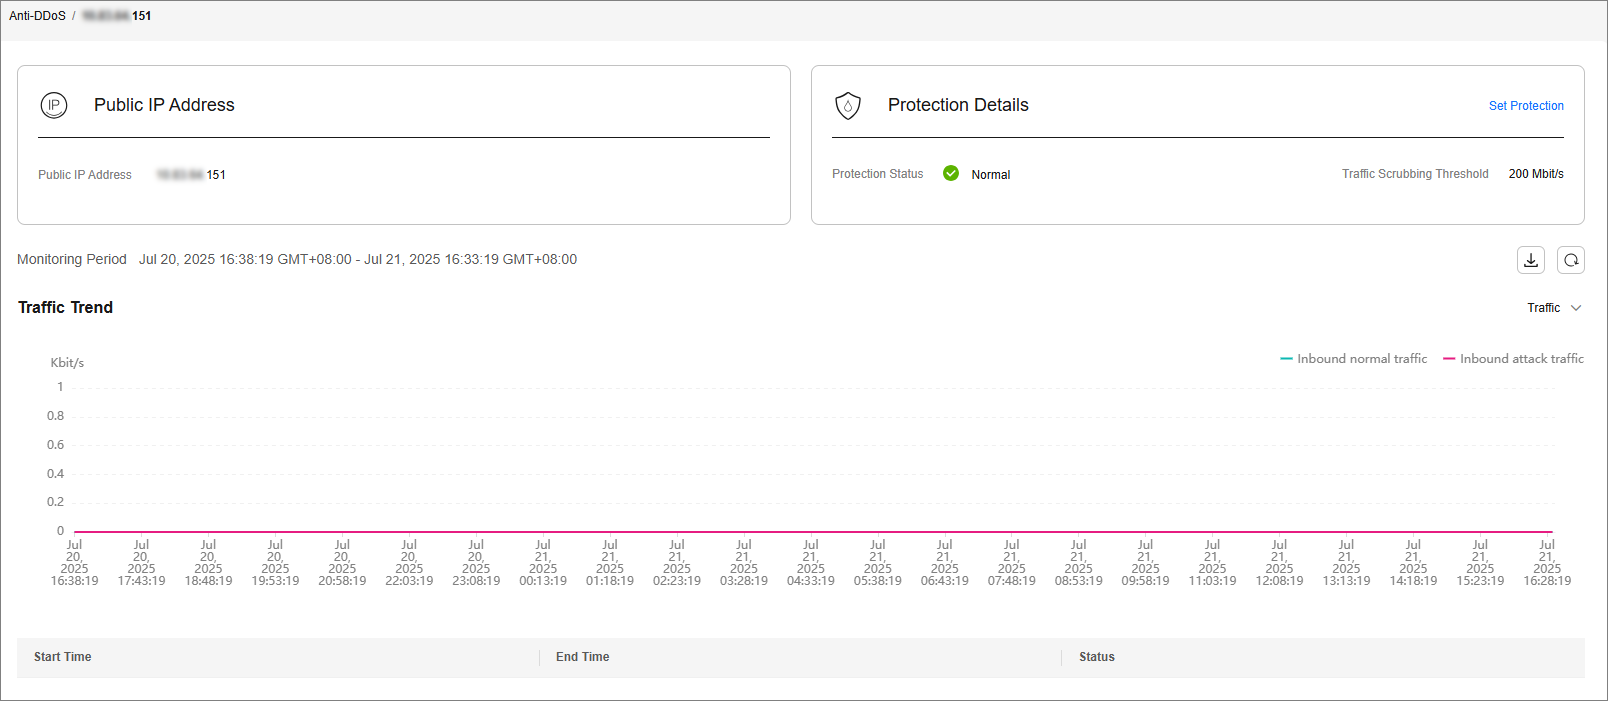
Feedback
Was this page helpful?
Provide feedbackThank you very much for your feedback. We will continue working to improve the documentation.


