
Using JupyterLab to Develop and Debug Code Online
JupyterLab is an interactive development environment, enabling you to compile notebooks, operate terminals, edit Markdown text, enable interaction, and view CSV files and images. JupyterLab is the future mainstream development environment for developers.
ModelArts allows you to access notebook instances online using JupyterLab and develop AI models based on the PyTorch, TensorFlow, or MindSpore engines. Figure 1 shows the operation process.
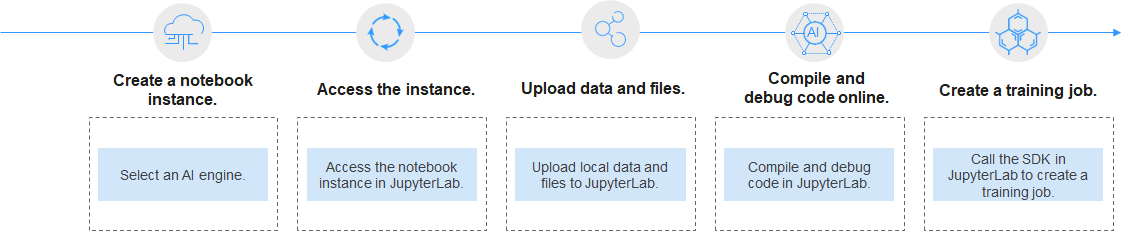
Procedure
- Create a notebook instance.
On the ModelArts management console, create a notebook instance with a proper AI engine. For details, see Creating a Notebook Instance.
- After the notebook instance is created, it is in the Running state. Locate it in the list and click Open in the Operation column to access JupyterLab.
- The Launcher page is automatically displayed. Perform required operations. For details, see JupyterLab Documentation.
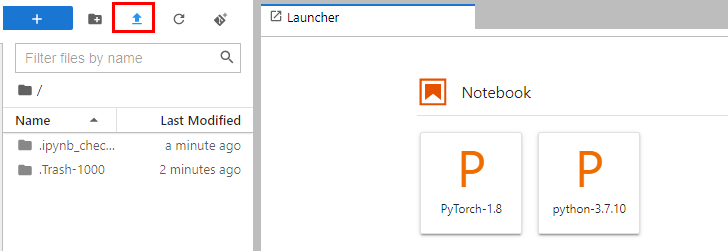
- Upload training data and code files to JupyterLab. For details, see Uploading Files from a Local Path to JupyterLab. Figure 2 Button for uploading a file
- In the navigation pane on the left, double-click the uploaded code file, compile the file in JupyterLab, and debug it. For details about how to use JupyterLab, see Common Functions of JupyterLab.

If your code file is in .py format, open a new .ipynb file and run the %load main.py command to load the content of the .py file to the .ipynb file for encoding and debugging.
Figure 3 Opening a code file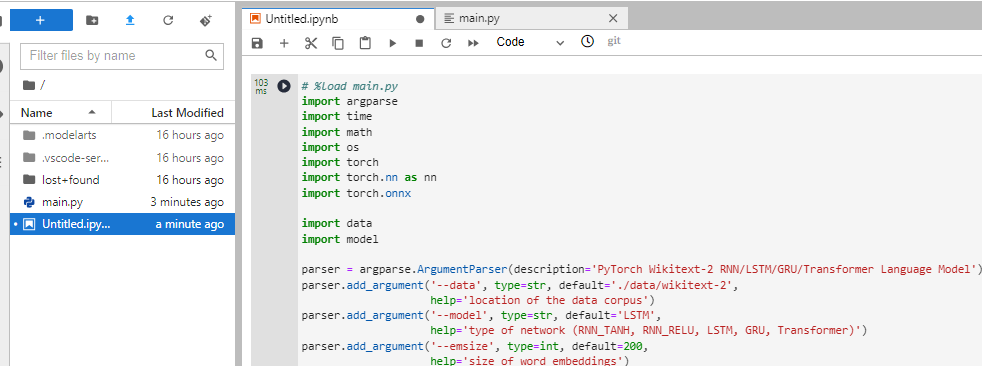
- In JupyterLab, call the ModelArts SDK to create a training job for in-cloud training.
For details, see Creating a Training Job.
Feedback
Was this page helpful?
Provide feedbackThank you very much for your feedback. We will continue working to improve the documentation.


