Importing and Exporting Assets
Scenarios
SecMaster allows you to import assets outside the cloud. After the import, the security status of the assets can be displayed. You can also export asset information, including information about assets on and off the cloud.
This section describes how to import and export assets.
Prerequisites
You have purchased the SecMaster standard or professional edition.
Limitations and Constraints
- Only files in .xlsx can be imported. Each time you can import one file no larger than 5 MB and with a maximum of 100 records.
- A maximum of 9,999 resource records can be exported.
Importing Assets
- Log in to the SecMaster console.
- Click
 in the upper left corner of the management console and select a region or project.
 - Click
 in the upper left corner of the page and choose Security & Compliance > SecMaster.
 - In the navigation pane on the left, choose Workspaces > Management. In the workspace list, click the name of the target workspace.
Figure 1 Workspace management page

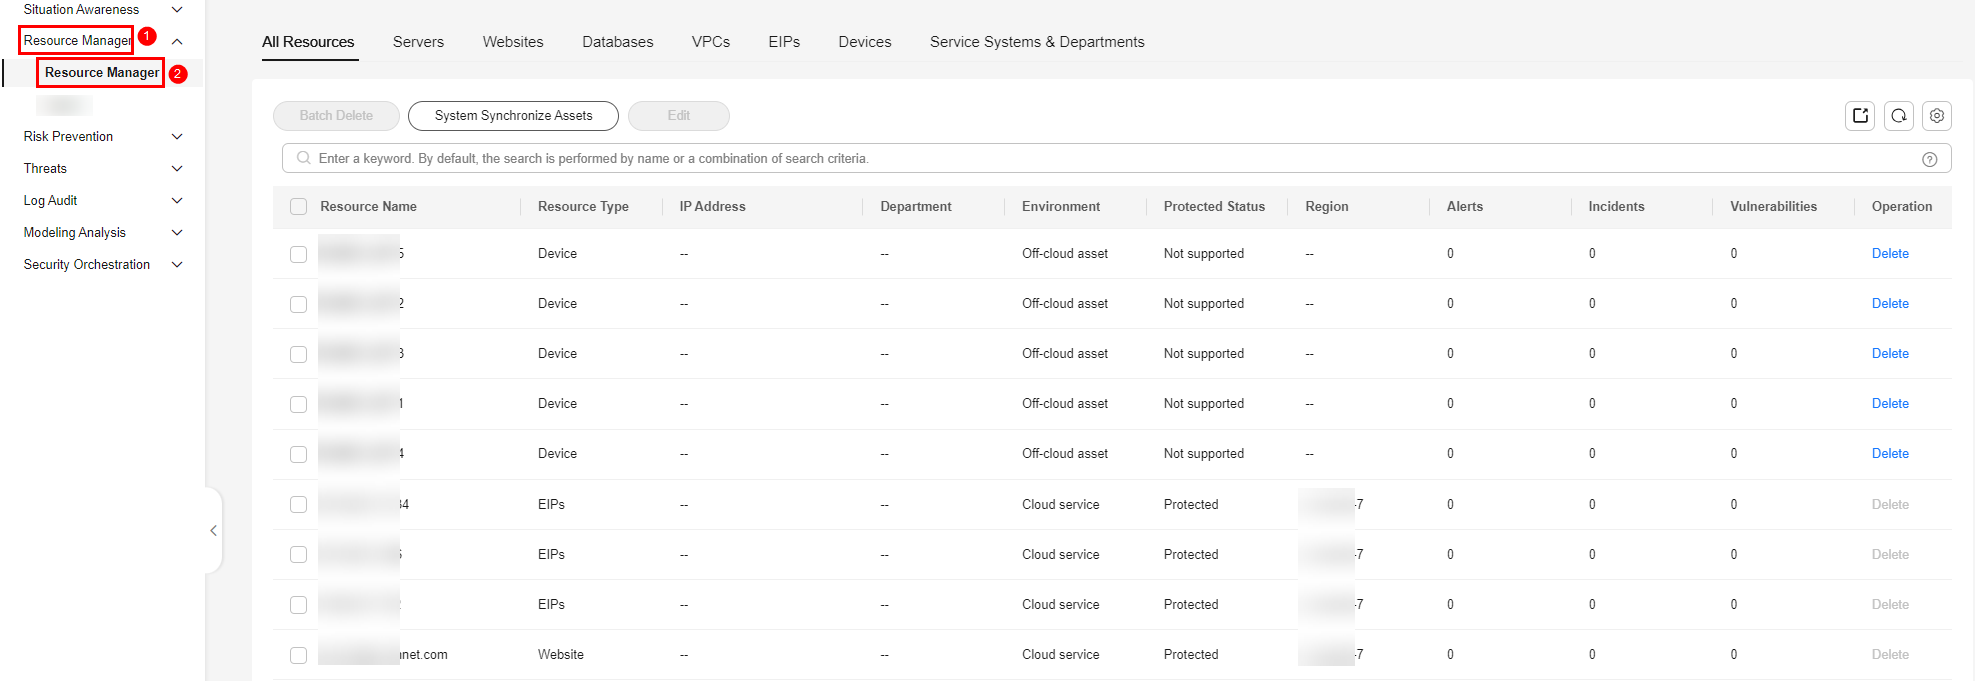
- In the navigation pane on the left, choose Resource Manager > Resource Manager.
Figure 2 Resource Manager

- On the Resource Manager page, click the corresponding asset tab, such as Servers, Websites, and Databases.
For example, if you want to import servers, click the Servers tab.
If you want to import departments or service systems, click the Departments and Service Systems tab.
- To import resources, click Import in the upper left corner of the resource list.
Import a department: Click
 under Department.
Import a service system: Click Import under Service System. The corresponding dialog box is displayed.
- In the Import dialog box, click Download Template. Then, fill information about the resource to be imported in the template.
In the import dialog box, click Download Template. Then, fill information about the department to be imported in the template.
In the import dialog box, click Download Template. Then, fill information about the service system to be imported in the template.
- After the template is completed, click Select File in the Import dialog box and select the Excel file you want to import.
- Click OK.
- After the import is complete, choose in the navigation pane on the left. On the displayed page, click the asset tab corresponding to the type of imported assets, and check the imported assets.
Exporting Assets
- Log in to the SecMaster console.
- Click
 in the upper left corner of the management console and select a region or project.
 - Click
 in the upper left corner of the page and choose Security & Compliance > SecMaster.
 - In the navigation pane on the left, choose Workspaces > Management. In the workspace list, click the name of the target workspace.
Figure 3 Workspace management page

- In the navigation pane on the left, choose Resource Manager > Resource Manager.
Figure 4 Resource Manager

- On the asset management page, click the corresponding asset tab. For example, if you want to export servers, click the Servers tab.
- On the asset page, select the assets to be exported and click
 in the upper right corner of the list.
To export department information, click the Service System tab and click the
 export button next to the department you want to export.
To export a service system, click the Service System tab, select the service system you want to export, and click Export above the list. The export dialog box is displayed.
- In the Export dialog box, set asset parameters.
Table 1 Exporting assets Parameter
Description
Format
By default, the asset list is exported into an Excel.
Columns
Select the parameters to be exported.
- Click OK.
The system automatically downloads the Excel to your local PC.
Feedback
Was this page helpful?
Provide feedbackThank you very much for your feedback. We will continue working to improve the documentation.


