

Help Center/ Simple Message Notification/ Best Practices/ Using FunctionGraph to Forward SMN Messages to Slack
Updated on 2025-08-26 GMT+08:00
Using FunctionGraph to Forward SMN Messages to Slack
Scenarios
Slack, developed by Slack Technologies, is cloud-based instant messaging software. Slack does not have an API to receive HTTPS messages sent from SMN. So, you cannot directly add a Slack subscription to receive SMN notifications. Instead, you need to use FunctionGraph to forward messages to a specified URL.
This section described how to use FunctionGraph to forward SMN messages to Slack.
Prerequisites
- You have created an SMN message topic, for example, smn-test. For details, see Creating a Topic.
- You have downloaded Slack.
Procedure
To use FunctionGraph to send SMN messages to Slack, perform the following operations:
Configuring Slack

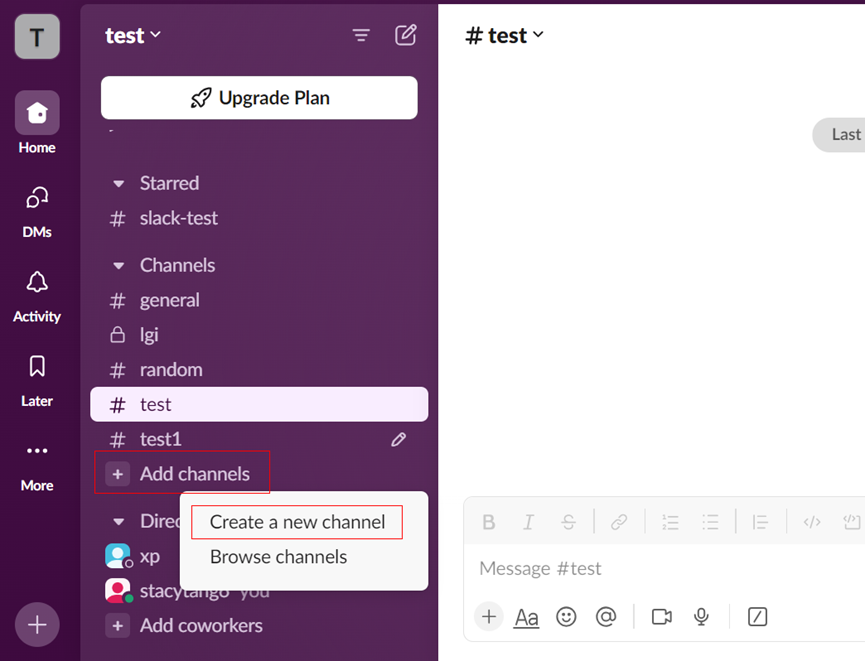
- Create or select a channel on Slack. Figure 1 Creating a channel
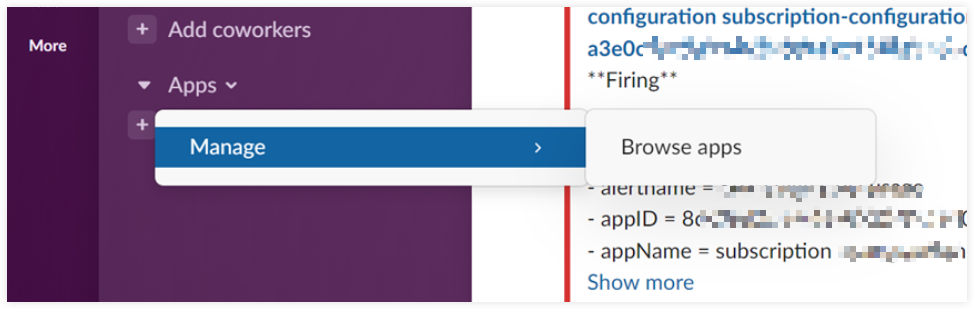
- Choose Apps > Manage > Browse apps. Figure 2 Choosing Apps
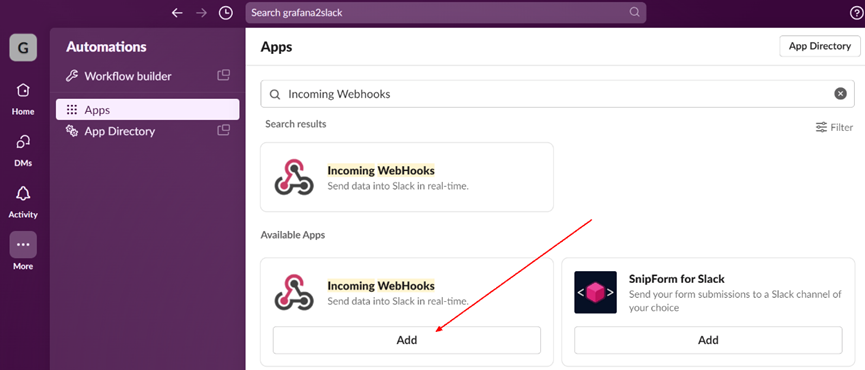
- Search for Incoming Webhooks and click Add. Figure 3 Adding Incoming Webhooks
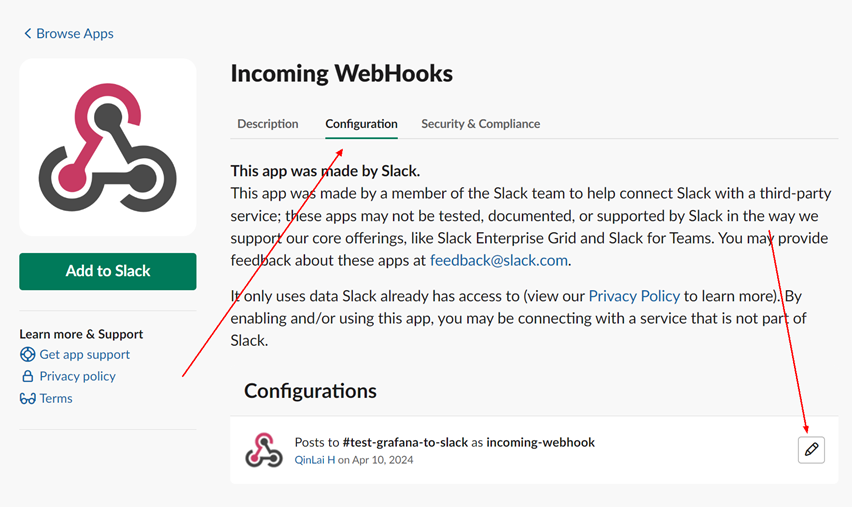
- Click Configuration to go to the configuration page and obtain the Webhook URL. Figure 4 Clicking Configuration
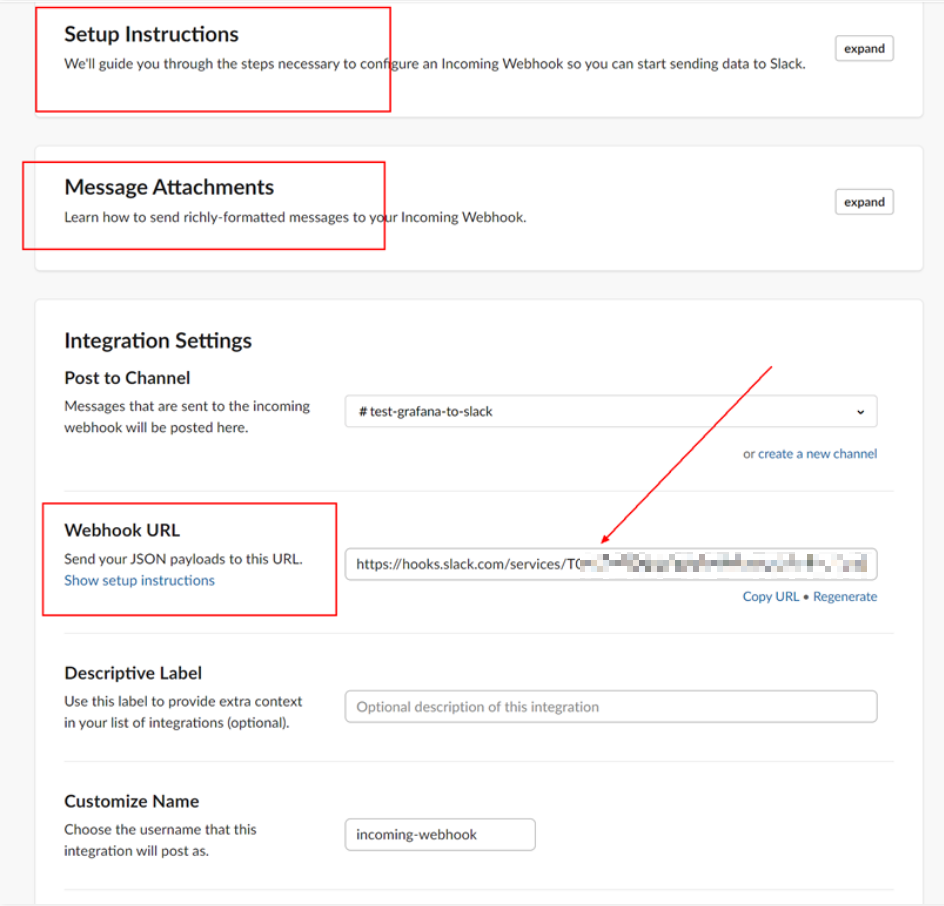
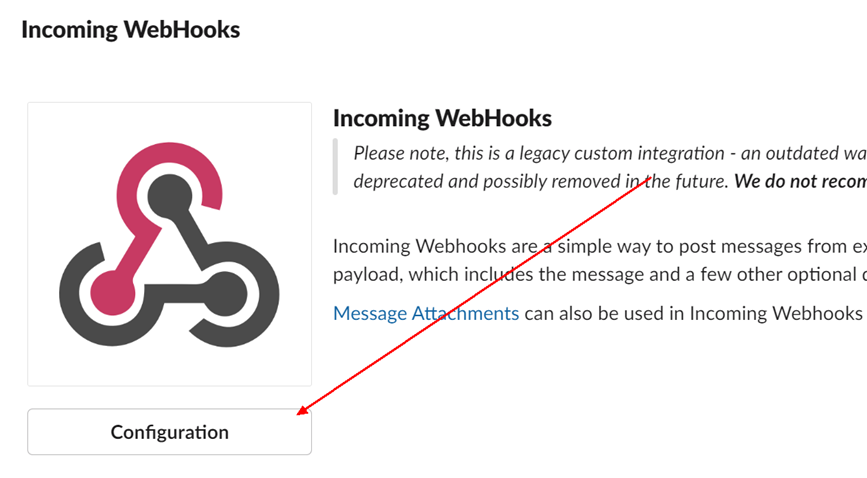 Figure 5 Obtaining the Webhook URL
- Save the obtained Webhook URL. Figure 6 Saving the Webhook URL
Configuring FunctionGraph
- Log in to the FunctionGraph console. In the navigation pane, choose Functions > Function List.
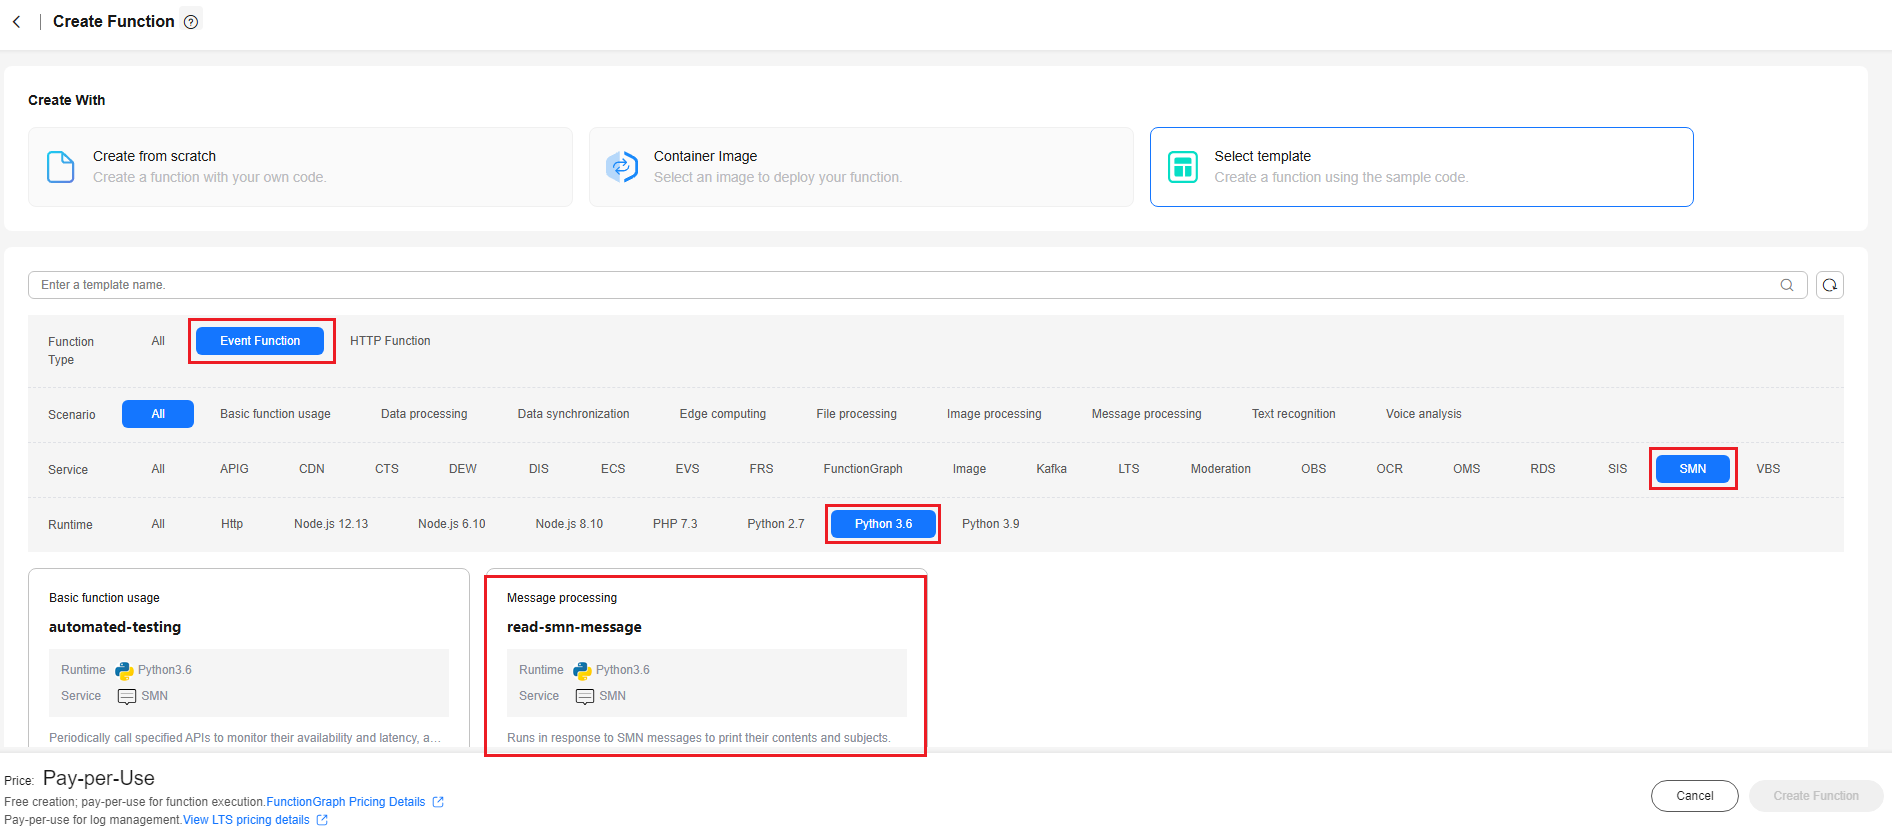
- Click Create Function in the upper right corner and choose Select template.
- Select the template shown in Figure 7 and click Configure.
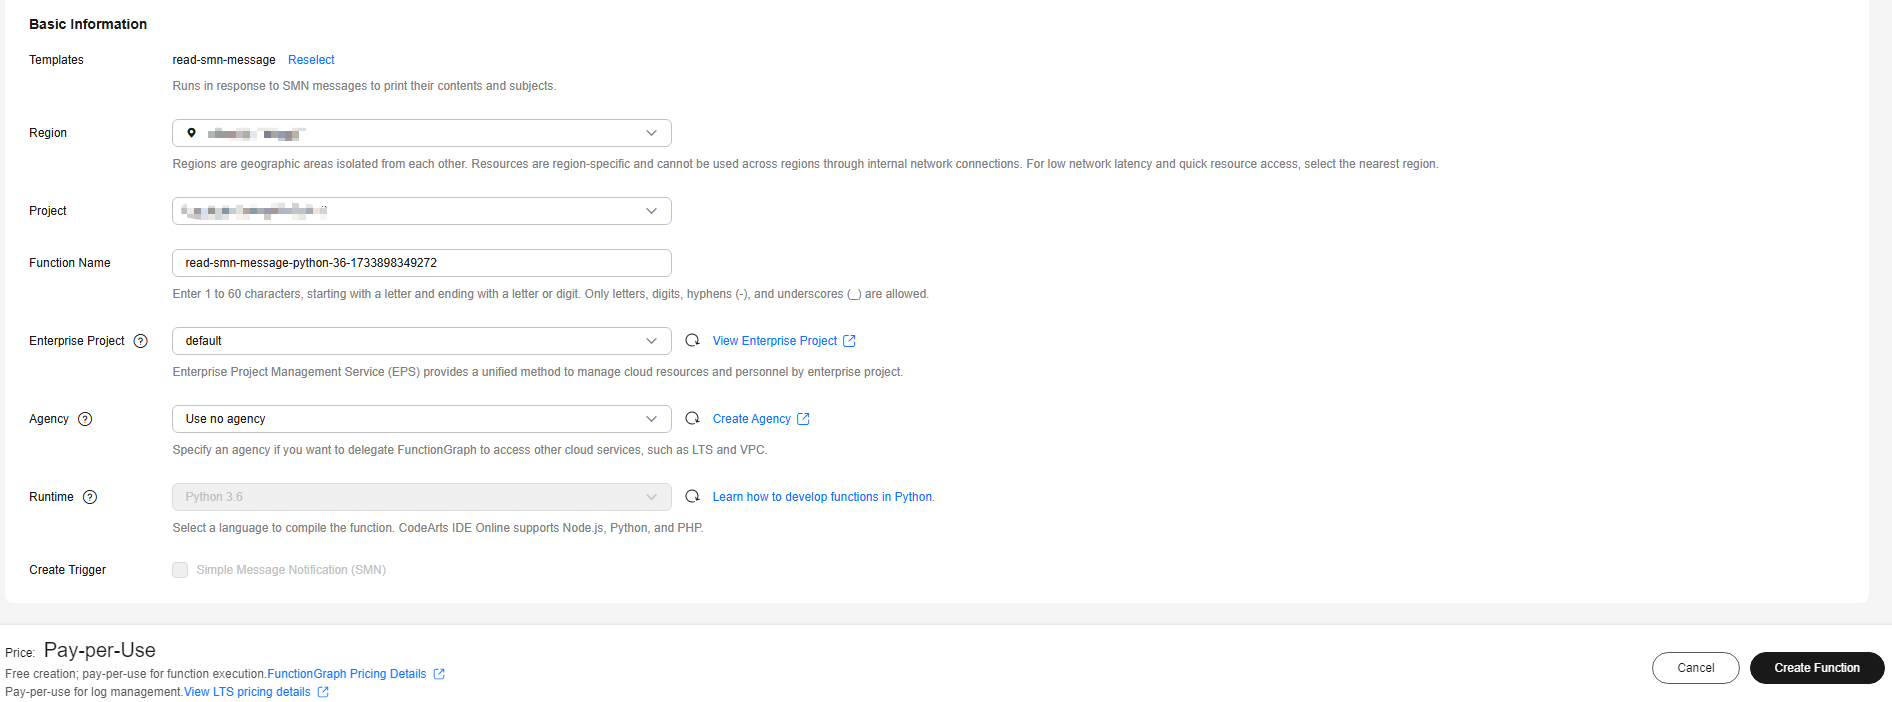
- Set the function name, select an agency, retain default values for other parameters, and click Create Function. Figure 8 Configuring basic information
- On the configuration details page, click the Code tab and edit the code in index.py. Figure 9 Editing the code
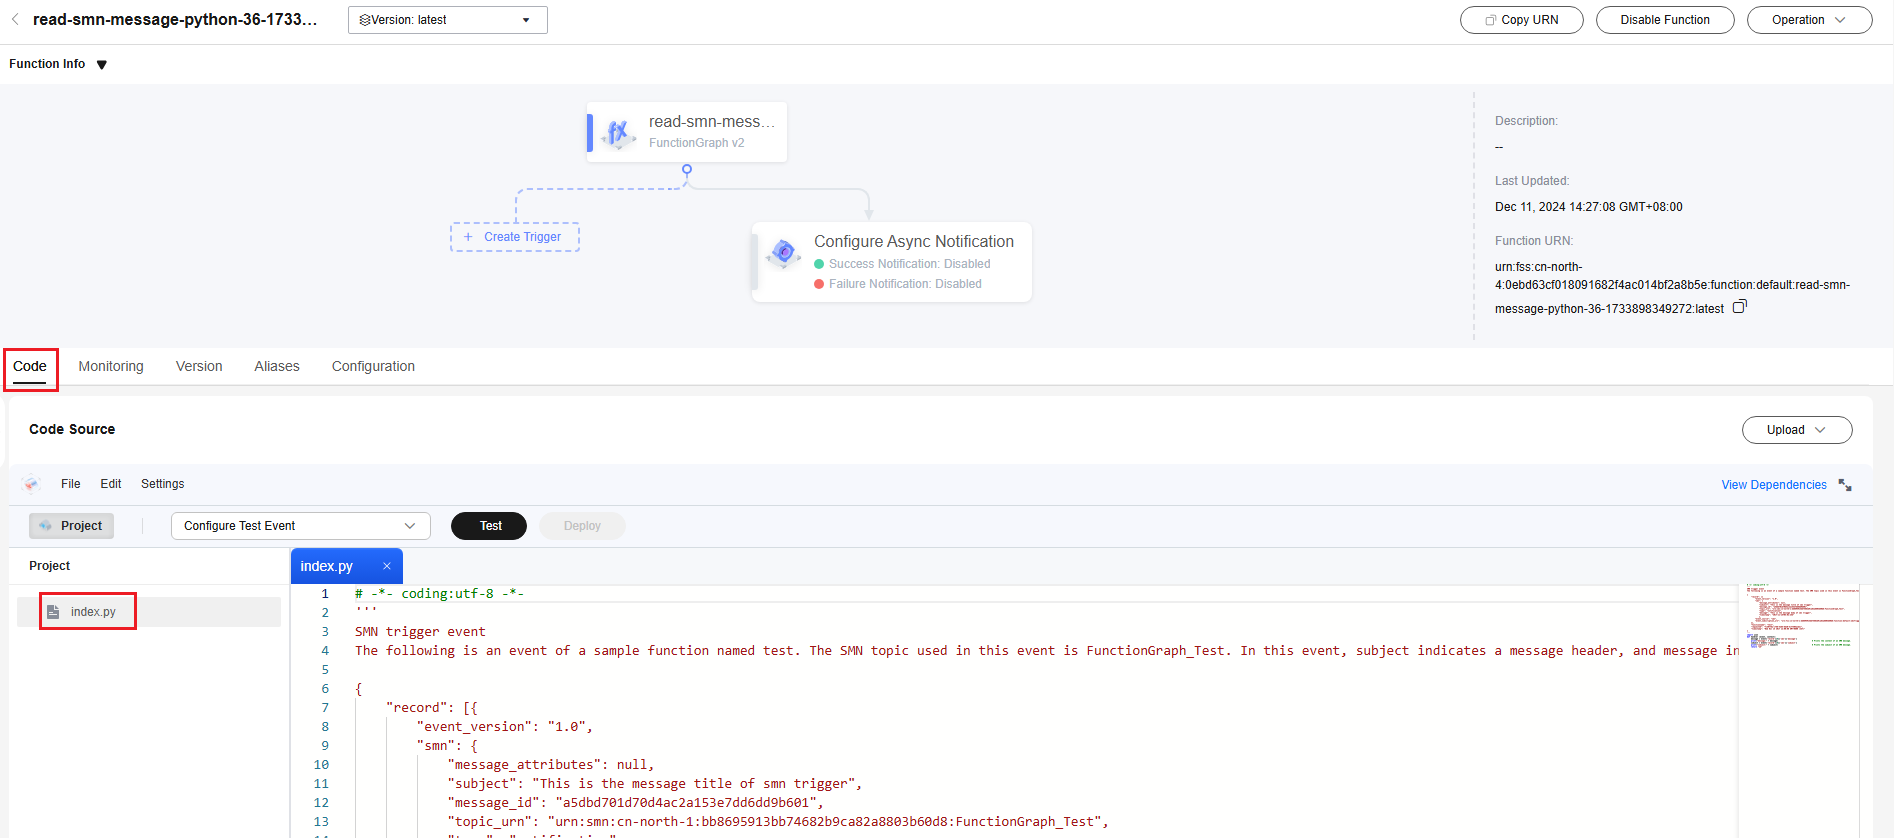
The following is an example of the code sent to Slack: (In actual use, set webhook_url to the Webhook URL obtained from Slack or perform other operations as required.)
# -*- coding:utf-8 -*- import json import requests def handler (event, context): # Common part: Construct the body fields required by the destination address. event contains all fields sent by SMN. payload = {'text': event["record"][0]["smn"]["message"]} # Forwarding part: Call a Slack API to forward messages to the Slack platform. try: webhook_url = 'Webhook URL obtained from Slack' response = requests.post(webhook_url, json=payload) response.raise_for_status() print('Message sent successfully') except requests.exceptions.RequestException as e: print(f"Error sending message to Slack: {e}") return event - After the editing is complete, press Ctrl+S to save the modification and update the code.
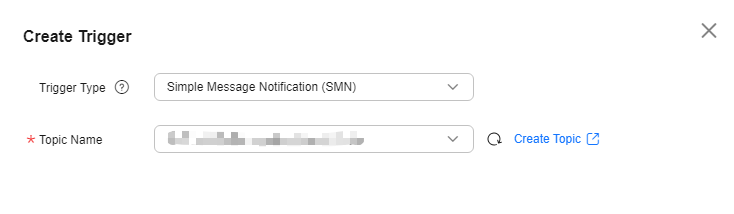
- Click Create Trigger.
- Set the following parameters:
- Trigger Type: Select Simple Message Notification (SMN).
- Topic Name: Select a topic, for example, smn-test.
Figure 10 Creating a trigger
- Click OK. After the topic is created, all messages sent to the topic are forwarded to the destination address through FunctionGraph.
Configuring SMN
- Log in to the SMN console. In the navigation pane, choose Topic Management > Topics.
- Locate the topic smn-test and click Add Subscription in the Operation column.
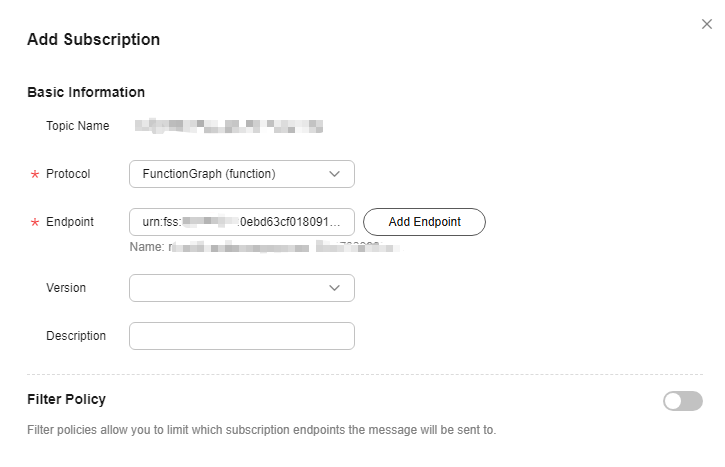
- Set the following parameters:
- Protocol: Select FunctionGraph (function).
- Endpoint: Select a created function, for example, smn-test.
Figure 11 Adding a subscription
- Click OK.
- Locate the topic smn-test and click Publish Message in the Operation column.
- Set the following parameters:
- Message Format: Select Text.
- Message: Enter the message content.
- Click OK to publish the message.
Viewing the Received Message
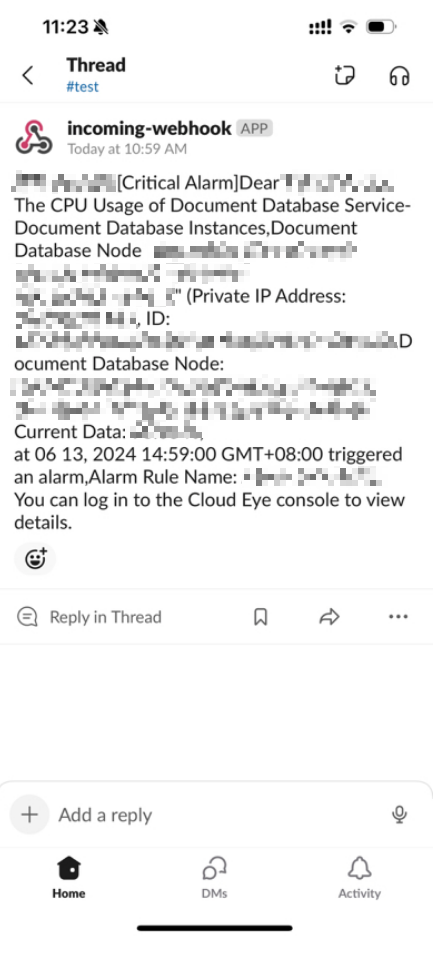
After a message is published, you can receive the message on Slack. Figure 12 shows an example.
What is your overall rating for this page?
0
1
2
3
4
5
6
7
8
9
10
Very dissatisfiedVery satisfied
Thank you very much for your feedback. We will continue working to improve the documentation.
The system is busy. Please try again later.


