

更新时间:2023-11-24 GMT+08:00
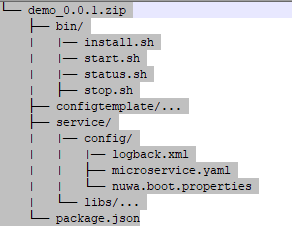
打包目录
概述
操作步骤
- 添加启动配置文件。
在IDE下面,依赖了NUWA的相关jar包,IDE会把这些jar包加载,所以运行是没有问题的。但是一旦打包以后,是不包含NUWA的jar包的,此时需要添加一个启动配置文件,说明加载NUWA的哪些模块。
添加文件src/main/config/nuwa.boot.properties,引入的插件在后面用逗号拼接。
nuwa.system.module.loadingList=nuwa-cse-foundation
- 添加启动脚本实例。
start.sh要求先启动NUWA,再启动Watchog,如果参数里有Watchdog,表示启动是由Watchdog拉起的,则不需要启动Watchdog。
stop.sh先关闭Watchdog,再关闭NUWA,如果参数里有Watchdog,表示是Watchdog执行的关闭操作,则不需要关闭Watchdog。
#!/bin/bash

BIN_PATH=`dirname $0`
APP_ROOT=${BIN PATH}/..

bash ${BIN_PATH}/stop.sh "$@"
# bash ${APP_ROOT}/nuwa/bin/startup.sh
# 没有使用CSE注册中心
bash ${APP_ROOT}/nuwa/bin/startup.sh --cse-sc-local
if [[ $# -ne 1 || "$1" != "watchdog" ]];then
    bash ${APP_ROOT}/nuwa/watchdog/bin/watchdog.sh start > /dev/null 2>&1
fi
status.sh判断进程是否存在,或者其它更严谨的判断服务正常启动的方式。
#!/bin/bash

ps -efww |grep "java" |grep "nuwa" |grep "com.huawei.nuwa.boot.loader.NuwaClassPathLauncher" |grep -v grep
- 配置Maven打包插件并执行打包命令
在微服务的pom.xml文件,使用Maven的maven-assembly-plugin作为打包插件。
图3 引入Maven打包插件
一般会将部署有关的文件放在deploy目录里。
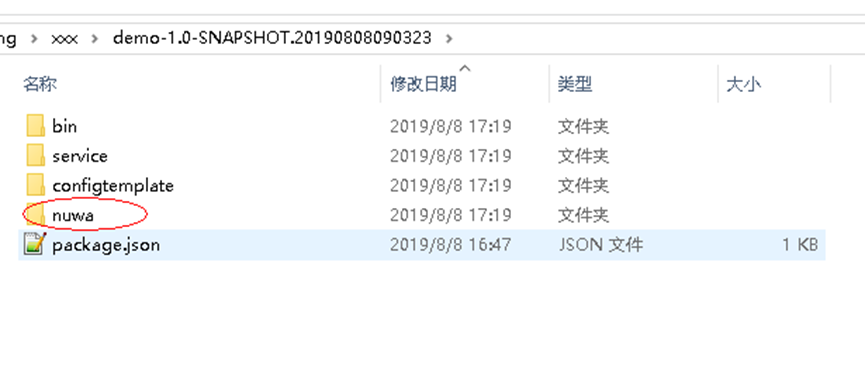
<?xml version="1.0" encoding="UTF-8"?>
<assembly xmlns="http://maven.apache.org/ASSEMBLY/2.0.0" xmlns:xsi="http://www.w3.org/2001/XMLSchema-instance"
    xsi:schemaLocation="http://maven.apache.org/ASSEMBLY/2.0.0 http://maven.apache.org/xsd/assembly-2.0.0.xsd">
    <id>make-auto-deploy-vm</id>

    <includeBaseDirectory>false</includeBaseDirectory>

    <formats>
        <format>zip</format>
    </formats>

    <dependencySets>
        <dependencySet>
            <outputDirectory>service/libs</outputDirectory>
            <scope>runtime</scope>
            <useTransitiveFiltering>true</useTransitiveFiltering>
        </dependencySet>
    </dependencySets>
    <fileSets>
        <fileSet>
            <directory>src/main/config</directory>
            <outputDirectory>service/config</outputDirectory>
            <fileMode>0600</fileMode>
            <directoryMode>0700</directoryMode>
            <lineEnding>unix</lineEnding>
        </fileSet>
        <fileSet>
            <directory>deploy/bin</directory>
            <outputDirectory>bin</outputDirectory>
            <fileMode>0700</fileMode>
            <directoryMode>0700</directoryMode>
            <lineEnding>unix</lineEnding>
        </fileSet>
        <fileSet>
            <directory>deploy_vm</directory>
            <outputDirectory>./</outputDirectory>
            <includes>
                <include>package.json</include>
            </includes>
            <fileMode>0600</fileMode>
            <directoryMode>0700</directoryMode>
            <filtered>true</filtered>
        </fileSet>
        <fileSet>
            <directory>deploy/configtemplate</directory>
            <outputDirectory>configtemplate</outputDirectory>
            <fileMode>0600</fileMode>
            <directoryMode>0700</directoryMode>
            <lineEnding>unix</lineEnding>
        </fileSet>
    </fileSets>
</assembly>
在项目根目录直接执行mvn clean package或者使用IDEA的打包方式,完成后会在target目录下,生成一个可以自动化部署的包,至此打包完成。
父主题: 使用NUWA框架实现应用开发


