
Manual Test Cases
After a requirement is created, the test case designer can design test cases. Test cases are classified into manual test cases, function automation test cases, API automation test cases, performance automation test cases, and security automation test cases.
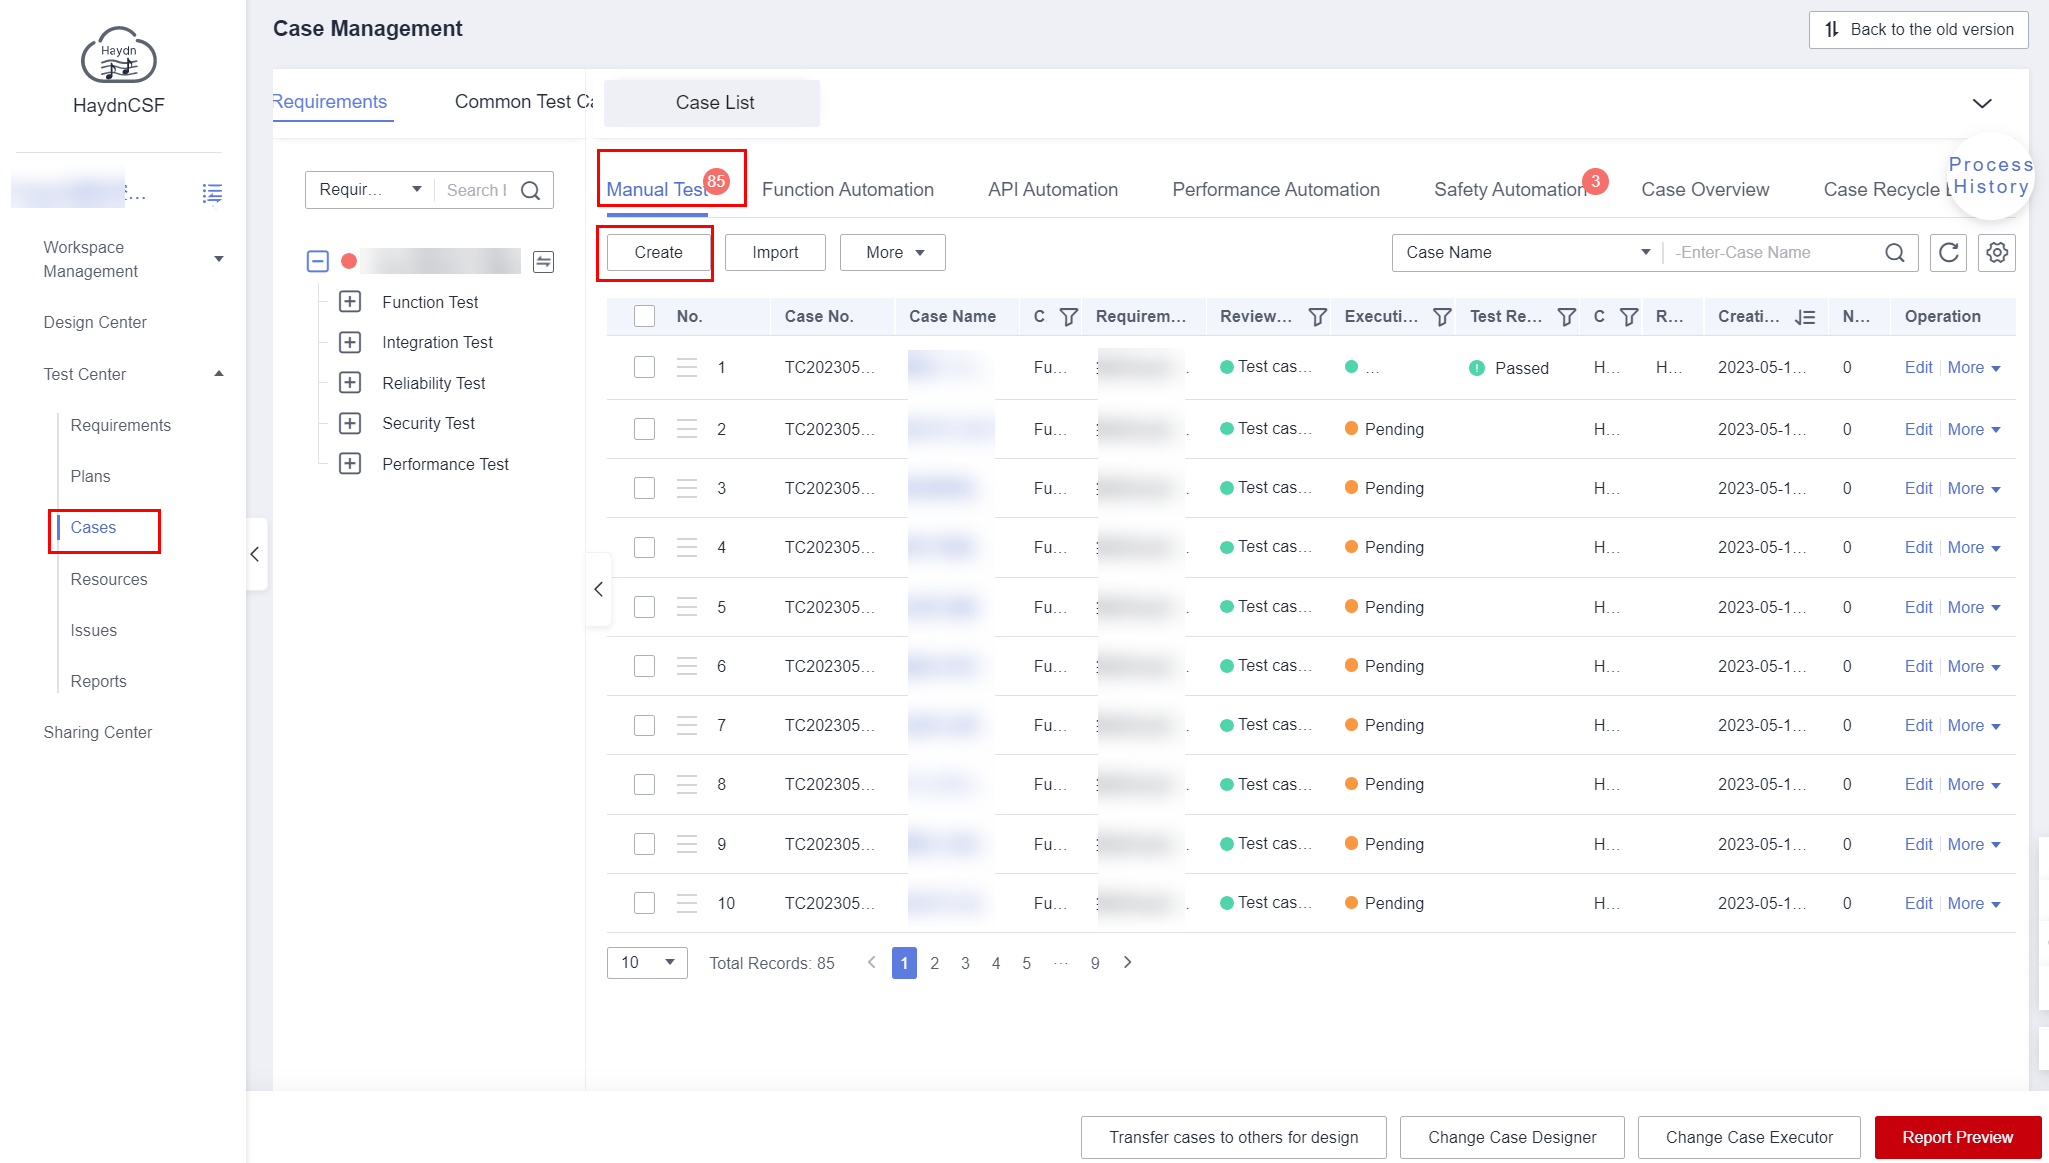
Creating a Manual Test Case
- Go to the workspace as the test case designer. In the navigation pane on the left, choose Verification Center > Cases. On the displayed page, click Manual Test and then click Create.
Figure 1 Creating a manual test case
- On the displayed page, enter related information and click OK. You can insert multiple test steps into a test case, and the step sequence can be adjusted.
- Requirement Description: Select the requirement that the test case belongs to from the drop-down list.
- Case Name: Enter a name for the test case. It is recommended that you standardize the test case name so that the function can be reflected in the test case name.
- Deployment Environment: Select the development environment where the test case is deployed from the drop-down list.
- Priority: Select the importance level of the test case from the drop-down list.
- Description: Describe the test case.
- Prerequisites: Enter the prerequisites for executing the test case.
- Test Procedure: Enter the steps involved in the test case.
- Expected Result: Enter the expected result of each step.
- Attachments: Upload the associated files required by the test case.
- View the test case statuses. The review status is To be reviewed, and the execution status is To be executed.
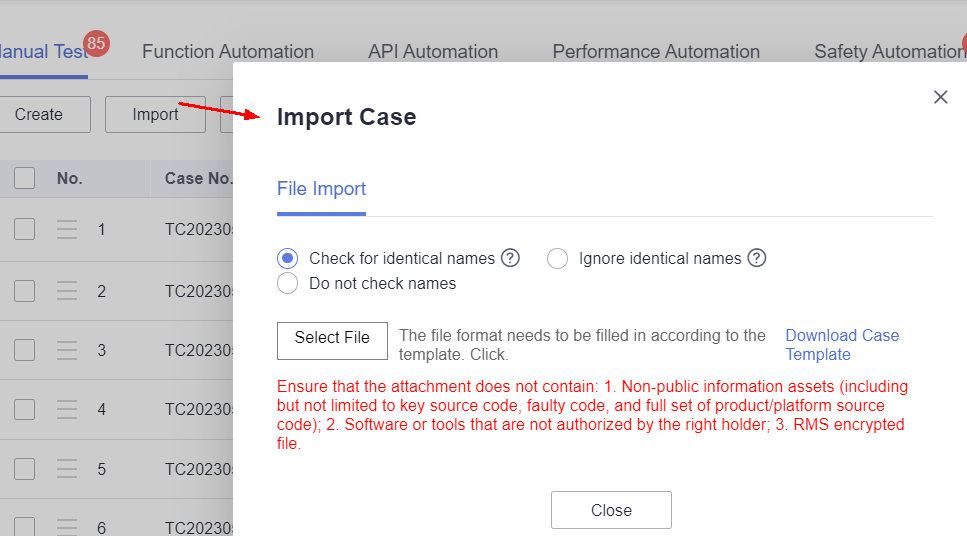
Importing Manual Test Cases
If there are multiple manual test cases, you can import them at a time.
- Click Import. In the Import Case dialog box, download the test case template.
Figure 2 Importing cases
- Open the downloaded test case template and fill in the test case information based on the remarks in the test case template.
Figure 3 Test case template


- Enter the test case information based on the remarks in the test case template.
- Cells without contents cannot contain spaces or newline characters.
- After filling in the test case information, delete the three lines in red. If the three lines are not deleted, a message will be displayed indicating that the three lines fail to be verified during the import. However, the test cases will still be imported.
- In the Import Case dialog box, click Select File and select the test case template file. When importing the test cases, you can choose to check for identical test case names.
- Check for identical names: The name of each test case must be unique, including the test cases in the file and the test cases created on the HaydnCSF platform.
- Ingore identical names: If there are test cases with the name as existing cases on the HaydnCSF platform, these cases will not be imported. If there are test cases with identical name in the file, only the first case will be imported.
- Do not check names: The system does not check whether case names are duplicate and imports all case names.
- Click OK to import the cases.
Editing a Manual Test Case
Manual test cases can be edited by test case designers and executors if there are no reports are being reviewed.
- Locate the test case and click Edit in the Operation column.
- Edit basic information about the test case, comment on the test case (such as providing suggestions), and click Submit. The comments will be displayed in the test case details.
- Click OK.
Loading a Template
HaydnCSF allows you to reference test case templates in the solution acceleration field, such as test case templates for joint operations certification and for Developer application building validation.
- Click More and select Load Template.
Figure 4 Loading a template

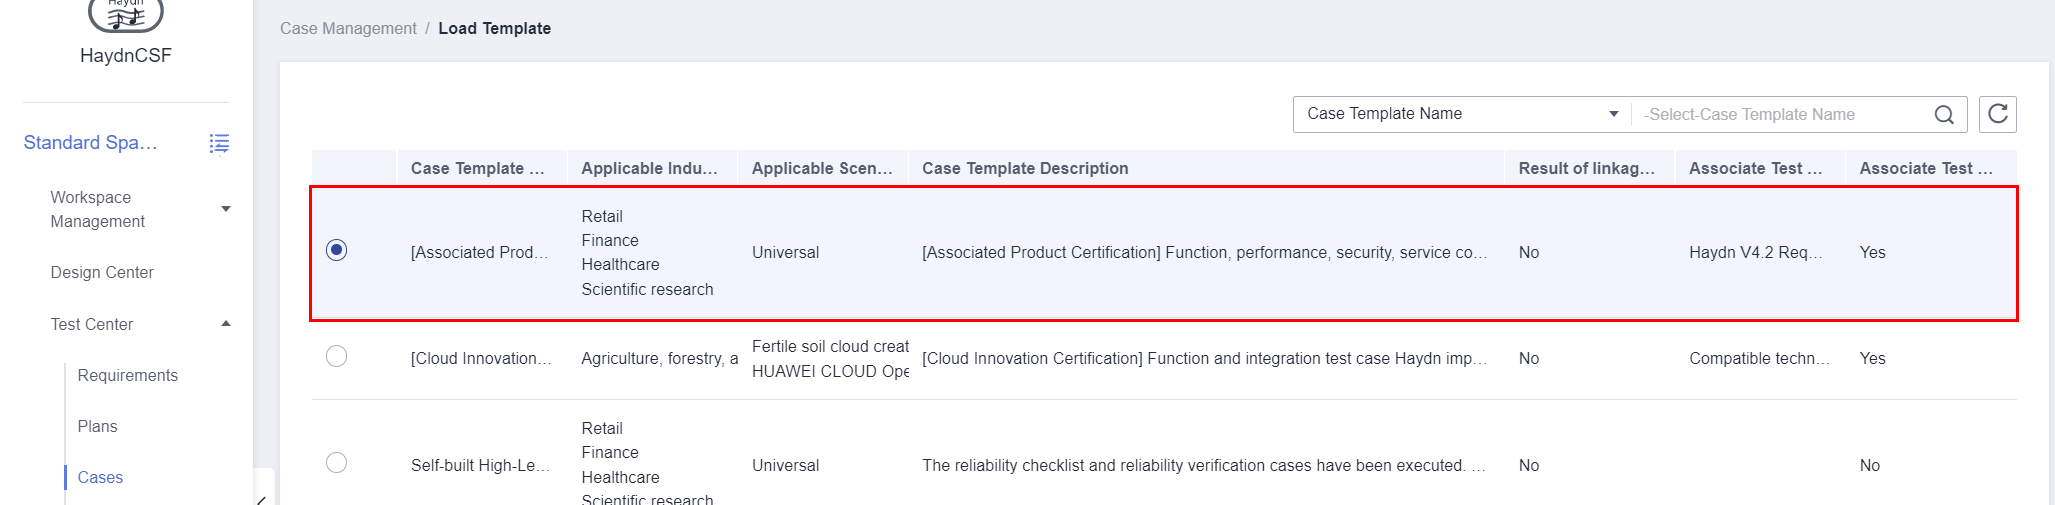
- Select the required test case template.
Figure 5 Test case templates
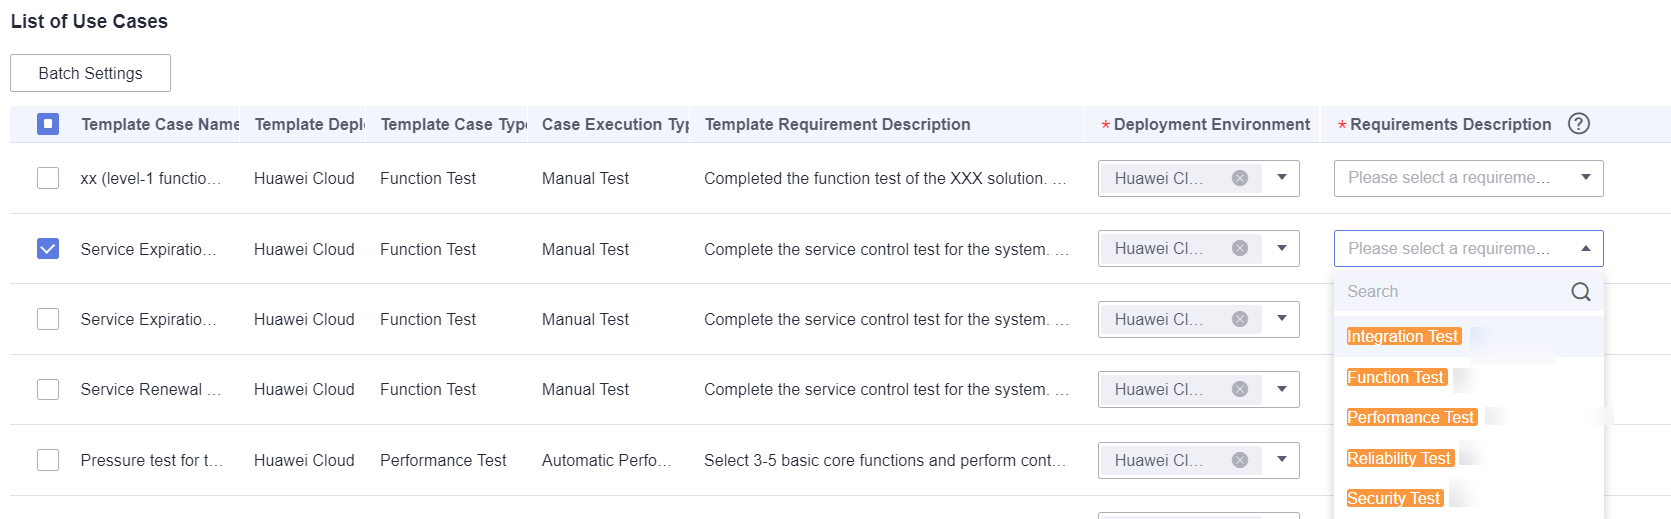
- View the test cases contained in the selected template at the bottom of the page.
- Select the required test cases.
- Select the deployment environment and the test requirement to which the test case is loaded.
Figure 6 Test cases
- Click OK at the bottom of the page to load the selected test cases.
Exporting Manual Test Cases
All members in the workspace can export test cases to a local directory.
- Select the test cases to be exported and choose More > Export.
- In the dialog box that is displayed, click Continue Exporting Cases.
- If you need to import the exported test cases to the test case list directly, clear the Case No. column in the .xlsx file. If you do not clear, existing test cases with the same number will be overwritten. You also need to delete the following columns in the .xlsx file: No., Case Author, Latest Test Result, Latest Executor, Creation Time, and Execution Status.
- If you only need to export the test cases, ignore the message and continue the exporting.
Deleting Manual Test Cases
Manual test cases can be deleted by test case designers and executors if there are no reports are being reviewed.
- Deleting a Single Test Case
Locate the test case and choose More > Delete in the Operation column.
- Deleting Test Cases in Batches
Select the test cases and choose More > Delete above the test case list.
Executing a Manual Test Case
Specified test case executor can execute manual test cases. Test case execution is parallel with test case design. The test case can be executed even if the test case design is not approved. However, the test case review must be completed before the report is submitted for review.
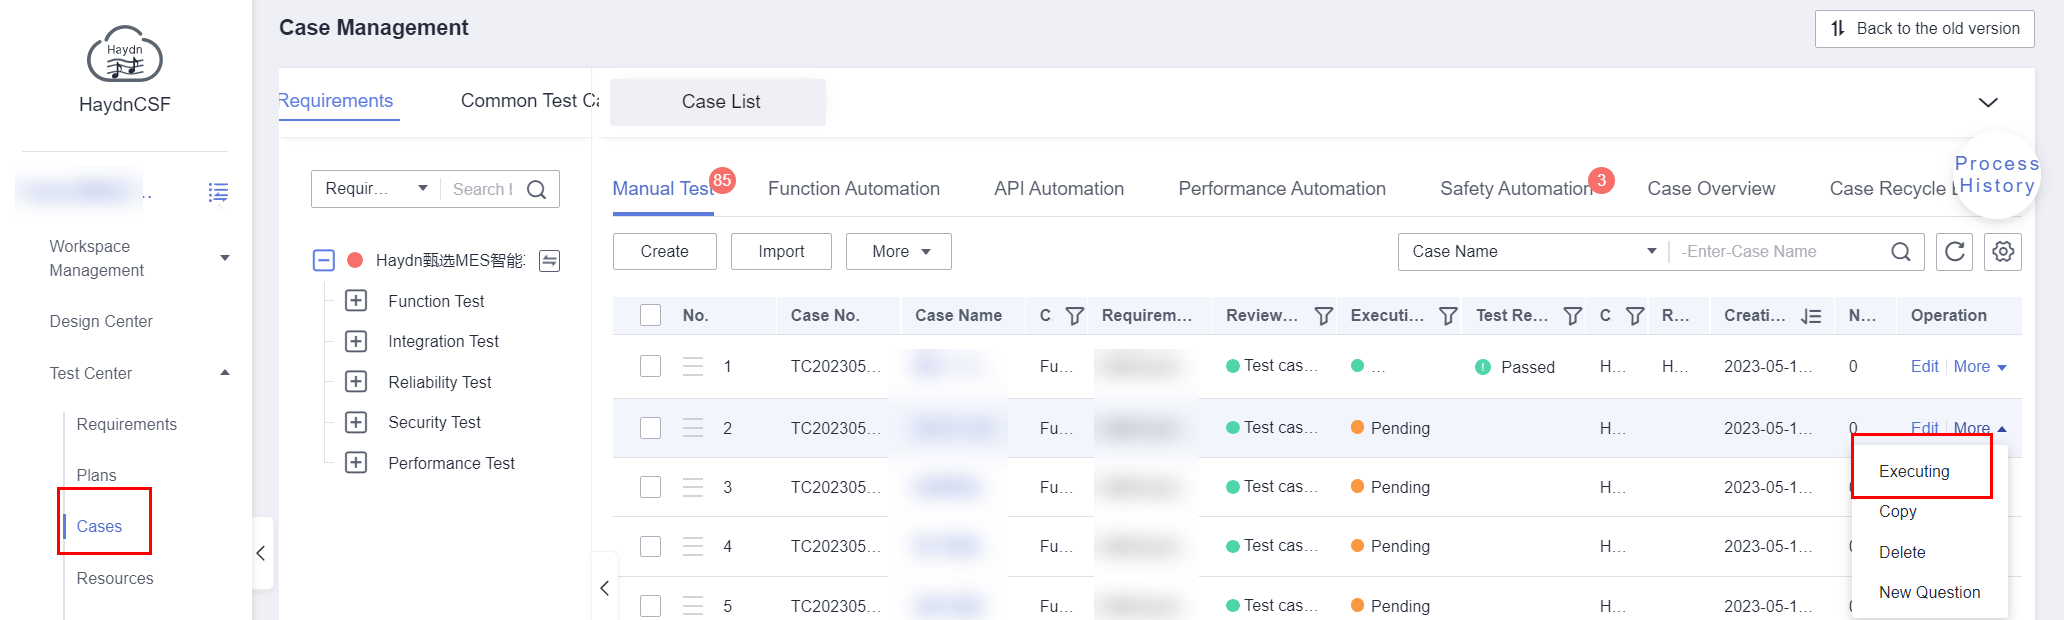
- Locate the test case and choose More > Execute in the Operation column.
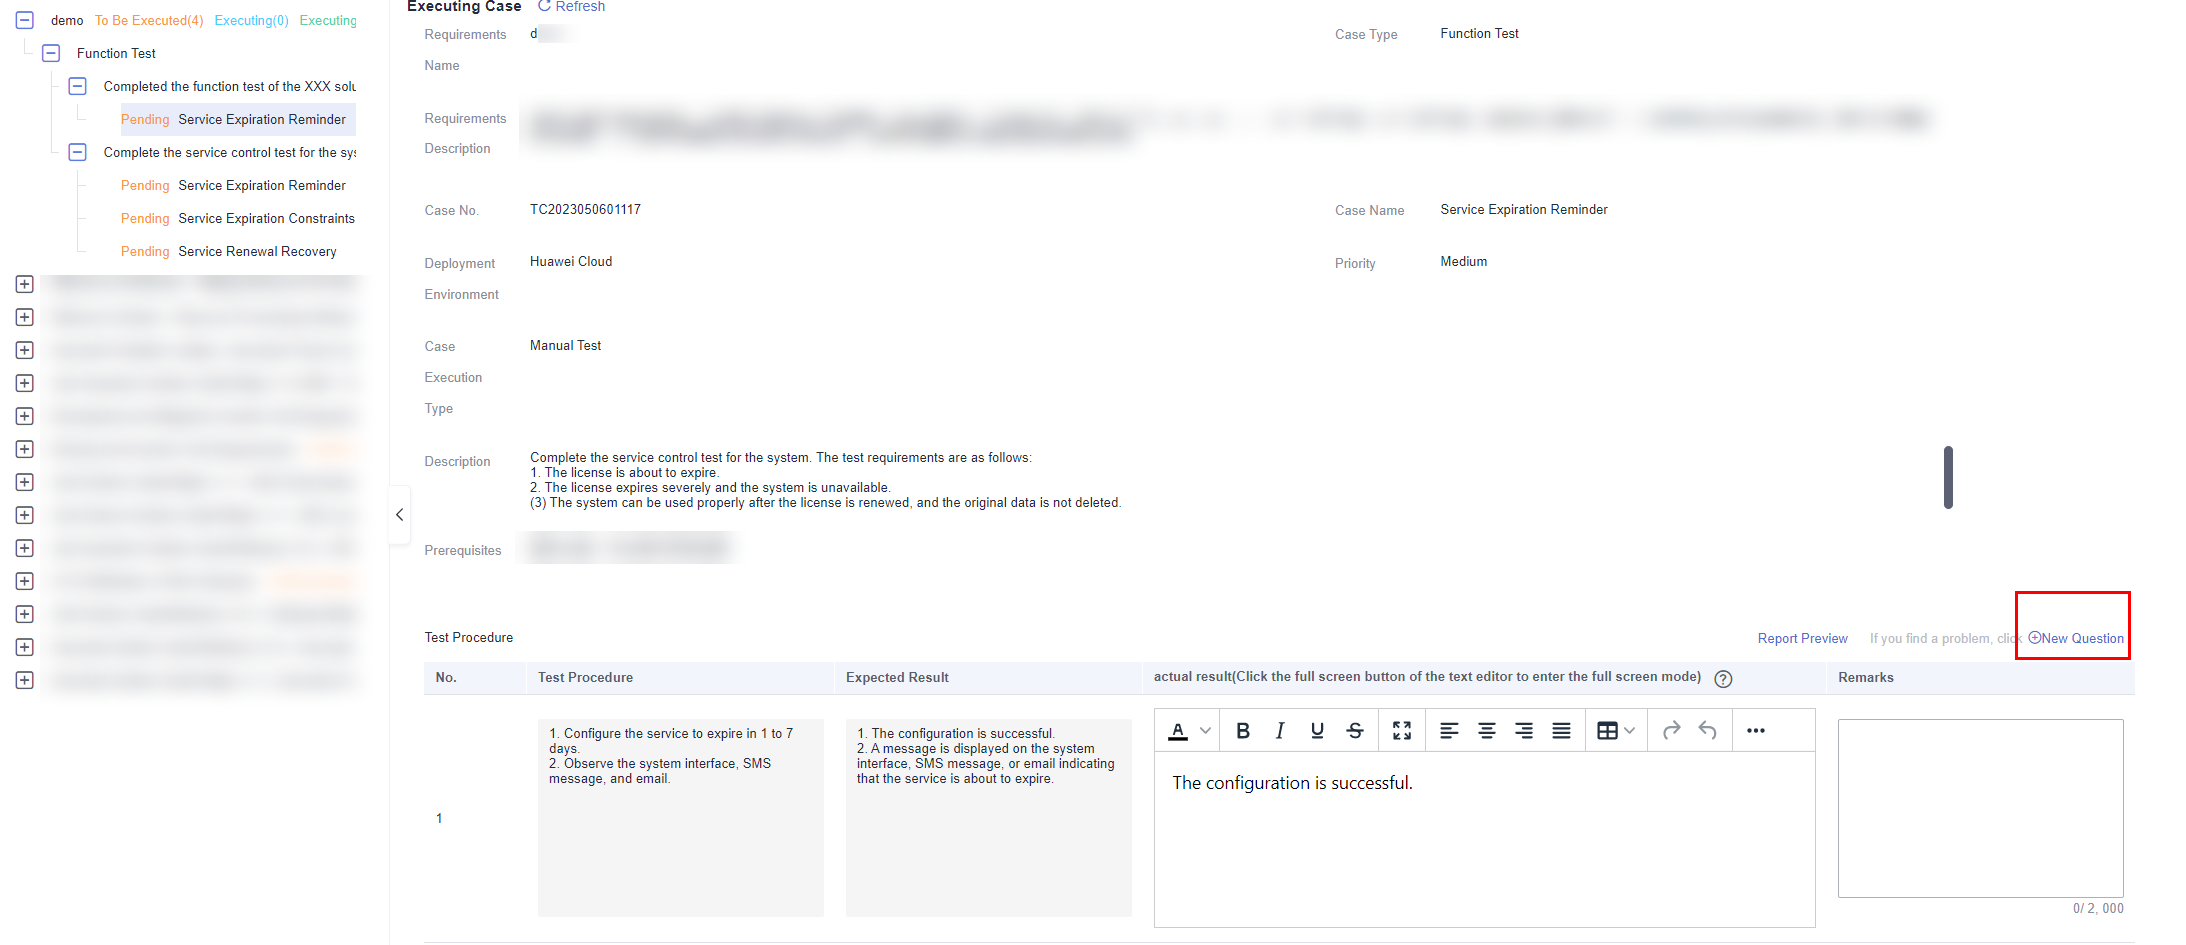
Figure 7 Executing a manual test case
- On the test case execution page, enter related information based on the execution results. You can click the maximize icon to display the rich text box in full screen.
- Actual Result: actual execution result of a step. The text box can be maximized and screenshots can be pasted.
- (Optional) Remarks: remarks about the test case execution
- (Optional) Attachments: attachments for the test case execution
- Case Status: There are three options: Pending, Executing, or Completed.
- Result Remarks: remarks on the execution result of the test case.
If the test case status is set to Completed, you must select an execution result from Passed, Failed, Passed conditionally, and N/A.
Figure 8 Manual test case execution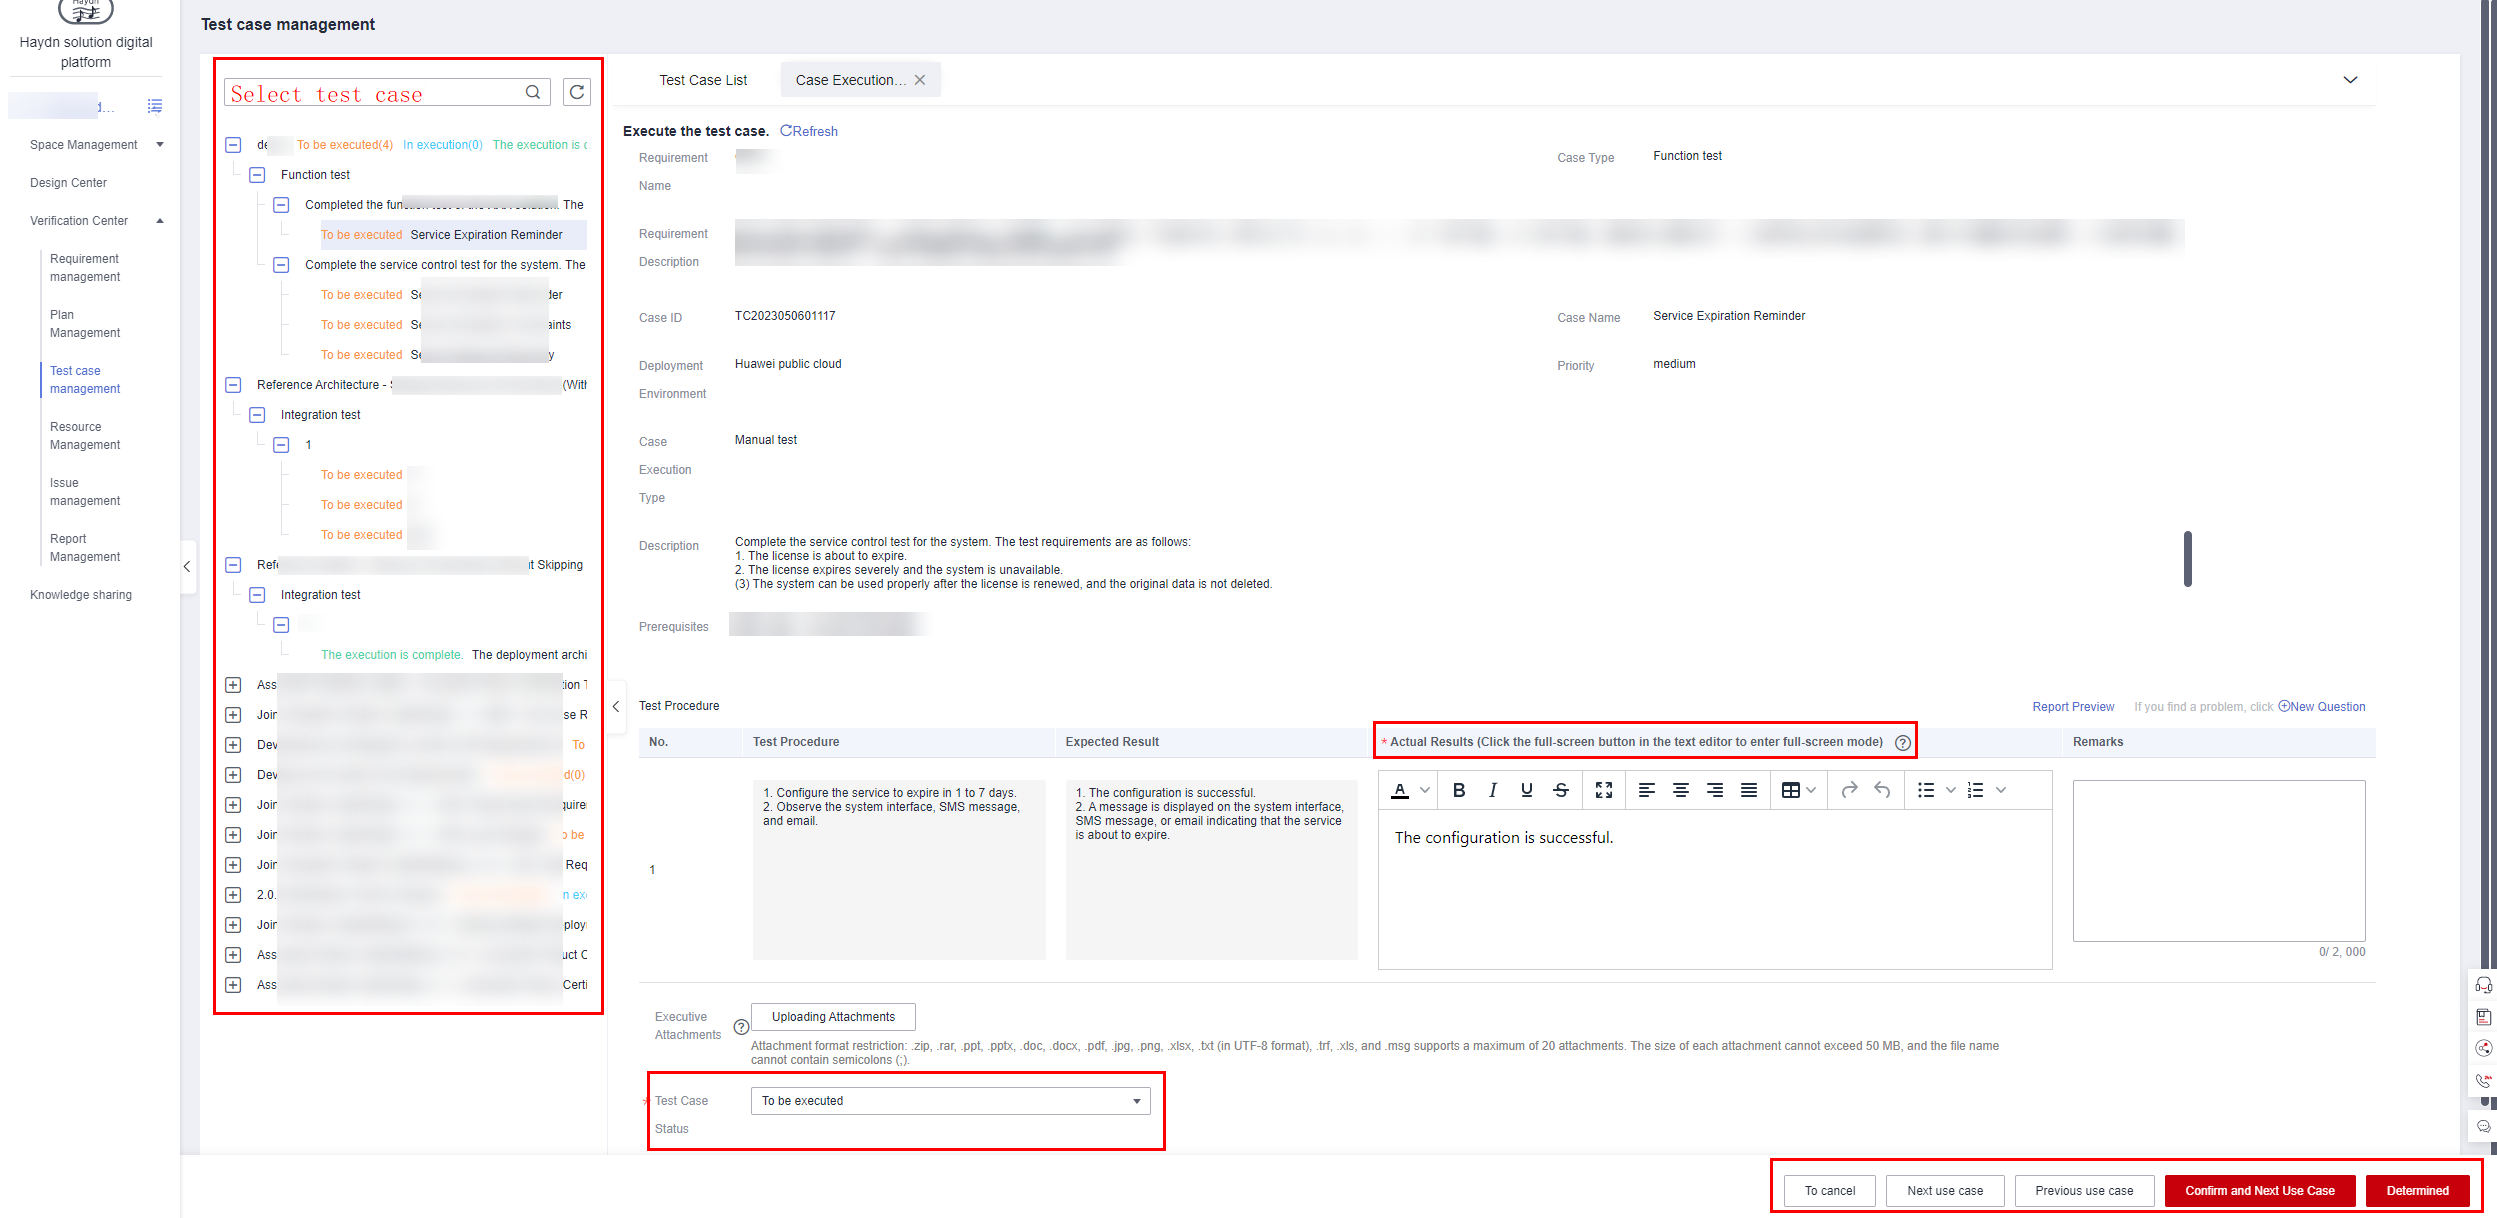
- Click OK to save the execution information of the test case. You can click Previous Case or Next Case to quickly go to the execution page of the previous or next test case.
Copying a Manual Test Case
Test cases can be copied to a specified test requirement in the workspace.
- Locate the test case and choose More > Copy in the Operation column.
- Configure the parameters as follows:
- Workspace: workspace where the test case will be copied
- Solution: solution that the test case can be used for
- Requirement: test requirement that the test case will be copied to
- Case Type: type of the test case
- Requirement Description: description of the requirement that the test case is copied to
- Deployment Environment: development environment where the test case will be deployed
Click OK.
Figure 9 Copying a test case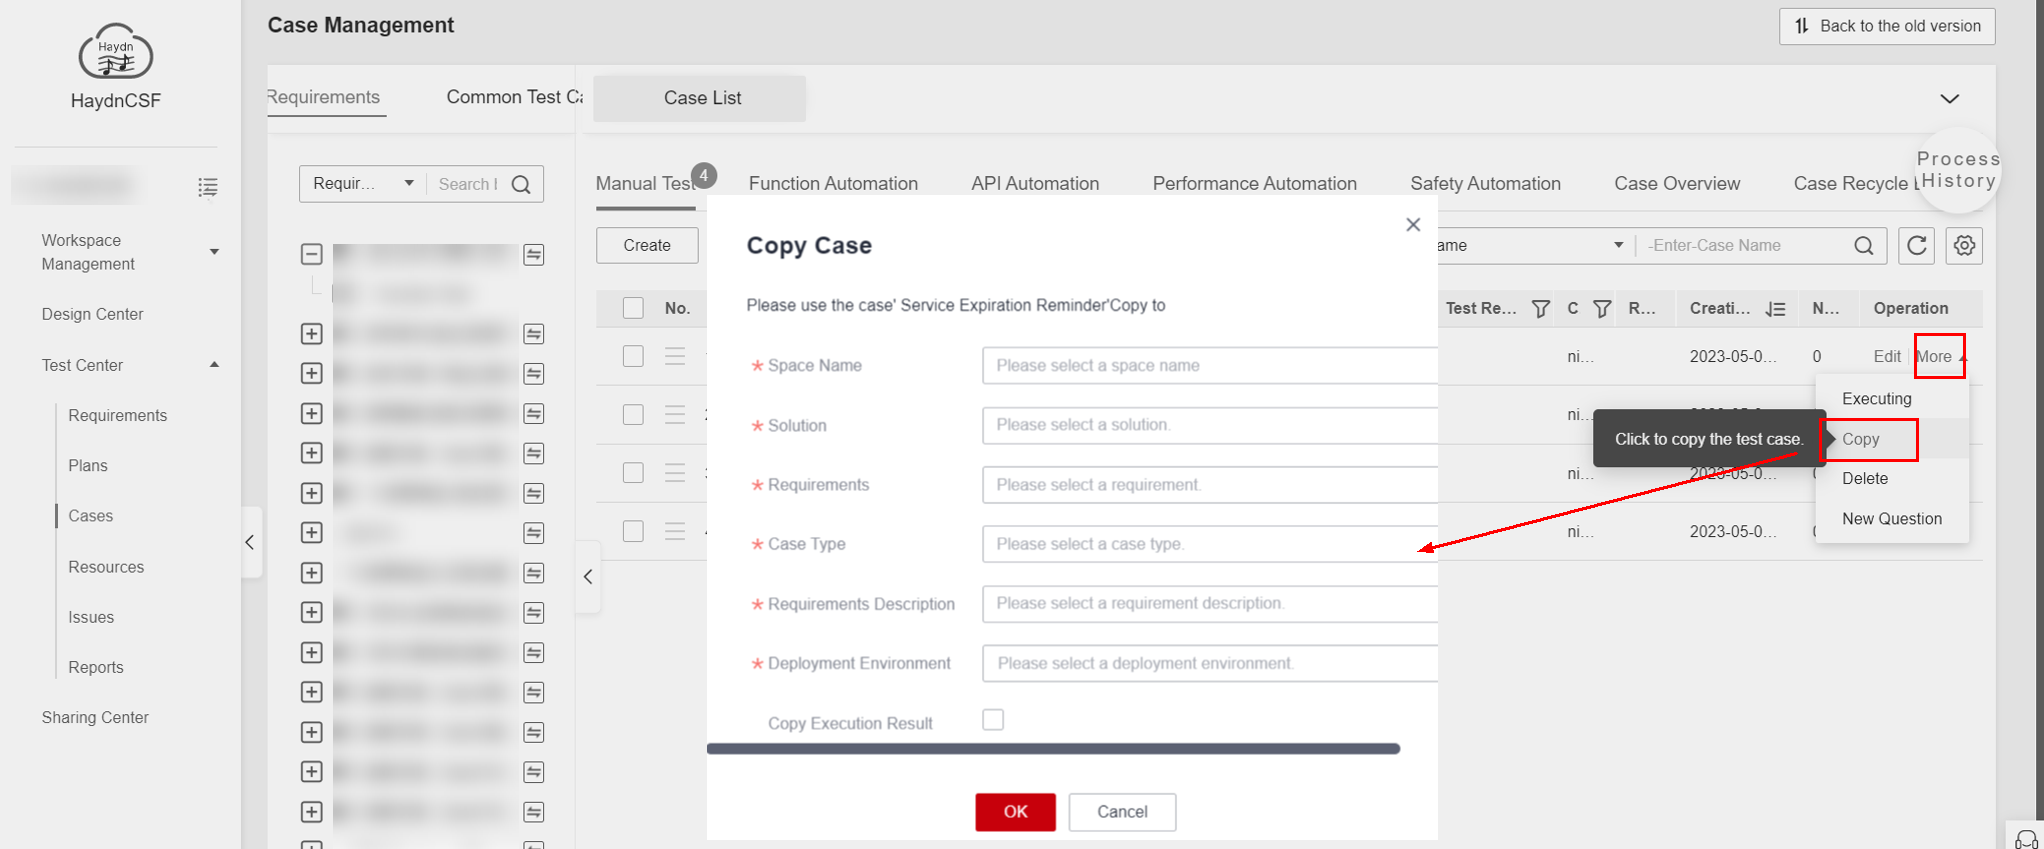
Associating a Test Case with an Issue
Members in the workspace can create issues for test cases on the Case Management page or Case Execution page.
- Locate the test case.
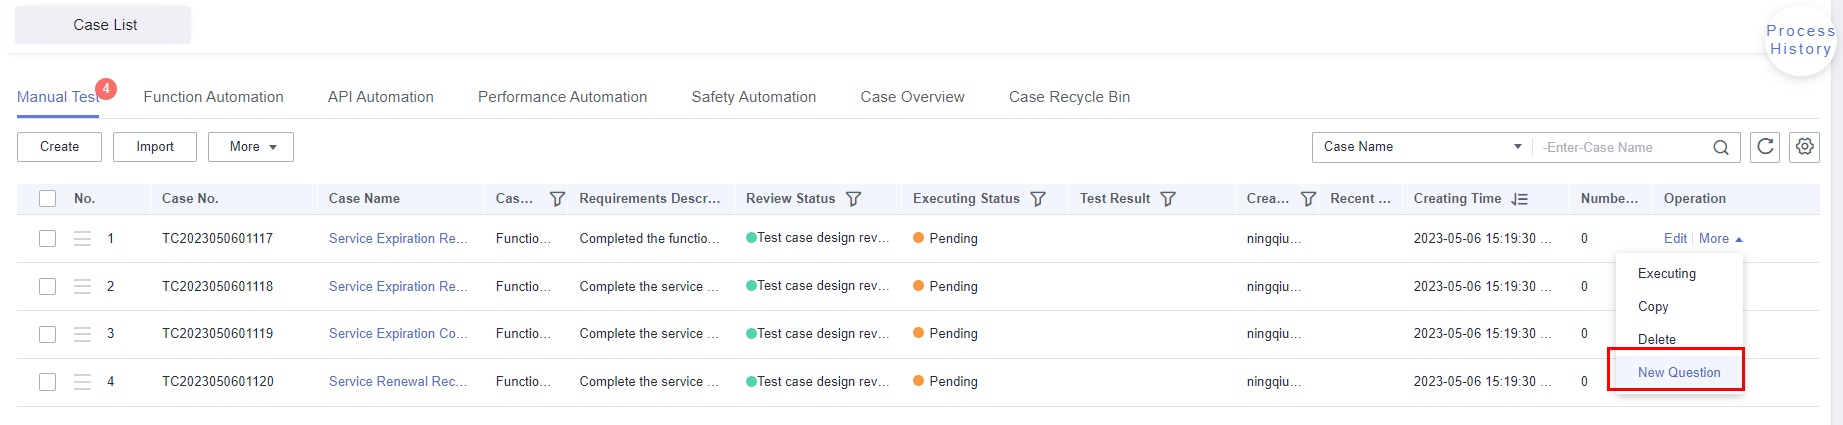
- Choose More > Create Issue in the Operation column.
Figure 10 Creating an issue on the Case Management page
- Choose More > Create Issue in the Operation column. On the test case execution page, click Create Issue.
Figure 11 Creating an issue on the Case Execution page
- Choose More > Create Issue in the Operation column.
- On the issue creation page, enter related information.
Parameters marked with a red asterisk (*) are mandatory.
- Issue Title: Enter a title for the issue. The title can consist of the person who raises the issue, issue type, and brief description.
- Issue Description: Describe the issue (such as the procedure for reproducing the issue and the symptom).
- Associated solution, requirement, requirement type, requirement description, and test case name are automatically displayed.
- Associated Cloud Service: Select the cloud services associated with the issue.
- Service Ticket No.: You need to create a service ticket in the Huawei Cloud service ticket system to obtain the service ticket number.
- Severity: Select the severity of the issue.
- Responsible Owner: Select the person who will handle the issue.
- Expected Rectification Date: Specify the deadline for handling the issue.
- Overdue Reminder: An email will be sent if the expected rectification date expires.
- Tag: identifies the issue.
Click OK.
Figure 12 Page for creating an issue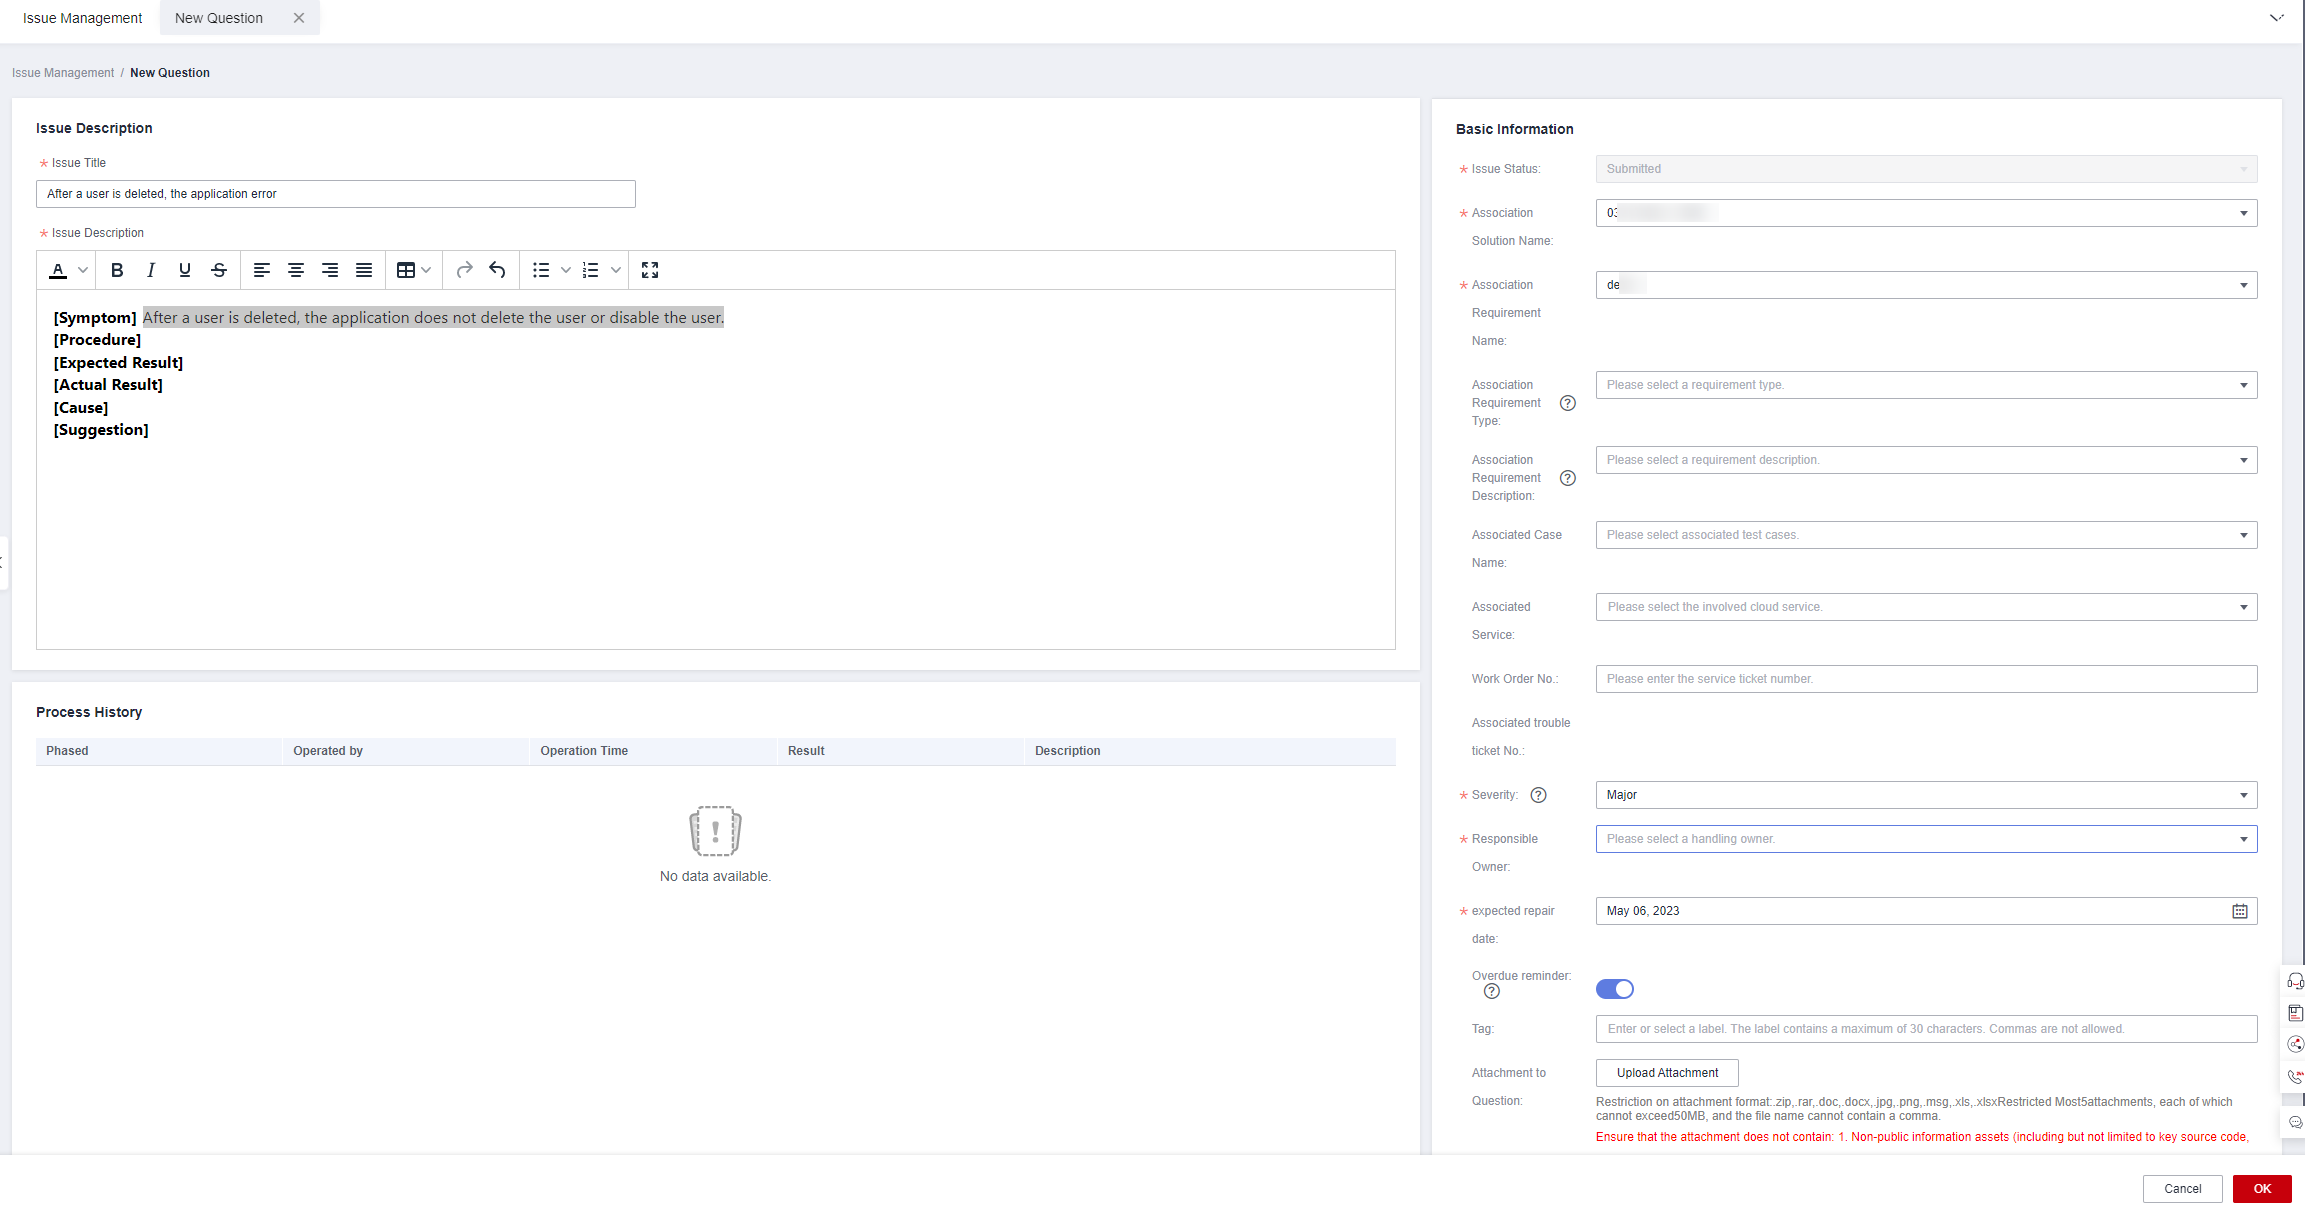
Feedback
Was this page helpful?
Provide feedbackThank you very much for your feedback. We will continue working to improve the documentation.See the reply and handling status in My Cloud VOC.
For any further questions, feel free to contact us through the chatbot.
Chatbot


