Rectifying a Faulty Node in a Standard Dedicated Resource Pool
This section describes how to rectify the faulty nodes. Currently, you can reset and replace the node, as well as configuring an HA redundant node. During fault locating and performance diagnosis, certain O&M operations need to be authorized by users.
HA Redundant Node
An HA redundant node is the backup node in a dedicated resource pool. It can automatically replace a faulty common node to improve the overall availability and fault tolerance capability of the resource pool, preventing service loss caused by the failure of a single node and ensuring service continuity and stability. You can set the number of HA instances based on your requirements.

HA redundant nodes cannot be used for service running, which will affect the number of actual available instances in the resource pool. When a resource pool delivers a task, select the number of actual available instances with caution. If the HA redundant instances are included, the task will fail to be delivered.
Mechanism
- HA redundant nodes are isolated and cannot be scheduled by default. Workloads cannot be scheduled to the nodes.
- HA redundant nodes function as standby nodes and work with node fault detection to ensure that the faulty nodes are automatically replaced by normal nodes in a resource pool. The replacement normally takes only a few minutes. After the replacement, the original HA redundant nodes will be de-isolated and become normal nodes, and the faulty nodes will be labeled as HA redundant nodes. Rectify the fault for future automatic switchover. After the faulty nodes are rectified, they become the new HA redundant nodes.
HA redundant nodes can free you from paying attention to node status and reduce O&M costs. However, you need to purchase backup nodes as HA redundant nodes. The resource costs are higher.

If a logical sub-pool is created in a Standard physical pool and the sub-pool is transparent, HA redundancy is no longer available in the Standard physical pool and is only available in the sub-pool. The transparency is a white-list function. Submit a service ticket to use it.
Setting HA nodes: You can set multiple HA redundant nodes in batches for a resource pool or set a single node as an HA redundant node.
5% of the total nodes in a resource pool should be HA redundant nodes. For example, there are 20 nodes in a resource pool, then there should be one HA redundant node.
If a service node is set as an HA redundant node, the jobs on the node still occupy the actual available resources of the resource pool. However, HA redundant nodes are not counted in the actual available resources, and the result may affect the node scheduling of the actual available resources. Note that the actual available resources of a resource pool are the total available resources of the resource pool minus the resources occupied by HA redundant nodes. When setting HA redundant nodes, use service-free nodes.
To check whether a node has any service, go to the resource pool details page. In the Nodes tab, check whether all GPUs and NPUs are available. If yes, the node has no services.
- Setting multiple HA redundant nodes in batches for a resource pool
- Method 1: Set when purchasing the resource pool.
Figure 1 Setting when purchasing

Parameters:
- HA Redundancy: Whether to enable HA redundancy for the resource pool.
After the function is enabled, the HA redundant node will be isolated, and workloads cannot be scheduled to the redundant node.
An HA redundant node functions as the standby node for the fault detection function. This node will take over workloads if its active node becomes faulty.
- Redundant Instances: number of HA redundant instances set for this flavor.
- HA Redundancy: Whether to enable HA redundancy for the resource pool.
- Method 2: Set on the resource pool details page.
Figure 2 Setting in the Specifications tab

- Method 3: Set on the Scaling page.
- Method 1: Set when purchasing the resource pool.
- Configure a single node as HA redundant node.
- Enabling HA redundancy
Select service-free nodes as HA redundant nodes. On the resource pool details page, click the Nodes tab, locate the target node, and choose More > Enable HA Redundancy in the Operation column. After the setting is successful, the node is in the standby state. Hover the cursor over the status, a message is displayed, indicating that HA redundancy has been enabled for the node.
If you need to enable HA redundancy for nodes in batches, select the target nodes, and click Enable HA Redundancy above the list.
Figure 3 Enabling HA redundancy
- Disabling HA redundancy
On the resource pool details page, click the Nodes tab. Locate the target node and click More > Disable HA Redundancy in the Operation column.
Once disabled, the nodes will be de-isolated and no longer used as standby nodes. Workloads can be scheduled to the nodes properly.
If you need to disable HA redundancy for nodes in batches, select the target nodes, and click Disable HA Redundancy above the list.
Figure 4 Disabling HA redundancy Figure 5 Non-HA redundancy
- Enabling HA redundancy
Resetting a Node
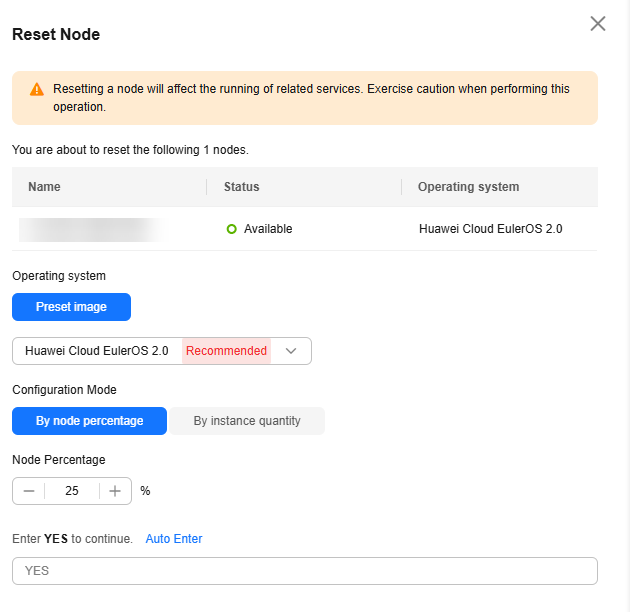
Perform this operation to upgrade the OS of the node. If an error occurs during node configuration update, reset the node to rectify the fault.
To reset a single node, access the Nodes tab, locate the target node in the list and click Reset in the Operation column. You can also select multiple nodes, and click Reset to reset multiple nodes.
NPU nodes whose instance specifications are snt9b23 cannot be reset.
Configure the parameters described in the table below.
|
Parameter |
Description |
|---|---|
|
Operating system |
Select an OS from the drop-down list. |
|
Configuration Mode |
Select a configuration mode for resetting the node.
|

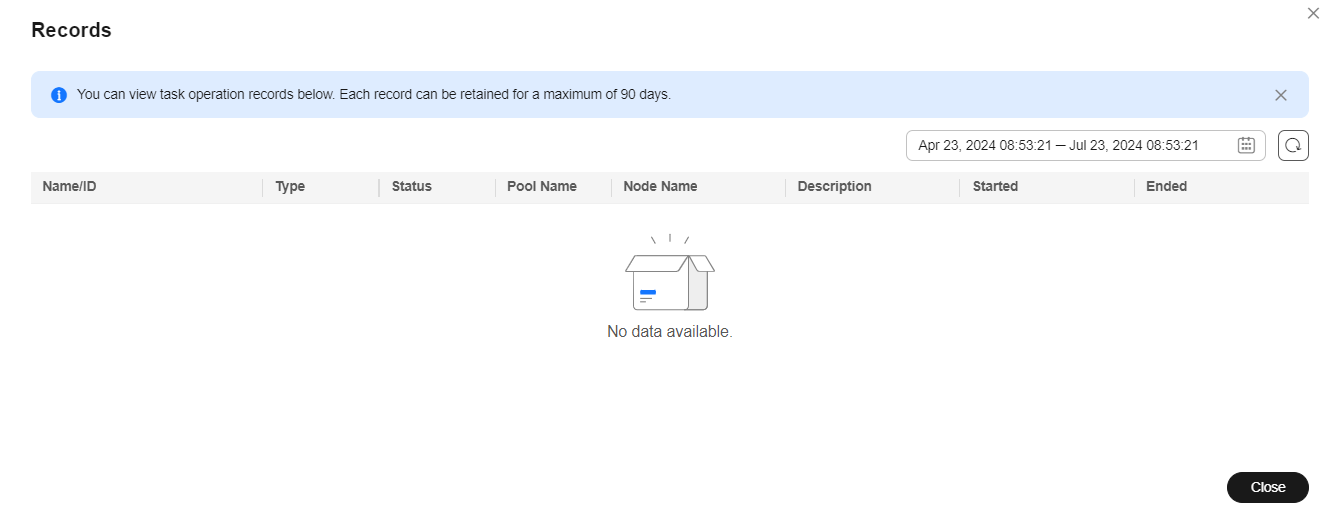
Check the node reset records on the Records page. If the node is being reset, its status is Resetting. After the reset is complete, the node status changes to Available. Resetting a node will not be charged.

- Resetting a node will affect running services.
- Only nodes in the Available or Unavailable state can be reset.
- A single node can be in only one reset task at a time. Multiple reset tasks cannot be delivered to the same node at a time.
- If there are any nodes in the Replacing state in the operation records, nodes in the resource pool cannot be reset.
- When the driver of a resource pool is being upgraded, nodes in this resource pool cannot be reset.
- After the node is reset, it will be unavailable for a short time. The service is being started and the health status is being checked. Wait patiently.
- For GPU and NPU specifications, after the node is reset, the driver of the node may be upgraded. Wait patiently.

Restarting a Node
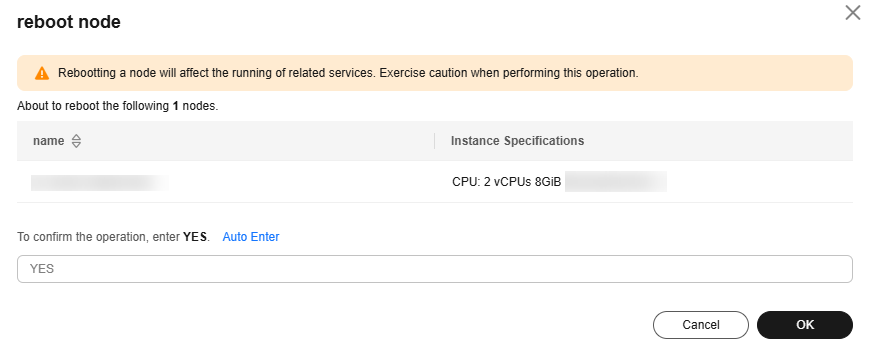
On the resource pool details page, click the Nodes tab, you can restart a node. To restart a single node, locate the target node, and click More > Reboot in the Operation column. You can also select multiple nodes and click Reboot above the list to restart multiple nodes.
When delivering a node restart task, select the corresponding nodes. Restarting a node will affect running services. Exercise caution.

Check the node operation records in the Records dialog box. If the node is being restarted, its status is Rebooting. After it is restarted, the status changes to Available. Restarting a node will not be charged.


- Restarting a node will affect running services.
- Only nodes in the Available or Unavailable state can be restarted.
- A single node can be in only one restart task at a time. Multiple restart tasks cannot be delivered to the same node at a time.
- If the node is being replaced, reset, or deleted, it cannot be restarted.
- When the driver of a resource pool is being upgraded, nodes in this resource pool cannot be restarted.
- After the node is restarted, it will be unavailable for a short time. The service is being started and the health status is being checked. Wait patiently.
Migrating a Node
Pay-per-use nodes can be migrated between resource pools.
To migrate nodes, the following requirements must be met:
- There must be at least one node left in the original resource pool after node migration.
- If the original resource pool has a logical subpool, the left resources in the original resource pool must meet the resource requirements of the logical subpool.
- There must be abundant available IP addresses in the target resource pool. Check the number of available IP addresses.
To migrate a node, perform the following steps:
- In the Nodes tab, select the target nodes and choose More > Migrate Node above the node list.
- Click Select Resource Pool on the displayed page.
Figure 10 Selecting the target resource pool

- In the Select Resource Pool dialog box, select the target resource pool to which the nodes are to be migrated and click OK.
- Select the target node pool and click Next: Confirm Specifications.
Figure 11 Selecting the target node pool

- Confirm the node migration information and click Submit.
Figure 12 Confirming the node migration information

In the upper right corner of the node list, click Records to view the operation records of node migration in the current resource pool.
Deleting or Unsubscribing from a Node
- To release a single node from a pay-per-use resource pool, locate the target node and click Delete in the Operation column, enter DELETE in the displayed dialog box, and click OK.
To delete nodes in batches, select the target nodes and click Delete above the node list, enter DELETE in the displayed dialog box, and click OK.
- For a yearly/monthly resource pool whose resources are not expired, click Unsubscribe in the Operation column.
- For a yearly/monthly resource pool whose resources are expired (in the grace period), click Release in the Operation column.
If the delete button is available for a yearly/monthly node, click the button to delete the node.

- Before deleting, unsubscribing from, or releasing a node, ensure that there are no running jobs on this node. Otherwise, the jobs will be interrupted.
- Delete, unsubscribe from, or release abnormal nodes in a resource pool and add new ones for substitution.
- If there is only one node, it cannot be deleted, unsubscribed from, or released.
Enabling/Disabling the Deletion Lock
To prevent nodes from being deleted or unsubscribed by mistake, you can enable the deletion lock. Once enabled, the nodes cannot be deleted or unsubscribed unless the lock is disabled.

- The deletion lock can be enabled only for the nodes in the resource pool.
- If the deletion lock is enabled, only node deletion and unsubscription are restricted. Other operations, such as node replacement, node restart, and node reset, work properly. Moreover, the resource pool that contains the nodes with deletion lock enabled can be deleted.
- Enabling deletion lock: Locate the target node and choose More > Enable Deletion Lock in the Operation column. In the displayed dialog box, confirm the information, enter YES in the text box, and click OK.
To enable deletion lock for multiple nodes in batches, select the target nodes and choose More > Enable Deletion Lock above the node list.
- Disabling deletion lock: Locate the target node and choose More > Disable Deletion Lock in the Operation column. In the displayed dialog box, confirm the information, enter YES in the text box, and click OK.
To disable deletion lock for multiple nodes in batches, select the target nodes and choose More > Disable Deletion Lock above the node list.
Draining a Node
To drain a node is to safely migrate workloads (such as pods) on a node to other nodes and mark the node as unschedulable in cluster management. You can enable node draining on the console to securely evict pods on a node. New pods will not be scheduled to the node.
When a node becomes faulty, you can drain the node to quickly isolate it. The pods evicted from the node will be scheduled by the workload controller to other nodes that are running normally.
You can drain a node only when the node status is available and schedulable.

During the draining, nodes become unavailable and job loads on the nodes will be evicted, which may cause job failures.
- Log in to the ModelArts console, choose Standard Cluster under Resource Management from the navigation pane.
- Click the target resource pool name to access its details page.
- In the Nodes tab, set node draining as required.
- To drain a single node, locate the node in the list and choose More > Node Drainage in the Operation column.
- To drain multiple nodes, select the target nodes, and choose More > Node Drainage above the node list.
- In the displayed dialog box, confirm the node information and the running jobs on the node, click One-Click Enter, enter YES in the text box, and click OK.
If the node status is available and drained, the job draining is complete.
If the node status is available and draining failed, hover the cursor over the node status to view the failure cause.Figure 13 Draining a node
Authorizing O&M on the Event Center Page
To view the faulty nodes reported by the ModelArts O&M platform, log in to the ModelArts console. In the navigation pane on the left, choose Event Center. The planned events of the faulty nodes are displayed, including the basic information, event type, event status, and event description. You can either redeploy the nodes or authorize Huawei technical support to perform O&M operations.
- Authorization conditions
Table 2 lists the event types and event status of the authorization operations that can be performed on the faulty node.
Table 2 Authorization conditions Event Type
Event Status
Authorization Operations
System maintenance
Authorization Pending
Authorization and redeployment
Local disk recovery
Authorization Pending
Authorization and redeployment
After the local disk is recovered, you can restore the partition by resetting the node.
WARNING:After authorization, recovering the local disk will cause local disk data loss. Therefore, migrate services and back up data before authorization.
Restarting a node
Authorization Pending
Authorization
O&M authorization
Authorization Pending
Authorization
Supernode maintenance
Authorization Pending
Authorization
Supernode redeployment
Authorization Pending
Redeployment
Redeployment of supernodes must be performed within physical supernodes. When supernodes are sold out, redeployment is not supported, and the authorization button becomes unavailable.
Supernode local disk recovery
Authorization Pending
Authorization
WARNING:After authorization, recovering the local disk will cause local disk data loss. Therefore, migrate services and back up data before authorization.
- Authorization
If the faulty nodes meet the requirements listed in Table 2, you can authorize Huawei technical support to perform O&M on the faulty nodes.
To do so, log in to the ModelArts console. In the navigation pane on the left, choose Event Center. Locate the target node and click Authorize in the Operation column. In the displayed dialog box, click OK.
If the planned event does not meet the requirements listed in Table 2, the Authorize button becomes unavailable.
After the O&M, Huawei technical support will disable the authorization. No further operations are required.
- Redeployment
If the faulty nodes meet the redeployment requirements listed in Table 2, you can authorize Huawei technical support to redeploy the faulty nodes.
After the O&M, Huawei technical support will disable the authorization. No further operations are required.

Redeploying nodes can restore them quickly, but local disk data will be lost. Therefore, migrate services and back up data before redeployment.
- To redeploy a node, log in to the ModelArts console. In the navigation pane on the left, choose Event Center under Resource Management, locate the node, and click Redeploy in the Operation column.
If the planned event does not meet the requirements listed in Table 2, the Redeploy button becomes unavailable.
- Check whether Forcible redeployment is selected, enter YES in the text box, and click OK.
Redeployment depends on the node status. If the node is unavailable, redeployment cannot be completed. However, you can select Forcible redeployment to forcibly redeploy the node.

Forcible redeployment resets the node, deleting all data on both its local and cloud disks. Exercise caution when performing this operation.
- To redeploy a node, log in to the ModelArts console. In the navigation pane on the left, choose Event Center under Resource Management, locate the node, and click Redeploy in the Operation column.
FAQ
How do I locate a faulty node in a standard resource pool?
In a standard resource pool, ModelArts will add a taint to a faulty Kubernetes node so that jobs will not be scheduled to the tainted node. You can locate the fault by referring to the isolation code and detection method. For details, see Faulty Nodes in a Standard Resource Pool.
Feedback
Was this page helpful?
Provide feedbackThank you very much for your feedback. We will continue working to improve the documentation.See the reply and handling status in My Cloud VOC.
For any further questions, feel free to contact us through the chatbot.
Chatbot


