
Accessing OBS Using HDFS Through Guardian
After interconnecting Guardian with OBS by referring to Disabling Ranger OBS Path Authentication for Guardian or Enabling Ranger OBS Path Authentication for Guardian, you can view and create OBS file directories on the HDFS client.
Prerequisites
If you interconnected Guardian with OBS by referring to Enabling Ranger OBS Path Authentication for Guardian, ensure that you have the read and write permissions on the OBS path in Ranger. For details about how to obtain the permissions, see Configuring Ranger Permissions.
Interconnecting HDFS with OBS
- Log in to the node on which the HDFS client is installed as a client installation user.
- Run the following command to switch to the client installation directory:
cd Client installation directory - Run the following command to configure environment variables:
source bigdata_env
- If Kerberos authentication is enabled for the cluster, run the following command to perform user authentication. The user must have the read and write permissions on the OBS directory. User authentication is not required for clusters with Kerberos authentication disabled.
kinit User performing HDFS operations - Access the OBS file system using the HDFS CLI.
The following commands are examples.
- Access the OBS file system.
hdfs dfs -ls obs://OBS parallel file system name/path - Create a directory in the OBS file system.
hdfs dfs -mkdir obs://OBS parallel file system name/hadoop - Upload the /opt/test.txt file on the client node to the obs://OBS parallel file system name/hadoop directory.
hdfs dfs -put /opt/test.txt obs://OBS parallel file system name/hadoopView the uploaded file in the corresponding OBS file system path.
- Access the OBS file system.
Changing the Log Level of OBS Client
- Go to the hadoop directory.
cd Client installation directory/HDFS/hadoop/etc/hadoop - Edit the file log4j.properties.
vi log4j.properties
Add the following OBS log level configuration to the file and save it.
log4j.logger.org.apache.hadoop.fs.obs=WARN
log4j.logger.com.obs=WARN
- Run the following command:
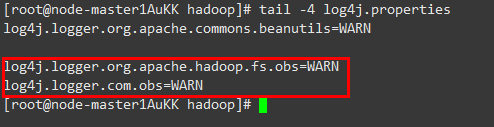
tail -4 log4j.properties
If the command output shown in Figure 1 is displayed, the log level has been changed.
Configuring Ranger Permissions
- Log in to FusionInsight Manager of the MRS cluster.
For details about how to log in to FusionInsight Manager, see Accessing MRS Manager.
- Choose System > Permission > User Group. On the displayed page, click Create User Group to create a user group without any roles, for example, obs_hadoop.
- Back to FusionInsight Manager and choose System > Permission > User. On the displayed page, click Create User to create a user that is associated only with the obs_hadoop user group, for example, hadoopuser.
- Log in to the Ranger management page as the rangeradmin user.
- On the home page, click component plug-in name OBS in the EXTERNAL AUTHORIZATION area.
- Click Add New Policy and add the Read and Write permissions on the desired OBS paths to the created user group.
The following figure shows the configurations needed for adding the Read and Write permissions on obs://OBS parallel file system name/hadoop to user group obs_hadoop.
Figure 2 Granting the Hadoop user group permissions for reading and writing OBS paths
Before configuring permission policies for OBS paths on Ranger, ensure that the AccessLabel function has been enabled for OBS. For how to enable it, contact OBS O&M personnel.
Feedback
Was this page helpful?
Provide feedbackThank you very much for your feedback. We will continue working to improve the documentation.See the reply and handling status in My Cloud VOC.
For any further questions, feel free to contact us through the chatbot.
Chatbot


