Downloading a Full Backup of a FlexusRDS for MySQL Instance
Scenarios
You can download manual and automated full backup files in .qp format for local storage.
Constraints
- Full backup files of frozen DB instances cannot be downloaded.
- When you use OBS Browser+ to download backup data, there is no charge for the outbound traffic from OBS.
- If the size of the backup data is greater than 400 MB, you are advised to use OBS Browser+ to download the backup data.
Method 1: Using OBS Browser+
- In the instance list, click the target instance name.
- Click Backups and Restorations.
- Locate the backup to be downloaded and click Download in the Operation column.
- In the displayed dialog box, select Use OBS Browser+ for Download Method and click OK.
Figure 1 Using OBS Browser+
 Figure 2 Download guide
- Download OBS Browser+ following step 1 provided on the download guide page.
- Decompress and install OBS Browser+.
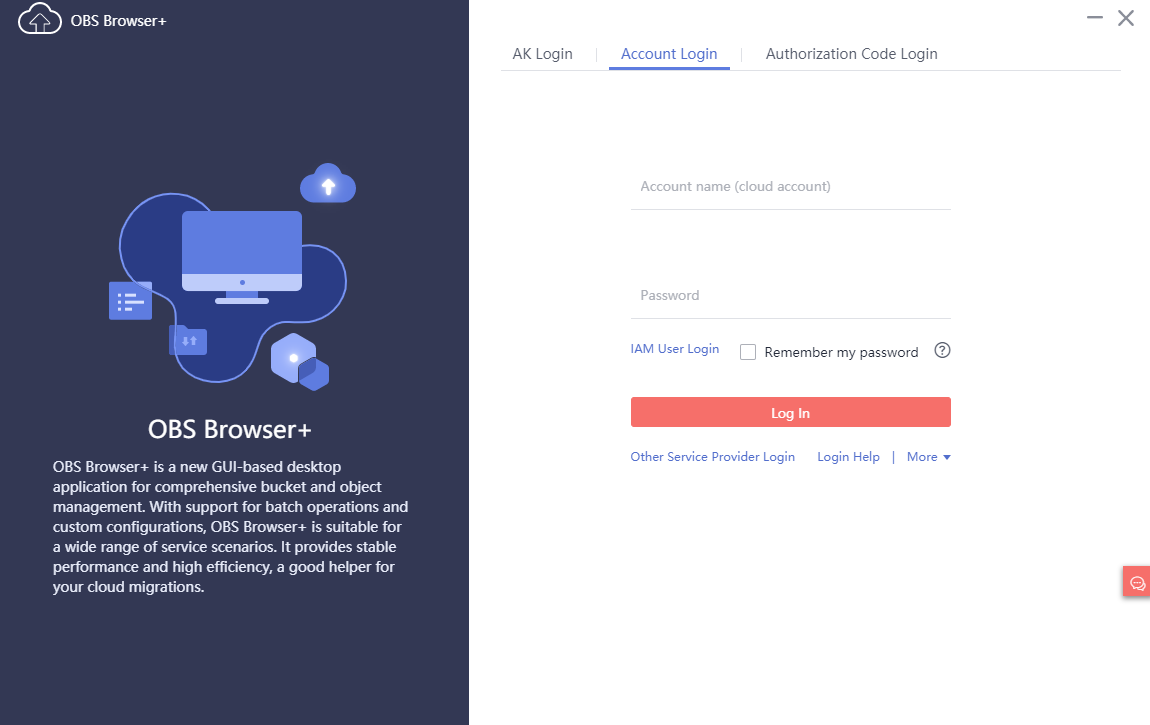
- Log in to OBS Browser+ using the username provided in step 2 on the download guide page.
Figure 3 Logging in to OBS Browser+

- Add an external bucket using the bucket name provided in step 2 on the download guide page.
Figure 4 Adding an external bucket


If you want to access OBS external buckets across accounts, the access permission is required. For details, see Granting IAM Users Under an Account the Access to a Bucket and the Resources in It.
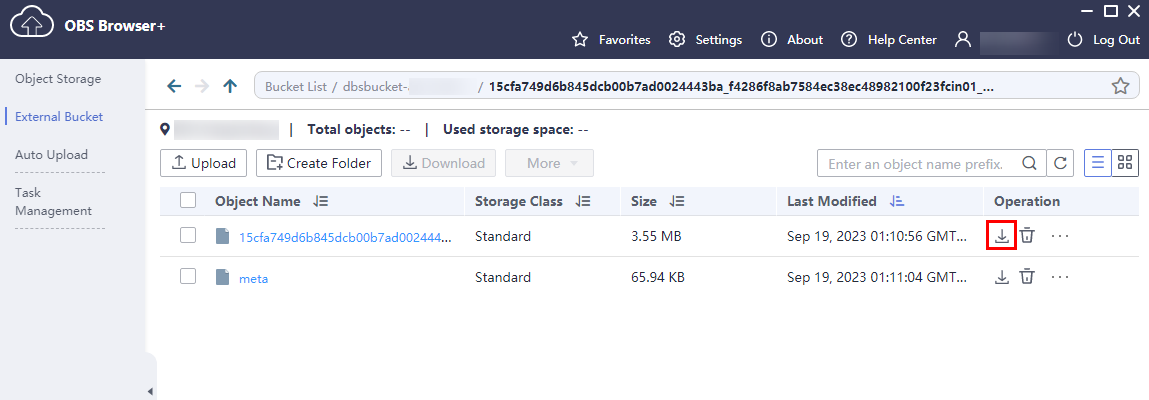
- Download the backup file.
On the OBS Browser+ page, click the bucket that you added. In the search box on the right of the object list page, enter the backup file name provided in step 3 on the download guide page. In the search result, locate the target backup and click
 in the Operation column.Figure 5 Downloading a backup
Method 2: Using Current Browser
- In the instance list, click the target instance name.
- Click Backups and Restorations.
- Locate the backup to be downloaded and click Download in the Operation column.
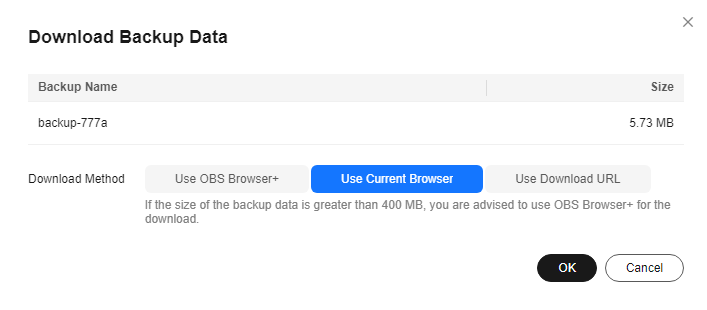
- In the displayed dialog box, select Use Current Browser for Download Method and click OK.
Figure 6 Using the current browser

Method 3: Using Download URL
- In the instance list, click the target instance name.
- Click Backups and Restorations.
- Locate the backup to be downloaded and click Download in the Operation column.
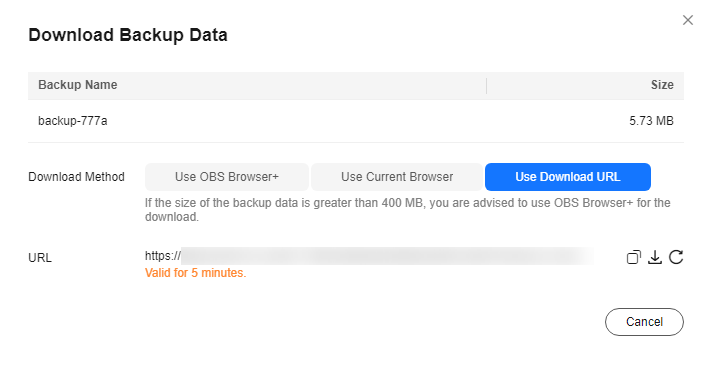
- In the displayed dialog box, select Use Download URL for Download Method, click
 to copy the URL, and enter the URL in your browser.
Figure 7 Using the download URL
- You can also run the following command to download backup files:
wget -O FILE_NAME --no-check-certificate "DOWNLOAD_URL"
The parameters in the command are as follows:
FILE_NAME: indicates the new backup file name after the download is successful. The original backup file name may be too long and exceed the maximum characters allowed by the client file system. You are advised to use the -O argument with wget to rename the backup file.
DOWNLOAD_URL: indicates the location of the backup file to be downloaded. If the location contains special characters, escape is required.
- You can also run the following command to download backup files:
Feedback
Was this page helpful?
Provide feedbackThank you very much for your feedback. We will continue working to improve the documentation.See the reply and handling status in My Cloud VOC.
For any further questions, feel free to contact us through the chatbot.
Chatbot


