Installing UniAgent on an ECS
Scenarios
Self-service O&M operations on ECSs such as hostname change and online password reset depend on UniAgent provided by Application Operations Management (AOM).
If UniAgent is not installed or the installation failed, you need to log in to the ECS and install UniAgent before performing self-service O&M.

You can install UniAgent in either of the following ways:
- Installing UniAgent on the ECS Console: When you intend to perform self-service O&M operations on an individual ECS and a message is displayed indicating that UniAgent is not installed or the installation failed, install UniAgent on the ECS console.
- Installing UniAgent on the Collection Management Console: When you intend to perform self-service O&M operations on multiple ECSs and a message is displayed indicating that UniAgent is not installed or the installation failed, install UniAgent on the Collection Management console.
Prerequisites
AOM 2.0 has been subscribed.
Installing UniAgent on the ECS Console
When you intend to perform self-service O&M operations on an individual ECS and a message is displayed indicating that UniAgent is not installed or the installation failed, do as follows to install UniAgent:
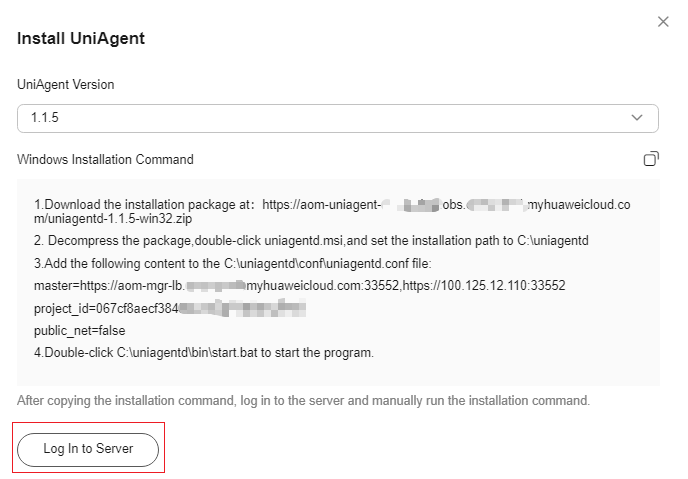
- In the slide-out panel of the ECS console, click Install UniAgent. The Install UniAgent panel slides out from the right.
Figure 2 Installing UniAgent (using a Windows ECS as an example)

- Select a UniAgent version. You are advised to select the latest version.
- Click the copy button in the upper right corner of the installation command area to copy the installation command.
- Click Log In to Server to log in to the ECS.
- Run the UniAgent installation command on the ECS.
- Windows ECSs: download the installation package and install UniAgent as instructed.
- Linux ECSs: paste and execute the installation command copied in 3.
- Return to the ECS console and click Check in the panel to check the UniAgent installation status.
After UniAgent is installed, wait for several minutes until the status is synchronized and click Check to update and check the UniAgent installation status. If the installation is complete, you can perform self-service O&M operations as needed.Figure 3 Checking UniAgent installation

Installing UniAgent on the Collection Management Console
When you intend to perform self-service O&M operations on multiple ECSs and a message is displayed indicating that UniAgent is not installed or the installation failed, do as follows to install UniAgent:
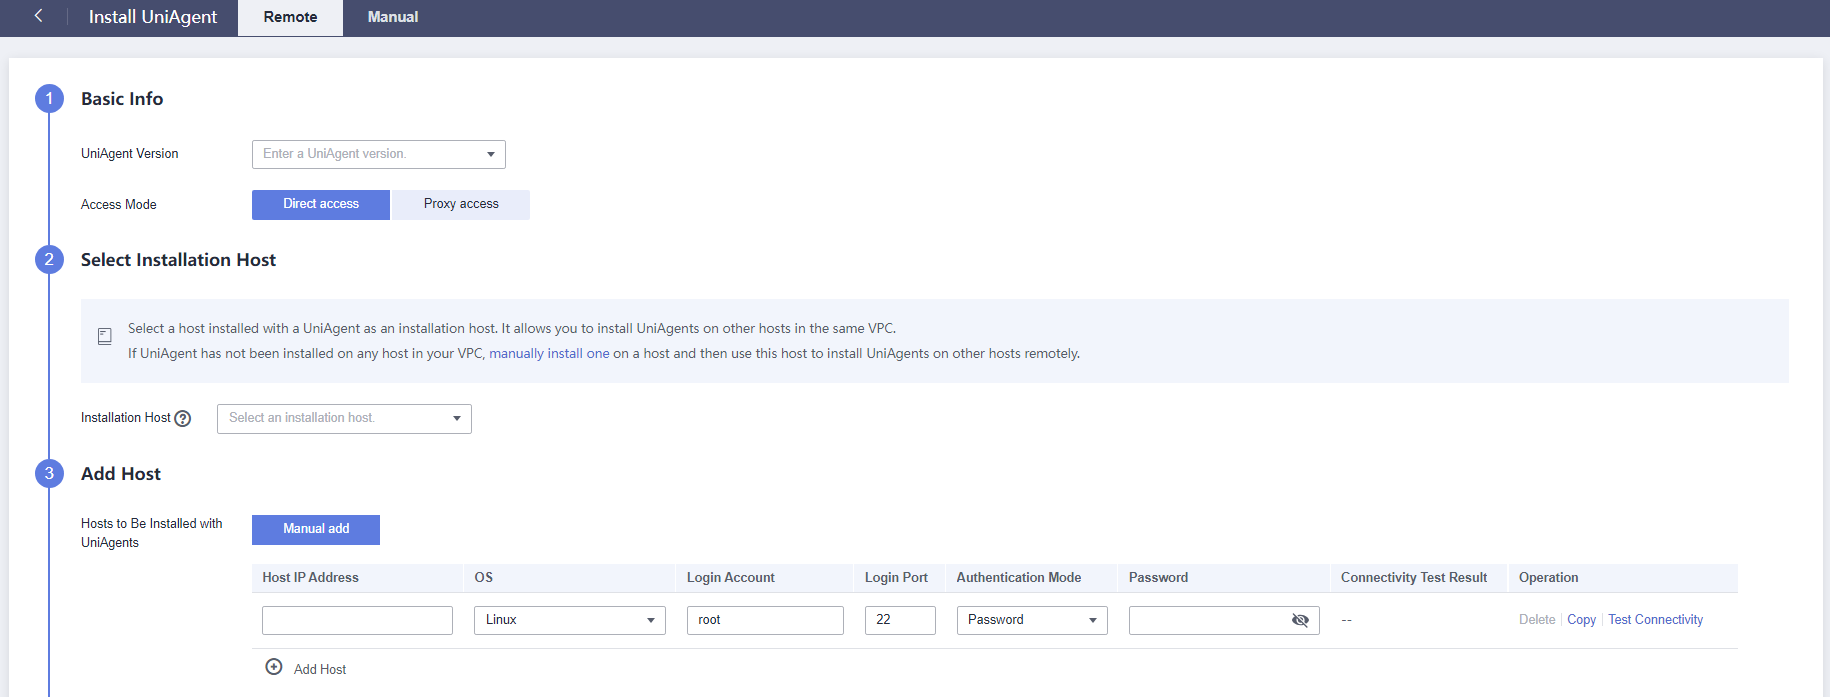
- In the slide-out panel of the ECS console, click Install UniAgent. Then you will be redirected to the Install UniAgent page of the Collection Management console.
Figure 4 Installing UniAgent on the Collection Management console

- Set parameters required to install UniAgent.
For details, see Installing a UniAgent.
- Return to the ECS console and click Check UniAgent Installation Status in the panel.
After UniAgent is installed, wait for several minutes until the status is synchronized and click Check UniAgent Installation Status to update and check the UniAgent installation status. After the installation is complete, you can perform self-service O&M operations as needed.
Feedback
Was this page helpful?
Provide feedbackThank you very much for your feedback. We will continue working to improve the documentation.See the reply and handling status in My Cloud VOC.
For any further questions, feel free to contact us through the chatbot.
Chatbot


