
Pulling an Image to Deploy an Application in a CCE Cluster
You can use an image to quickly deploy a single-pod workload that can be accessed over the Internet. This section describes how to use an image to quickly deploy Nginx in a CCE cluster.
Prerequisites
You have a CCE cluster that contains at least one node with 4 vCPUs and 8 GiB memory. The node is bound with an EIP.
Deploying an Application
- Log in to the CCE console.
- Click the name of the cluster to access the cluster console.
- In the navigation pane, choose Workloads. In the right pane, click Create Workload in the upper right corner.
- Configure the following parameters and keep the default values for other parameters:
Basic Info
- Workload Type: Select Deployment.
- Workload Name: Set it to nginx.
- Namespace: Select default.
- Pods: Set the quantity of pods to 1.
Container Settings
In the Container Information area, click Basic Info and click Select Image. In the dialog box displayed, click the Open Source Images tab, search for nginx, and select the nginx image.
Figure 1 Selecting the nginx image
Service Settings
In the Service Settings area, click the plus sign (+) and create a Service for external network access to the workload. This example shows how to create a LoadBalancer Service. Configure the below parameters in the sliding window on the right.
- Service Name: Enter nginx. The name of the Service is exposed to external networks.
- Service Type: Select LoadBalancer.
- Service Affinity: Retain the default value.
- Load Balancer: If a load balancer is available, select an existing load balancer. If not, select Auto create to create one.
- Ports:
- Protocol: Select TCP.
- Service Port: In this example, set this parameter to 8080. Load balancer will use this port to create a listener and provide an entry for external traffic.
- Container Port: listening port of the application. In this example, this parameter is set to 80. If another application is used, the container port must be the same as the listening port provided by the application.
Figure 2 Creating a Service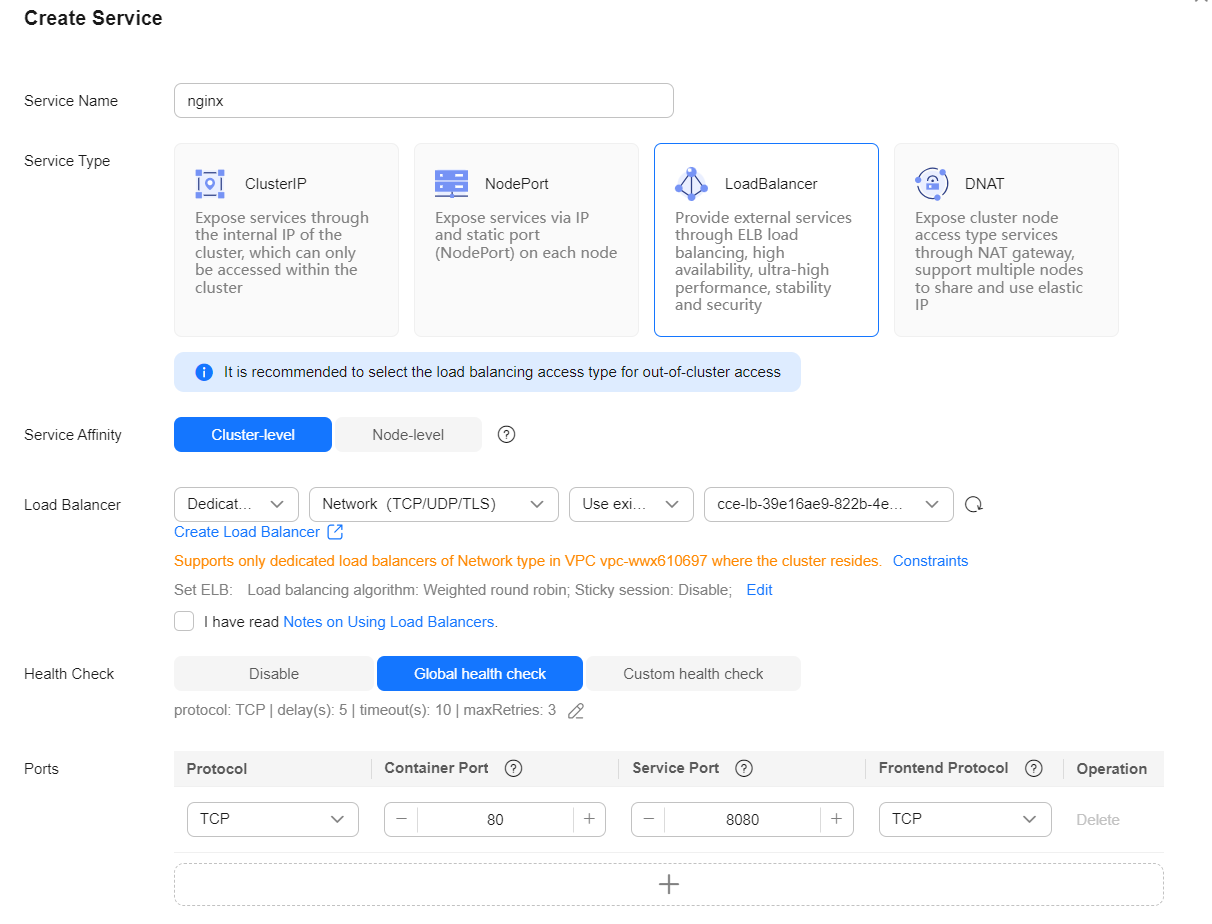
- Click Create Workload.
Wait until the workload is created.
The created workload in the Running state will be displayed on the Deployments tab.
Figure 3 Workload created
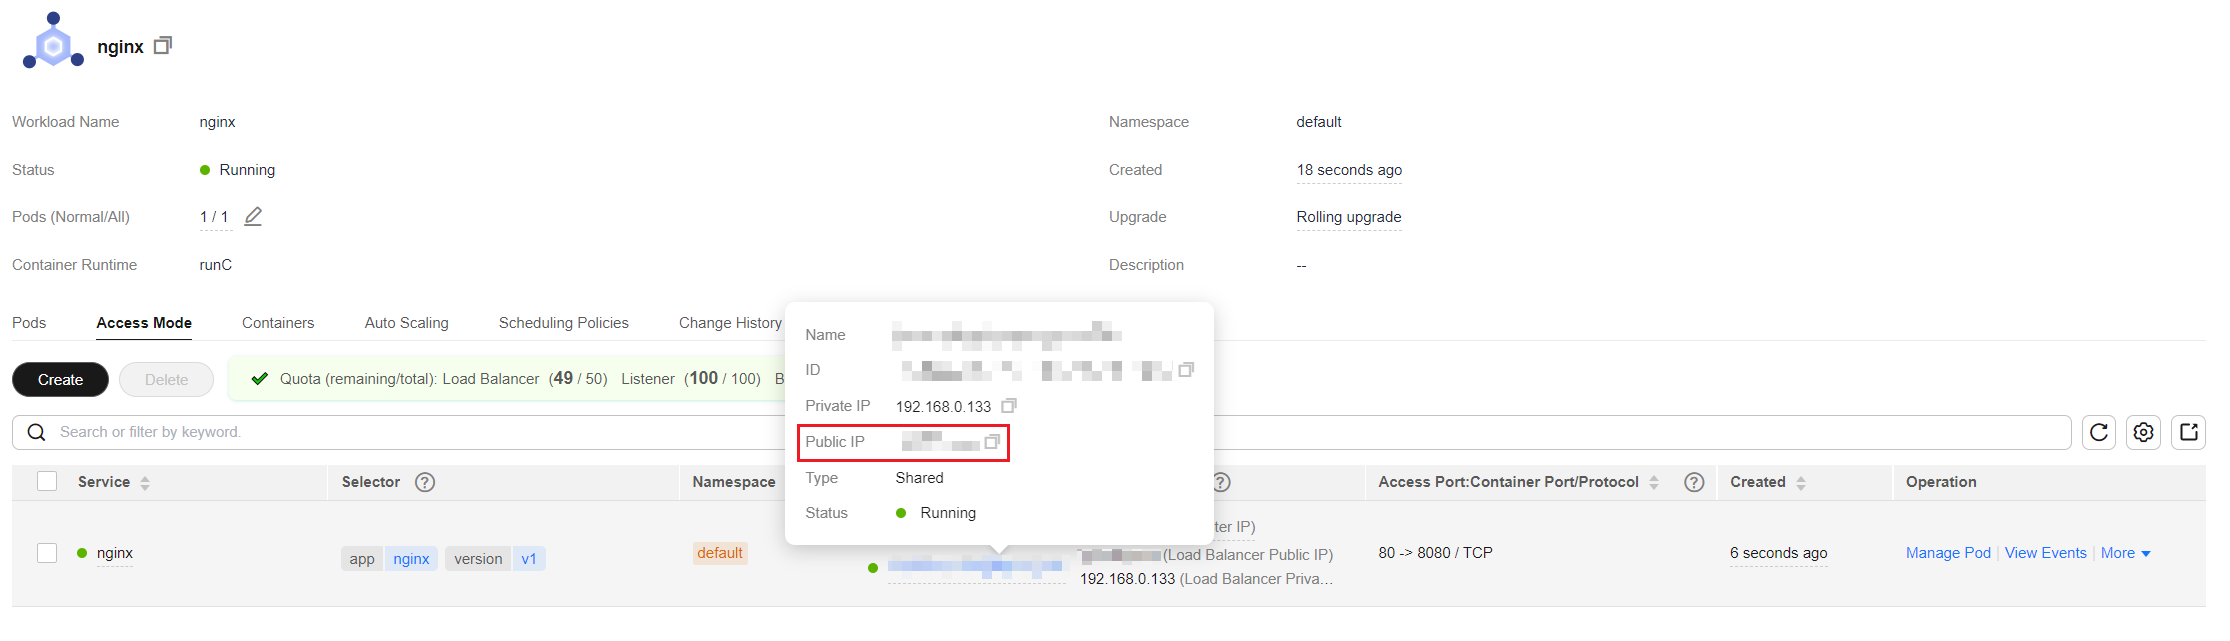
- Obtain the external access address of Nginx.
Click the name of the nginx workload to go to its details page. On the page displayed, click the Access Mode tab, view the Nginx IP address. The public IP address is the external access address.Figure 4 Obtaining the external access address
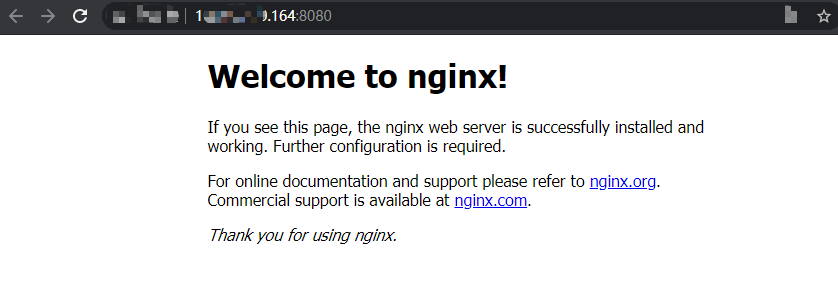
- In the address bar of a browser, enter <external-access-address>:service-port to access the application. The service-port is configured in Ports.
Figure 5 Accessing Nginx
Feedback
Was this page helpful?
Provide feedbackThank you very much for your feedback. We will continue working to improve the documentation.See the reply and handling status in My Cloud VOC.
For any further questions, feel free to contact us through the chatbot.
Chatbot


