Step 3: Start the Staking Node
Starting a staking node is to start a validator client using a key, gRPC endpoint, and TLS certificate.
Prerequisites
- You have created a staking node.
- You have created and obtained an API key.
Procedure
- On the NES console, choose Dedicated > Network Management.
- Click a node ID.
Figure 1 Node ID

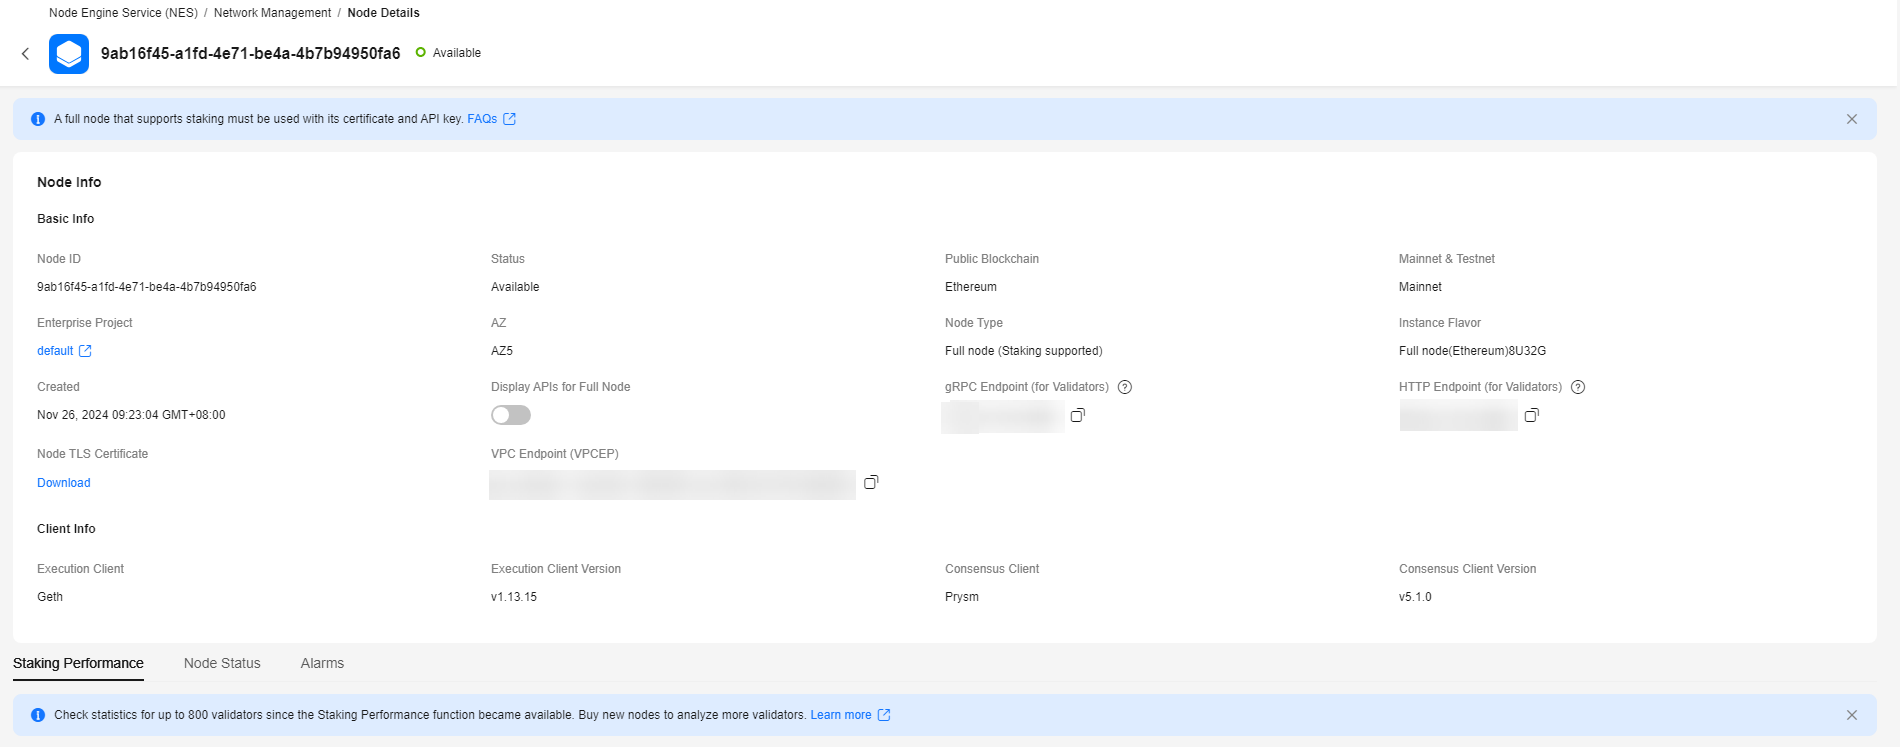
- Obtain the values of gRPC Endpoint and Node TLS Certificate.
Figure 2 Node details

- Paste the key and TLS certificate to the hardware machine installed with the script. Run the following command to import the key to the keystore:
./prysm.sh validator accounts import --keys-dir=<YOUR_FOLDER_PATH> --< NETWORK >
NETWORK is the staking network and YOUR_FOLDER_PATH is the actual key file path.
- After the key is imported, execute the prysm.sh file and configure the following parameters to start the staking node:
- beacon-rpc-provider: the value of gRPC Endpoint
- grpc-headers: the API key
- tls-cert: the relative path of Node TLS Certificate
For example:
./prysm.sh validator --beacon-rpc-provider=xx.xx.xx.xx:30002 --grpc-headers=credential=xxxxxxxxxxxxxxxxxxxxxx --tls-cert=ca.crt

These parameters are mandatory for interconnecting Huawei Cloud nodes. Check the Prysm Documentation to learn other parameters.
Feedback
Was this page helpful?
Provide feedbackThank you very much for your feedback. We will continue working to improve the documentation.See the reply and handling status in My Cloud VOC.
For any further questions, feel free to contact us through the chatbot.
Chatbot


