
Quick Deployment
This section describes how to quickly deploy this solution.
|
Name |
Type |
Mandatory |
Description |
Default Value |
|---|---|---|---|---|
|
vpc_name |
string |
Yes |
Virtual Private Cloud (VPC) name. This template uses a newly created VPC. The VPC name must be unique. It can contain 1 to 54 characters. Only letters, digits, underscores (_), hyphens (-), and periods (.) are allowed. |
scalable-hpc-cluster-with-slurm-demo |
|
security_group_name |
string |
Yes |
Security group name. This template uses a newly created security group. It can contain 1 to 64 characters. Only letters, digits, underscores (_), hyphens (-), and periods (.) are allowed. |
scalable-hpc-cluster-with-slurm-demo |
|
bandwidth_size |
number |
Yes |
Bandwidth size, in Mbit/s. Value range: 1-2,000 |
5 |
|
ecs_name |
string |
Yes |
ECS name. It must be unique. The name is in the {ecs_name}-master or {ecs_name}-node format. It can contain 1 to 57 characters. Only lowercase letters, digits, and hyphens (-) are allowed. |
scalable-hpc-cluster-with-slurm-demo |
|
ecs_password |
string |
Yes |
Initial password of an ECS. It can contain 8 to 26 characters, and it must include at least three of the following character types: uppercase letters, lowercase letters, digits, and special characters ($!@%-_=+[]:./^,{}?). The password cannot contain the username or the username spelled backwards. The default administrator account is root. |
Left blank |
|
ecs_master_flavor |
string |
Yes |
The flavor of an ECS that can function as a scheduling node. For more flavors, see A Summary List of x86 ECS Specifications. |
c6s.xlarge.2 |
|
ecs_node_flavor |
string |
Yes |
The flavor of an ECS that can function as a compute node. For more flavors, see A Summary List of x86 ECS Specifications. |
c6s.8xlarge.2 |
|
keypair_name |
string |
Yes |
The name of the existing SSH key pair. Only account key pairs under Key Pair Service are supported. For details, see Key Pair Management. |
Left blank |
|
sfs_turbo_name |
string |
Yes |
The name of an SFS file. It can contain 4 to 64 characters, and it must start with a letter, case-insensitive. Only letters, digits, hyphens (-), and underscores (_) are allowed. |
scalable-hpc-cluster-with-slurm-demo |
|
sfs_turbo_size |
number |
Yes |
The size of an SFS file, in GB. SFS file systems provide shared file storage for clusters. Value range: 500-32,768 |
500 |
|
as_name |
string |
Yes |
The name of an auto scaling resource. This template uses a newly created auto scaling group to provide auto scaling for clusters. The name must be unique. It can contain 1 to 50 characters. Only letters, digits, and hyphens (-) are allowed. |
scalable-hpc-cluster-with-slurm-demo |
|
charge_mode |
string |
Yes |
Billing mode. It can be prePaid (yearly/monthly) or postPaid (pay-per-use). |
postPaid |
|
charge_period_unit |
string |
Yes |
Unit of a subscription term. This parameter is mandatory only when charging_mode is set to prePaid. Value range: month or year |
month |
|
charge_period |
number |
Yes |
Subscription term. This parameter is mandatory only when charging_mode is set to prePaid. Value range:
|
1 |
|
AK |
string |
Yes |
The Access Key ID (AK) created for configuring Gearbox. For details about how to create and obtain an access key, see 1. |
Left blank |
|
SK |
string |
Yes |
The Secret Access Key (SK) created for configuring Gearbox. For details about how to create and obtain an access key, see 1. |
Left blank |
|
project_id |
string |
Yes |
The project ID for the region where the solution is deployed. For details about how to obtain the project ID, see Identity and Access Management > Projects. |
Left blank |
- Access the Quick-Start Guides of Huawei Cloud and choose Deploying a Scalable HPC Cluster with Slurm.
Figure 1 Selecting a solution

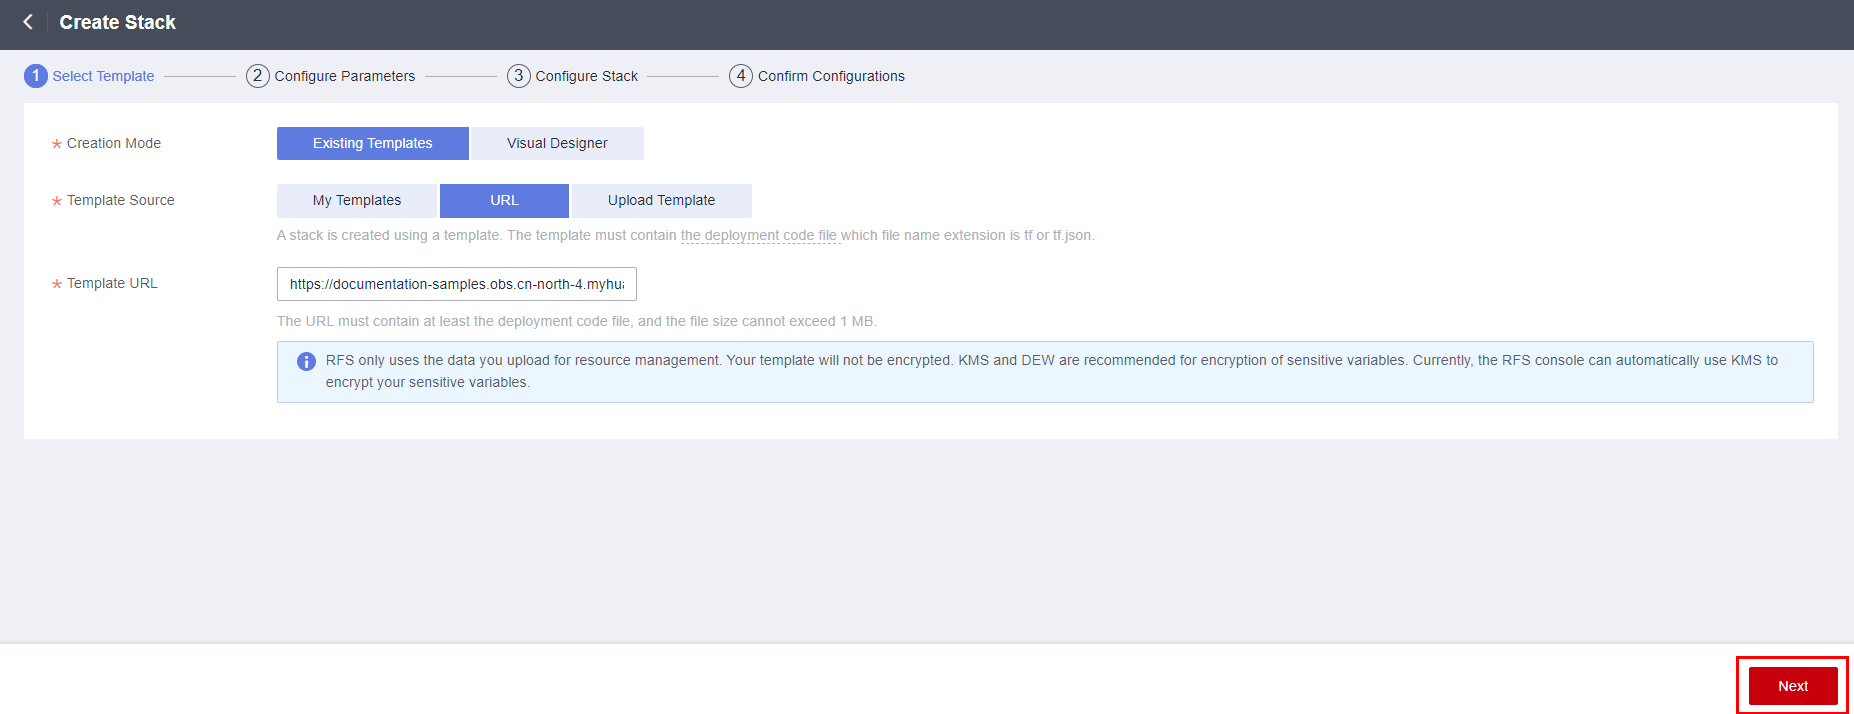
- Click Deploy to switch to the Create Stack page.
Figure 2 Easy deployment
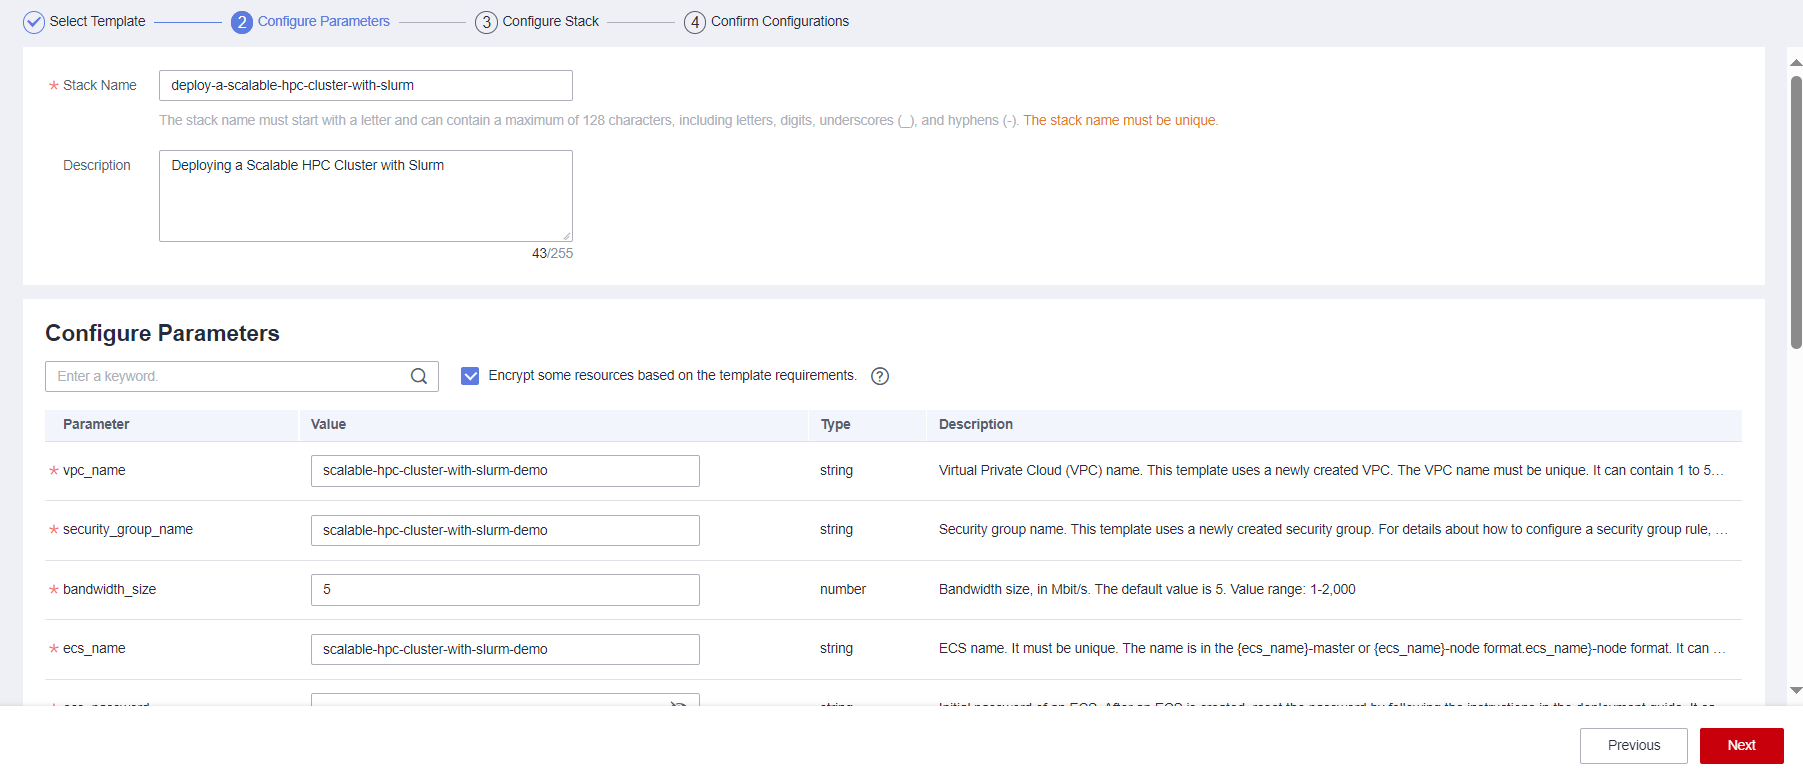
- Click Next and configure user-defined parameters based on Table 1.
Figure 3 Configuring parameters
- Click Next to create an execution plan.
Figure 4 Creating an execution plan
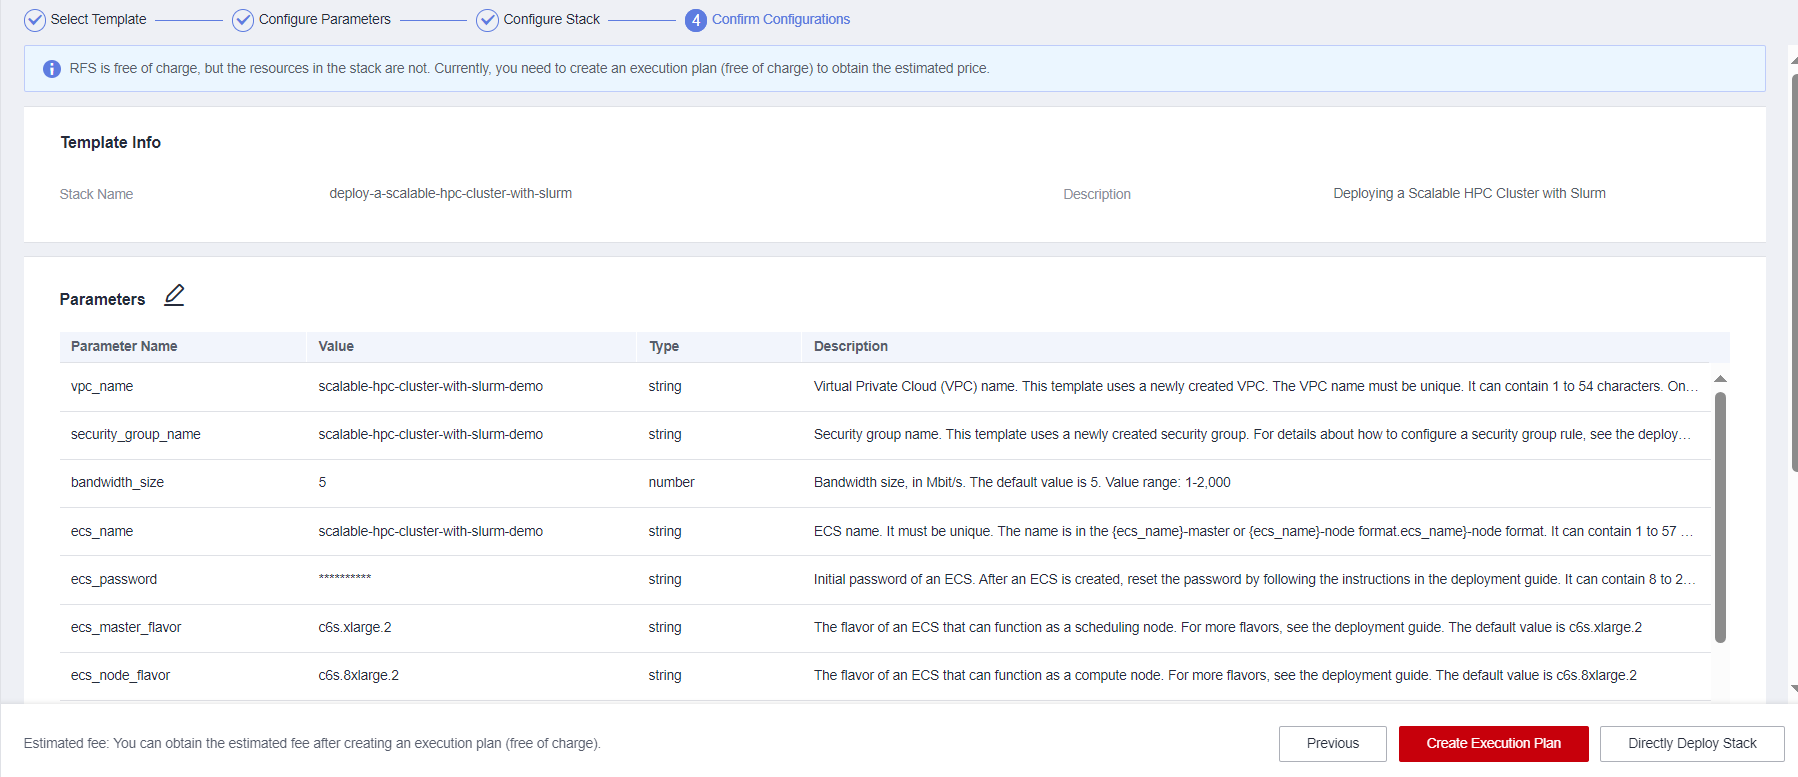
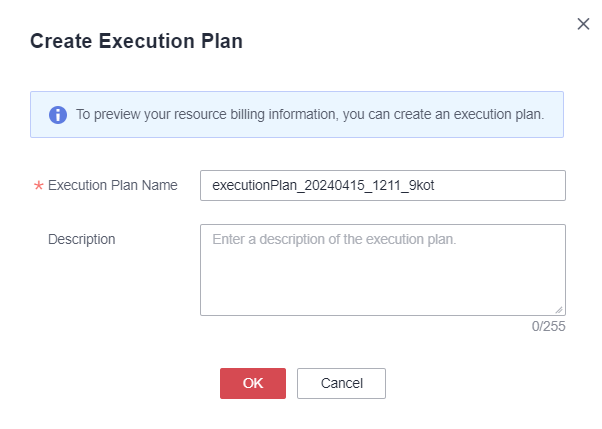
- On the Confirm Configurations page, click Create Execution Plan. In the displayed dialog box, enter an execution plan name and click OK.
Figure 5 Creating an execution plan
- Wait until the execution plan is successfully created, and locate that plan and click Deploy in the Operation column. In the displayed dialog box, click Execute.
Figure 6 Deploying the execution plan
 Figure 7 Confirming the execution plan
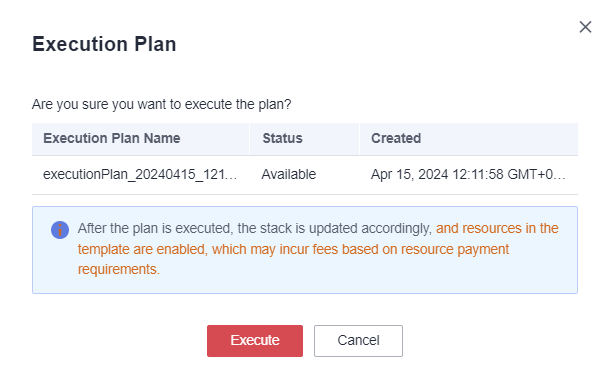
- (Optional) If you select the yearly/monthly billing mode and your account balance is insufficient, log in to the Billing Center to manually pay for the order. You can refer to Table 2 to see the total price.
- Wait until the execution plan is successfully deployed, as shown in the following figure. Wait for another 30 minutes until the cluster is successfully deployed.
Figure 8 Execution plan deployed

Note: Do not log in to any ECS to perform other operations before the cluster deployment is complete. Otherwise, the cluster deployment may fail.
Feedback
Was this page helpful?
Provide feedbackThank you very much for your feedback. We will continue working to improve the documentation.See the reply and handling status in My Cloud VOC.
For any further questions, feel free to contact us through the chatbot.
Chatbot


