Implementing Callback APIs and Making, Exporting, and Uploading a Callback Certificate
Implementing Callback APIs
1 2 3 4 5 |
@Override
public void handleDeviceAdded(NotifyDeviceAddedDTO body) {
    System.out.println("deviceAdded ==> " + body);
    //TODO deal with deviceAdded notification
}
|
- A message pushed by the IoT platform must be processed according to the service. However, complex calculations, I/O operations, and operations that will take a long time are not recommended. You can write data into the database, and access or refresh the corresponding page before obtaining data from the database.
- The callback path has been set in the SDK. Therefore, pay attention to the callback URL during subscription. For details, see APIs in the "Message Push" section in the Java SDK API Reference Document.
- The callback IP address is the same as that of the server. It must be a public IP address.
- The callback port of the Java SDK Demo is configured in the src\main\resource\application.properties directory.
1
2
#specify the port of the web application
server.port=8099
Making a Callback Certificate
A self-signed certificate is used as an example. A commercial certificate must be applied from the CA.
- Open the Windows CLI, and enter where java to switch to the bin directory of the JDK.
1
2
where java
Cd /d {bin directory of the JDK}

- Run the following command to generate the tomcat.keystore file:
1
keytool -genkey -v -alias tomcat -keyalg RSA -keystore tomcat.keystore -validity 36500
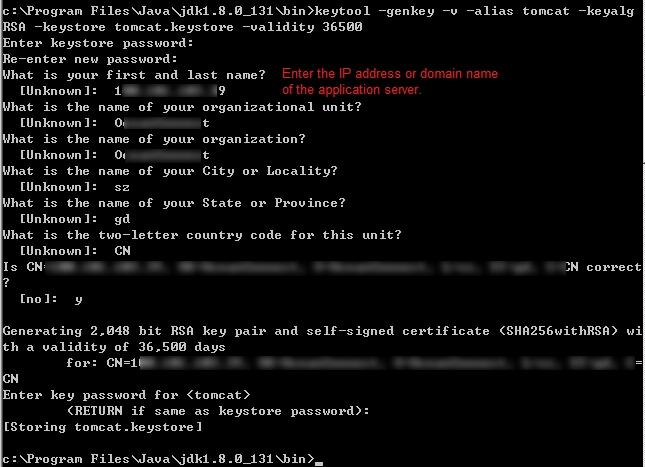

- If the tomcat.keystore file exists in the bin directory of the JDK, move the file to another path.
- Enter the IP address or domain name of the application server under What is your first and last name?
- The password of <tomcat> must be the same as that of the keystore (press Enter in the last step). Remember the password of the keystore, as it will be used in subsequent configurations.
- Place the root certificate ca.pem provided by the IoT platform in the bin directory of the JDK and run the following command to add it to the trust certificate chain of the tomcat.keystore file:
1
keytool -import -v -file ca.pem -alias iotplatform_ca -keystore tomcat.keystore

Enter the keystore password. Check the imported certificate content and enter y.

 NOTE:
NOTE:
- The test root certificate ca.pem of the IoT platform can be found in the cert directory of the Java SDK package.
- After the root certificate ca.pem provided by the IoT platform is added to the trust certificate chain of the tomcat.keystore file, the sub-certificate issued by ca.pem can obtain the trust of the application server.
- Place the tomcat.keystore file in the directory of the Java SDK Demo, for example, src\main\resources. Open the src\main\resource\application.properties file and add the following configuration, where server.ssl.key-store indicates the path where the tomcat.keystore file is stored and server.ssl.key-store-password indicates the password of the keystore:
#one-way authentication (server-auth)
server.ssl.key-store=./src/main/resources/tomcat.keystore
server.ssl.key-store-password=741852963.
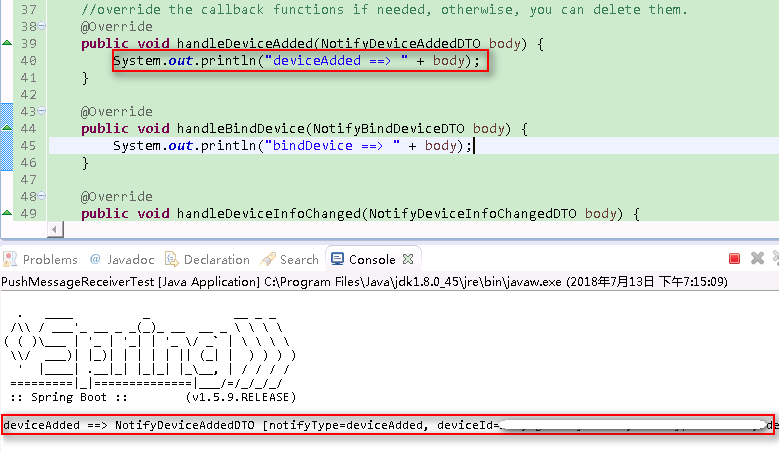
- Right-click PushMessageReceiverTest and choose to run the PushMessageReceiverTest class in the Java SDK Demo. The command output is as follows:
 NOTE:
NOTE:
Data is transferred to the corresponding callback function when it is pushed to the application server.
Exporting a Callback Certificate
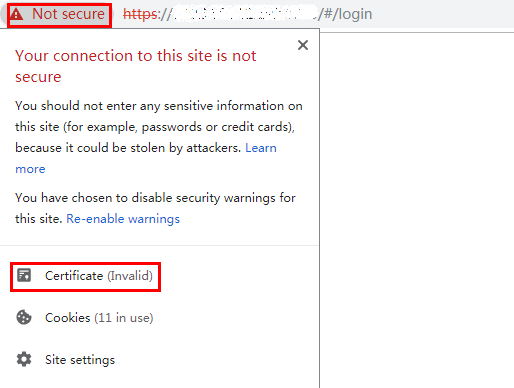
- Use a browser to open the callback URL https://server:8099/v1.0.0/messageReceiver and view the certificate. Google Chrome is used as an example.
The IP address of the server is the same as that of the local host. 8099 is the port configured in the application.properties file.
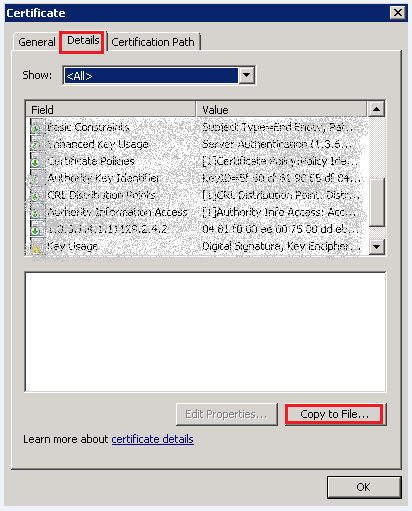
- In the Certificate dialog box, click the Details tab. Click Copy to File.
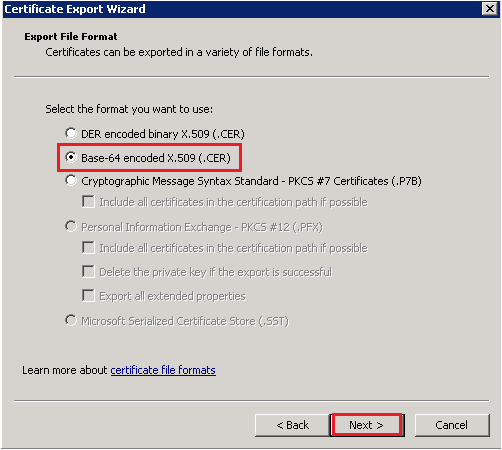
- Click Next. In the Export File Format dialog box displayed, select Base-64 encoded X.509 (.CER), and click Next.
- Specify the path for saving the certificate.
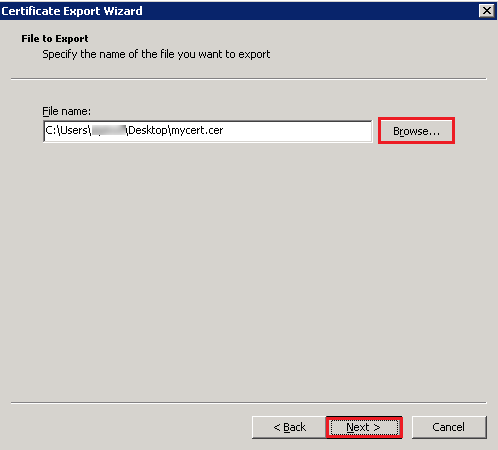
- In the File to Export dialog box, click Browse. Select a path, enter the file name, and click Save to return to the Certificate Export Wizard dialog box. Then, click Next.
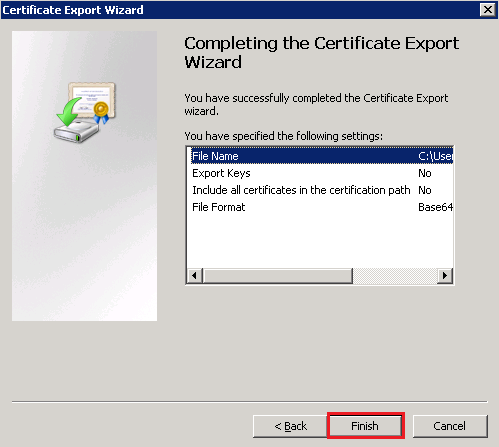
- Click Finish to export the certificate.

If the application server is deployed on the cloud, multiple certificates may exist. You are advised to export the certificates one by one after the deployment is complete.
- In the File to Export dialog box, click Browse. Select a path, enter the file name, and click Save to return to the Certificate Export Wizard dialog box. Then, click Next.
- If multi-level certificates exist, export them one by one.
- In the Certificate dialog box, select a certificate path and click View Certificate.
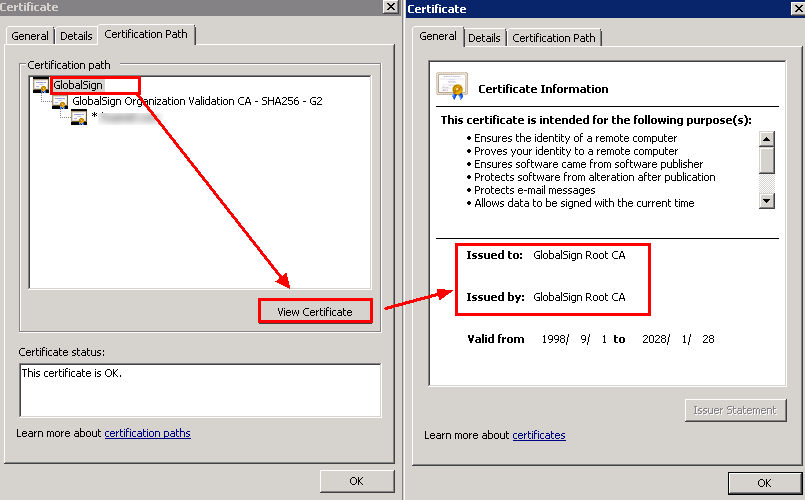
- Click the Details tab and repeat the preceding steps to export every selected certificate.
- In the Certificate dialog box, select a certificate path and click View Certificate.
- Use the text editor to combine all the exported certificates sequentially into a PEM file. This file must be uploaded to the corresponding application on the IoT platform.
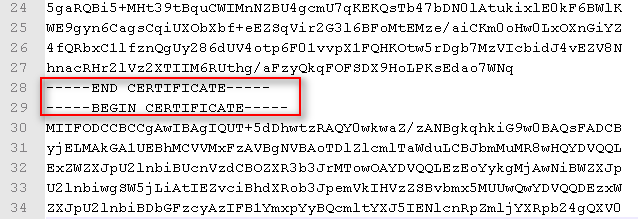

- The configuration in the Demo is one-way authentication. After the certificate is exported, change it to two-way authentication. Open the following configuration file (delete the comment and change the tomcat.keystore directory and password). The root certificate of the platform has been added to the tomcat.keystore trust certificate chain. Therefore, you do not need to modify the configuration file. Restart the server.
#two-way authentication (add client-auth)
server.ssl.trust-store=./src/main/resources/tomcat.keystore
server.ssl.trust-store-password=741852963.
server.ssl.client-auth=need
- One-way authentication is less secure than two-way authentication. Therefore, two-way authentication is recommended.
Uploading the Callback Certificate
- Log in to the Developer Center and access a project.
- Choose , and click Certificate Management.
- Click Add to upload the certificate.
Feedback
Was this page helpful?
Provide feedbackThank you very much for your feedback. We will continue working to improve the documentation.See the reply and handling status in My Cloud VOC.
For any further questions, feel free to contact us through the chatbot.
Chatbot


