
Using a Dedicated Load Balancer for TLS Offloading (One-Way Authentication)
Scenarios
If your Layer 4 services have high security requirements, you can use SSL encryption to improve service security. However, configuring SSL encryption on backend servers may lower their performance. To address this issue, you can add a TLS listener to a dedicated load balancer to forward requests and deploy certificates on the listener. The load balancer decrypts incoming requests and forwards them as plaintext to your backend servers. You do not need to configure certificates on backend servers.
TLS offloading enhances network security, improves backend server performance, simplifies backend server configuration and O&M, and helps efficiently and securely forward Layer 4 service traffic.
Prerequisites
- There is a dedicated load balancer with an EIP bound to it. If there is no such resource, you can buy one and bind an IPv4 EIP to the load balancer.
- You have either purchased a certificate or uploaded a third-party certificate to SSL Certificate Manager (SCM), and configured a public domain name for the certificate. It is recommended to purchase an SSL certificate on the Cloud Certificate & Manager (CCM) console.
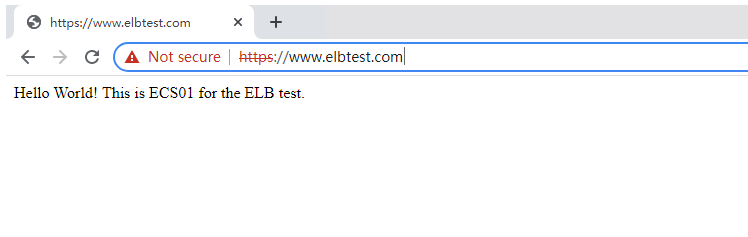
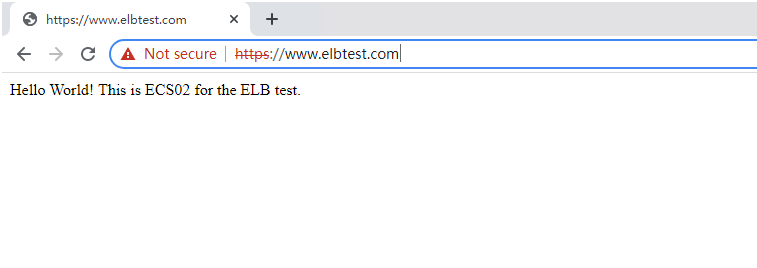
- There is a TLS backend server group with two ECSs (ECS01 and ECS02) running in it. Each ECS hosts an application.
Procedure

Step 1: Upload the Server Certificate to the ELB Console
Before adding a TLS listener to a load balancer, you need to upload your server certificate to the ELB console.
- Go to the load balancer list page.
- In the navigation pane on the left, choose Certificates.
- Click Add Certificate in the top right corner and set parameters by referring to Table 1.
Table 1 Server certificate parameters Parameter
Description
Certificate Type
Specifies the certificate type. Select Server certificate.
Source
Specifies the source of a certificate. There are two options: SSL Certificate Manager and Your certificate.
SSL Certificate Manager is used in this example, so that you can select the SSL certificates you have purchased on the CCM console.
Certificate
Specifies the certificate that you want to upload to the ELB console.
Enterprise Project
Specifies an enterprise project by which cloud resources and members are centrally managed.
SNI Domain Name (Optional)
All domain names of the SSL certificate will be automatically selected.
If the certificate is intended for SNI, you can select an SNI certificate based on the domain name in the HTTPS requests.
Description (Optional)
Provides supplementary information about the certificate.
- Click OK.
Step 2: Add a TLS Listener and Configure One-Way Authentication
- Go to the load balancer list page.
- Locate the target load balancer and click Add Listener in the Operation column.
- On the Add Listener page, select TLS for Frontend Protocol and One-way authentication for SSL Authentication.
Select the server certificate uploaded to the ELB console in Step 1 for Server Certificate, and retain the default values for other parameters or change them as needed.
Figure 2 Configuring one-way authentication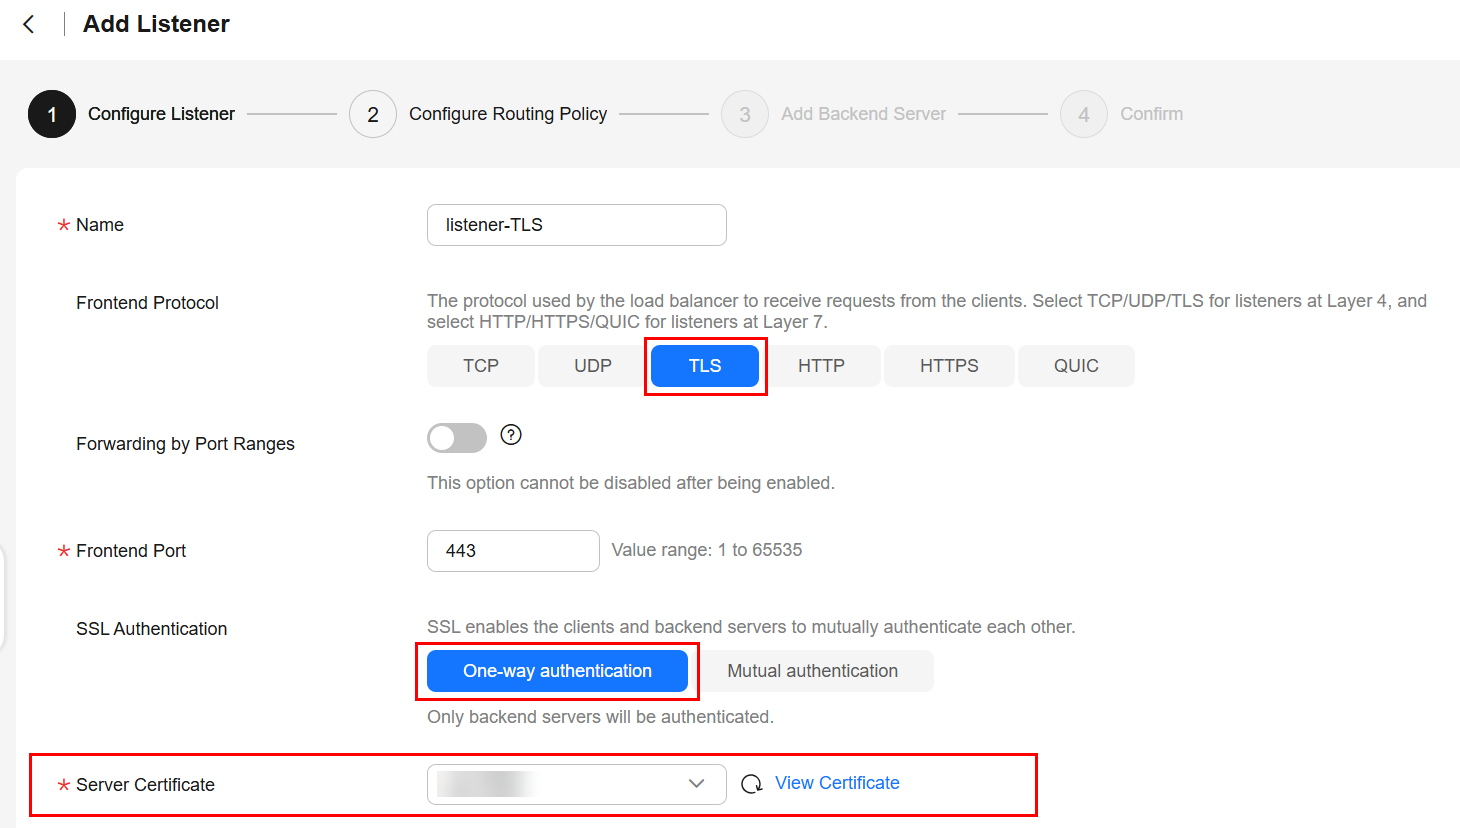
- Click Next: Configure Request Routing Policy and select Use existing for Backend Server Group. Select an existing backend server group and click Next: Confirm.
- Confirm the configurations and click Submit.
Step 3: Configure Domain Name Resolution
You can add an A record set to resolve the domain name to the public IP address of the load balancer so that clients can access the load balancer using the public domain name.
The following provides an example for resolving a website domain name to an IPv4 address. For details about how to configure an A record set, see Routing Internet Traffic to a Website.
- Go to the DNS console.
- In the navigation pane on the left, choose Public Zones.
The zone list is displayed.
- Locate the public zone and click Manage Record Sets in the Operation column.
- Click Add Record Set.
- Configure the parameters based on Table 2.
Table 2 Parameters for adding an A record set Parameter
Example Value
Description
Type
A – Map domains to IPv4 addresses
Type of the record set. In this example, set it to A - Map domains to IPv4 addresses.
Name
www
Prefix of the domain name to be resolved.
Line
Default
Resolution line. The DNS server will return the IP address of the specified line, depending on where end users come from.
The default value is Default.
Default: returns the default resolution result irrespective of where the visitors come from.
TTL (s)
300
Cache duration of the record set on a local DNS server, in seconds.
In this example, the default value 300 is used.
Value
192.168.12.2
IPv4 addresses mapped to the domain name. In this example, set this parameter to the EIPs bound to the load balancer.
Advanced Settings (Optional)
-
Click
 to expand the advanced settings, set the alias and weight of the record set, and add a description and tags. In this example, the default settings are used.
 - Click OK.
- Switch back to the Record Sets tab.
The added record set is in the Normal state.
Step 4: Verify Load Balancing
Reference
- For details about how to add a TLS listener, see Adding a TLS Listener.
- Related APIs
Feedback
Was this page helpful?
Provide feedbackThank you very much for your feedback. We will continue working to improve the documentation.See the reply and handling status in My Cloud VOC.
For any further questions, feel free to contact us through the chatbot.
Chatbot


