Granting Permissions to Prevent Users from Deleting Backups and Restoring Data
To ensure service and data security, you can use Identity and Access Management (IAM) policies to control users' access to CBR. This minimizes the data loss risks caused by misoperations. This section describes how to configure the permissions for forbidding backup deletion and restoration.
Application Scenarios
An enterprise has purchased ECS instances to deploy services and configured a backup policy to back up data at 22:00 every day. To ensure service and data security, the enterprise wants to prevent the O&M personnel from deleting backups or restoring data for ECS instances.
In this case, you can create a custom policy with restricted permissions granted to IAM users.
Step 1: Create a Custom Policy
- Log in to the IAM console as an administrator.
- In the navigation pane, choose Permissions > Policies/Roles, and then click Create Custom Policy in the upper right corner.
Figure 1 Creating a custom policy

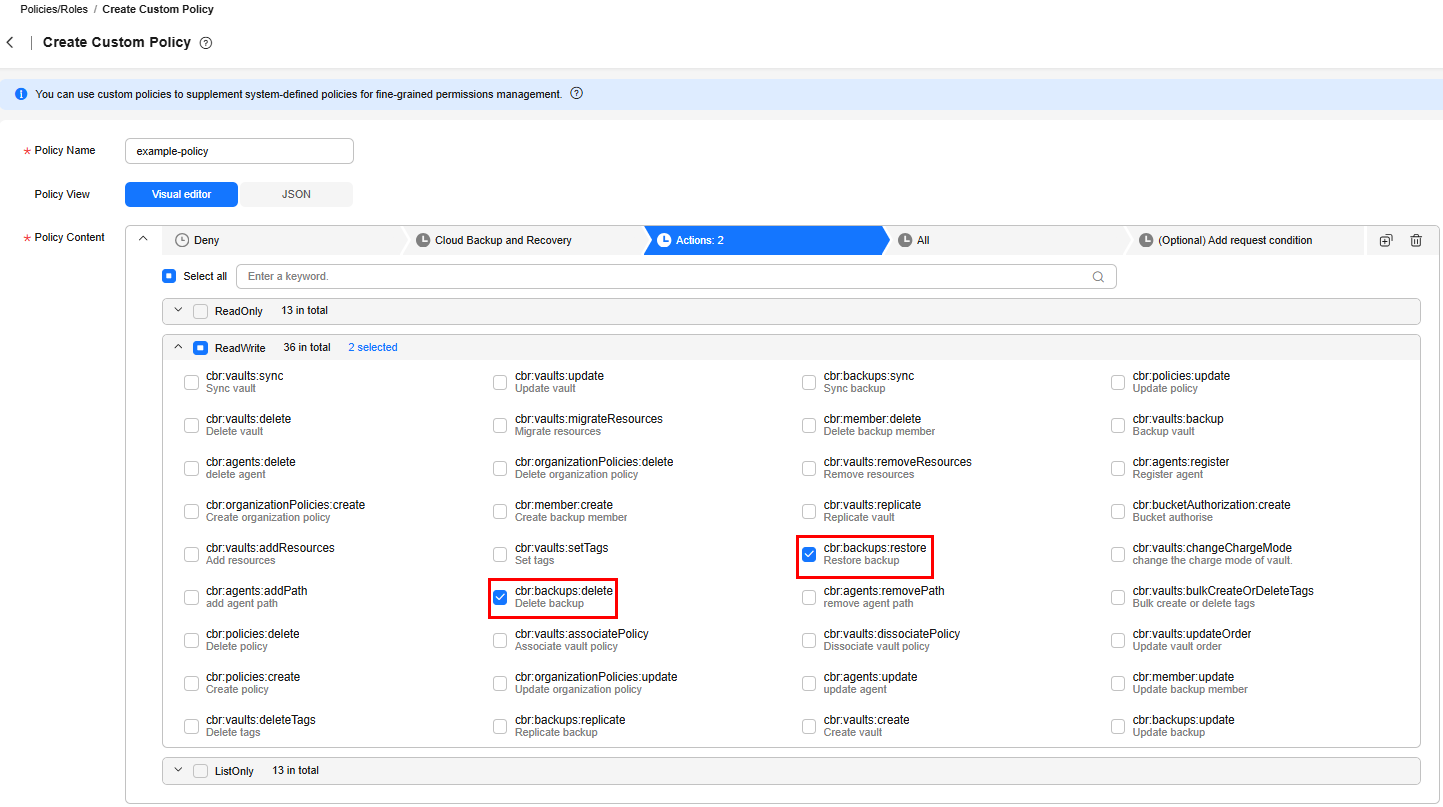
- Enter a policy name, for example, example-policy.
- Select Visual editor for Policy View.
- Enter the policy content.
Figure 2 Configuring the policy

- (Optional) Select Visual editor for Policy View. Enter the policy content.
{ "Version": "1.1", "Statement": [ { "Effect": "Deny", "Action": [ "cbr:backups:restore", "cbr:backups:delete" ] } ] } - (Optional) Enter a brief description for the policy.
- Click OK.
Step 2: Create an IAM User Group
- In the navigation pane, choose User Groups and then click Create User Group.
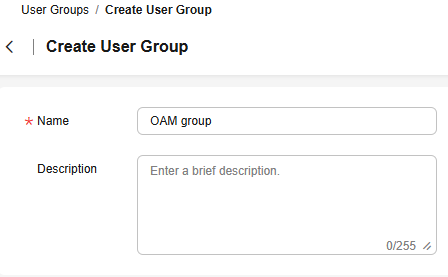
Figure 3 Creating a user group

- In the displayed dialog box, enter a name for the O&M user group.
Only letters, digits, spaces, hyphens (-), and underscores (_) are allowed.Figure 4 Setting user group information

- Click OK.
You will be redirected to the user group list and the created O&M user group is displayed in the list.
Step 3: Authorize the IAM User Group
- In the navigation pane, choose User Groups.
- In the user group list, click Authorize in the row containing the OAM group.
Figure 5 Authorizing permissions to the O&M personnel

- On the Select Policy/Role page, select example-policy. Click Next.
Figure 6 Selecting the required permissions

- Specify the scope. The system recommends an authorization scope for the permissions you selected. Table 1 describes all the authorization scopes provided by IAM.
Table 1 Authorization scopes Scope
Description
All resources
IAM users will be able to use all resources, including those in enterprise projects, region-specific projects, and global services under your account based on granted permissions.
Enterprise projects
IAM users can use the resources in the enterprise projects you select based on the assigned permissions. This option is available only when the enterprise project function has been enabled.
This option is displayed only when you enable Enterprise Project. For details about Enterprise Project, see What Is Enterprise Project Management Service? To enable the enterprise project function, see Enabling the Enterprise Project Function.
Region-specific projects
IAM users can use the resources in the region-specific projects you select based on the assigned permissions.
If you select global service permissions, the permissions will be applied to all resources by default. If you select project-level service permissions, the permissions will be applied to the region-specific projects you select.
NOTE:The region-specific projects for Dedicated Cloud cannot be selected.
- Click OK.
Step 4: Add the IAM User to the O&M User Group.
- In the navigation pane, choose User Groups.
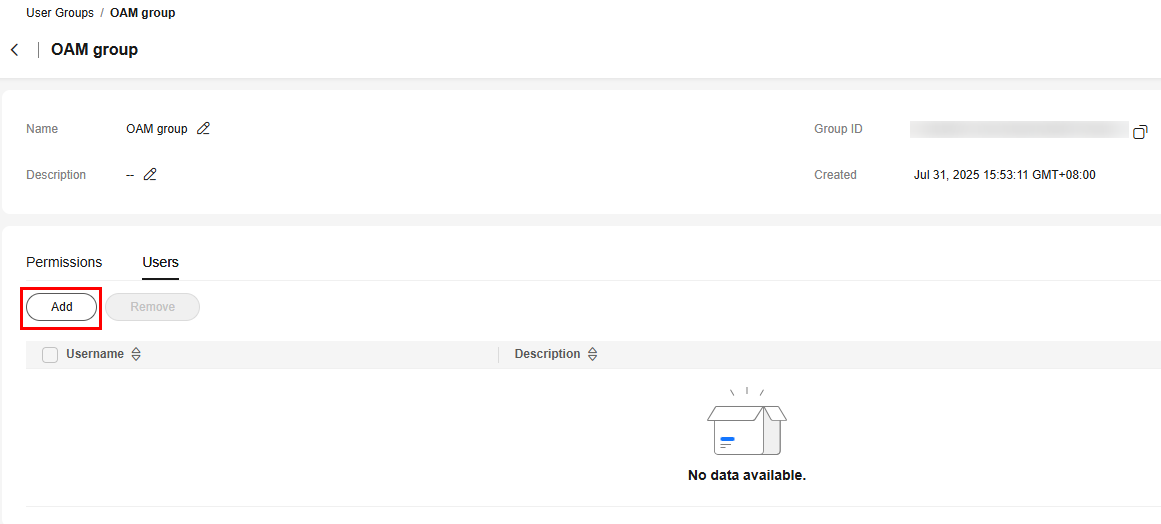
- In the user group list, click the name of the O&M user group. The user group details page is displayed.
- Click the User Management tab. Click Add.
Figure 7 Adding a user

- Select the user to be added to the user group and click OK. The added user is displayed in the user list.
Step 5: Log in to the Console as an IAM User
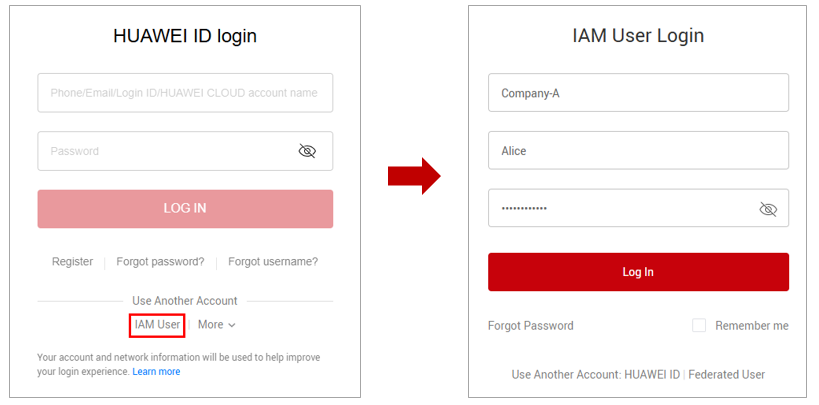
- On the IAM user login page, enter the tenant name/original Huawei Cloud account name, IAM username/email address, and IAM user password.
Figure 8 IAM user login

Table 2 Login parameters Parameter
Description
Tenant name or Huawei Cloud account name
Account used to create the IAM user, for example, Company-A.
IAM username or email address
IAM username or email address entered during the user creation. You can obtain the IAM username and IAM user's initial password from the administrator. In this example, the IAM username of the O&M personnel is Alice.
IAM user password
Password of the IAM user, rather than the account.
- Click Log In. The IAM user logs in to Huawei Cloud.
- On the CBR console, try to delete a backup. If the backup cannot be deleted, the policy has taken effect.
Feedback
Was this page helpful?
Provide feedbackThank you very much for your feedback. We will continue working to improve the documentation.See the reply and handling status in My Cloud VOC.
For any further questions, feel free to contact us through the chatbot.
Chatbot


