Creating an Agency to Grant ECS Access to COC
Scenarios
COC's job management is required for batch VPC change. To use job management, you need to create an agency to grant ECS access and related permissions to COC.
If you need to batch change VPCs of multiple ECSs, you can refer to this section to create an agency first.
Procedure
- Log in to the IAM console.
- On the IAM console, choose Agencies from the left navigation pane and click Create Agency on the displayed page.
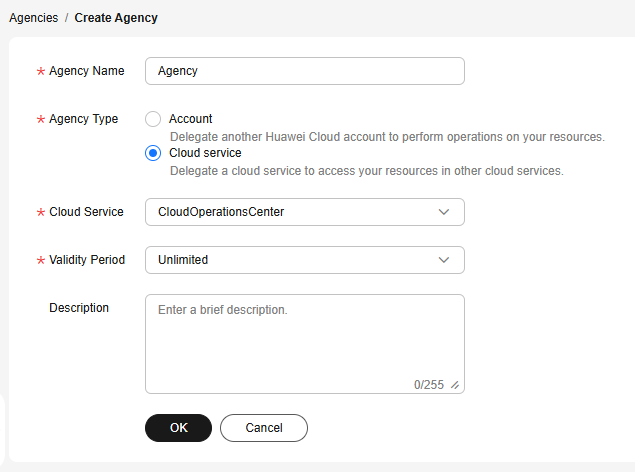
- Configure agency parameters.
- Agency Name: Enter an agency name.
- Agency Type: Select Cloud service.
- Cloud Service: Select the cloud service to be authorized, for example, CloudOperationsCenter.
- Validity Period: Set this parameter based on service requirements.
- Description (Optional): Enter a description.
Figure 1 Creating an agency
- Click OK.
- In the displayed dialog box, click Authorize.
- Select the permissions to be granted to the agency.
If no policy is available in the list, click Create Policy in the upper right corner of the list to create one. For details, see Creating a Custom Policy.
A custom policy must contain the following content:{ "Version": "1.1", "Statement": [ { "Effect": "Allow", "Action": [ "ecs:cloudServers:changeVpc", "ecs:cloudServers:list" ] } ] } - Click Next and specify the authorization scope.
- Click OK. The agency is created.
Feedback
Was this page helpful?
Provide feedbackThank you very much for your feedback. We will continue working to improve the documentation.See the reply and handling status in My Cloud VOC.
For any further questions, feel free to contact us through the chatbot.
Chatbot


