
Co-Browse Plug-in Development and Usage Guide
Reasons for Using a Browser Plug-in
When a user uses the co-browsing function to open a third-party web page (regardless of whether the request is initiated by an agent or a user), the co-browsing function cannot be used if the cobrowse.js file is not imported to the third-party web page. You can use the browser plug-in to import the cobrowse.js file to the third-party web page.
Browser plug-in operator: user side.
Downloading the Browser Plug-in Demo
https://bbs.huaweicloud.com/forum/thread-0206111661125233006-1-1.html
Browser Plug-in Development Guide
The following demo (download address: Downloading the Browser Plug-in Demo) is for reference by third-party website developers. If there is no special requirement, modify the aiccDomain parameter as follows to complete an available plug-in.
- Demo file list:
- File description and code example:
- cobrowse.png
Plug-in icon file, which can be replaced as required.
- content_script.js
The following is the content_script.js sample code. Replace the aiccDomain parameter with the actual AICC domain name. Other code does not need to be modified.
function loadCoBrowseJS() { const urlParams = new URLSearchParams(window.location.search.replace(/&/g, "&")); const isShareUrl = urlParams.get('cobrowse_share_url'); if (!isShareUrl) { return; } let innerScript = document.createElement("script"); innerScript.type = "text/javascript"; if (typeof (onJSLoadSuccess) != "undefined") { innerScript.readyState ? innerScript.onreadystatechange = function () { if (innerScript.readyState == "loaded" || innerScript.readyState == "complete") { innerScript.onreadystatechange = null; onJSLoadSuccess(); } } : innerScript.onload = function () { onJSLoadSuccess(); } } // The AICC domain name needs to be dynamically changed. (The domain name can be in the format of IP address + Port number or in the format of https://www.xxxxx.com.) let aiccDomain = 'https://ip:port'; innerScript.src = `${aiccDomain}/service-cloud/resource.root/cobrowse/sdk/cobrowse.js`; document.getElementsByTagName('head')[0].appendChild(innerScript) } function onJSLoadSuccess() { let injectedCode = '(' + function() { CoBrowse.initFromUrl(); } + ')();'; let script = document.createElement('script'); script.textContent = injectedCode; (document.head || document.documentElement).appendChild(script); script.parentNode.removeChild(script); } loadCoBrowseJS(); - manifest.json
Plug-in configuration file, which does not need to be modified.
{ "name": "AICC CoBrowse Plugin", "version": "1.0", "description": "Automatic integrate AICC Web CoBrowse.", "permissions": [ "<all_urls>", "tabs" ], "browser_action": { "default_icon": "cobrowse.png", "default_title": "AICC CoBrowse" }, "options_page": "options.html", "minimum_chrome_version": "14", "content_scripts": [ { "matches": [ "<all_urls>" ], "all_frames": false, "js": [ "content_script.js" ] } ], "icons": { "16": "cobrowse.png", "48": "cobrowse.png", "128": "cobrowse.png", "256": "cobrowse.png" }, "manifest_version": 2 } - options.html
No modification is required.
<html>
<head>
<title>AICC Cobrowse Options</title>
<script src="content_script.js"></script>
</head>
<body>

<div class="aicc-cobrowse">

</div>

</body>
</html>
- cobrowse.png

Publishing a Browser Plug-in
After a plug-in is developed on a third-party website, the plug-in needs to be released on the public network for users to download and install. It is recommended that the installation method of the browser plug-in be described to users so that users can correctly install the plug-in. For details about the installation method, see the following content in this document.
Installing a Browser Plug-in
- Download the plug-in from the download path provided by the website and decompress it.
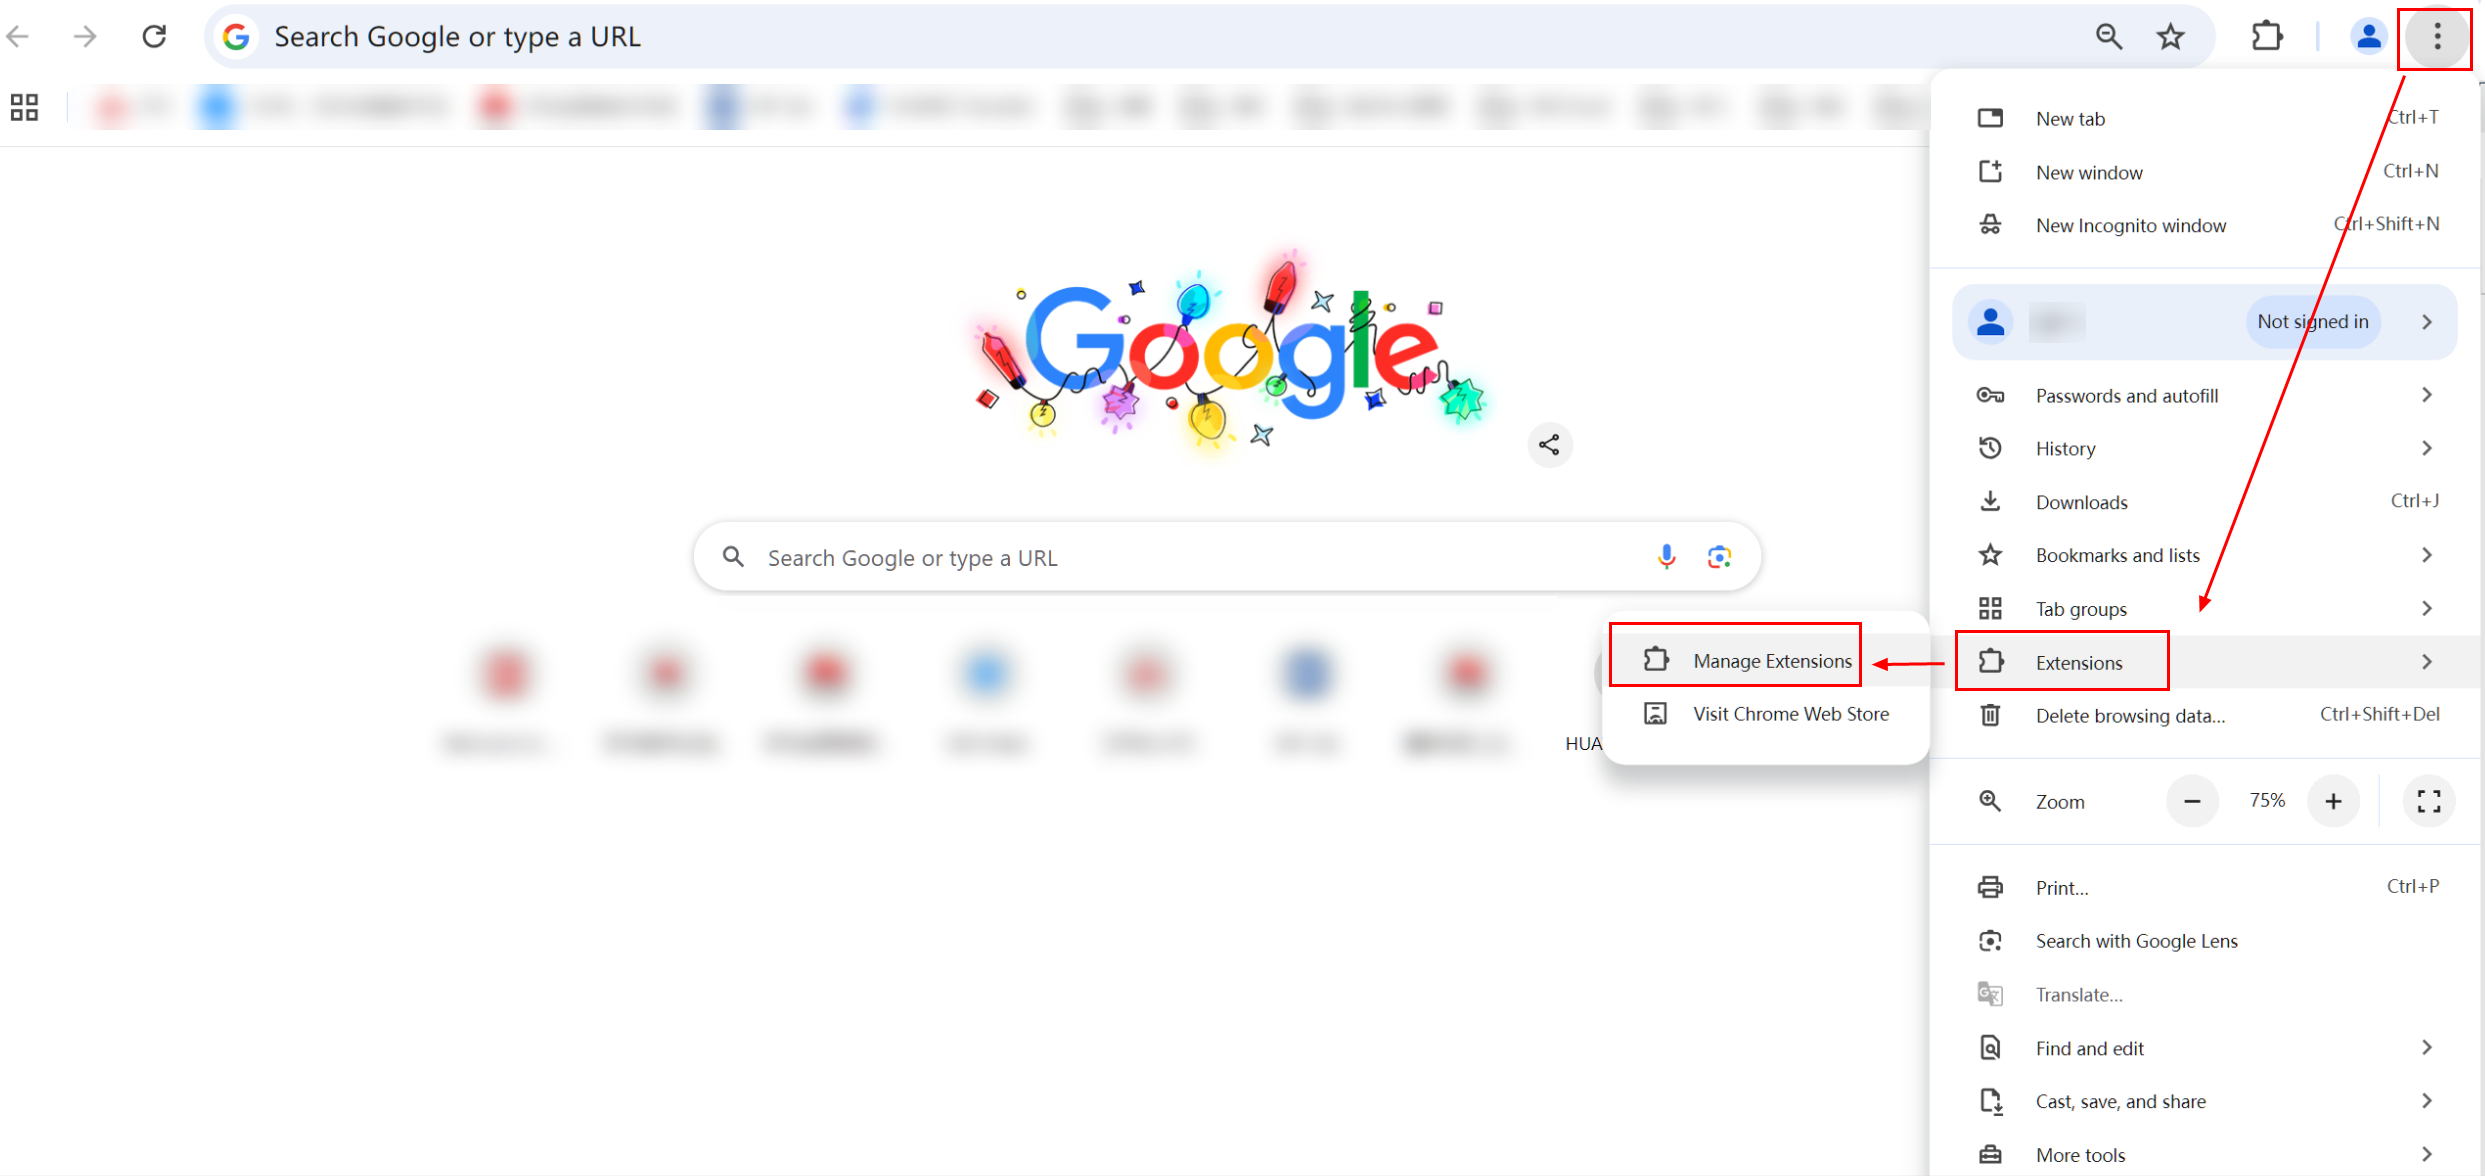
- Open Google Chrome, click the drop-down button in the upper right corner, and choose .
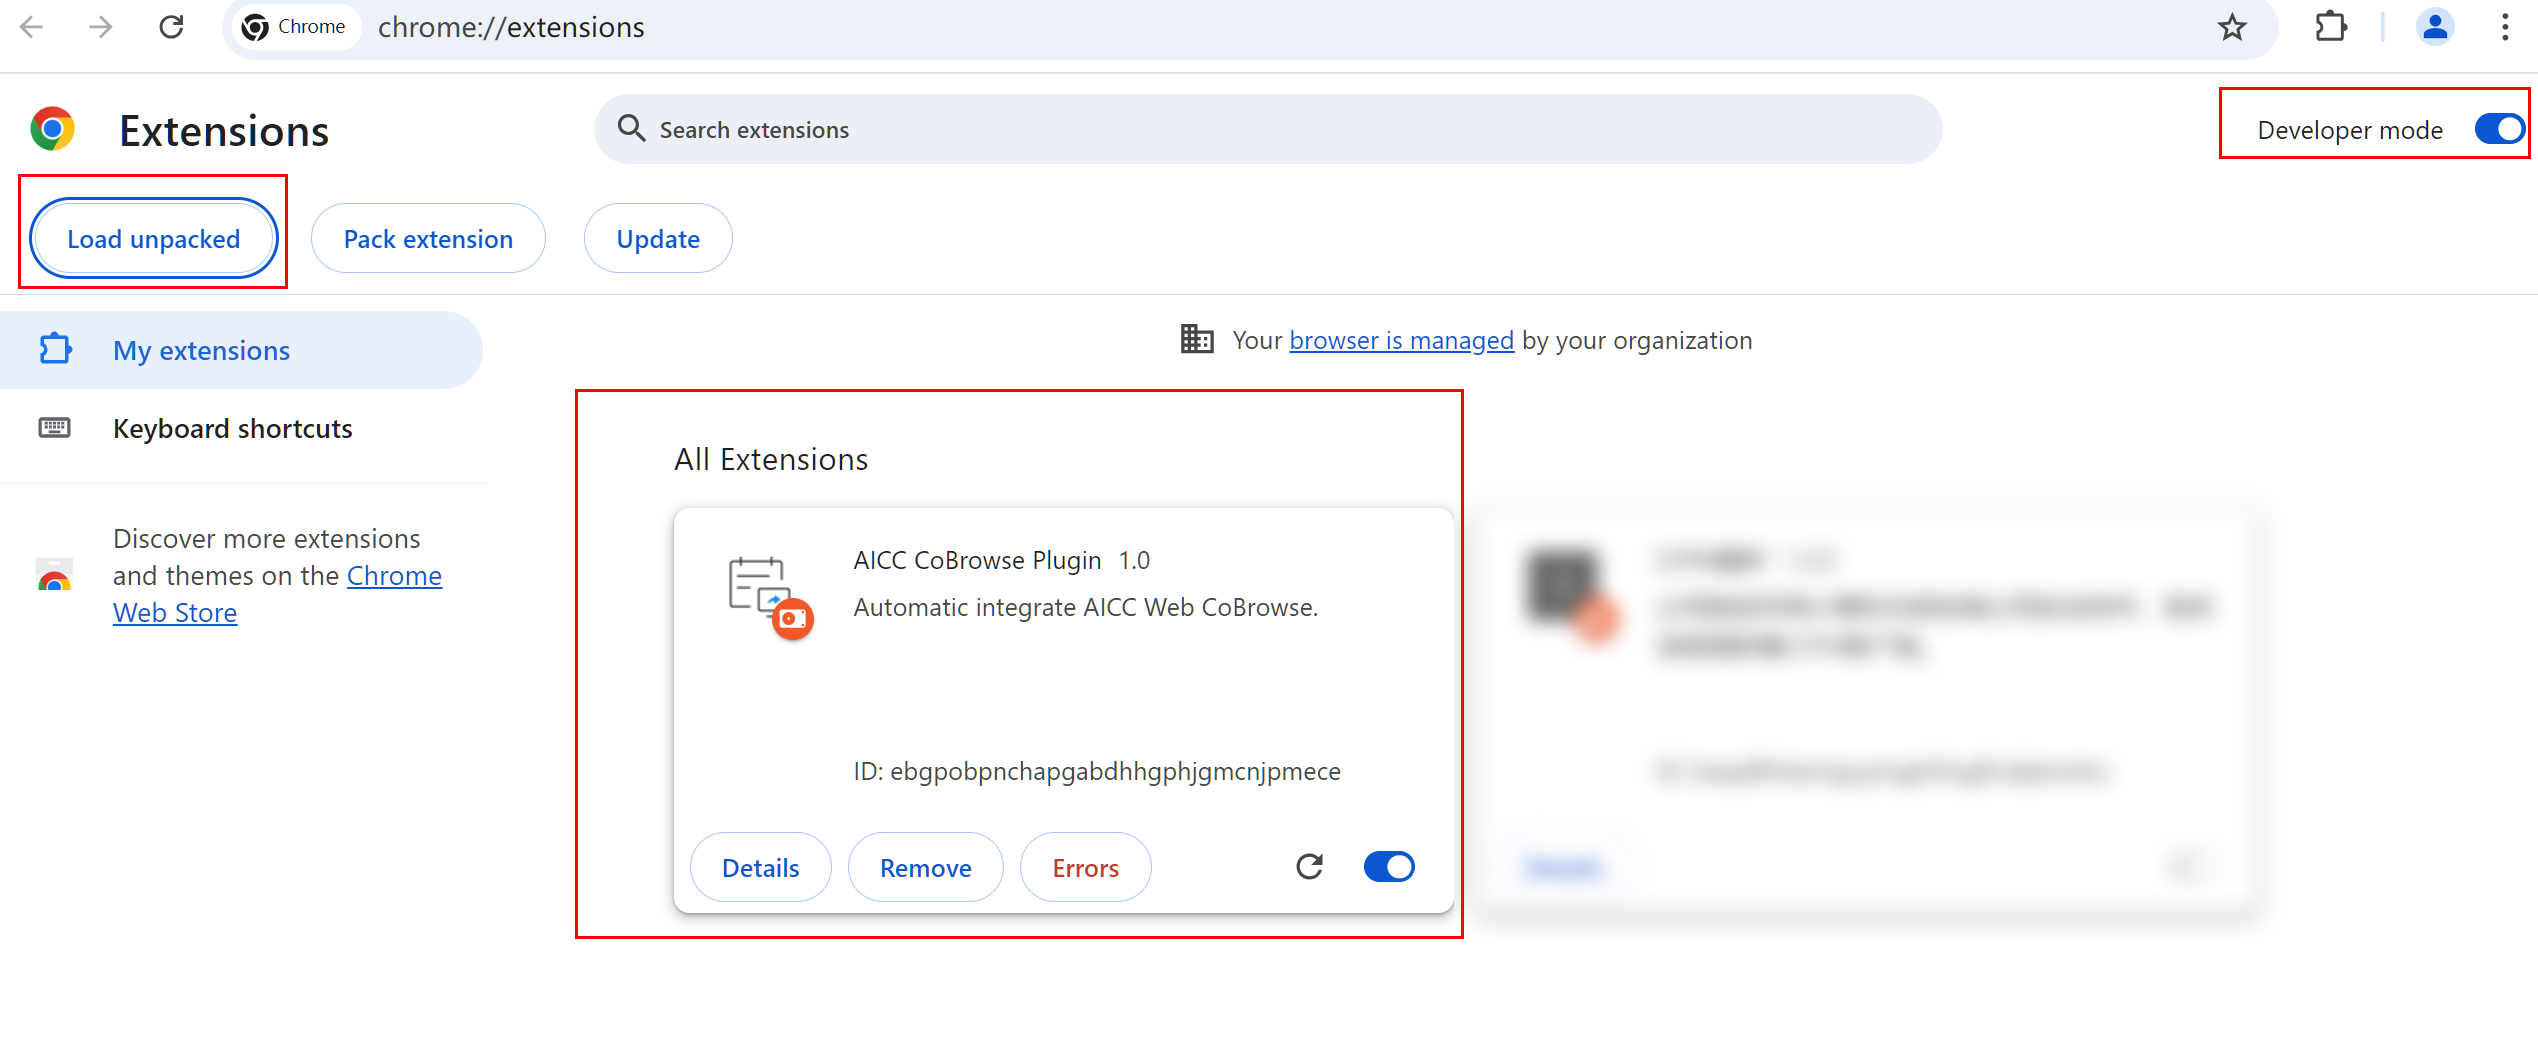
- Open the developer mode of the browser. Click the decompressed extension program and select the decompressed plug-in file for which the configuration has been modified.

- If the following information is displayed on the page, the installation is successful:
Usage and Effect Display of a Plug-in (Using the Agent Side as an Example)
- The agent and user access the web channel.
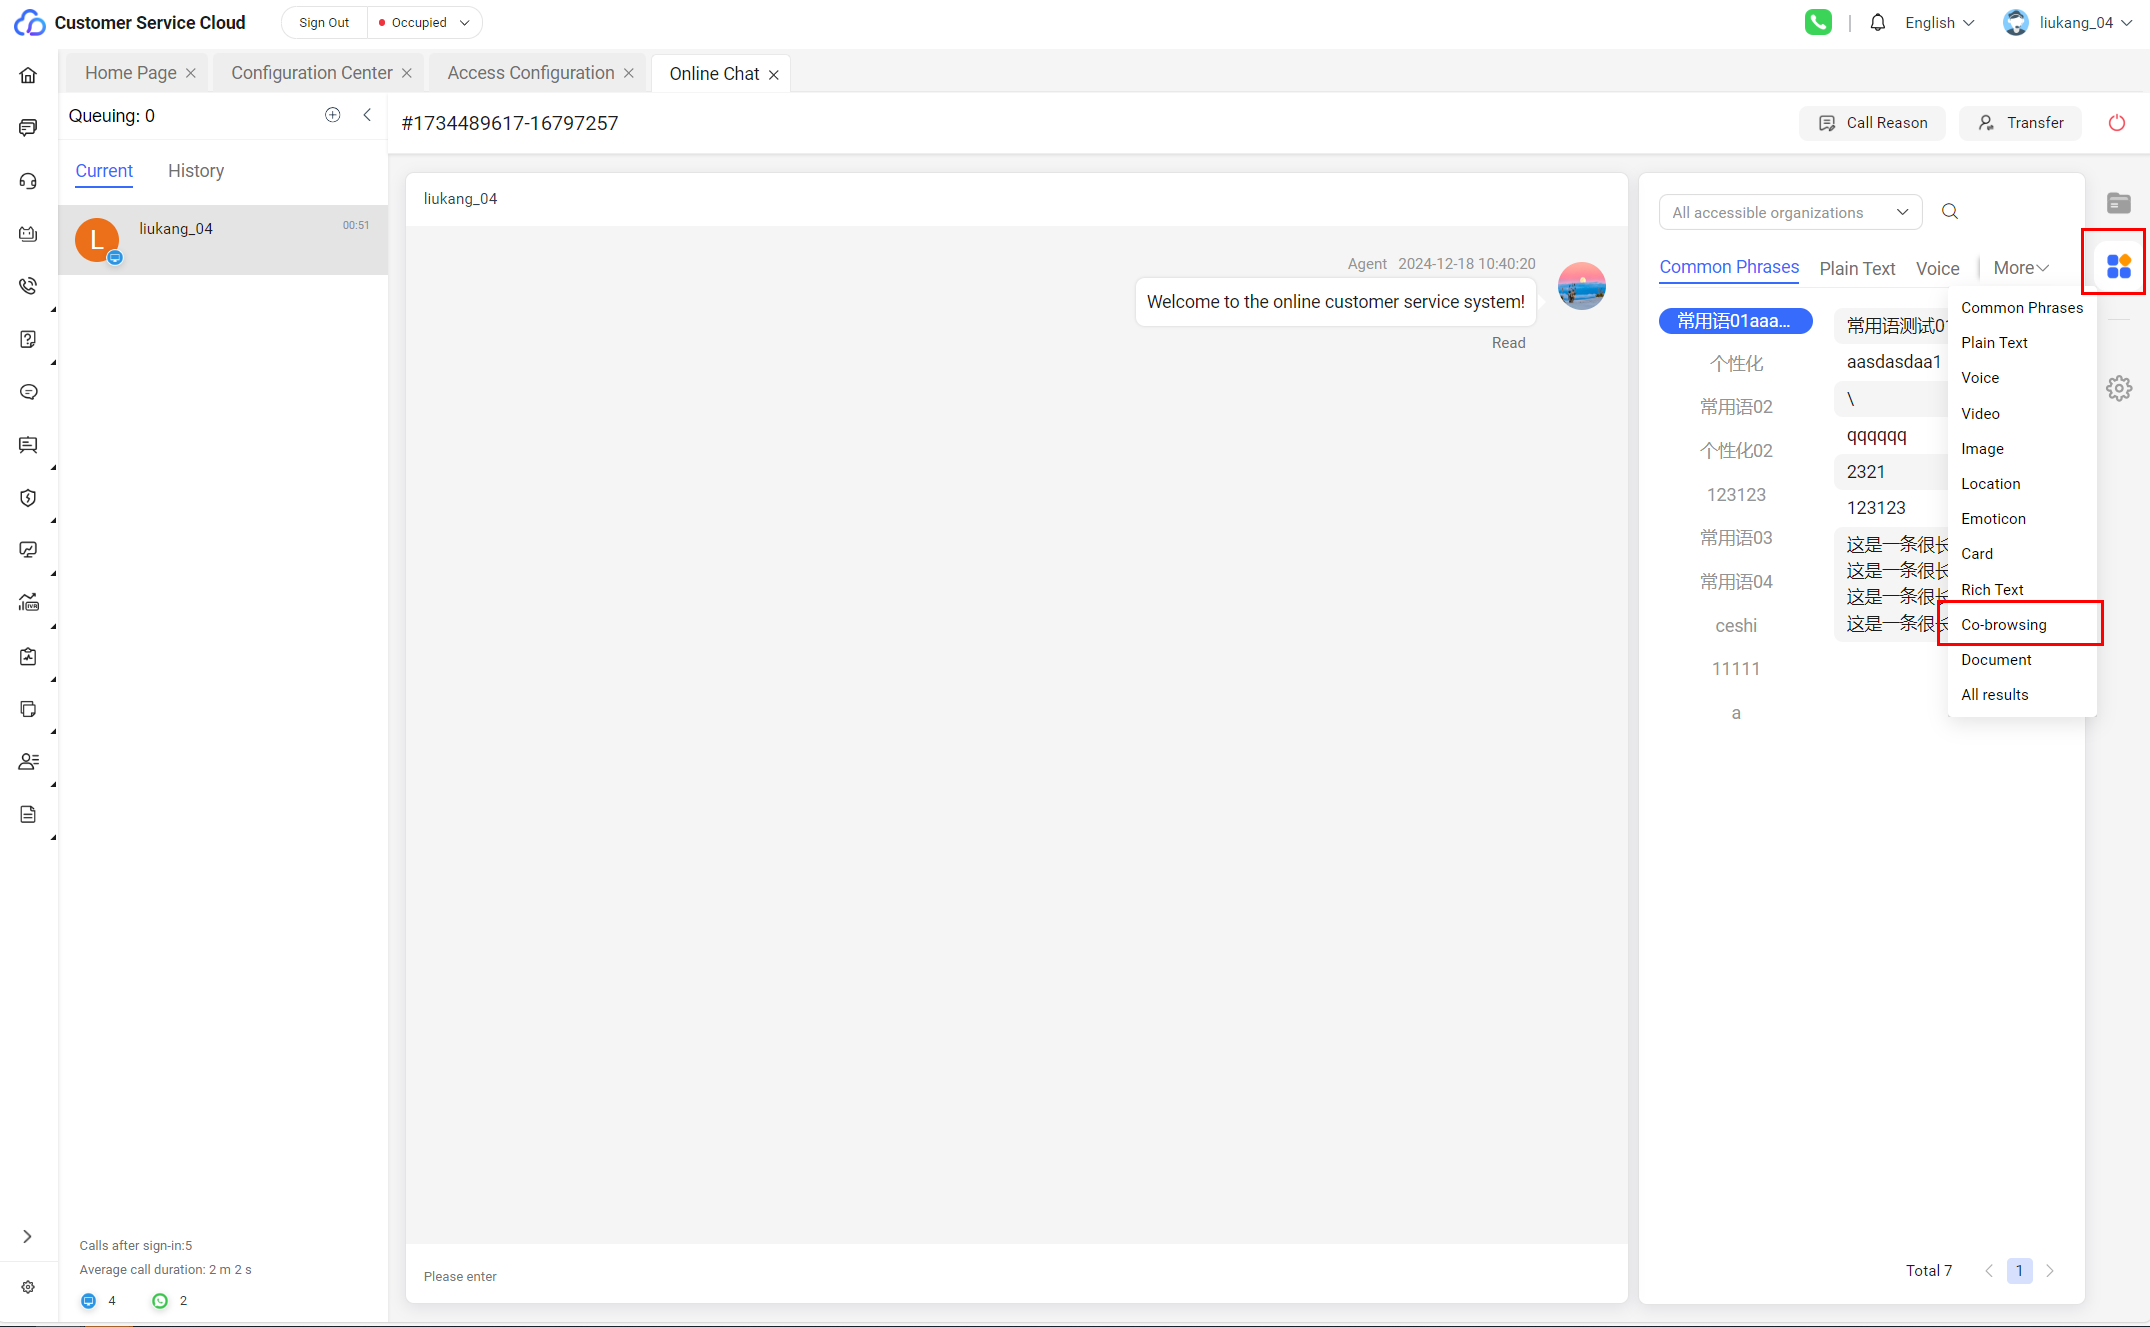
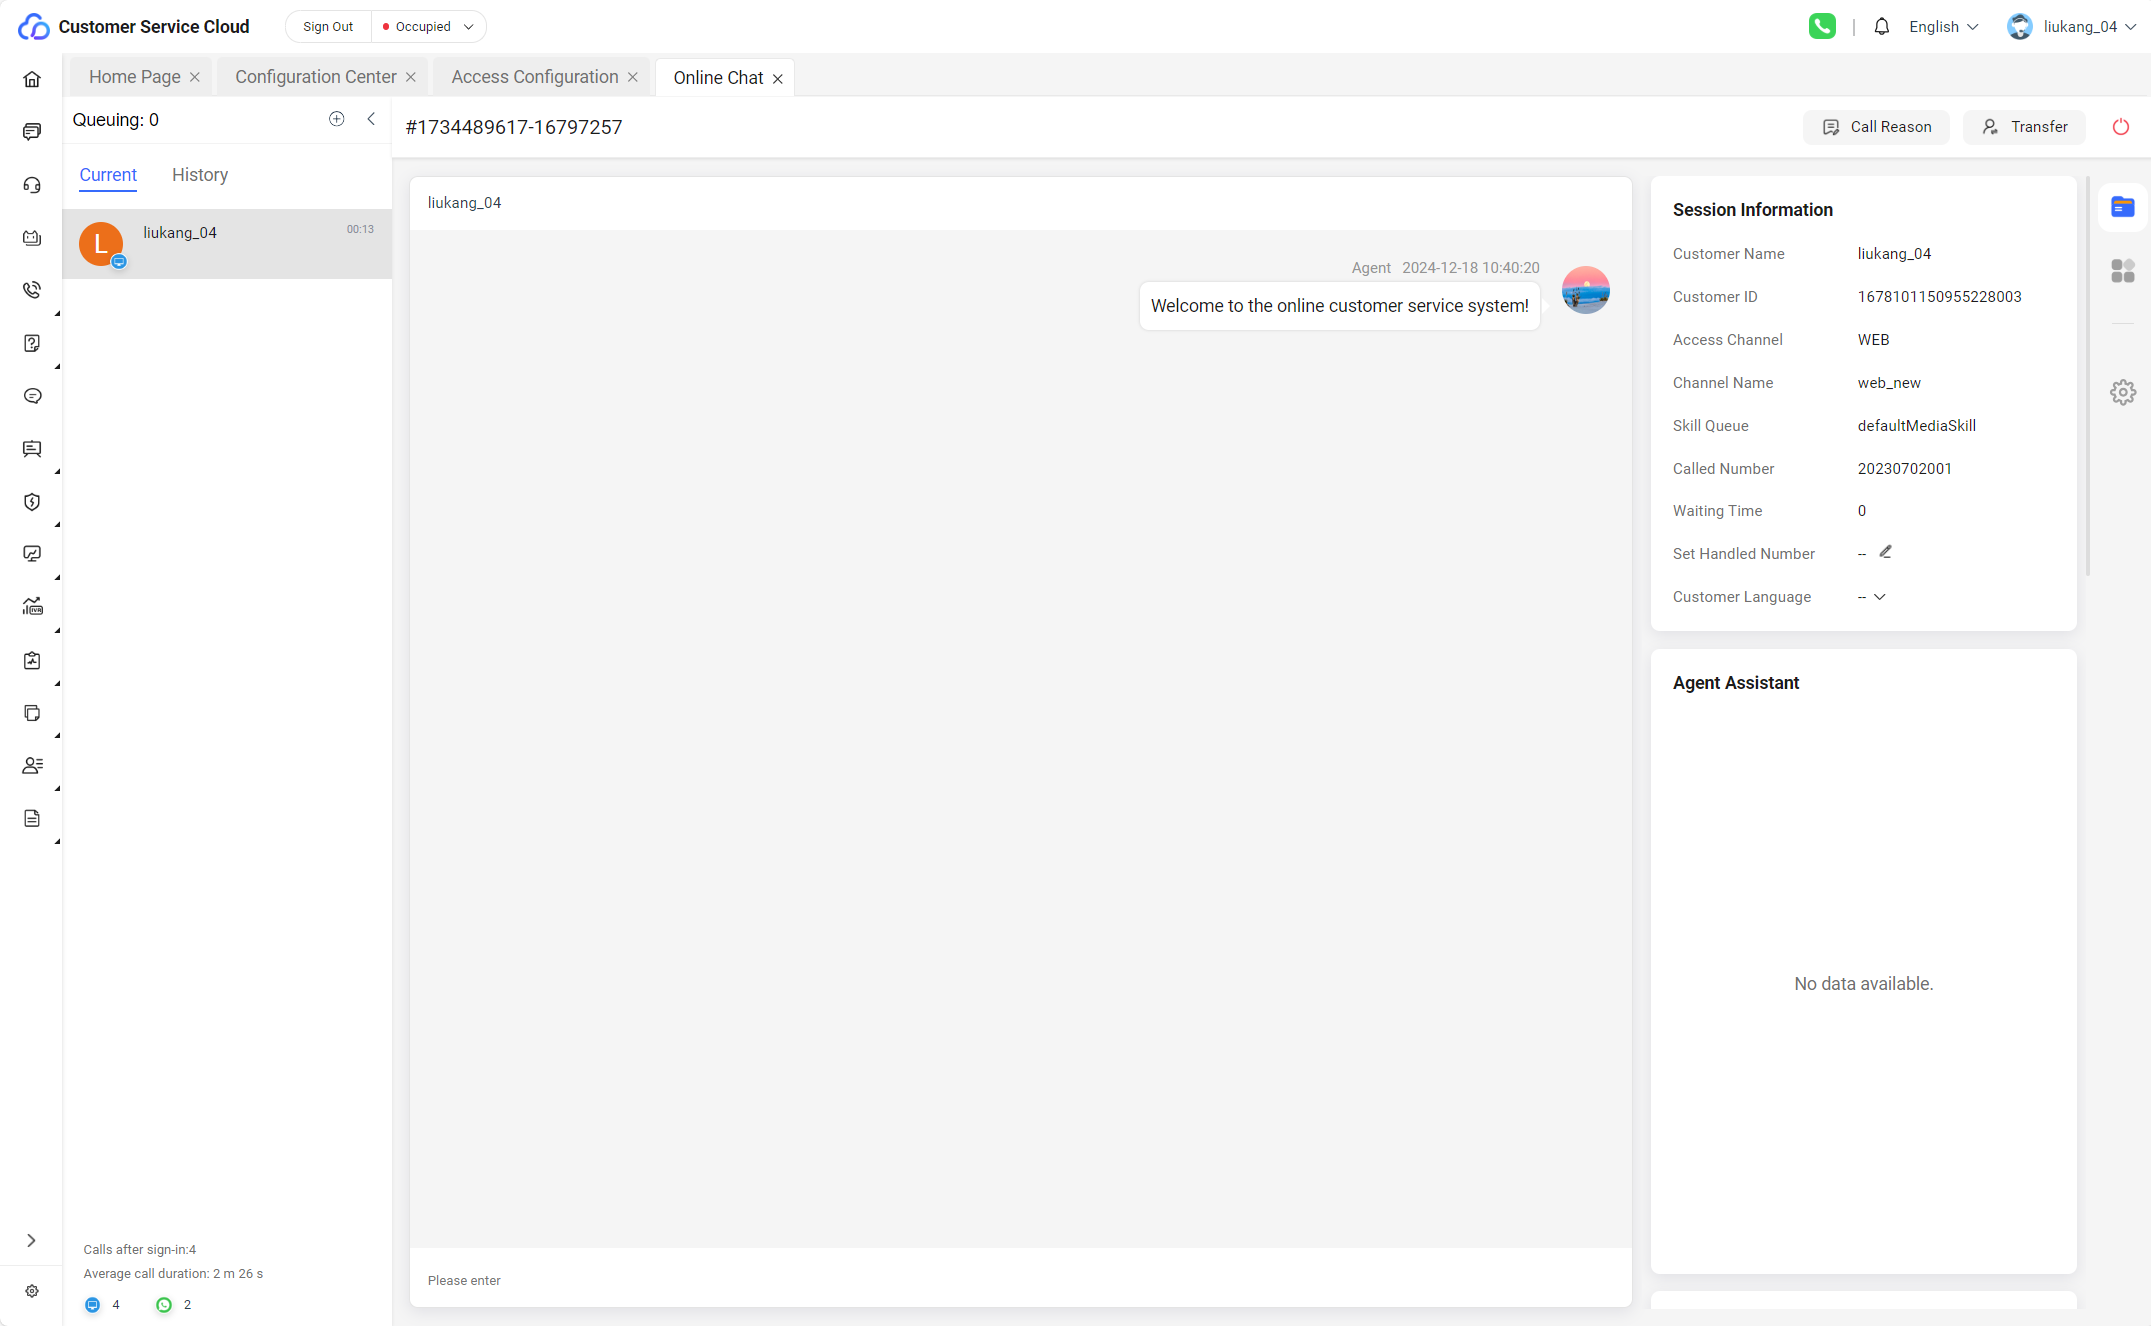
- Click the toolbar on the right and choose Co-browsing as the agent.
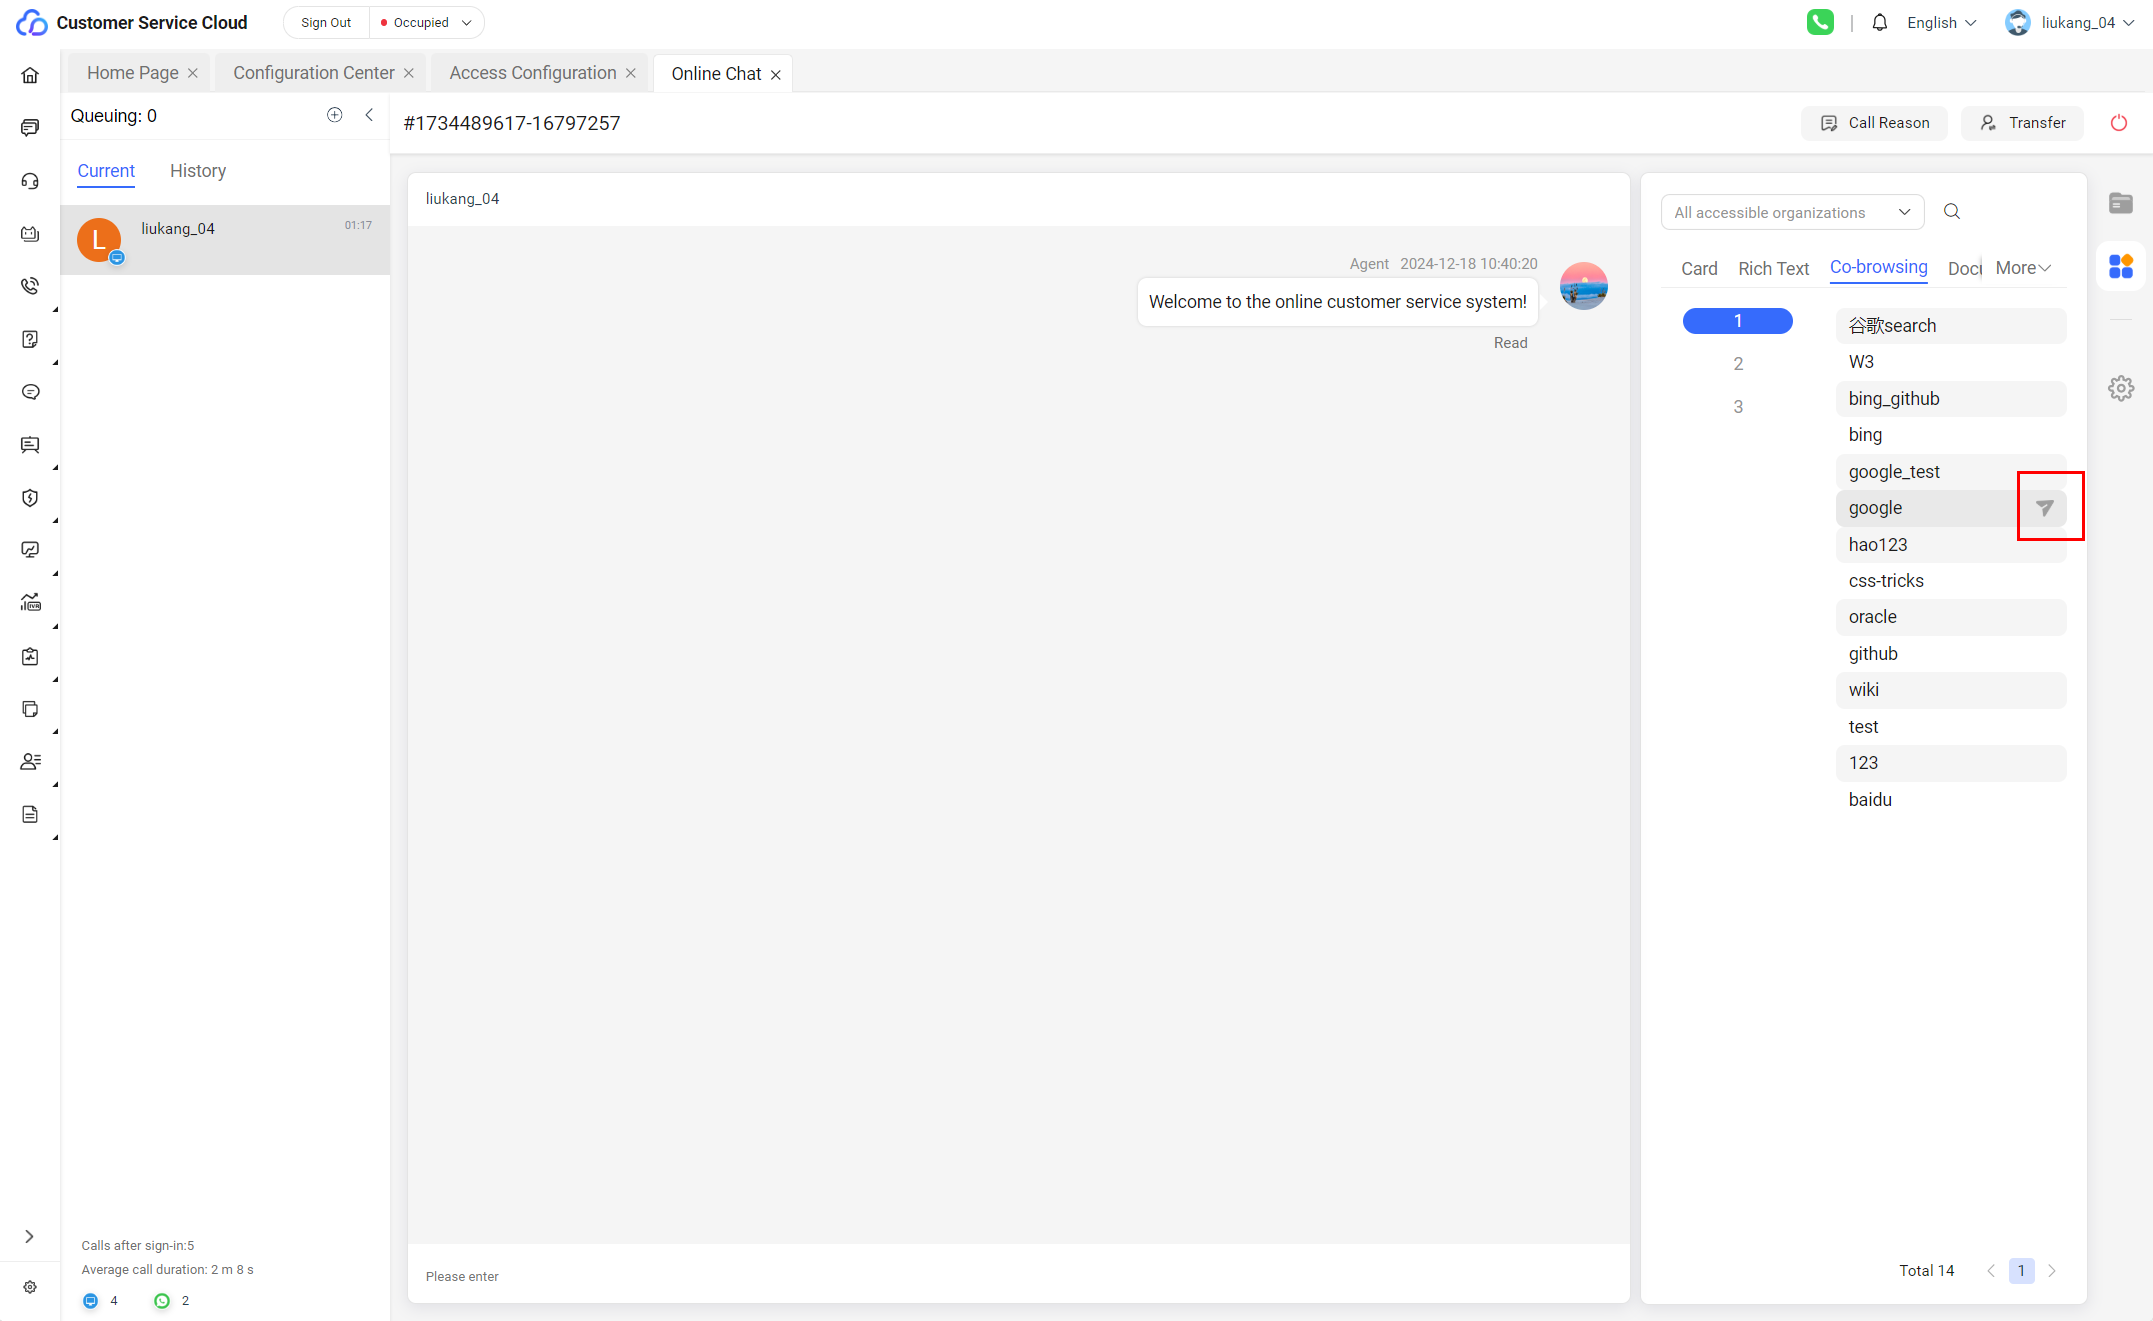
- Select the website that requires co-browsing (configured under ) and click Send.
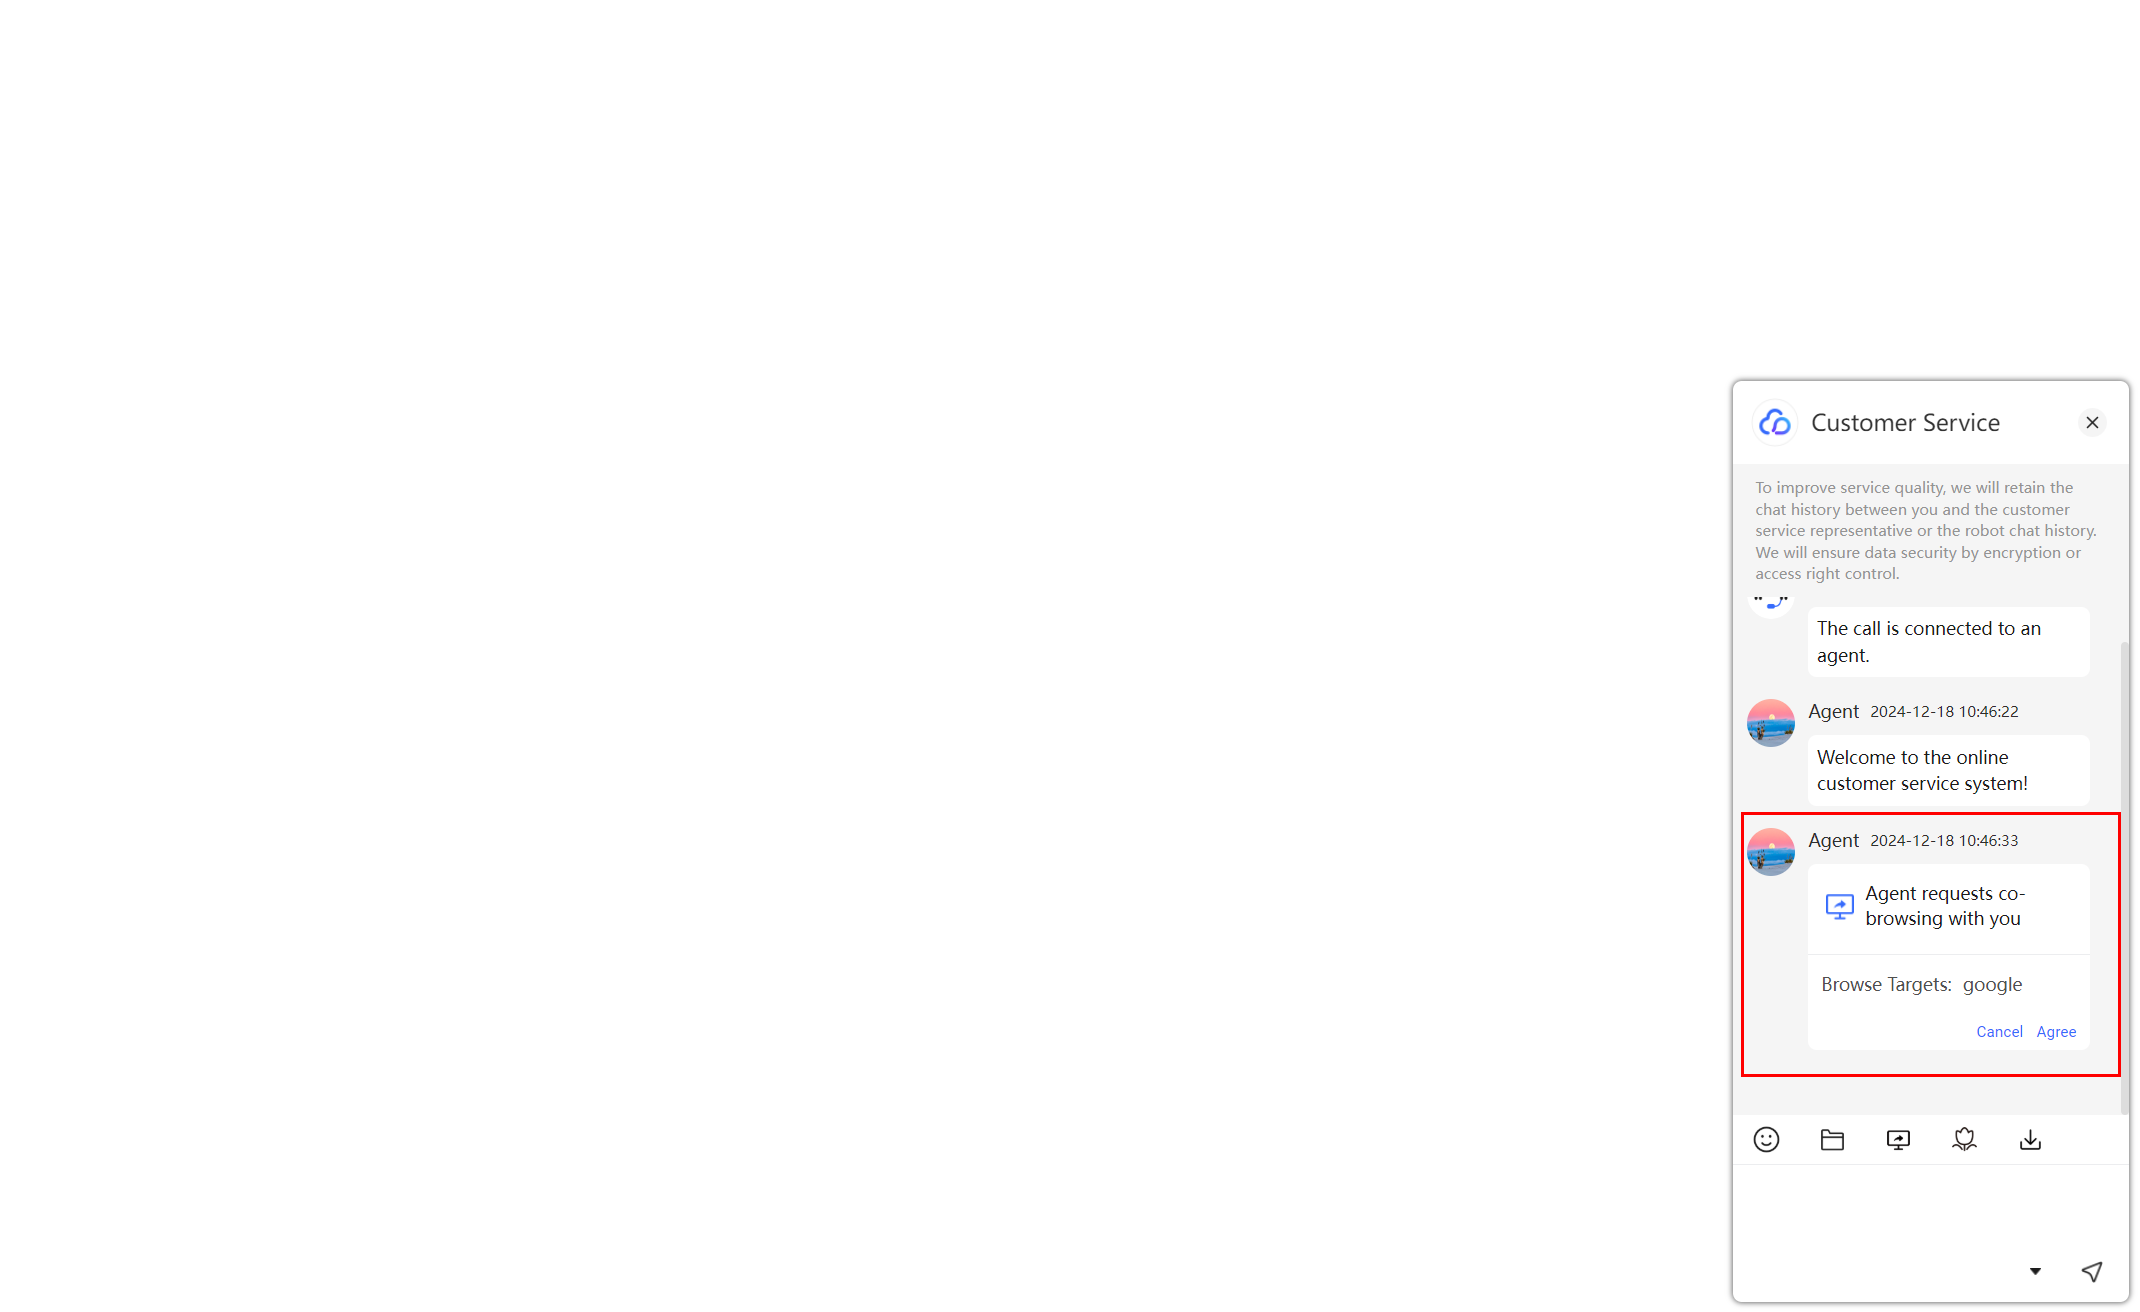
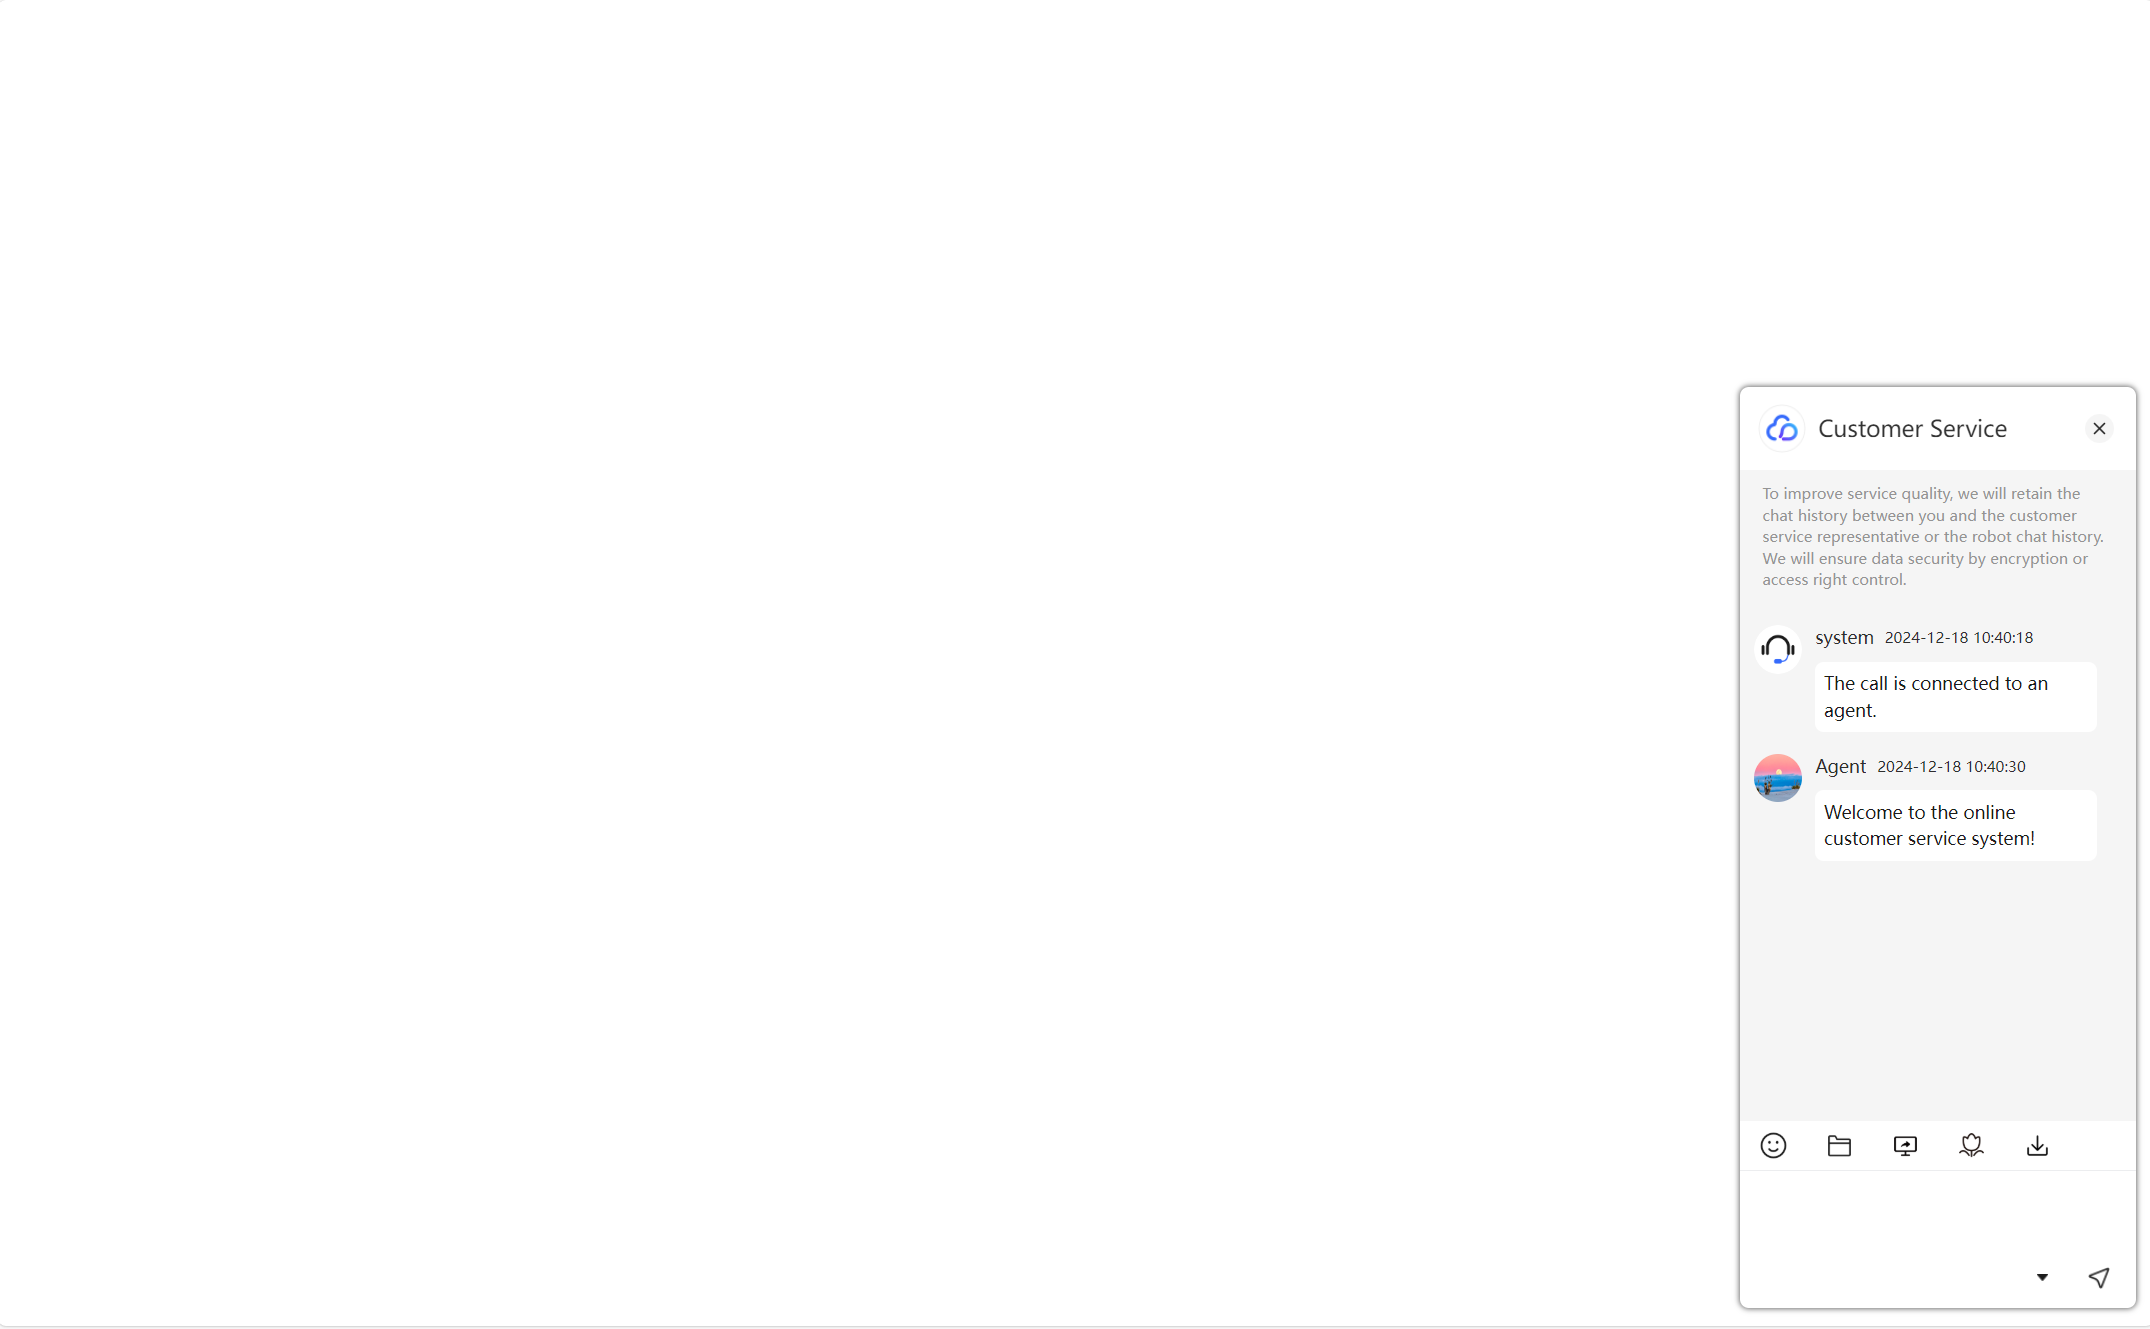
- After the agent clicks the send button, the user receives a request card. The user can click Agree or Reject.
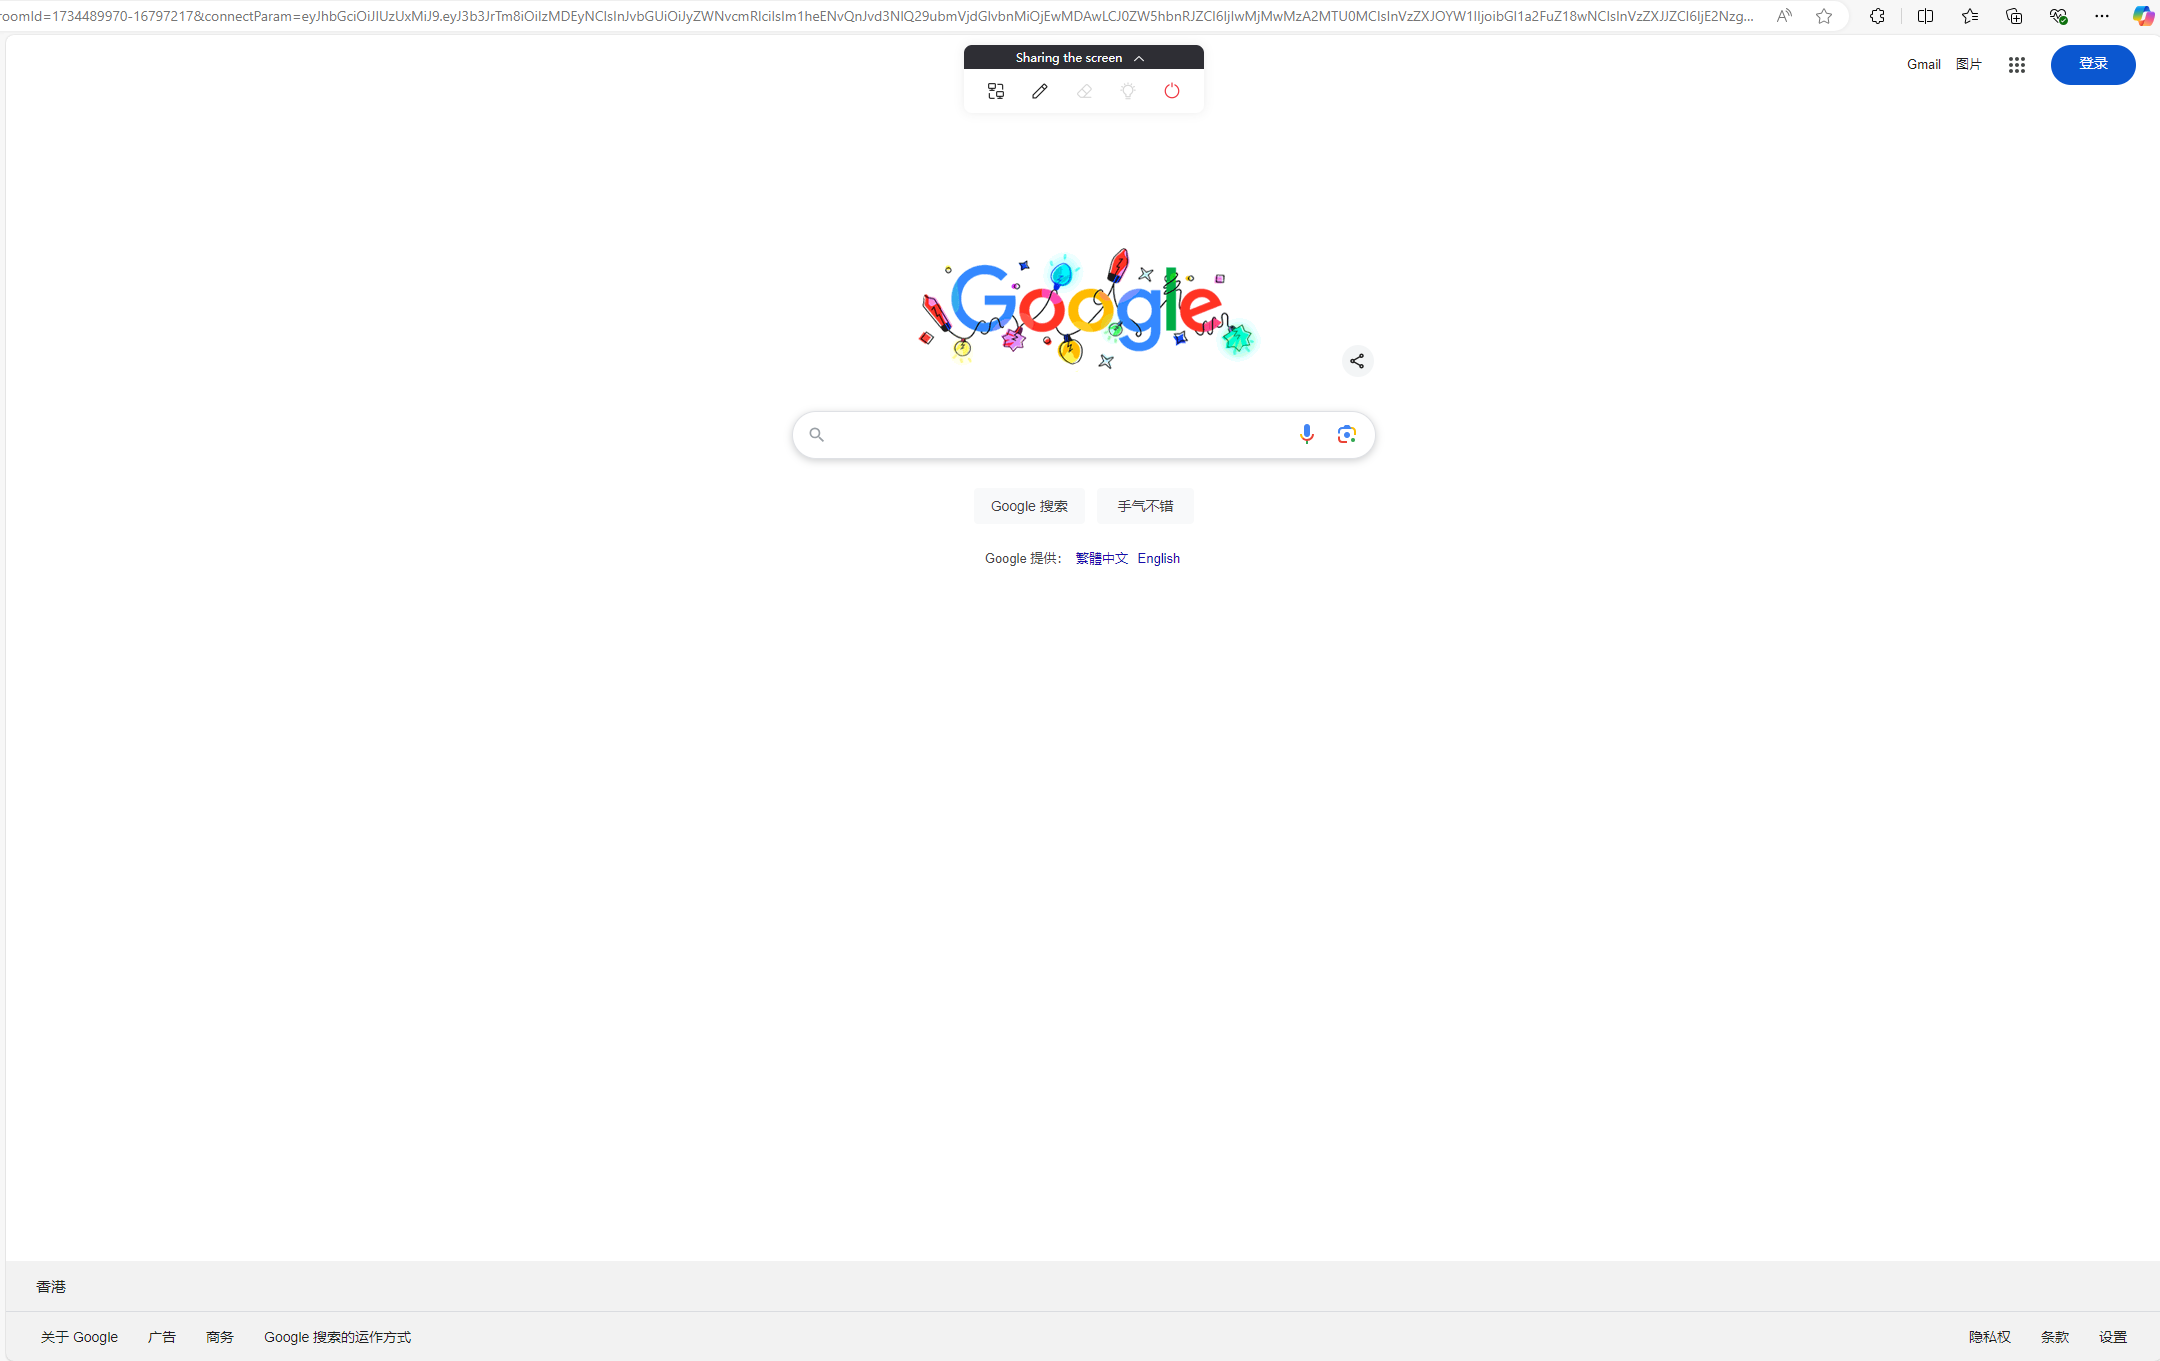
- After the user agrees, the third-party website will be opened in the browser on the user side.
- At the same time, the agent opens the third-party website as a tab page in the system.
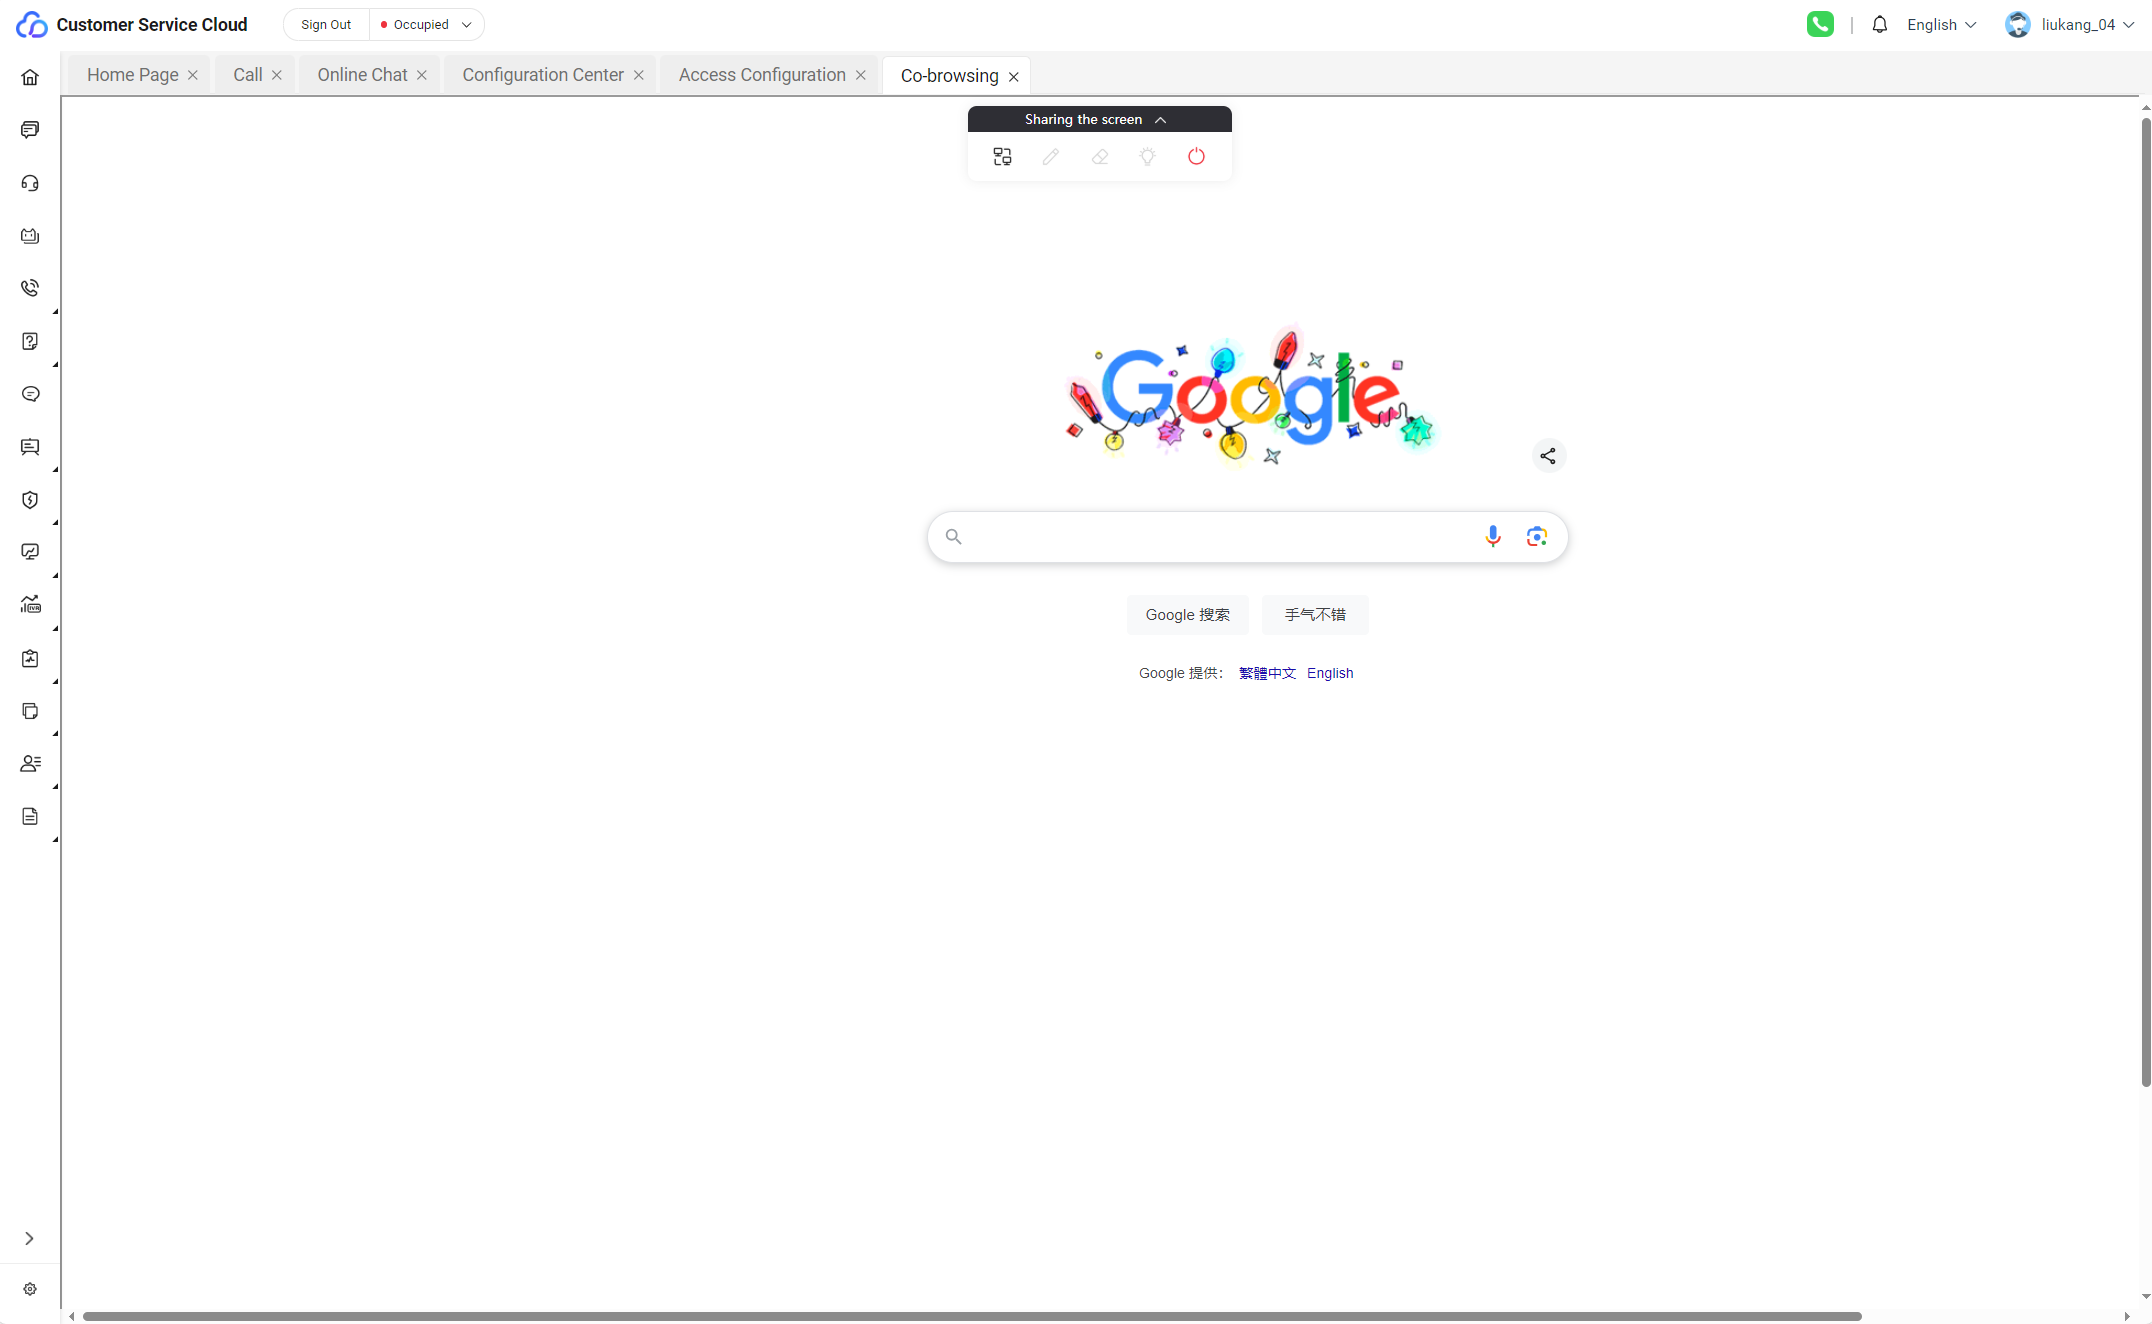
- The agent and user perform co-browsing operations on third-party web pages.
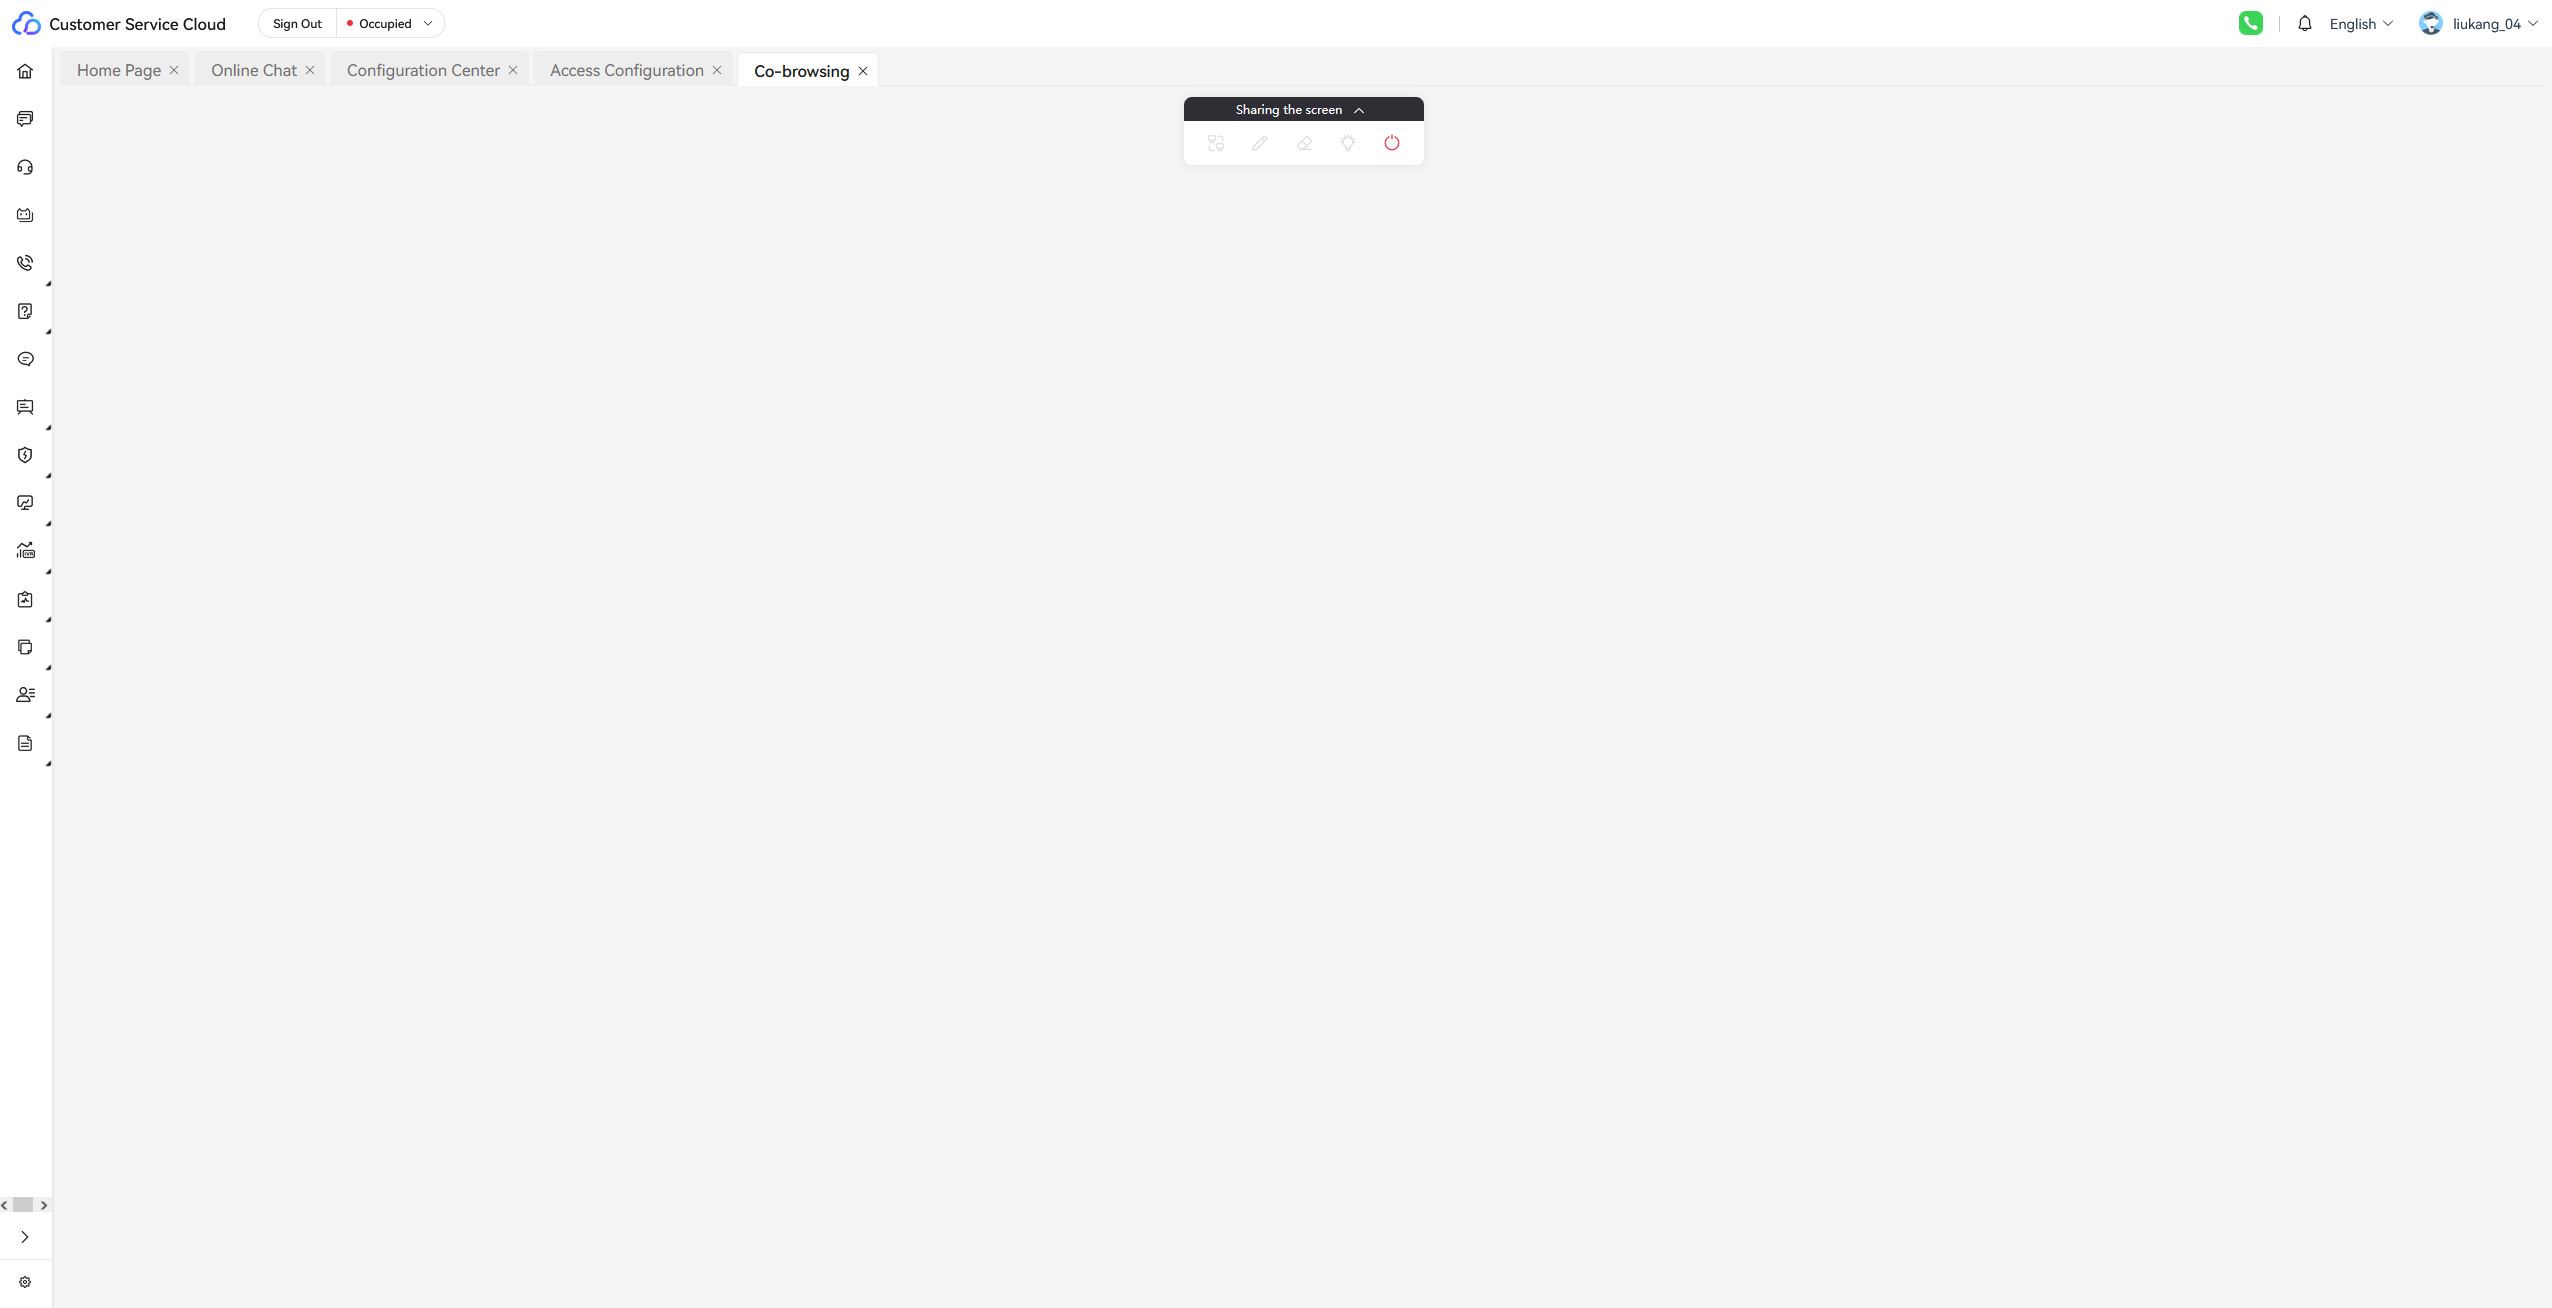
If the plug-in is not installed on the agent side, third-party websites cannot be displayed properly through the Co-browsing tab page on the agent side, and the co-browsing function cannot be used properly on the third-party websites opened by users (the co-browsing icon is not displayed in the lower right corner), as shown in the following figure.

Feedback
Was this page helpful?
Provide feedbackThank you very much for your feedback. We will continue working to improve the documentation.See the reply and handling status in My Cloud VOC.
For any further questions, feel free to contact us through the chatbot.
Chatbot


