Enabling and Configuring a Dynamic Resource Pool for Impala
Scenarios
Admission control is an Impala feature that imposes limits on concurrent SQL queries, to avoid resource usage spikes and out-of-memory conditions on busy clusters. The admission control feature lets you set an upper limit on the number of concurrent Impala queries and on the memory used by those queries. Any additional queries are queued until the earlier ones finish, rather than being cancelled or running slowly and causing contention. As other queries finish, the queued queries are allowed to proceed. You can also place limits on the maximum number of queries that are queued (waiting) and a limit on the amount of time they might wait before returning with an error. These queue settings let you ensure that queries do not wait indefinitely.
Impala leverages Hadoop's fair-scheduler.xml and llama-site.xml configuration files to configure resource queues and admission control, enabling isolation of service resource pools from user workloads and effective control of SQL query concurrency.
You need to use a dynamic resource pool to control Impala concurrency.

Adding a Resource Pool Configuration File
- Log in to the master1 node of the cluster, switch to user omm, and create the fair-scheduler.xml and llama-site.xml files in the /home/omm directory.

- Open the fair-scheduler.xml file and add the following configurations:
<allocations> <queue name="root"> <aclSubmitApps> </aclSubmitApps> <queue name="default"> <maxResources>4096 mb, 0 vcores</maxResources><!--This parameter is for reference only.--> <aclSubmitApps>*</aclSubmitApps> </queue> <queue name="development"> <maxResources>2048 mb, 0 vcores</maxResources><!--This parameter is for reference only.--> <aclSubmitApps>admin</aclSubmitApps> </queue> <queue name="production"> <maxResources>7168 mb, 0 vcores</maxResources><!--This parameter is for reference only.--> <aclSubmitApps>omm</aclSubmitApps> </queue> </queue> <queuePlacementPolicy> <rule name="specified" create="false"/> <rule name="default" /> </queuePlacementPolicy> </allocations> - Open the llama-site.xml file and add the following configurations:
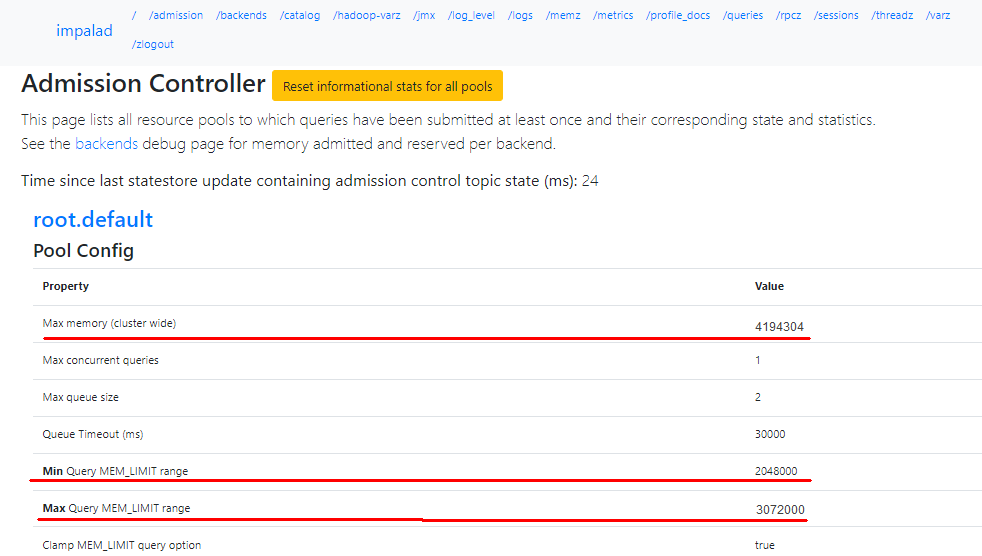
<?xml version="1.0" encoding="UTF-8"?> <configuration> <property> <name>llama.am.throttling.maximum.placed.reservations.root.default</name> <value>1</value> </property> <property> <name>llama.am.throttling.maximum.queued.reservations.root.default</name> <value>2</value><!--This parameter is for reference only.--> </property> <property> <name>impala.admission-control.pool-default-query-options.root.default</name> <value>mem_limit=128m,query_timeout_s=20,max_io_buffers=10</value> </property> <property> <name>impala.admission-control.pool-queue-timeout-ms.root.default</name> <value>30000</value><!--This parameter is for reference only.--> </property> <property> <name>impala.admission-control.max-query-mem-limit.root.default</name> <value>3072000000</value><!--3GB--><!--This parameter is for reference only.--> </property> <property> <name>impala.admission-control.min-query-mem-limit.root.default</name> <value>2048000000</value><!--2GB--> </property> <property> <name>impala.admission-control.clamp-mem-limit-query-option.root.default.regularPool</name> <value>true</value> </property> </configuration> - Run the following commands to synchronize fair-scheduler.xml and llama-site.xml to the etc folder in the installation directory on all Impalad nodes, respectively:
scp fair-scheduler.xml {IP address of the Impalad instance}:/opt/Bigdata/FusionInsight_Impala_***/***_Impalad/etc/
scp llama-site.xml {IP address of the Impalad instance}:/opt/Bigdata/FusionInsight_Impala_***/***_Impalad/etc/

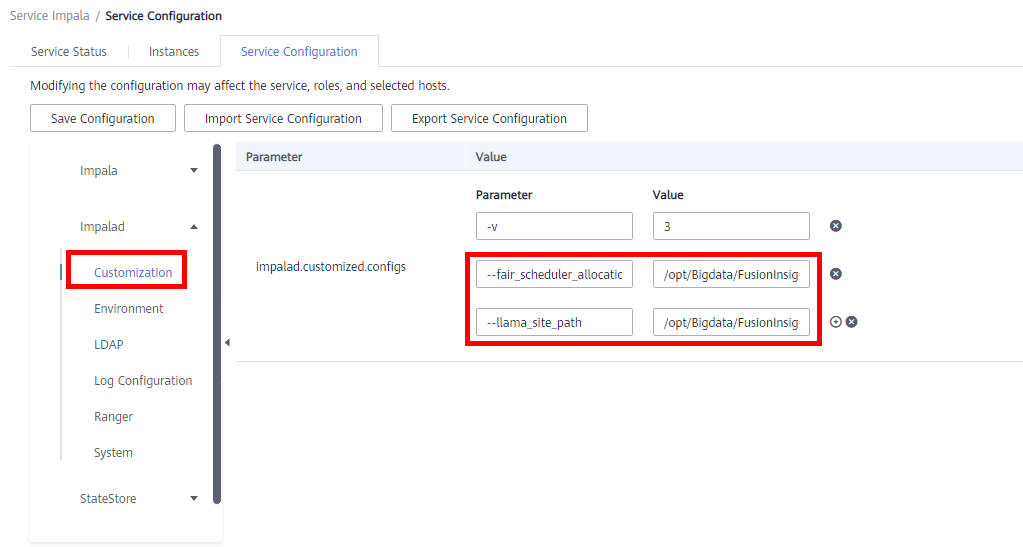
- Log in to FusionInsight Manager and choose Cluster > Services > Impala. Click Configurations and then All Configurations. Choose Impalad(Role) > Customization. Add the following custom parameters and values to impalad.customized.configs:
Table 1 Custom configurations Parameter
Value
--fair_scheduler_allocation_path
/opt/Bigdata/FusionInsight_Impala_***/***_Impalad/etc/fair-scheduler.xml
--llama_site_path
/opt/Bigdata/FusionInsight_Impala_***/***_Impalad/etc/llama-site.xml
Figure 1 Custom configurations
- Click Save to save the settings.
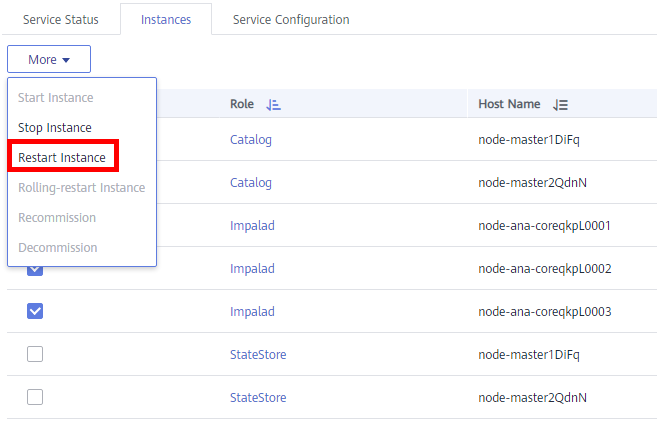
- Click the Instances tab, and choose More > Restart Instance to restart the Impalad instances.
Figure 2 Restarting instances

Verifying Resource Pool Configuration
- Log in to the node where the Impala client is installed, run the source command to obtain the environment variables, and run the following command:
impala-shell -i {IP address of the Impalad instance:Port number} -Q request_pool=root.default (resource pool configured in fair-scheduler.xml and llama-site.xml)

Execute SQL statements.

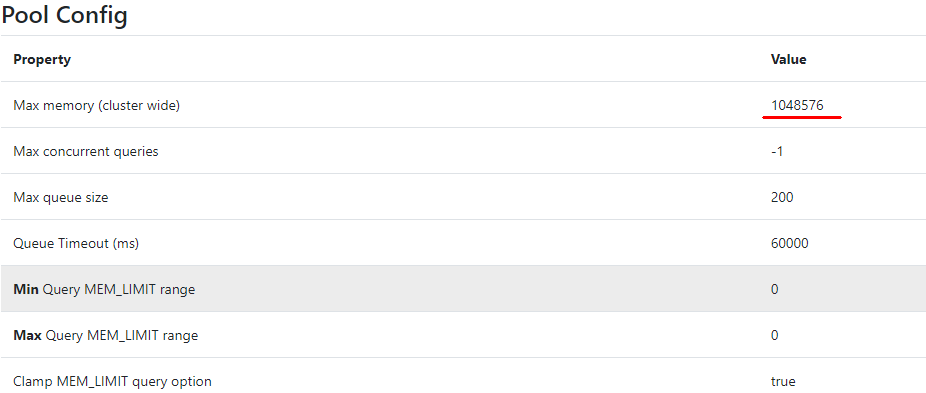
- Log in to the Impalad web UI to check the resource pool usage and apply the configurations.
https://{Cluster console address}:9022/component/Impala/Impalad/95/

Feedback
Was this page helpful?
Provide feedbackThank you very much for your feedback. We will continue working to improve the documentation.See the reply and handling status in My Cloud VOC.
For any further questions, feel free to contact us through the chatbot.
Chatbot


