

Quick Deployment
Quickly deploy the CDN for download acceleration solution.
| Parameter | Type | Mandatory | Description | Default Value |
|---|---|---|---|---|
| bucket_name | string | Yes | Name of the OBS bucket used to store application data, which is globally unique. Enter 3 to 63 characters, including lowercase letters, digits, hyphens (-), and periods (.). | None |
| accelerate_domain | string | Yes | Domain name used to access the application to accelerate. You are advised to use a level-2 domain name of the public domain specified by publicZone_domain. A domain name consists of one or more parts, representing domains at different levels. These parts, technically known as labels, are concatenated and delimited by periods (.). A label contains letters, digits, and hyphens (-). A domain name can contain up to 75 characters. Do not start or end a domain name with a hyphen (-). Example: download.game-apk1.com. | None |
| publicZone_domain | string | Yes | Public domain used by the user service system to provide services. A domain name consists of one or more parts, representing domains at different levels. These parts, technically known as labels, are concatenated and delimited by periods (.). A label contains letters, digits, and hyphens (-). A domain name can contain up to 75 characters. Do not start or end a domain name with a hyphen (-). Example: game-apk1.com. | None |
| service_type | string | Yes | Acceleration service type. Values: download (file download acceleration, default value); web (website acceleration); video (on-demand service acceleration). | download |
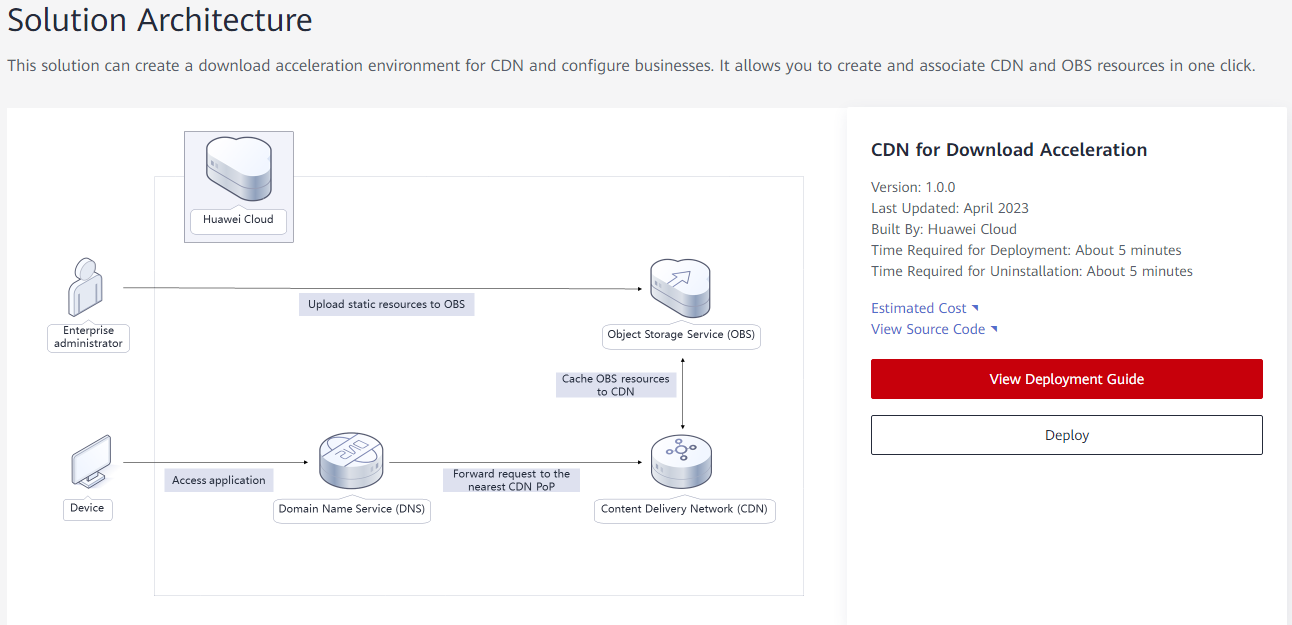
- Log in to Huawei Cloud Solution Best Practices, choose CDN for Download Acceleration, and click Deploy. The Create Stack page is displayed. Figure 1 Deploying the solution
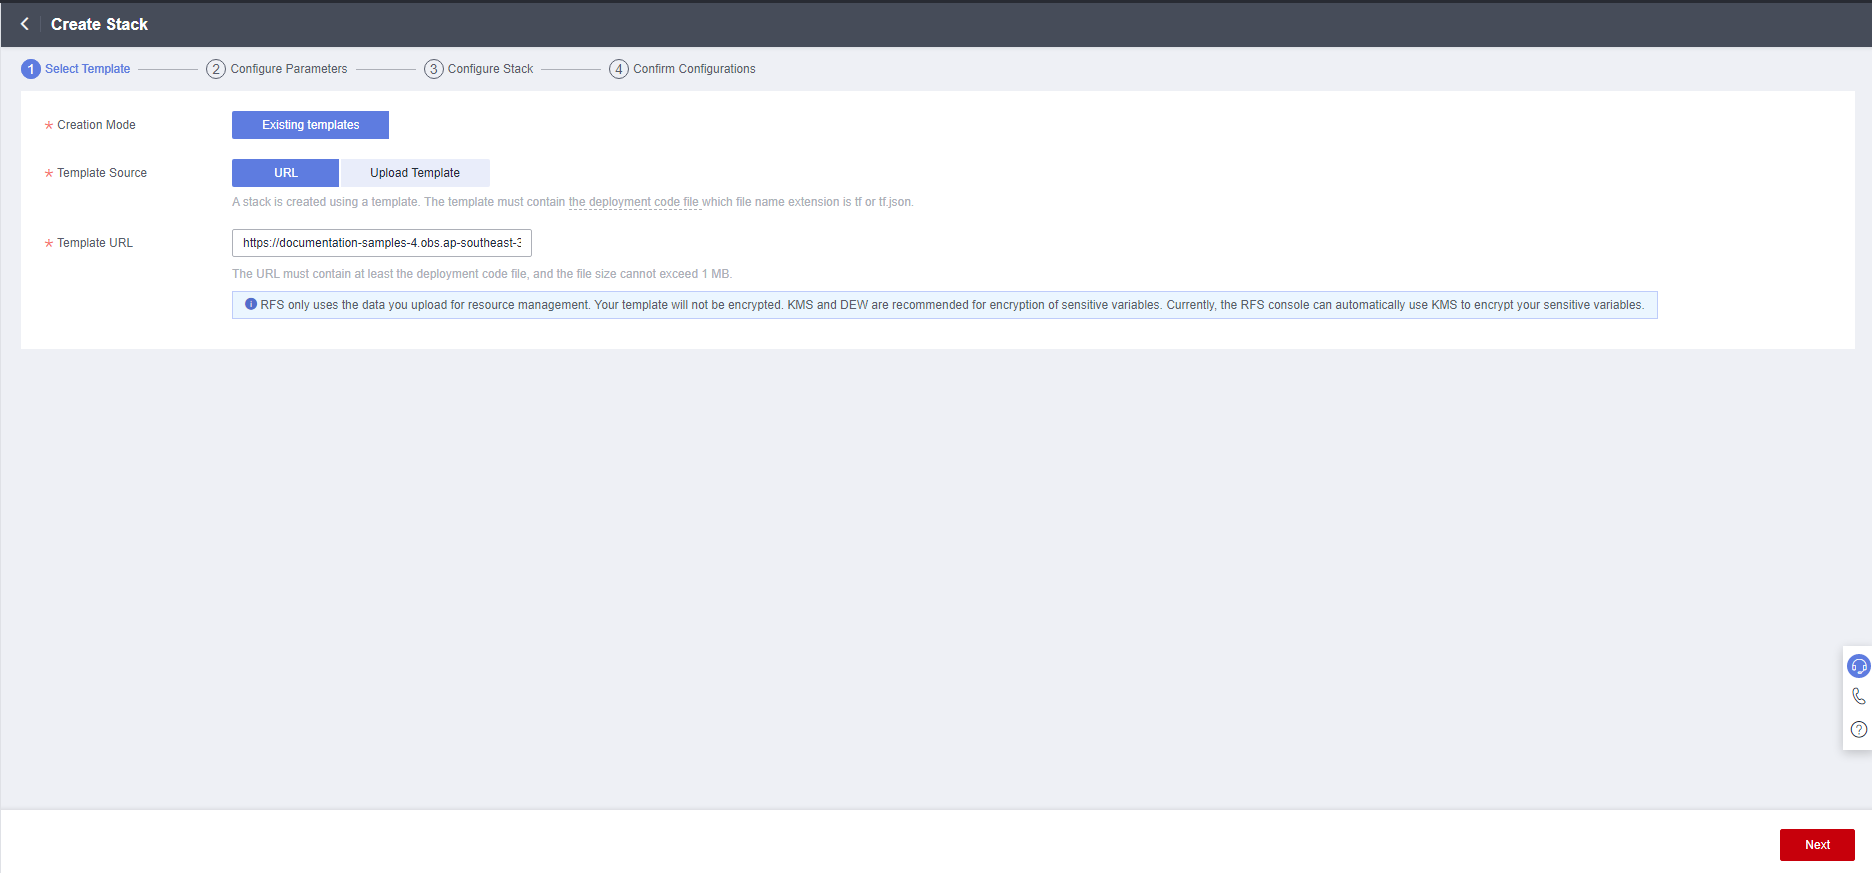
- On the Select Template page, click Next. Figure 2 Selecting a template
- On the Configure Parameters page, enter the stack name, set configuration parameters based on the Table 1, and click Next. Figure 3 Configuring parameters

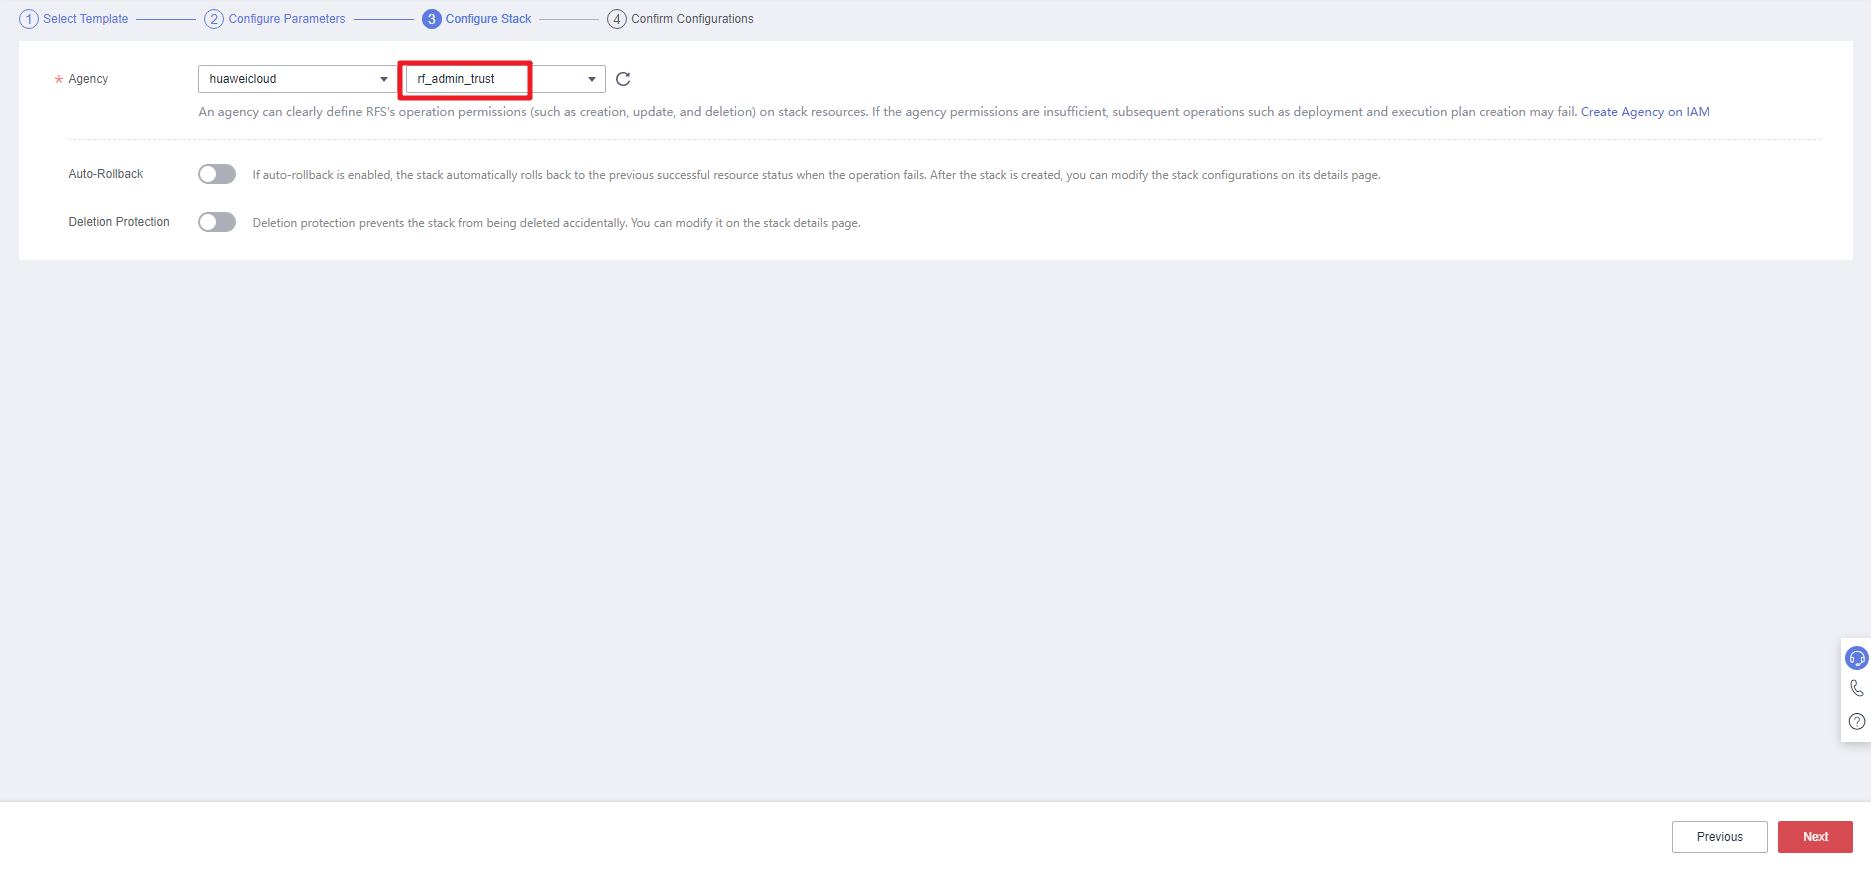
- On the Configure Stack page, select rf_admin_trust from the Agency drop-down list and click Next. Figure 4 Configuring the stack
- On the Confirm Configurations page, click Create Execution Plan. Figure 5 Confirming configurations

- In the Create Execution Plan dialog box, enter the execution plan name and click OK. Figure 6 Creating an execution plan

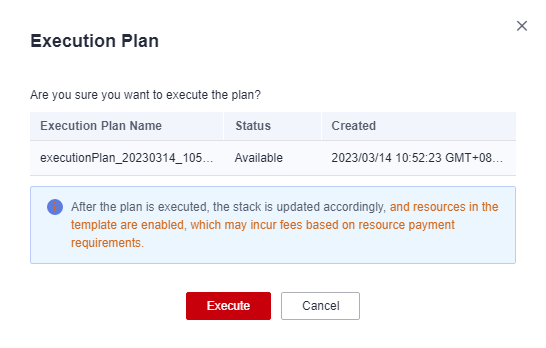
- Click Deploy in the row containing the target execution plan. In the displayed dialog box, click Execute for resource deployment. Figure 7 Execution plan
 Figure 8 Confirming the execution plan
- Click the Events tab and check whether the message "Apply required resource success" is displayed. If yes, the solution is successfully deployed. Figure 9 Solution deployed

What is your overall rating for this page?
Thank you very much for your feedback. We will continue working to improve the documentation.See the reply and handling status in My Cloud VOC.
For any further questions, feel free to contact us through the chatbot.
Chatbot


