Este conteúdo foi traduzido por máquina para sua conveniência e a Huawei Cloud não pode garantir que o conteúdo foi traduzido com precisão. Para exibir o conteúdo original, use o link no canto superior direito para mudar para a página em inglês.
Central de ajuda/
TaurusDB/
Guia de usuário/
Logs e auditoria/
Gerenciamento de logs de erros de uma instância de banco de dados
Atualizado em 2025-05-23 GMT+08:00
Gerenciamento de logs de erros de uma instância de banco de dados
Os logs de erro contêm logs gerados enquanto o banco de dados está em execução. Eles podem ajudá-lo a analisar problemas com o banco de dados.
Visualização de detalhes do log
- Faça logon no console de gerenciamento.
- Clique em
 no canto superior esquerdo e selecione uma região e um projeto.
 - Clique em
 no canto superior esquerdo da página e escolha Databases > TaurusDB.
 - Na página Instances, clique no nome da instância.
- No painel de navegação, escolha Logs.
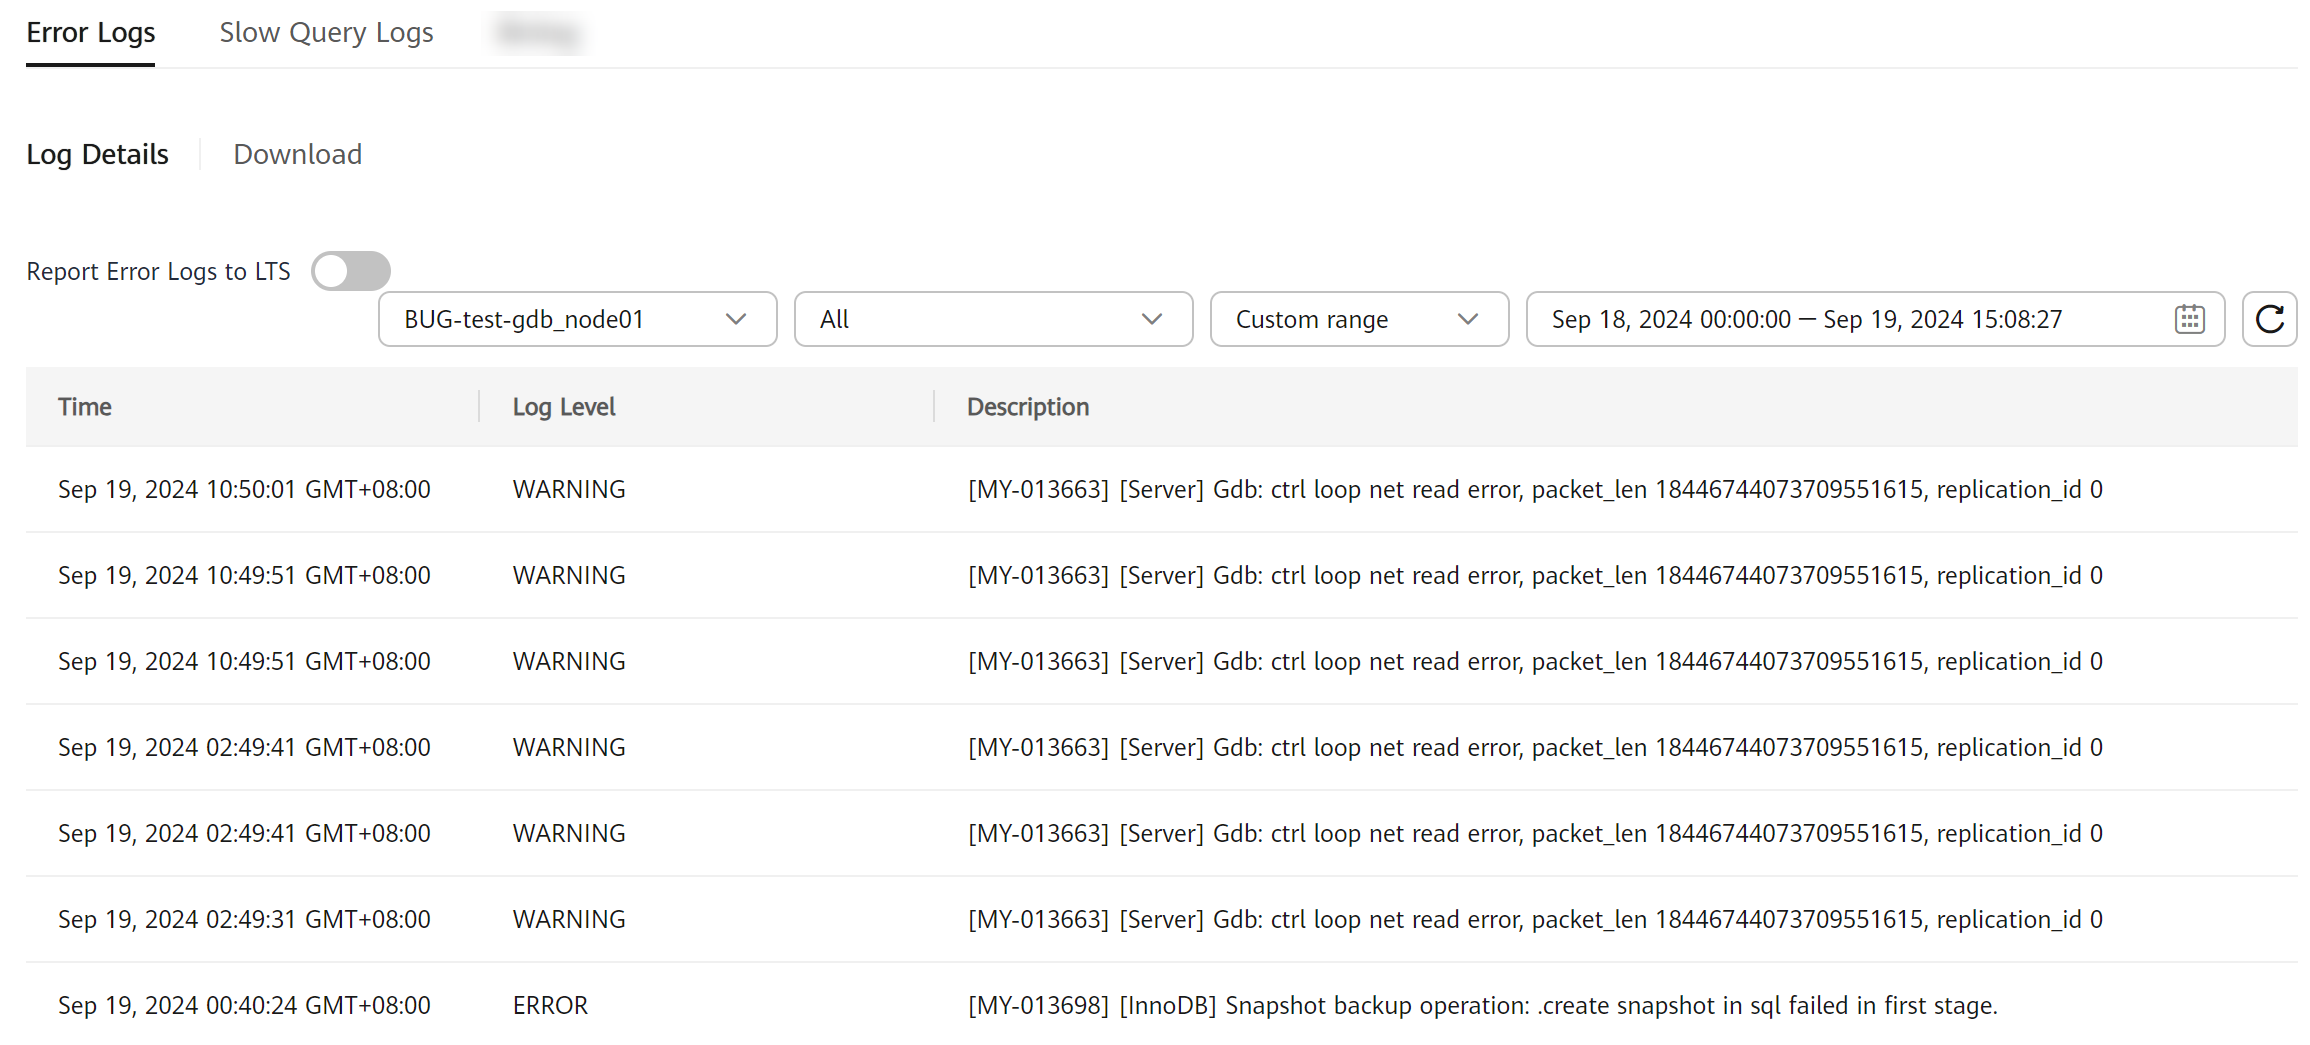
- Na página , exiba logs de erros de nós diferentes, em níveis de logs diferentes e dentro de um intervalo de tempo especificado.
Clique na lista suspensa no canto superior direito e selecione um nome de nó e um nível de log, conforme necessário.
Os níveis de logs de erros incluem ALL, INFO, WARNING, ERROR, FATAL e NOTE.
Clique em
 e especifique um período de tempo.Figura 1 Exibição de logs de erros
Baixar um log de erros
- Na página Instances, clique no nome da instância.
- No painel de navegação, escolha Logs.
- Na guia Error Logs, clique em Download. Localize um log cujo status é Preparation completed e clique em Download na coluna Operation.
Figura 2 Baixar um log de erros

- O sistema carrega automaticamente as tarefas de preparação de download. A duração do carregamento é determinada pelo tamanho do arquivo de log e pelo ambiente de rede.
- Quando o log está sendo preparado para download, o status do log é Preparing.
- Quando o log estiver pronto para download, o status do log é Preparation completed.
- Se a preparação para download falhar, o status do log é Abnormal.
Logs no estado Preparing ou Abnormal não podem ser baixados.
- Somente registros não superiores a 40 MB podem ser baixados diretamente desta página. O intervalo de tempo é calculado a partir do momento em que você baixa os logs de volta ao momento em que o tamanho do arquivo acumulado atinge 40 MB.
- O link para download é válido por 5 minutos. Depois que o link de download expirar, uma mensagem será exibida indicando que o link de download expirou. Se você precisar baixar o log, clique em OK.
- Você pode selecionar os logs a serem baixados por nó.
- O sistema carrega automaticamente as tarefas de preparação de download. A duração do carregamento é determinada pelo tamanho do arquivo de log e pelo ambiente de rede.
Relatório de logs de erros para o LTS
- Faça logon no console de gerenciamento.
- Clique em
 no canto superior esquerdo e selecione uma região e um projeto.
 - Clique em
 no canto superior esquerdo da página e escolha .
 - Na página Instances, clique no nome da instância.
- No painel de navegação, escolha Logs.
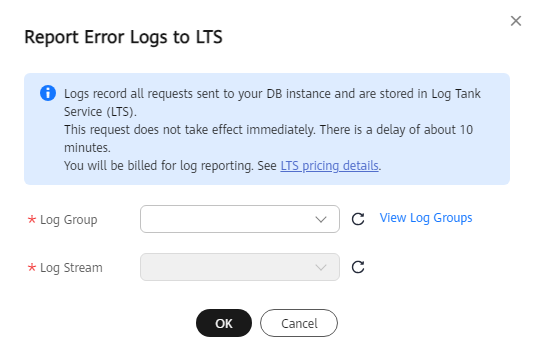
- Na guia Error Logs, clique em
 ao lado de Report Error Logs to LTS.
 - Selecione um grupo de logs de LTS e um fluxo de logs e clique em OK.
Figura 3 Relatório de logs de erros para o LTS

Tópico principal: Logs e auditoria
Feedback
Esta página foi útil?
Deixar um comentário
Obrigado por seus comentários. Estamos trabalhando para melhorar a documentação.
O sistema está ocupado. Tente novamente mais tarde.


