
Managing Logical Subpools of a Standard Dedicated Resource Pool
You can split logical subpools from a ModelArts Standard dedicated resource pool and set resource quotas for each subpool, including reserved quotas and quota rollout. After a logical subpool is split, tasks in the training, inference, and development environments must be delivered to the logical subpool and restricted by the quota. Only tasks within the quota can be delivered and run.
On the resource pool details page, click Subpools. In the logical subpool list, you can click Create Subpool in the upper left corner to create a logical subpool. You can also scale in or out a created logical subpool, set the job types, and delete the logical subpool.
If you need to migrate the resources of one logical subpool to another pool, delete one subpool, and scale out the other subpool.
Creating a Logical Subpool
- Log in to the ModelArts console. In the navigation pane on the left, choose Standard Cluster under Resource Management.
- Click the target resource pool name to access its details page.
- On the resource pool details page, click Subpools. Then, click Create Subpool in the upper left corner.
Figure 1 Logical subpool

- Click Create Subpool. In the displayed dialog box, set the parameters and click OK.
If a created logical subpool needs to be bound to a physical pool node, enable node binding.
Table 1 Parameters for creating a logical subpool Parameter
Description
Name
Name of a logical pool.
Description
Description of a logical subpool.
Job Type
Job type supported by the logical subpool. The job type must be supported by the physical dedicated resource pool.
Instance Specification Management
Set the following parameters. ModelArts will schedule tasks for the logical subpool based on the configured parameters.
- Step: the smallest unit for changing the minimum quota. In node binding, nodes at each step are treated as one group. Step is available only for supernodes and full-rack nodes. In the supernode scenario, the step size of a logical subpool can be smaller than that of a physical pool.
The step size cannot be changed after a logical subpool is created. Set a proper step size as required.
- Minimum Quota: minimum resources of a logical subpool. The value can be 0.
- Maximum Quota: maximum resources of a logical subpool. The value must be no less than the guaranteed quota.
If the minimum quota is less than the maximum quota, Development Environment cannot be selected for Job Type.
Task scheduling rules:- If the required resources are no more than the minimum quota, the resource usage can be guaranteed.
- If the required resources are more than the minimum quota, and no more than the maximum quota, the jobs can be scheduled when the resources are sufficient and will be preempted when the resources are insufficient.
Figure 2 Creating a Logical Subpool
- Step: the smallest unit for changing the minimum quota. In node binding, nodes at each step are treated as one group. Step is available only for supernodes and full-rack nodes. In the supernode scenario, the step size of a logical subpool can be smaller than that of a physical pool.
Scaling a Logical Subpool
Locate the target logical subpool and click Adjust Capacity in the Operation column. In the displayed dialog box, reset the instance specifications and click OK.
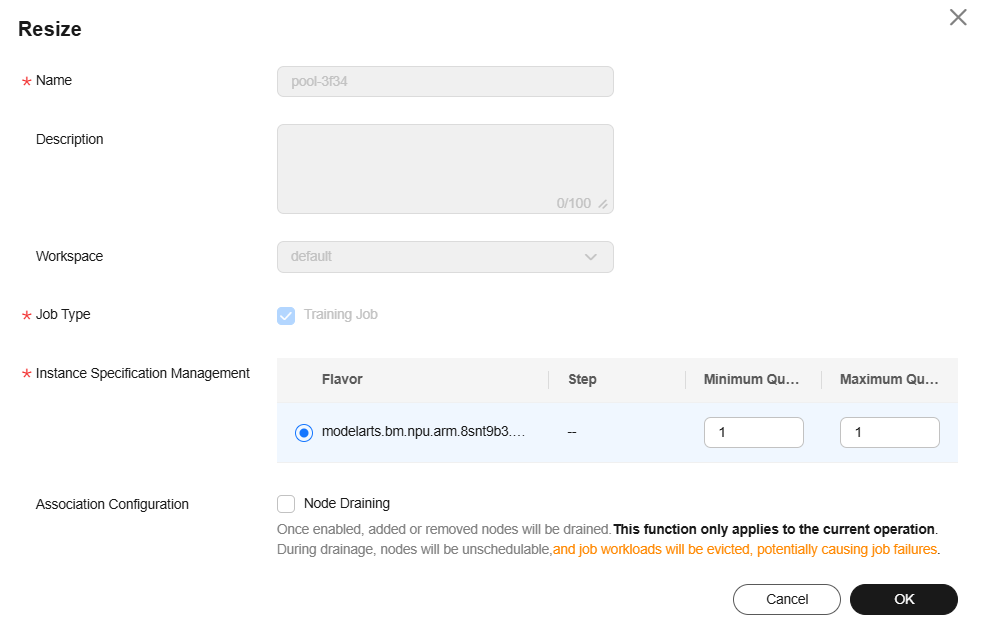
For logical subpools with node binding enabled, check whether node draining needs to be enabled during scaling. Node draining is to clear node resources to release or remove nodes that are no longer needed.
If node draining is enabled, the drainage will be performed on the nodes to be scaled only this time. You can check the drainage status in the Nodes tab. If the draining fails, hover the cursor over the node status to view the failure cause.

During the draining, nodes cannot be scheduled and job loads on the nodes will be evicted, which may cause job failures.
Setting the Job Type of a Logical Subpool
Locate the target logical subpool and click Set Job Type in the Operation column. In the displayed dialog box, set the target job type and click OK.
Modifying configured job types may cause the following problems: development environment instances are deleted, running training jobs fail, and running inference services fail.
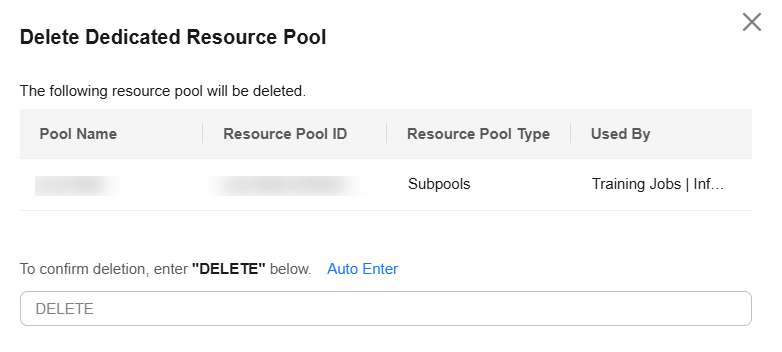
Deleting a Logical Subpool
Locate the target logical subpool and click Delete in the Operation column. In the displayed dialog box, enter DELETE and click OK.
Enabling/Disabling Node Binding for a Standard Dedicated Resource Pool
If a logical subpool has been created in a resource pool, you can enable node binding to bind dedicated nodes to the logical subpool.
Once enabled, the system will automatically bind the corresponding number of dedicated nodes. Tasks can only run on the bound nodes to ensure resource dedication and stability. This function applies to tasks that require high resource assurance and stability.
Node binding can:
- Improve task stability. By binding specific nodes, tasks will not be interrupted due to dynamic node allocation, ensuring task continuity and stability.
- Assure resources. After node binding is enabled, tasks can exclusively use the bound node resources, preventing resource competition with other tasks.
- Optimize resource usage. Proper allocation of node resources can improve overall resource usage and avoid resource waste.
Enabling node binding
After node binding is enabled, the service background automatically binds nodes to the logical subpool.
Locate the target resource pool in the list and choose  > Enable Node Binding on the right.
In the displayed Enable Node Binding dialog box, click OK.
- Log in to the ModelArts console. In the navigation pane on the left, choose Standard Cluster under Resource Management.
- Locate the target resource pool in the list and choose
 > Enable Node Binding on the right.
 - In the displayed Enable Node Binding dialog box, click OK.
After node binding is enabled for the standard dedicated resource pool, nodes in a resource pool can be bound to logical subpools.
Once node binding is disabled, the jobs in the original logical subpool may be occupied. Exercise caution when performing this operation.
Locate the target resource pool in the list and choose  > Disable Node Binding on the right.
- In the displayed dialog box, confirm the information, enter YES in the text box, and click OK.
- Log in to the ModelArts console. In the navigation pane on the left, choose Standard Cluster under Resource Management.
- Locate the target resource pool in the list and choose
 > Disable Node Binding on the right.
 - In the displayed dialog box, confirm the information, enter YES in the text box, and click OK.
Binding to Another Logical Subpool
After node binding is enabled for the standard dedicated resource pool, nodes in a resource pool can be bound to a specified logical subpool.
- Log in to the ModelArts console. In the navigation pane on the left, choose Standard Cluster under Resource Management.
- Click the resource pool with node binding enabled. The resource pool details page is displayed.
- Switch to the Nodes tab, select the target nodes, and click Bind Logical Subpool above the list.
Figure 5 Rebinding to a logical subpool

- In the Bind Logical Subpool dialog box, set the parameters for binding the nodes. The nodes that meet the parameter settings can be bound to the logical subpool.
- The target nodes must be in a steady (Available or Abnormal) state.
- If the driver version of the logical subpool does not match the nodes, the node driver will automatically be upgraded, which will interrupt services.
Table 2 Parameters Parameter
Description
Node Source
Select the resource pool type of the node before the binding. You can select a physical resource pool or a logical subpool.
Node Type
Select the node type of the node to be bound. You can select a single node or a supernode.
- Single node: A physical or virtual server that provides independent basic compute, storage, and network resources
- Supernode: A converged node that provides a large-scale compute resource pool and supports flexible allocation and high-density deployment Supernodes are specially designed to support large-scale model inference tasks. These servers are usually equipped with multiple compute cards (such as Ascend NPUs) to provide powerful computing capabilities to meet heavy–load inference requirements. Supernodes are supported only in CN Southwest–Guiyang1 and CN East2.
Instance Specifications
Select instance specifications for the node. You must select nodes with identical specifications to rebind them to a new resource pool.
Node Batch
If Node Type is set to Supernode, you need to select the batch of nodes to be rebound. You must select nodes of the same batch to rebind them to a new resource pool.
Node List
Select the target nodes in the list.
Drain Nodes
Node draining is to clear node resources to release or remove nodes that are no longer needed.
After node draining is enabled, nodes in the logical subpool will be drained. The draining operation takes effect only for the current logical subpool rebinding. You can check the drainage information in the Nodes tab. If the draining fails, hover the cursor over the node status to view the failure cause.
WARNING:During the draining, nodes cannot be scheduled and job loads on the nodes will be evicted, which may cause job failures.
- Click Next, select the target resource pool type and the target resource pool, and click OK.
If Node Source is Physical resource pool, the target resource pool must be a logical subpool. If Node Source is Logical subpool, the target resource pool can be a physical resource pool or a logical subpool.
If Node Source is Supernode, the node can be bound only to a logical subpool that matches the instance specifications and the selected nodes can be divided by the resource pool specification step.
Feedback
Was this page helpful?
Provide feedbackThank you very much for your feedback. We will continue working to improve the documentation.See the reply and handling status in My Cloud VOC.
For any further questions, feel free to contact us through the chatbot.
Chatbot


