
Overview
ModelArts provides various plug-ins for you to selectively expand resource pool functions to meet service requirements.
Plug-ins Installed by Default
When you create a dedicated resource pool, certain plug-ins will be installed by default based on the resource pool type and job type.

Plug-ins installed by default in a resource pool cannot be uninstalled.
|
Plug-in |
Description |
|---|---|
|
ModelArts Node Agent is a plug-in for monitoring cluster node exceptions, also, a component for connecting to third-party monitoring platforms. It is a daemon that runs on each node to collect node problems from different daemon processes. |
|
|
The metric-collector, a default built-in plug-in of ModelArts, runs as a node daemon to collect node and job metrics and report them to AOM. |
|
|
The AI suite, NV GPU, is a device management plug-in that supports GPUs in containers. To use GPU nodes in a cluster, this plug-in must be installed. When you create a dedicated resource pool, this plug-in is automatically installed only when the instance specification type is set to GPU. |
|
|
The AI suite, Ascend NPU, is a device management plug-in that supports Huawei NPUs in containers. When you create a dedicated resource pool, this plug-in is automatically installed only when the instance specification type is set to NPU. |
|
|
Volcano is a batch scheduling platform based on Kubernetes. It provides a series of features required by machine learning, deep learning, bioinformatics, genomics, and other big data applications, as a powerful supplement to Kubernetes capabilities. When you create a dedicated resource pool, this plug-in is automatically installed when Job Type is set to Training Jobs. |
Installing the Plug-in Manually
You can install plug-ins to extend resource pool functions as required.
|
Plug-in |
Description |
|---|---|
|
NodeLocal DNSCache is a set of daemons running on cluster nodes. It improves cluster DNS performance by using DNS cache proxies. |
|
|
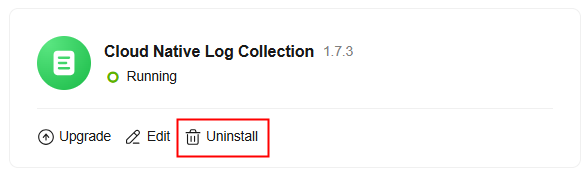
Log Collect is used to collect cloud native logs and Kubernetes events based on open-source Fluent Bit and OpenTelemetry. log-agent supports CRD-based log collection policies. Based on your configured policy rules, it can collect container standard output logs, container file logs, node logs, and Kubernetes event logs in a cluster and forward them to Log Tank Service (LTS). It also reports all abnormal Kubernetes events and some normal Kubernetes events to Application Operations Management (AOM) for event alarm configuration. |
|
|
The Cloud Native Cluster Monitoring plug-in (formerly kube-prometheus-stack) uses Prometheus-operator and Prometheus and provides easy-to-use, end-to-end Kubernetes cluster monitoring. |
Plug-in Lifecycle
|
Status |
Status Attribute |
Description |
|---|---|---|
|
Installing |
Intermediate |
The plug-in is being deployed. If all instances cannot be scheduled due to incorrect plug-in configuration or insufficient resources, the system sets the plug-in status to Unavailable 10 minutes later. |
|
Running |
Stable |
The plug-in is running, all plug-in instances are deployed, and the plug-in can be used properly. |
|
Upgrading |
Intermediate |
The plug-in is being upgraded. |
|
Not available |
Stable |
The plug-in is abnormal and cannot be used. You can click the status to view the failure cause. |
|
Deleting |
Intermediate |
The plug-in is being deleted. If this state stays for a long time, an exception occurred. |
Searching for a Plug-in on the Plug-in Square
The ModelArts Plug-in Square provides various plug-ins. You can view the plug-in details and install them to a specified resource pool as needed.
|
Operation |
Description |
Procedure |
|---|---|---|
|
Searching for and viewing a plug-in |
Search for and view a plug-in. |
Log in to the ModelArts console. In the navigation pane on the left, choose Add-ons. Choose a resource type from the drop-down list to filter plug-ins, or enter a keyword in the search box to search for a plug-in. |
|
Viewing plug-in details |
View the plug-in details, including the plug-in introduction and component list. |
|
|
Installing a plug-in |
Certain plug-ins can be manually installed. |
|
Viewing the Plug-ins of a Standard Resource Pool on the Resource Pool Details Page
In the Plug-ins tab of the resource pool details page, perform the operations described in Table 5.
|
Operation |
Description |
Procedure |
|---|---|---|
|
Querying the plug-ins |
View all plug-ins of a resource pool. On this page, you can view plug-in details, install, upgrade, and uninstall plug-ins, and manage plug-ins in a centralized manner. |
|
|
Viewing plug-in details |
View the plug-in details, including the plug-in introduction and component list. |
|
|
Plug-ins installed by default |
When you create a resource pool, certain plug-ins are installed by default. |
|
|
Installing the plug-in manually |
You can manually install a plug-in in a resource pool. |
Method 1: Install the plug-in when you create a standard dedicated resource pool. For details, see Creating a Standard Dedicated Resource Pool. Method 2: Install the plug-in on the Plug-in Square. For details, see Searching for a Plug-in on the Plug-in Square. Method 3:
|
|
Editing a plug-in |
Edit plug-in parameters. |
|
|
Upgrading a plug-in |
Upgrade the plug-in to the latest version. |
|
|
Uninstalling a plug-in |
Uninstall a plug-in from the resource pool. This operation cannot be undone. |
|

FAQ
- If a mandatory plug-in is unavailable, or is being installed or deleted for a long time, contact ModelArts technical support.
- If a plug-in that can be installed or uninstalled is unavailable or is being installed or deleted for a long time, you can uninstall the plug-in and reinstall it. If the fault persists, contact ModelArts technical support.
Feedback
Was this page helpful?
Provide feedbackThank you very much for your feedback. We will continue working to improve the documentation.See the reply and handling status in My Cloud VOC.
For any further questions, feel free to contact us through the chatbot.
Chatbot


