
Esta página ainda não está disponível no idioma selecionado. Estamos trabalhando para adicionar mais opções de idiomas. Agradecemos sua compreensão.
- What's New
- Function Overview
-
Product Bulletin
- Vulnerability Notice
-
Product Notices
- [Product Discontinuation Notice] RDS for PostgreSQL 12 Will Be Discontinued on May 1, 2025, 00:00:00 GMT+08:00
- [Offline Notice] RDS for PostgreSQL 10 and 11 Will Go Offline on November 1, 2024, 00:00:00 GMT+08:00
- [Product Discontinuation Notice] RDS for MySQL 5.6 Will Be Discontinued on July 1, 2024, 00:00:00 GMT+08:00
- [Product Discontinuation Notice] RDS for PostgreSQL 10 and 11 Will Be Discontinued on July 1, 2024, 00:00:00 GMT+08:00
- [Offline Notice] RDS for PostgreSQL 9.5 and 9.6 Will Go Offline on July 1, 2024, 00:00:00 GMT+08:00
- [Notice] OBT for Memory Acceleration of RDS for MySQL Starts from May 28, 2024
- Product Release Notes
- Service Overview
- Billing
-
Getting Started
- Getting Started with RDS for MySQL
- Getting Started with RDS for MariaDB
- Getting Started with RDS for PostgreSQL
- Getting Started with RDS for SQL Server
- Kernels
-
User Guide
-
Working with RDS for MySQL
- Using IAM to Grant Access to RDS
- Buying an RDS for MySQL DB Instance
- Instance Connection
- Database Usage
- Database Migration
- Version Upgrade
- Instance Management
-
Instance Modifications
- Changing a DB Instance Name
- Changing a DB Instance Description
- Changing the Replication Mode
- Changing the Failover Priority
- Changing Read/Write Permissions
- Enabling or Disabling Event Scheduler
- Changing a DB Instance Class
- Changing a Storage Type
- Scaling Up Storage Space
- Configuring Storage Autoscaling
- Changing the Maintenance Window
- Changing a DB Instance Type from Single to Primary/Standby
- Promoting a Read Replica to Primary
- Manually Switching Between Primary and Standby DB Instances
- Changing the AZ of a Standby DB Instance
- Updating the OS of a DB Instance
- Data Backups
- Data Restorations
- Read Replicas
-
Database Proxy (Read/Write Splitting)
- Introduction to RDS for MySQL Database Proxy
- Constraints on Database Proxy
- Using RDS for MySQL Database Proxies for Read/Write Splitting
-
Database Proxy Configurations
- Configuring Transaction Splitting
- Configuring Connection Pools
- Modifying Read/Write Splitting Parameters
- Configuring the Delay Threshold and Routing Policy
- Enabling or Disabling Access Control
- Changing the Read/Write Splitting Address
- Applying for and Changing a Private Domain Name for a Database Proxy
- Changing the Read/Write Splitting Port
- Changing the Number of Proxy Nodes
- Changing the Instance Class of a DB Proxy Instance
- Configuring Multi-Statement Processing Modes
- Changing a Proxy from Pay-per-Use to Yearly/Monthly
- Database Proxy Lifecycle
- Database Proxy Kernel Versions
- Best Practices for Database Proxy
- Problem Diagnosis and SQL Analysis
-
Security and Encryption
- Database Account Security
- Resetting the Administrator Password to Restore Root Access
- Changing a Security Group
- Performing a Server-Side Encryption
- Configuring an SSL Connection
- Configuring the TDE Function
- Configuring a Password Expiration Policy
- Unbinding an EIP
- Using the Database of the Latest Version
- Using DBSS (Recommended)
- Parameters
- Log Management
- Metrics and Alarms
- Billing Management
- Interconnection with CTS
- Task Center
- RDS for MySQL Tags
- RDS for MySQL Quotas
- MySQL Memory Acceleration
-
Working with RDS for MariaDB
- Suggestions on Using RDS for MariaDB
- Instance Connection
-
Performance Tuning
- What Is the Maximum Number of IOPS Supported by RDS?
- How Do I Improve the Query Speed of My RDS Database?
- Identifying Why CPU Usage of RDS for MariaDB Instances Is High and Providing Solutions
- RDS for MariaDB Memory Usage Too High
- What Should I Do If an RDS DB Instance Is Abnormal Due to Full Storage Space?
- Troubleshooting Slow SQL Issues for RDS for MariaDB Instances
- Resolving Insufficient Storage Issues for RDS for MariaDB Instances
- Permissions Management
- Instance Lifecycle
-
Instance Modifications
- Upgrading a Minor Version
- Changing a DB Instance Name
- Changing a DB Instance Description
- Changing the Replication Mode
- Changing the Failover Priority
- Changing a DB Instance Class
- Scaling Up Storage Space
- Storage Autoscaling
- Manually Switching Between Primary and Standby DB Instances
- Changing the Maintenance Window
- Read Replicas
- Data Backups
- Data Restorations
-
Parameter Templates
- Creating a Parameter Template
- Modifying RDS for MariaDB Instance Parameters
- Exporting a Parameter Template
- Importing a Parameter Template
- Comparing Parameter Templates
- Viewing Parameter Change History
- Replicating a Parameter Template
- Resetting a Parameter Template
- Applying a Parameter Template
- Viewing Application Records of a Parameter Template
- Modifying a Parameter Template Description
- Deleting a Parameter Template
- Connection Management
- Database Management
- Account Management (Non-Administrator)
- Account and Network Security
- Metrics and Alarms
- Interconnection with CTS
- Log Management
-
DBA Assistant
- Function Overview
- Viewing the Overall Status of a DB Instance
- Managing Real-Time Sessions
- Viewing Performance Metrics
- Subscribing to Intelligent O&M
- Viewing Storage Usage
- Viewing Table Diagnosis Results
- Setting a Diagnosis Threshold
- Viewing Top Databases and Tables by Physical File Size
- Viewing Slow Query Logs
- Concurrency Control
- Auto Flow Control
- Managing Diagnosis Reports
- Task Center
- Managing Tags
- Managing Quotas
-
Working with RDS for PostgreSQL
- Permissions Management
- Buying an RDS for PostgreSQL DB Instance
-
Instance Connection
- Overview
- Connecting to an RDS for PostgreSQL Instance Through DAS (Recommended)
- Connecting to an RDS for PostgreSQL Instance Through the psql CLI Client
- Connecting to an RDS for PostgreSQL Instance Using pgAdmin
- Connecting to an RDS for PostgreSQL Instance Through JDBC
- Connecting to an RDS for PostgreSQL Instance Using Python
- Connection Management
- Database Usage
- Database Migration
- Version Upgrade
- Instance Management
-
Instance Modifications
- Changing a DB Instance Name
- Changing a DB Instance Description
- Changing the Replication Mode
- Changing the Failover Priority
- Changing a DB Instance Class
- Changing the Storage Type
- Scaling Storage Space
- Storage Autoscaling
- Changing the Maintenance Window
- Changing a DB Instance Type from Single to Primary/Standby
- Manually Switching Between Primary and Standby DB Instances
- Changing the AZ of a Standby DB Instance
- Updating the OS of a DB Instance
- Data Backups
- Data Restorations
- Read Replicas
- DR Management
- Extension Management
-
Problem Diagnosis and SQL Analysis
- Function Overview
- Performance Monitoring
- Problem Diagnosis
- SQL Analysis
-
Common Performance Problems
- Troubleshooting High CPU Usage
- Troubleshooting High Memory Usage
- Troubleshooting Database Age Increase Problem
- Troubleshooting High Storage Space Usage
- Troubleshooting Abnormal Connections and Active Connections
- Troubleshooting Long-Running Transactions
- Troubleshooting Inactive Logical Replication Slots
- Troubleshooting High Oldest Replication Slot Lag or Replication Lag
- Troubleshooting SQL Statements That Have Been Executed for 3s or 5s
- Security and Encryption
-
Parameters
- Modifying Parameters of an RDS for PostgreSQL Instance
-
Managing Parameter Templates
- Creating a Parameter Template
- Applying a Parameter Template
- Resetting a Parameter Template
- Replicating a Parameter Template
- Comparing Parameter Templates
- Importing a Parameter Template
- Exporting a Parameter Template
- Modifying a Parameter Template Description
- Deleting a Parameter Template
- Viewing Parameter Change History
- Viewing Application Records of a Parameter Template
- Suggestions on RDS for PostgreSQL Parameter Tuning
- Log Management
- Metrics and Alarms
- Billing Management
- Interconnection with CTS
- Task Center
- RDS for PostgreSQL Tags
- RDS for PostgreSQL Quotas
- RDS for PostgreSQL Enhanced Edition
-
Working with RDS for SQL Server
- Suggestions on Using RDS for SQL Server
- Instance Connection
- Database Migration
- Performance Tuning
- Instance Lifecycle
-
Instance Modifications
- Changing a DB Instance Name
- Changing a DB Instance Description
- Changing the Failover Priority
- Cloning a DB Instance
- Changing a DB Instance Class
- Scaling Up Storage Space
- Configuring Autoscaling
- Changing the Maintenance Window
- Changing a DB Instance Type from Single to Primary/Standby
- Manually Switching Between Primary and Standby DB Instances
- Updating the DB Engine and OS of a DB Instance
- Read Replicas
- Data Backups
- Data Restorations
-
Parameters
- Creating a Parameter Template
- Modifying RDS for SQL Server Instance Parameters
- Exporting a Parameter Template
- Comparing Parameter Templates
- Viewing Parameter Change History
- Replicating a Parameter Template
- Resetting a Parameter Template
- Applying a Parameter Template
- Viewing Application Records of a Parameter Template
- Modifying a Parameter Template Description
- Deleting a Parameter Template
- Connection Management
- Accounts (Non-Administrator)
- Databases
- Security and Encryption
- Distributed Transactions
- SQL Server Integration Services (SSIS)
- Metrics and Alarms
- Interconnection with CTS
- Log Management
- DBA Assistant
- Publications and Subscriptions
- Task Center
- Billing Management
- Enabling or Disabling FileStream
- CLR Integration
- Default Language Setting for RDS for SQL Server
-
Usage of Stored Procedures
- Creating a Database Account
- Granting SSIS Permissions to a Domain Account
- Deploying an SSIS Project
- Changing Custom Database Names
- Viewing Error Logs
- Tracing Flags
- Capturing Change Data
- Removing a Custom Database from an Availability Group
- Replicating Databases
- Granting Database Permissions to Subaccounts
- Deleting Custom Databases
- Updating Database Statistics
- Cycling SQL Server Agent Error Logs
- Cycling SQL Server Error Logs
- Creating Alerts
- Setting Up Notifications for Alert
- Creating Operators for Alerts and Jobs
- Updating Alert Settings
- Updating Alert Notification Methods
- Updating Information About Operators for Alerts and Jobs
- Removing Alerts
- Removing SQL Server Agent Notification Definitions for Specific Alerts and Operators
- Removing Operators
- Shrinking Databases
- Changing the Permission to View All Databases
- Granting Permissions of Database-Level db_owner Role
- RDS for SQL Server Tags
- RDS for SQL Server Quotas
-
Working with RDS for MySQL
-
Best Practices
- Overview
-
RDS for MySQL
- Migrating Data from Self-Managed MySQL Databases to RDS for MySQL
- Configuring Remote Single-Active DR for an RDS for MySQL Instance Using DRS
- Migrating MySQL Databases from Other Clouds to RDS for MySQL
- Using RDS for MySQL to Set Up WordPress
- Using RDS for MySQL to Set Up Discuz!
- Description of innodb_flush_log_at_trx_commit and sync_binlog
- How Do I Improve the Query Speed of My RDS for MySQL Instance?
- Handling RDS for MySQL Long Transactions
- Security Best Practices
-
RDS for PostgreSQL
-
Creating a Cross-Region DR Relationship for an RDS for PostgreSQL Instance
- Overview
- Resource Planning
- Operation Process
- Preparing an RDS for PostgreSQL Instance in the Production Center
- Preparing an RDS for PostgreSQL Instance in the DR Center
- Configuring Cross-Region Network Connectivity
- Creating a DR Relationship
- Promoting a DR Instance to Primary
- Removing a DR Relationship
- FAQs
- RDS for PostgreSQL Publications and Subscriptions
- User-Defined Data Type Conversion
- Using Client Drivers to Implement Failover and Read/Write Splitting
- Using PoWA
- Best Practices for Using pg_dump
- Best Practices for Using PgBouncer
- Security Best Practices
-
Creating a Cross-Region DR Relationship for an RDS for PostgreSQL Instance
-
RDS for SQL Server
- Restoring Data from Backup Files to RDS for SQL Server DB Instances
- Migrating Data from a Self-Managed SQL Server Database on an ECS to an RDS for SQL Server DB Instance
- Modifying Parameters of RDS for SQL Server Instances
- Supporting DMVs
- Using the Import and Export Function to Migrate Data from a Local Database to an RDS for SQL Server DB Instance
- Creating a Subaccount of rdsuser
- Creating tempdb Files
- Microsoft SQL Server Publication and Subscription
- Installing a C# CLR Assembly in RDS for SQL Server
- Creating a Linked Server for an RDS for SQL Server DB Instance
- Deploying SQL Server Reporting Services (SSRS) on RDS for SQL Server
- Shrinking an RDS for SQL Server Database
- Using DAS to Create and Configure Agent Job and DBLink on the Master and Slave Databases for RDS for SQL Server Instances
- Creating a Job for Scheduled Instance Maintenance
- Using Extended Events
- Security Best Practices
- Performance White Paper
-
API Reference
- Before You Start
- API Overview
- Calling APIs
-
API v3.1 (Recommended)
- Applying a Parameter Template
- Modifying Parameters of a Specified Instance
- Restoring Data to an Existing DB Instance
- Restoring Tables to a Specified Point in Time (RDS for MySQL)
- Querying Database Error Logs (MySQL)
- Querying Database Slow Logs (MySQL)
- Deleting a Database (RDS for SQL Server)
- Shrinking Database Logs
-
API v3 (Recommended)
- Querying Version Information About APIs
- Querying Version Information About a DB Engine
- Querying Database Specifications
- Querying the Storage Type of a Database
- Querying Storage Usage of a DB Instance
-
DB Instance Management
- Creating a DB Instance
- Creating a DB Instance (API v5)
- Changing the Billing Mode from Pay-per-Use to Yearly/Monthly
- Stopping an Instance
- Starting an Instance
- Changing a DB Instance Name
- Changing the Description of a DB Instance
- Applying for a Private Domain Name
- Modifying a Private Domain Name
- Querying the Domain Name of a DB Instance
- Querying the IPv6 Domain Name of a DB Instance
- Obtaining the Replication Status of a DB Instance
- Querying Available Instance Classes for a DB Instance
- Changing DB Instance Specifications
- Scaling Up Storage Space of a DB Instance
- Configuring an Autoscaling Policy
- Querying an Autoscaling Policy
- Changing a Single DB Instance to Primary/Standby DB Instances
- Rebooting a DB Instance
- Deleting a DB Instance
- Querying DB Instances
- Binding and Unbinding an EIP
- Changing the Failover Priority
- Manually Switching Primary/Standby DB Instances
- Changing the Data Replication Mode of Primary/Standby DB Instances
- Changing Read/Write Permissions
- Migrating a Standby DB Instance
- Configuring the Maintenance Window
- Upgrading the Minor Version of a DB Instance
- Configuring a Monitoring by Seconds Policy
- Querying a Monitoring by Seconds Policy
- Enabling TDE for a DB Instance (RDS for SQL Server)
- Querying TDE Status of a DB Instance (RDS for SQL Server)
- Unlocking a DB Instance from the Read-Only State
- DR Instances
- Database Security
-
Backup and Restoration
- Setting an Automated Backup Policy
- Setting a Cross-Region Backup Policy
- Obtaining an Automated Backup Policy
- Querying Information About a Cross-Region Backup Policy
- Creating a Manual Backup
- Obtaining Backups
- Querying Cross-Region Backups
- Querying DB Instances for Which Cross-Region Backups Are Created
- Obtaining the Link for Downloading a Backup File
- Deleting a Manual Backup
- Querying the Restoration Time Range
- Querying the Restoration Time Range of a Cross-Region Backup
- Restoring Data to a New DB Instance
- Stopping a Backup (RDS for PostgreSQL)
- Checking Whether Fast Restoration Can Be Used for Restoring Databases or Tables (RDS for MySQL)
- Querying Tables That Can Be Restored to a Specified Point in Time (RDS for PostgreSQL)
- Querying Databases That Can Be Restored to a Specified Point in Time
- Restoring Tables to a Specified Point in Time (RDS for PostgreSQL)
- Restoring Databases to a Specified Point in Time
-
Upgrading a Major Version
- Querying the Target Version to Which a DB Instance Can Be Upgraded (RDS for PostgreSQL)
- Performing a Major Version Upgrade Pre-Check for a DB Instance (RDS for PostgreSQL)
- Querying the Major Version Check Status or Upgrade Status of a DB Instance (RDS for PostgreSQL)
- Querying the Major Version Upgrade Check History of a DB Instance (RDS for PostgreSQL)
- Upgrading a Major Version of a DB Instance (RDS for PostgreSQL)
- Querying the Major Version Upgrade History of a DB Instance (RDS for PostgreSQL)
-
Log Information Queries
- Showing Original Logs
- Querying Slow Query Log Files (SQL Server)
- Querying Extended Logs (RDS for SQL Server)
- Obtaining Links for Downloading Extended Logs (RDS for SQL Server)
- Obtaining Slow Query Log Statistics (RDS for MySQL)
- Obtaining Links for Downloading Slow Query Logs
- Obtaining Links for Downloading Error Logs (RDS for PostgreSQL)
- Setting SQL Audit
- Querying the Policy for SQL Audit Logs
- Obtaining Audit Logs
- Obtaining the Links for Downloading Audit Logs
- Setting the Local Retention Period of Binlogs
- Obtaining the Local Retention Period of Binlogs
- Instance Diagnosis
-
SQL Statement Concurrency Control (RDS for PostgreSQL)
- Adding a SQL Statement Concurrency Control Rule for a Database
- Deleting a SQL Statement Concurrency Control Rule
- Modifying a SQL Statement Concurrency Control Rule
- Querying SQL Statement Concurrency Control Rules
- Enabling or Disabling a SQL Statement Concurrency Control Rule or Disabling All SQL Statement Concurrency Control Rules
- Database Proxy (RDS for MySQL)
-
Database and Account Management (MySQL)
- Precautions
- Creating a Database
- Querying Details About a Database (Discarded)
- Querying Databases
- Querying Authorized Databases of a Specified User
- Modifying the Database Remarks of a Specified DB Instance
- Deleting a Database
- Creating a Database Account
- Querying Database Users of a DB Instance (Discarded)
- Querying Database Users
- Querying Authorized Users of a Specified Database
- Modifying Remarks of a Database Account
- Deleting a Database Account
- Configuring a Password for a Database Account
- Authorizing a Database Account
- Revoking Permissions of a Database Account
- Resetting the Password for User root
-
Database and Account Management (PostgreSQL)
- Creating a Database
- Creating a Database Account
- Creating a Database Schema
- Granting Read or Write Permissions to a Database Account
- Resetting a Password for a Database Account
- Querying Databases
- Querying Database Users
- Querying Database Schemas
- Configuring Account Permissions
- Changing the Database Owner
- Granting a Role to a User
- Revoking a Role from a User
- Querying Roles
- Querying pg_hba.conf of a DB Instance
- Modifying or Adding One or More Records in pg_hba.conf
- Overwriting pg_hba.conf
- Deleting One or More Records from pg_hba.conf
- Querying the pg_hba.conf Change History of a DB Instance
-
Database and Account Management (Microsoft SQL Server)
- Querying the Available SQL Server Character Set
- Creating a Database
- Querying Databases
- Creating a Database Account
- Configuring a Password for a Database Account
- Querying Database Users
- Querying Authorized Users of a Specified Database
- Deleting a Database Account
- Authorizing a Database Account
- Revoking Permissions of a Database Account
- Adding Host Addresses for MSDTC
- Querying MSDTC Hosts
-
Parameter Management
- Obtaining a Parameter Template List
- Creating a Parameter Template
- Modifying a Parameter Template
- Replicating a Parameter Template
- Querying Change History of Instance Parameters
- Obtaining the Parameter Template of a Specified DB Instance
- Obtaining Parameters in a Specified Parameter Template
- Deleting a Parameter Template
- Extension Management (RDS for PostgreSQL)
- Configuring Replication Delay for a Read Replica (RDS for PostgreSQL)
- Recycling a DB Instance
- Tag Management
- Quota Management
- Obtaining Task Information
-
Historical APIs
-
API v3
- Querying API Versions
- Upgrading a Minor Version
- Applying a Parameter Template
- Modifying Parameters of a Specified DB Instance
- Restoring Data to an Existing DB Instance
- Restoring Tables to a Specified Point in Time (RDS for MySQL)
- Querying Database Error Logs
- Querying Database Slow Logs (RDS for MySQL)
- Deleting a Database (RDS for SQL Server)
- Shrinking Database Logs (Not Recommended)
- Database Proxy (PostgreSQL)
-
API v3
- Permissions and Supported Actions
- Appendix
- Change History
- SDK Reference
-
FAQs
-
Product Consulting
- What Should I Pay Attention to When Using RDS?
- Will My RDS DB Instances Be Affected by Other User Instances?
- Will Different RDS DB Instances Share CPU and Memory Resources?
- How Long Does It Take to Create an RDS DB Instance?
- What Can I Do About Slow Responses of Websites When They Use RDS?
- What Is the Time Delay for Primary/Standby Replication?
- Can Multiple ECSs Connect to the Same RDS DB Instance?
- Will Backups Be Encrypted After Disk Encryption Is Enabled for My RDS Instance?
- What Is the Availability of RDS DB Instances?
- Does RDS Support Cross-AZ High Availability?
- Can RDS Primary/Standby DB Instances Be Changed to Single DB Instances?
- What Are the Differences Between RDS for MySQL and TaurusDB?
- Does RDS Support CloudPond?
- What Encryption Functions Does RDS for MySQL Support?
- Is RDS for MySQL Compatible with MariaDB?
- Does RDS for MySQL Support TokuDB?
- What Are the Restrictions on RDS for MySQL Instances After GTID Is Enabled?
- What Is the Maximum Size Allowed for a Single Table in RDS for MySQL Instances?
- What Are the Differences Between RDS and Other Database Solutions?
- Can I Use a Template to Create DB Instances?
- What Can I Do If I Can't Find My RDS Resources?
- Resource Freezing, Release, Stopping, Deletion, and Unsubscription
-
Resource and Disk Management
- Which Types of Logs and Files Occupy RDS Storage Space?
- Does RDS Support Storage Scale-Down of DB Instances?
- Which Items Occupy the Storage Space of My RDS DB Instances?
- How Much Storage Space Is Required for DDL Operations?
- What Are the Differences Between the Storage Space and Backup Space of an RDS for PostgreSQL Primary/Standby Instance?
- How Do I Prevent a Sharp Increase in Data Disk Usage If I Want to Push a Large Amount of Data to My RDS for SQL Server Instance in a Short Period of Time?
-
Database Connection
- What Should I Do If I Can't Connect to My RDS DB Instance?
- What Do I Do If the Number of RDS Database Connections Reaches the Upper Limit?
- What Is the Maximum Number of Connections to an RDS DB Instance?
- What Should I Do If an ECS Cannot Connect to an RDS DB Instance Through a Private Network?
- What Should I Do If My RDS Instance Fails to Be Connected Due to Database Client Problems?
- What Should I Do If an RDS Database Problem Causes a Connection Failure?
- Do Applications Need to Support Reconnecting to an RDS DB Instance Automatically?
- Why Can't I Ping My EIP After It Is Bound to an RDS DB Instance?
- Can I Access an RDS DB Instance Over an Intranet Connection Across Regions?
- Why Did the New Password Not Take Effect After I Reset the Administrator Password of My RDS Instance?
- Can I Access Standby RDS DB Instances?
- How Do I Check the Connections to an RDS for MySQL Instance?
- Will I Be Logged Out If the Connection to RDS for SQL Server Instances Times Out?
- What Should I Do If an RDS for SQL Server DB Instance Failed to Be Connected?
- Can an External Server Access the RDS Database?
- Will My Access Be Restricted by Bandwidth When I Connect to My Instance from an ECS over a Private Network?
- How Can I Install SQL Server Management Studio?
-
Database Migration
- What Types of DB Engines Does RDS Support for Importing Data?
- Why Do I Need to Use the mysqldump or pg_dump Tools for Migration?
- What Should I Do When a Large Number of Binlog Files Cause Storage Space Insufficiency During an RDS MySQL Instance Migration?
- Precautions for Exporting Large Tables Through mysqldump
- Commands for Exporting Data Through mysqldump
-
Database Permission
- Why Does the Root User of My RDS Instance Not Have the Super Permissions?
- What Are the Differences Between RDS ManageAccess and DAS Permissions?
- How Do I View Authorized Databases After a Local Client Is Connected to an RDS DB Instance?
- Can Multiple Users Log In to an RDS Instance Through DAS at the Same Time? Will the Accounts Be Locked If I Enter Wrong Passwords Several Times in a Row?
- Does RDS for MySQL Support Multiple Accounts?
- Why Did I Fail to Create an Object on the postgres Database as a Common User?
- What Should I Do If a Role Failed to Be Deleted from an RDS for PostgreSQL Instance?
- Why Did My RDS for PostgreSQL Migration Fail?
- How Do I Grant the REPLICATION Permission to an RDS for PostgreSQL Database User?
- Why Is An Error Reported When I Attempt to Change a Table Owner of My RDS for PostgreSQL Instance?
- How Are the Login Name Permissions of RDS for SQL Server 2017 Enterprise Edition Primary/Standby DB Instances Synchronized to Its Read Replicas?
- After a Primary Instance Account Is Deleted and Recreated on RDS for SQL Server, Will the Permissions Be Automatically Synchronized?
-
Database Storage
- What Types of Storage Does RDS Use?
- How Do I View the Storage Usage of My RDS Instance?
- What Storage Engines Does RDS for MySQL Support?
- Does RDS for MySQL Support Stored Procedures and Functions?
- What Should I Do If My Data Exceeds the Available Storage of an RDS for MySQL Instance?
- Where Are the Database Files Created on My RDS for SQL Server Instance Stored?
-
Database Usage
- How Do I Use DAS to Query SQL Statements?
- How Do I View Session IDs and Login and Logout Time of an RDS Database?
- How Do I Create a Scheduled Task for My RDS for MySQL Instance?
- What Should I Do If the root Account of My RDS for MySQL Instance Was Deleted by Mistake?
- What Should I Do If Garbled Characters Are Displayed After SQL Query Results Are Exported to an Excel File for My RDS Instance?
- Does the OPTIMIZE TABLE Operation Lock Tables on an RDS DB Instance?
- Does RDS for MySQL 8.0 Support Full-Text Search?
- How Do I Use the mysqlbinlog Tool?
- Why Is an Error Reported When I Attempt to Delete a Database from My RDS for SQL Server Primary/Standby DB Instance?
-
Backup and Restoration
- How Do I View My Backup Storage Usage?
- How Is RDS Backup Data Billed?
- Why Has Automated Backup of My RDS Instance Failed?
- Why Is Data Lost or Deleted from My RDS Instance?
- How Long Does RDS Store Backup Data For?
- How Do I Clear RDS Backup Space?
- Can My RDS Instance Still Be Used in the Backup Window?
- How Can I Back Up an RDS Database to an ECS?
- Can I Dump RDS Backup Files to My OBS Bucket?
- Does RDS for MySQL Support Table-Level Backup to a Specified OBS Bucket?
- Can I Delete the RDS for MySQL Backup Policy?
- Does RDS for PostgreSQL Support Table PITR?
- How Are Unsynchronized Backups Generated for RDS for SQL Server DB Instances?
- Where Are RDS Backup Files Stored?
-
Read Replicas and Read/Write Splitting
- Why Can't I Purchase Read Replicas on the RDS Console?
- Can I Change the Replication Mode Between RDS Primary Instances and Read Replicas?
- Does RDS Support Read/Write Splitting?
- Does RDS for MySQL Support Sharding and Read/Write Splitting?
- Can I Request Multiple Read/Write Splitting Addresses for My RDS for MySQL Instance?
- Database Monitoring
-
Capacity Expansion and Specification Change
- Are My RDS DB Instances Still Available During Storage Scale-up and Instance Class Change?
- Why Does My RDS Instance Become Faulty After Its Database Port Is Changed?
- Can I Change the VPC or Subnet that My RDS DB Instance Belongs To?
- How Do I Distinguish Between General-Purpose and Dedicated RDS for MySQL Instances Using Cloud SSDs?
-
Database Parameter Modification
- Can I Use SQL Commands to Modify Global Parameters of My RDS Instance?
- How Do I Change the Time Zone of an RDS DB Instance?
- How Do I Set the Encoding Format of the RDS for MySQL 8.0 Character Set?
- How Do I Set Case Sensitivity for RDS for MySQL Table Names?
- How Do I Enable Query Caching for My RDS for MySQL Instance?
- How Do I Configure a Password Expiration Policy for My RDS for MySQL Instance?
- How Do I Change the Transaction Isolation Level of an RDS for MySQL Instance?
- How Do I Ensure that the Character Set of an RDS MySQL Database Is Correct?
- How Do I Use the utf8mb4 Character Set to Store Emojis in an RDS for MySQL DB Instance?
- What Inappropriate Parameter Settings Will Cause Unavailability of My RDS for PostgreSQL Instance?
- How Do I Set the Upper Limit for the Storage Space Occupied by Temporary Files of My RDS for PostgreSQL Instance?
- How Do I Configure the test_decoding Extension for My RDS for PostgreSQL Instance?
- Where Should I Store NDF Files for RDS for SQL Server?
- How Do I Modify the Collation of an RDS for SQL Server Character Set?
- Log Management
-
Network Security
- How Can Data Security Be Ensured During Transmission When I Access an RDS Instance Through an EIP?
- How Can I Prevent Untrusted Source IP Addresses from Accessing RDS?
- How Do I Import the SSL Certificate of an RDS Instance to a Windows or Linux Server?
- How Do I Check the Validity Period of the SSL Certificate of My RDS for MySQL Instance?
- What Are the Possible Causes for Data Corruption of an RDS Instance?
- After My RDS DB Instance Is Deleted, Why Can't the Associated Security Group Be Deleted Immediately?
- Version Upgrade
- Developer-Related APIs and SDKs for RDS
-
Product Consulting
-
Troubleshooting
-
RDS for MySQL
-
Backup and Restoration Issues
- No SUPER Permissions When Restoring an RDS for MySQL Full Backup to a Local MySQL Database
- Backup Failures Due to DDL Operations
- Restoring an On-Premises or Huawei Cloud Backup File to an RDS DB Instance
- RDS for MySQL Backup Job Failure
- Manual Backups Taking More Time Than Automated Full Backups
- Incorrect Login Password During Data Restoration from a Local Backup File
- Automated Incremental Backup Failed Due to Full Storage
- RDS Point-in-Time Restoration Task Failure
- SQL Statements Such as SET @@SESSION.SQL_LOG_BIN Displayed After You Run mysqldump
- Insufficient Permissions During Data Export Using mysqldump
- Key Considered Invalid or Deleted During Table-Level PITR
-
Primary/Standby Replication Issues
- How Primary/Standby Replication Works
- Automatic Recovery of Extended Primary/Standby Replication Delay
- Primary/Standby Replication Delay Scenarios and Solutions
- Abnormal Replication Between Primary and Standby RDS DB Instances
- Primary/Standby Replication Delay Increases Sharply and Then Decreases
- Insufficient Permissions Reported for Canal
- Canal Fails to Parse Binlogs
- RDS for MySQL Binlog Issues
- Parameter-related Issues
-
Performance Issues
- High CPU Usage
- Out of Memory (OOM) Errors
- Insufficient Disk Bandwidth
- Slow SQL Statements Due to Improper Composite Index Settings
- DB Instance Becoming Read-Only Due to Insufficient Storage
- High Storage Usage Due to Uncleared Old Binlogs
- Slow Response Due to Deadlocks
- Read Replica Uses Far More Storage Than the Primary Instance
- CPU Usage Increase
- Slow SQL Execution Due to Hot and Cold Data Problems
- High Table Fragmentation Rate
- Full Storage Caused by Complex Queries
- Why Is My SQL Query So Slow?
- Instance Class Change or Minor Version Upgrade Failure Caused by Long Transactions
- Native Error 1461 Reported by an RDS for MySQL DB Instance
- System Inaccessible After Field Addition to an RDS for MySQL Database Table
- Storage Filled Up by Undo Logs Due to Long Transactions
- Locating Long Transactions
- Sharp Increase in the Commit Time of Some SQL Statements
- Oversized ibdata1
-
SQL Issues
- Double Quotation Marks Cannot Be Identified During SQL Statement Execution
- Error 1366 Reported When Data Containing Emojis Is Updated
- Failed to Change the varchar Length Due to the Index Length Limit
- Invalid TIMESTAMP Default Value during Table Creation
- AUTO_INCREMENT Not Displayed in the Table Structure
- Slow Stored Procedure Execution Due to Inconsistent Collations
- ERROR [1412] Reported for a DB Instance
- Error Message "Too many keys specified" Displayed When a Secondary Index Is Created
- Failed to Delete a Table with a Foreign Key
- DISTINCT and GROUP BY Optimization
- Character Set and Collation Settings
- An Error Message Is Displayed When a User Is Created for a DB Instance
- Slow SQL Queries After a Large Amount of Data Is Deleted from a Large Table
- Event Scheduler Not Taking Effect Immediately After Being Enabled
- Equivalent Comparison Failures with Floating-Point Numbers
- A Large Number of SELECT Requests Routed to The Primary Instance After Database Proxy Is Enabled
- RENAME USER Execution Failure
- ERROR[1451] Reported When a Table with Foreign Keys Cannot Be Deleted
- Solution to the Failure of Converting the Field Type
- "Row size too large" Reported When an RDS for MySQL Table Failed to Be Created
- ERROR [1412] Reported by an RDS for MySQL DB Instance
- Instance Reboot Failure or ERROR 1146: Table 'xxx' doesn't exist Reported During Table Operations
- Error Reported During Pagination Query
- Error Reported During User Creation
- Syntax Error Reported When GRANT Is Used to Grant All Privileges
- Error Reported During Table Creation for an RDS for MySQL 5.6 DB Instance
- Inconsistent Data Obtained on the Primary and Standby Nodes When a Query Is Performed Using an Auto-Increment Primary Key Value
- "Data too long for column" Displayed When Data Is Inserted into an RDS for MySQL Instance
-
Connection Issues
- "Access denied" Displayed During Database Connection
- Failed to Connect to a Database Using mariadb-connector in SSL Mode
- Error Message "connection established slowly"
- Login Failed After ssl_type of root Is Changed to ANY
- Error Reported During Login to a DB Instance Through DAS
- "Your password does not satisfy the current policy requirements" Displayed When Permissions Are Granted or Revoked on DAS
- SSL Connection Failed Due to Inconsistent TLS Versions
- Failed to Connect to a Database as root
- RDS for MySQL Client Automatically Disconnected from a DB Instance
- RDS for MySQL DB Instance Inaccessible
- Login Failed After the authentication_string Field Is Changed to Display the Password for RDS for MySQL
- MySQL-server Connection Failure After a Version Upgrade of RDS for MySQL
- Connection Exit Due to Improper Timeout Parameter Settings
- Database Connection Through Code (php/java/python) Failed After SSL Is Enabled
- There Is a Disconnection Every 45 Days Due to the istio-citadel Certificate System
- Error 1251 Reported During Login to a DB Instance on the Navicat Client After the Database Version Is Upgraded
-
Other Issues
- No Scanned Rows Recorded in Slow Query Logs
- Rows Recorded in the SQL Diagnosis Result Far Less Than the Scanned Rows Recorded in Slow Query Logs
- Millisecond-Level SQL Statements Recorded in Slow Query Logs
- Viewing Storage of RDS DB Instances
- "The table is full" Displayed in Error Logs
- Audit Log Upload Policy Description
- Auto-increment Field Values
- Starting Value and Increment of AUTO_INCREMENT
- AUTO_INCREMENT Value Exceeding the Maximum Value of This Field plus 1
- Auto-Increment Field Value Jump
- Changing the AUTO_INCREMENT Value of a Table
- Failed to Insert Data Because Values for the Auto-increment Primary Key Field Reach the Upper Limit
- The Impact of Creating an Empty Username
- Connection to a Primary/Standby DB Instance Suspended Using pt-osc
- Error Reported During Payment for a DB Instance
- Failed to Change a Database Name
- Error Reported When a DB Instance Is Purchased
-
Backup and Restoration Issues
-
RDS for PostgreSQL
- A Large Number of Schemas Whose Owner Is rdsadmin
- Index Name Containing a Schema Name During Index Creation
- Authentication Not Supported When a DB Instance Is Accessed Through an Application
- Error Reported When a Request Is Executed Through an Existing Connection
- Slow Instance Reboot Due to Too Many Inodes
- "password is easily cracked" Displayed When an RDS for PostgreSQL User Is Created
-
RDS for SQL Server
- Account Creation Failure for a SQL Server Database Migrated from Alibaba Cloud to Huawei Cloud
- Error Reported When a New Account Is Used to Log In to an RDS for SQL Server Instance
- Failed to Change the Instance Class of an RDS for SQL Server Instance or Perform a Primary/Standby Switchover
- How Do I Remove and Re-establish a Replication of My RDS for SQL Server Instance?
-
RDS for MySQL
- Videos
- Glossary
-
More Documents
-
User Guide (ME-Abu Dhabi Region)
- Introduction
- Getting Started with RDS for MySQL
- Getting Started with RDS for PostgreSQL
- Getting Started with RDS for SQL Server
-
Working with RDS for MySQL
- Data Migration
- Instance Management
- Instance Modifications
- Read Replicas
-
Backups and Restorations
- Working with Backups
- Configuring an Intra-Region Backup Policy
- Creating a Manual Backup
- Downloading a Backup File
- Downloading a Binlog Backup File
- Setting a Local Retention Period for MySQL Binlogs
- Restoring from Backup Files to RDS for MySQL
- Restoring a DB Instance to a Point in Time
- Restoring a Table to a Specified Point in Time
- Replicating a Backup
- Deleting a Manual Backup
-
Parameter Template Management
- Suggestions on Tuning MySQL Parameters
- Creating a Parameter Template
- Modifying Parameters
- Exporting a Parameter Template
- Comparing Parameter Templates
- Viewing Parameter Change History
- Replicating a Parameter Template
- Resetting a Parameter Template
- Applying a Parameter Template
- Viewing Application Records of a Parameter Template
- Modifying a Parameter Template Description
- Deleting a Parameter Template
- Connection Management
- Database Management
- Account Management (Non-Administrator)
- Database Account Security
- Data Security
- Metrics
- Log Management
- Task Center
- Managing Tags
-
Working with RDS for PostgreSQL
- Data Migration
- PostgreSQL Enhanced Edition
- Instance Management
- Instance Modifications
- Read Replicas
- Backups and Restorations
-
Parameter Template Management
- Creating a Parameter Template
- Modifying Parameters
- Exporting a Parameter Template
- Comparing Parameter Templates
- Viewing Parameter Change History
- Replicating a Parameter Template
- Resetting a Parameter Template
- Applying a Parameter Template
- Viewing Application Records of a Parameter Template
- Modifying a Parameter Template Description
- Deleting a Parameter Template
- Connection Management
- Database Account Security
- Data Security
- Metrics
- Log Management
- Task Center
- Plugin Management
- Managing Tags
-
Working with RDS for SQL Server
- Instance Management
- Instance Modifications
- Read Replicas
- Backups and Restorations
-
Parameter Template Management
- Creating a Parameter Template
- Modifying Parameters
- Exporting a Parameter Template
- Comparing Parameter Templates
- Viewing Parameter Change History
- Replicating a Parameter Template
- Resetting a Parameter Template
- Applying a Parameter Template
- Viewing Application Records of a Parameter Template
- Modifying a Parameter Template Description
- Deleting a Parameter Template
- Connection Management
- Data Security
- Metrics
- Log Management
- Task Center
- Usage of Stored Procedures
- Managing Tags
-
FAQs
-
Product Consulting
- What Precautions Should Be Taken When Using RDS?
- What Is the Availability of RDS DB Instances?
- Can I Use a Template to Create DB Instances?
- What Are the Differences Between RDS and Other Database Solutions?
- Will My RDS DB Instances Be Affected by Other Users' DB Instances?
- Does RDS Support Cross-AZ High Availability?
- Can RDS Primary/Standby DB Instances Be Changed to Single DB Instances?
- What Should I Do If Garbled Characters Are Displayed After SQL Query Results Are Exported to an Excel File?
- What Can I Do About Websites Responding Slower After Using RDS?
- How Does a Cloud Database Perform a Primary/Standby Switchover?
- Can Multiple ECSs Connect to the Same RDS DB Instance?
- Why an Error is Reported When I Attempt to Delete a Database from RDS SQL Server Primary/Standby DB Instances?
- Can Primary and Standby RDS DB Instances Be Deployed in the Same AZ?
-
Resource and Disk Management
- Which Types of Logs and Files Occupy RDS Storage Space?
- Which Items Occupy the Storage Space of My RDS DB Instances?
- What Overhead Does the Storage Space Have After I Applied for an RDS DB Instance?
- How Much Storage Space Is Required for DDL Operations?
- How Many DB Instances Can Run on RDS?
- How Many Databases Can Run on an RDS DB Instance?
-
Database Connection
- Can an External Server Access the RDS Database?
- How Do I Troubleshoot If the Number of RDS Database Connections Reaches the Upper Limit?
- What Is the Maximum Number of Connections to an RDS DB Instance?
- How Can I Create and Connect to an ECS?
- What Should I Do If an ECS Cannot Connect to an RDS DB Instance?
- What Should I Do If a Database Client Problem Causes a Connection Failure?
- What Should I Do If an RDS Database Problem Causes a Connection Failure?
- How Do My Applications Access an RDS DB Instance in a VPC?
- Do Applications Need to Support Reconnecting to the RDS DB Instance Automatically?
- How Can I Connect to a PostgreSQL Database Through JDBC?
- What Should I Do If an RDS for SQL Server DB Instance Failed to Be Connected?
- Can I Access an RDS DB Instance Over an Intranet Across Regions?
- Is an SSL Connection to a DB Instance Interrupted After a Primary/Standby Switchover or Failover Occurs?
- Does MySQL Support SSL Connections?
- Why Does the New Password Not Take Effect After I Reset the Administrator Password?
- Database Migration
- Database Permission
- Database Storage
- Client Installation
-
Backup and Restoration
- How Long Does RDS Store Backup Data?
- Can My Database Be Used in the Backup Window?
- How Can I Back Up RDS Databases to an ECS?
- Why Has My Automated Backup Failed?
- What Happens to Database Backups After an RDS DB Instance Is Deleted?
- Will My Backups Be Deleted If I Delete My Cloud Account?
- Why Is a Table or Data Missing from My Database?
- Database Monitoring
- Capacity Expansion and Specification Change
- Database Parameter Modification
- Log Management
-
Network Security
- What Security Protection Policies Does RDS Have?
- How Can I Ensure the Security of RDS DB Instances in a VPC?
- How Can Data Security Be Ensured During Transmission When I Access RDS Through an EIP?
- How Can I Prevent Untrusted Source IP Addresses from Accessing RDS?
- How Can I Import the Root Certificate to the Windows or Linux OS?
- How Can I Identify Data Corruption?
-
Product Consulting
-
API Reference (ME-Abu Dhabi Region)
- Before You Start
- API Overview
- Calling APIs
- Obtaining an API Version
-
API v3 (Recommended)
- Querying Version Information About a DB Engine
- Querying Database Specifications
- Querying the Storage Type of a Database
-
DB Instance Management
- Creating a DB Instance
- Changing DB Instance Specifications
- Scaling Up Storage Space of a DB Instance
- Changing a Single DB Instance to Primary/Standby DB Instances
- Rebooting a DB Instance
- Querying the Available SQL Server Character Set
- Deleting a DB Instance
- Querying Details About DB Instances
- Binding and Unbinding an EIP
- Resetting a Database Password
- Changing the Failover Priority
- Manually Switching Primary/Standby DB Instances
- Changing the Data Synchronize Model of Primary/Standby DB Instances
- Migrating a Standby DB Instance
- Configuring the Maintenance Window
- Database Security
-
Parameter Configuration
- Obtaining a Parameter Template List
- Creating a Parameter Template
- Modifying a Parameter Template
- Applying a Parameter Template
- Modifying Parameters of a Specified DB Instance
- Obtaining the Parameter Template of a Specified DB Instance
- Obtaining Parameters in a Specified Parameter Template
- Deleting a Parameter Template
-
Backup and Restoration
- Setting an Automated Backup Policy
- Obtaining an Automated Backup Policy
- Creating a Manual Backup
- Obtaining Details About Backups
- Obtaining the Link for Downloading a Backup File
- Deleting a Manual Backup
- Querying the Restoration Time Range
- Restoring Data to a New DB Instance
- Restoring Data to an Existing DB Instance
- Restoring Tables to a Specified Point in Time (MySQL)
- Log Information Queries
-
Database and Account Management (MySQL)
- Precautions
- Creating a Database
- Querying Details About Databases
- Querying Authorized Databases of a Specified User
- Deleting a Database
- Creating a Database Account
- Querying Details About Database Users
- Querying Authorized Users of a Specified Database
- Deleting a Database Account
- Configuring a Password for a Database Account
- Authorizing a Database Account
- Revoking Permissions of a Database Account
- Database and Account Management (Microsoft SQL Server)
- Appendix
-
User Guide (Paris Region)
- Introduction
- Getting Started with RDS for MySQL
- Getting Started with RDS for PostgreSQL
-
Working with RDS for MySQL
-
Instance Management
- Changing a DB Instance Name
- Changing the Failover Priority
- Changing a DB Instance Class
- Scaling Up Storage Space
- Rebooting a DB Instance
- Changing a DB Instance Type from Single to Primary/Standby
- Manually Switching Between Primary and Standby DB Instances
- Selecting Displayed Items
- Exporting DB Instance Information
- Creating a Same DB Instance
- Deleting a DB Instance or Read Replica
- Read Replicas
- Backups and Restorations
-
Parameter Template Management
- Suggestions on Tuning MySQL Parameters
- Creating a Parameter Template
- Modifying Parameters
- Exporting a Parameter Template
- Comparing Parameter Templates
- Viewing Parameter Change History
- Replicating a Parameter Template
- Resetting a Parameter Template
- Applying a Parameter Template
- Viewing Application Records of a Parameter Template
- Modifying a Parameter Template Description
- Deleting a Parameter Template
- Connection Management
- Data Migration
- Data Security
- Metrics and Alarms
- Log Management
- Task Center
-
Instance Management
-
Working with RDS for PostgreSQL
-
Instance Management
- Changing a DB Instance Name
- Changing the Failover Priority
- Changing a DB Instance Class
- Scaling Up Storage Space
- Rebooting a DB Instance
- Changing a DB Instance Type from Single to Primary/Standby
- Manually Switching Between Primary and Standby DB Instances
- Selecting Displayed Items
- Exporting DB Instance Information
- Creating a Same DB Instance
- Deleting a DB Instance or Read Replica
- Read Replicas
- Backups and Restorations
-
Parameter Template Management
- Creating a Parameter Template
- Modifying Parameters
- Exporting a Parameter Template
- Comparing Parameter Templates
- Viewing Parameter Change History
- Replicating a Parameter Template
- Resetting a Parameter Template
- Applying a Parameter Template
- Viewing Application Records of a Parameter Template
- Modifying a Parameter Template Description
- Deleting a Parameter Template
- Connection Management
- Data Migration
- Data Security
- Metrics and Alarms
- Log Management
- Task Center
- Plugin Management
-
Instance Management
-
FAQs
-
Product Consulting
- What Precautions Should Be Taken When Using RDS?
- What Is the Availability of RDS DB Instances?
- Can I Use a Template to Create DB Instances?
- What Are the Differences Between RDS and Other Database Solutions?
- Will My RDS DB Instances Be Affected by Other Users' DB Instances?
- Does RDS Support Cross-AZ High Availability?
- Can RDS Primary/Standby DB Instances Be Changed to Single DB Instances?
- What Should I Do If Garbled Characters Are Displayed After SQL Query Results Are Exported to an Excel File?
- What Can I Do About Websites Responding Slower After Using RDS?
- How Does a Cloud Database Perform a Primary/Standby Switchover?
- Can Multiple ECSs Connect to the Same RDS DB Instance?
- Can Primary and Standby RDS DB Instances Be Deployed in the Same AZ?
-
Resource and Disk Management
- Which Types of Logs and Files Occupy RDS Storage Space?
- Which Items Occupy the Storage Space of My RDS DB Instances?
- What Overhead Does the Storage Space Have After I Applied for an RDS DB Instance?
- How Much Storage Space Is Required for DDL Operations?
- How Many DB Instances Can Run on RDS?
- How Many Databases Can Run on an RDS DB Instance?
-
Database Connection
- Can an External Server Access the RDS Database?
- How Do I Troubleshoot If the Number of RDS Database Connections Reaches the Upper Limit?
- What Is the Maximum Number of Connections to an RDS DB Instance?
- How Can I Create and Connect to an ECS?
- What Should I Do If an ECS Cannot Connect to an RDS DB Instance?
- What Should I Do If a Database Client Problem Causes a Connection Failure?
- What Should I Do If an RDS Database Problem Causes a Connection Failure?
- How Do My Applications Access an RDS DB Instance in a VPC?
- Do Applications Need to Support Reconnecting to the RDS DB Instance Automatically?
- How Can I Connect to a PostgreSQL Database Through JDBC?
- Can I Access an RDS DB Instance Over an Intranet Across Regions?
- Is an SSL Connection to a DB Instance Interrupted After a Primary/Standby Switchover or Failover Occurs?
- Does MySQL Support SSL Connections?
- Why Does the New Password Not Take Effect After I Reset the Administrator Password?
- Database Migration
- Database Permission
- Database Storage
- Client Installation
-
Backup and Restoration
- How Long Does RDS Store Backup Data?
- Can My Database Be Used in the Backup Window?
- How Can I Back Up RDS Databases to an ECS?
- Why Has My Automated Backup Failed?
- What Happens to Database Backups After an RDS DB Instance Is Deleted?
- Will My Backups Be Deleted If I Delete My Cloud Account?
- Why Is a Table or Data Missing from My Database?
- Database Monitoring
- Capacity Expansion and Specification Change
- Database Parameter Modification
- Log Management
-
Network Security
- What Security Protection Policies Does RDS Have?
- How Can I Ensure the Security of RDS DB Instances in a VPC?
- How Can Data Security Be Ensured During Transmission When I Access RDS Through an EIP?
- How Can I Prevent Untrusted Source IP Addresses from Accessing RDS?
- How Can I Import the Root Certificate to the Windows or Linux OS?
- How Can I Identify the Validity Period of an SSL Root Certificate?
- How Can I Identify Data Corruption?
-
Product Consulting
-
API Reference (Paris Region)
- Before You Start
- API Overview
- Calling APIs
- Obtaining an API Version
-
API v3 (Recommended)
- Querying Version Information About a DB Engine
- Querying Database Specifications
- DB Instance Management
-
Parameter Configuration
- Obtaining a Parameter Template List
- Creating a Parameter Template
- Modifying a Parameter Template
- Applying a Parameter Template
- Modifying Parameters of a Specified DB Instance
- Obtaining the Parameter Template of a Specified DB Instance
- Obtaining Parameters in a Specified Parameter Template
- Deleting a Parameter Template
-
Backup and Restoration
- Setting an Automated Backup Policy
- Obtaining an Automated Backup Policy
- Creating a Manual Backup
- Obtaining Details About Backups
- Obtaining the Link for Downloading a Backup File
- Deleting a Manual Backup
- Querying the Restoration Time Range
- Restoring Data to a New DB Instance
- Restoring Data to an Existing or Original DB Instance
- Log Information Queries
- Tag Management
- Obtaining Task Information
- Appendix
-
User Guide (Kuala Lumpur Region)
- Introduction
- Getting Started with RDS for MySQL
- Getting Started with RDS for PostgreSQL
- Getting Started with RDS for SQL Server
-
Working with RDS for MySQL
- Data Migration
- Parameter Tuning
- Instance Lifecycle
-
Instance Modifications
- Upgrading a Major Version
- Changing a DB Instance Name
- Changing the Failover Priority
- Changing a DB Instance Class
- Scaling up Storage Space
- Changing the Maintenance Window
- Changing a DB Instance Type from Single to Primary/Standby
- Promoting a Read Replica Into a Single DB Instance
- Manually Switching Between Primary and Standby DB Instances
- Migrating a Standby DB Instance
- Read Replicas
-
Backups and Restorations
- Working with Backups
- Configuring an Automated Backup Policy
- Setting a Cross-Region Backup Policy
- Creating a Manual Backup
- Downloading a Backup File
- Downloading a Binlog Backup File
- Setting a Local Retention Period for MySQL Binlogs
- Restoring from Backup Files to DB Instances
- Restoring a DB Instance to a Point in Time
- Replicating a Backup
-
Parameter Template Management
- Creating a Parameter Template
- Modifying Parameters
- Exporting a Parameter Template
- Comparing Parameter Templates
- Viewing Parameter Change History
- Replicating a Parameter Template
- Resetting a Parameter Template
- Applying a Parameter Template
- Viewing Application Records of a Parameter Template
- Modifying a Parameter Template Description
- Deleting a Parameter Template
- Connection Management
- Database Management
- Account Management (Non-Administrator)
- Database Account Security
- Data Security
- Metrics and Alarms
- Interconnection with CTS
- Log Management
- Task Center
-
Working with RDS for PostgreSQL
- Data Migration
- Parameter Tuning
- PostgreSQL Enhanced Edition
- PostgreSQL Kernel Functions
- Instance Lifecycle
- Instance Modifications
- Read Replicas
-
Backups and Restorations
- Working with Backups
- Configuring an Automated Backup Policy
- Set a Cross-Region Backup Policy
- Creating a Manual Backup
- Downloading a Full Backup File
- Downloading an Incremental Backup File
- Restoring from Backup Files to RDS for PostgreSQL
- Restoring a DB Instance to a Point in Time
- Replicating a Backup
-
Parameter Template Management
- Creating a Parameter Template
- Modifying Instance Parameters
- Exporting a Parameter Template
- Comparing Parameter Templates
- Viewing Parameter Change History
- Replicating a Parameter Template
- Resetting a Parameter Template
- Applying a Parameter Template
- Viewing Application Records of a Parameter Template
- Modifying a Parameter Template Description
- Deleting a Parameter Template
- Connection Management
- Plugin Management
- Database Account Security
- Data Security
- and AlarmsMetrics and Alarms
- Interconnection with CTS
- Task Center
-
Working with RDS for SQL Server
- Instance Lifecycle
- Instance Modifications
- Read Replicas
- Backups and Restorations
-
Parameter Template Management
- Creating a Parameter Template
- Modifying Parameters
- Exporting a Parameter Template
- Comparing Parameter Templates
- Viewing Parameter Change History
- Replicating a Parameter Template
- Resetting a Parameter Template
- Applying a Parameter Template
- Viewing Application Records of a Parameter Template
- Modifying a Parameter Template Description
- Deleting a Parameter Template
- Connection Management
- Data Security
- and AlarmsMetrics and Alarms
- Interconnection with CTS
- Task Center
- Usage of Stored Procedures
-
FAQs
-
Product Consulting
- What Should I Pay Attention to When Using RDS?
- What Is the Availability of RDS DB Instances?
- Can I Use a Template to Create DB Instances?
- What Are the Differences Between RDS and Other Database Solutions?
- Will My RDS DB Instances Be Affected by Other User Instances?
- Does RDS Support Cross-AZ High Availability?
- Can RDS Primary/Standby DB Instances Be Changed to Single DB Instances?
- What Should I Do If Garbled Characters Are Displayed After SQL Query Results Are Exported to an Excel File?
- How Do I Create an AD Domain?
- What Can I Do About Slow Respond of Websites When They Use RDS?
- How Does a Cloud Database Perform a Primary/Standby Switchover?
- Can Multiple ECSs Connect to the Same RDS DB Instance?
- Why Is an Error Reported When I Attempt to Delete a Database from RDS SQL Server Primary/Standby DB Instances?
-
Resource and Disk Management
- Which Types of Logs and Files Occupy RDS Storage Space?
- Which Items Occupy the Storage Space of My RDS DB Instances?
- What Overhead Does the Storage Space Have After I Applied for an RDS DB Instance?
- How Much Storage Space Is Required for DDL Operations?
- How Many DB Instances Can Run on RDS?
- How Many Databases Can Run on an RDS DB Instance?
-
Database Connection
- Can an External Server Access the RDS Database?
- What Do I Do If the Number of RDS Database Connections Reaches the Upper Limit?
- What Is the Maximum Number of Connections to an RDS DB Instance?
- How Can I Create and Connect to an ECS?
- What Should I Do If an ECS Cannot Connect to an RDS DB Instance Through a Private Network?
- What Should I Do If a Database Client Problem Causes a Connection Failure?
- What Should I Do If an RDS Database Problem Causes a Connection Failure?
- How Do My Applications Access an RDS DB Instance in a VPC?
- Do Applications Need to Support Reconnecting to the RDS DB Instance Automatically?
- How Can I Connect to a PostgreSQL Database Through JDBC?
- What Should I Do If an RDS for SQL Server DB Instance Failed to Be Connected?
- Can I Access an RDS DB Instance Over an Intranet Connection Across Regions?
- Is an SSL Connection to a DB Instance Interrupted After a Primary/Standby Switchover or Failover?
- Does MySQL Support SSL Connections?
- Why Did the New Password Not Take Effect After I Reset the Administrator Password?
- Database Migration
- Database Permission
- Database Storage
- Client Installation
-
Backup and Restoration
- How Long Does RDS Store Backup Data For?
- Can My Database Be Used in the Backup Window?
- How Can I Back Up an RDS Database to an ECS?
- Why Has My Automated Backup Failed?
- What Happens to Database Backups After an RDS DB Instance Is Deleted?
- Will My Backups Be Deleted If I Delete My Cloud Account?
- Why Is a Table or Data Missing from My Database?
- Database Monitoring
- Capacity Expansion and Specification Change
- Database Parameter Modification
- Log Management
-
Network Security
- What Security Protection Policies Does RDS Have?
- How Can I Ensure the Security of RDS DB Instances in a VPC?
- How Can Data Security Be Ensured During Transmission When I Access RDS Through an EIP?
- How Can I Prevent Untrusted Source IP Addresses from Accessing RDS?
- How Can I Import the Root Certificate to a Windows or Linux OS?
- How Can I Identify the Validity Period of an SSL Root Certificate?
- How Can I Identify Data Corruption?
-
Product Consulting
-
API Reference (Kuala Lumpur Region)
- Before You Start
- API Overview
- Calling APIs
- Obtaining an API Version
-
API v3 (Recommended)
- Querying Version Information About a DB Engine
- Querying Database Specifications
- Querying the Storage Type of a Database
-
DB Instance Management
- Creating a DB Instance
- Changing DB Instance Specifications
- Scaling Up Storage Space of a DB Instance
- Changing a Single DB Instance to Primary/Standby DB Instances
- Rebooting a DB Instance
- Querying the Available SQL Server Character Set
- Deleting a DB Instance
- Querying Details About DB Instances
- Binding and Unbinding an EIP
- Resetting a Database Password
- Changing the Failover Priority
- Manually Switching Primary/Standby DB Instances
- Changing the Data Synchronize Model of Primary/Standby DB Instances
- Migrating a Standby DB Instance
- Database Security
-
Parameter Configuration
- Obtaining a Parameter Template List
- Creating a Parameter Template
- Modifying a Parameter Template
- Applying a Parameter Template
- Modifying Parameters of a Specified DB Instance
- Obtaining the Parameter Template of a Specified DB Instance
- Obtaining Parameters in a Specified Parameter Template
- Deleting a Parameter Template
-
Backup and Restoration
- Setting an Automated Backup Policy
- Obtaining an Automated Backup Policy
- Creating a Manual Backup
- Obtaining Details About Backups
- Obtaining the Link for Downloading a Backup File
- Deleting a Manual Backup
- Querying the Restoration Time Range
- Restoring Data to a New DB Instance
- Restoring Data to an Existing DB Instance
- Restoring Tables to a Specified Point in Time (MySQL)
- Log Information Queries
-
Database and Account Management (MySQL)
- Precautions
- Creating a Database
- Querying Details About Databases
- Querying Authorized Databases of a Specified User
- Deleting a Database
- Creating a Database Account
- Querying Details About Database Users
- Querying Authorized Users of a Specified Database
- Deleting a Database Account
- Configuring a Password for a Database Account
- Authorizing a Database Account
- Revoking Permissions of a Database Account
- Database and Account Management (Microsoft SQL Server)
- Tag Management
- Obtaining Task Information
- Appendix
-
User Guide (Ankara Region)
- Introduction
- Getting Started with RDS for MySQL
- Getting Started with RDS for PostgreSQL
-
Working with RDS for MySQL
- Database Migration
- Parameter Tuning
- Permissions Management
- Instance Lifecycle
-
Instance Modifications
- Changing a DB Instance Name
- Changing the Failover Priority
- Changing a DB Instance Class
- Scaling up Storage Space
- Changing the Maintenance Window
- Changing a DB Instance Type from Single to Primary/Standby
- Promoting a Read Replica Into a Single DB Instance
- Manually Switching Between Primary and Standby DB Instances
- Migrating a Standby DB Instance
- Read Replicas
-
Backups and Restorations
- Working with Backups
- Configuring an Automated Backup Policy
- Setting a Cross-Region Backup Policy
- Creating a Manual Backup
- Downloading a Backup File
- Downloading a Binlog Backup File
- Restoring from Backup Files to DB Instances
- Restoring a DB Instance to a Point in Time
- Restoring a Table to a Point in Time
- Replicating a Backup
- Deleting a Manual Backup
-
Parameter Template Management
- Creating a Parameter Template
- Modifying Parameters
- Exporting a Parameter Template
- Comparing Parameter Templates
- Viewing Parameter Change History
- Replicating a Parameter Template
- Resetting a Parameter Template
- Applying a Parameter Template
- Viewing Application Records of a Parameter Template
- Modifying a Parameter Template Description
- Deleting a Parameter Template
- Connection Management
-
Database Proxy (Read/Write Splitting)
- Introducing Read/Write Splitting
- Best Practices for Database Proxy
- Enabling Read/Write Splitting
- Configuring Delay Threshold and Distributing Read Weight
- Changing the Read/Write Splitting Address
- Changing the Instance Class of a DB Proxy Instance
- Upgrading the Kernel Version of Database Proxy
- Enabling or Disabling Access Control
- Disabling Read/Write Splitting
- Rules for Distributing Weights
- Testing Read/Write Splitting Performance
- Data Security
- Metrics and Alarms
- Log Management
- Task Center
-
Working with RDS for PostgreSQL
- Database Migration
- Parameter Tuning
- Permissions Management
- Instance Lifecycle
- Instance Modifications
- Read Replicas
-
Backups and Restorations
- Working with Backups
- Configuring an Automated Backup Policy
- Set a Cross-Region Backup Policy
- Creating a Manual Backup
- Downloading a Full Backup File
- Downloading an Incremental Backup File
- Restoring from Backup Files to RDS for PostgreSQL
- Restoring a DB Instance to a Point in Time
- Replicating a Backup
- Deleting a Manual Backup
-
Parameter Template Management
- Creating a Parameter Template
- Modifying Instance Parameters
- Exporting a Parameter Template
- Comparing Parameter Templates
- Viewing Parameter Change History
- Replicating a Parameter Template
- Resetting a Parameter Template
- Applying a Parameter Template
- Viewing Application Records of a Parameter Template
- Modifying a Parameter Template Description
- Deleting a Parameter Template
- Connection Management
- Plugin Management
- Tablespace Management
- Data Security
- Metrics and Alarms
- Log Management
- Task Center
-
FAQs
-
Product Consulting
- What Should I Pay Attention to When Using RDS?
- What Is the Availability of RDS DB Instances?
- Does RDS Support Cross-AZ High Availability?
- What Can I Do About Slow Responses of Websites When They Use RDS?
- Can I Change the Replication Mode Between Primary DB Instances and Read Replicas?
- What Is the Time Delay for Primary/Standby Replication?
- What Are the Restrictions on MySQL DB Instances After GTID Is Enabled?
- How Many Databases Can Run on an RDS DB Instance?
- What Is the Maximum Size Allowed for a Single Table in MySQL Instances?
- Resource and Disk Management
-
Database Connection
- What Should I Do If I Can't Connect to My RDS DB Instance?
- Can an External Server Access the RDS Database?
- What Do I Do If the Number of RDS Database Connections Reaches the Upper Limit?
- What Is the Maximum Number of Connections to an RDS DB Instance?
- How Can I Create and Connect to an ECS?
- What Should I Do If an ECS Cannot Connect to an RDS DB Instance Through a Private Network?
- What Should I Do If a Database Client Problem Causes a Connection Failure?
- What Should I Do If an RDS Database Problem Causes a Connection Failure?
- Do Applications Need to Support Reconnecting to the RDS DB Instance Automatically?
- How Can I Connect to an RDS for PostgreSQL Database Through JDBC?
- Why Cannot I Ping My EIP After It Is Bound to a DB Instance?
- How Can I Obtain the IP Addreenabled SQL auditss of an Application?
- Can I Access an RDS DB Instance Over an Intranet Connection Across Regions?
- Why Did the New Password Not Take Effect After I Reset the Administrator Password?
- How Do I Set the Encoding Format of the MySQL 8.0 Character Set?
- What Should I Do If the ECS and RDS Are Deployed in Different VPCs and They Cannot Communicate with Each Other?
- How Do I View All IP Addresses Connected to a Database?
- Can I Access Standby RDS DB Instances?
- How Do I Check the Connections to an RDS for MySQL Instance?
- Database Migration
- Database Permission
- Database Storage
- Client Installation
- Database Usage
-
Backup and Restoration
- How Long Does RDS Store Backup Data For?
- How Do I Clear RDS Backup Space?
- Can My Database Be Used in the Backup Window?
- How Do I View My Backup Storage Usage?
- How Can I Back Up an RDS Database to an ECS?
- Will Backups Be Retained After My RDS Instance Is Deleted?
- Why Has My Automated Backup Failed?
- Why Is a Table or Data Missing from My Database?
- How Do I Restore a Local Database Backup to RDS?
- Does RDS for PostgreSQL Support Table PITR?
- Can I Dump Backup Files to OBS Buckets?
- Does RDS for MySQL Support Table-Level Backup to a Specified OBS Bucket?
- Can I Delete the RDS for MySQL Backup Policy?
- Database Monitoring
- Capacity Expansion and Specification Change
-
Database Parameter Modification
- What Inappropriate Parameter Settings Cause Unavailability of the RDS for PostgreSQL Database?
- How Can I Change the Time Zone?
- How Do I Configure a Password Expiration Policy for RDS for MySQL DB Instances?
- How Do I Change the RDS Transaction Isolation Level?
- Does RDS for PostgreSQL Support the test_decoding Plugin?
- How Do I Use the utf8mb4 Character Set to Store Emojis in an RDS for MySQL DB Instance?
- Can I Use SQL Commands to Modify Global Parameters?
- How Do I Set Case Sensitivity for RDS for MySQL Table Names?
- Can I Enable Query Caching for My RDS for MySQL Instance?
-
Network Security
- What Security Protection Policies Does RDS Have?
- How Can Data Security Be Ensured During Transmission When I Access RDS Through an EIP?
- How Can I Prevent Untrusted Source IP Addresses from Accessing RDS?
- How Do I Configure a Security Group to Enable Access to RDS DB Instances?
- How Can I Import the Root Certificate to a Windows or Linux OS?
- How Can I Identify the Validity Period of an SSL Root Certificate?
- What Are the Possible Causes for Data Corruption?
- Version Upgrade
-
Product Consulting
- Change History
-
API Reference (Ankara Region)
- Before You Start
- API Overview
- Calling APIs
-
API v3 (Recommended)
- Querying Version Information About APIs
- Querying Version Information About a DB Engine
- Querying Database Specifications
- Querying the Storage Type of a Database
-
DB Instance Management
- Creating a DB Instance
- Stopping an Instance
- Starting an Instance
- Changing DB Instance Specifications
- Scaling Up Storage Space of a DB Instance
- Changing a Single DB Instance to Primary/Standby DB Instances
- Rebooting a DB Instance
- Deleting a DB Instance
- Querying Details About DB Instances
- Binding and Unbinding an EIP
- Changing the Failover Priority
- Manually Switching Primary/Standby DB Instances
- Changing the Data Replication Mode of Primary/Standby DB Instances
- Migrating a Standby DB Instance
- Configuring the Maintenance Window
- Database Security
-
Parameter Configuration
- Obtaining a Parameter Template List
- Creating a Parameter Template
- Modifying a Parameter Template
- Applying a Parameter Template
- Modifying Parameters of a Specified Instance
- Obtaining the Parameter Template of a Specified DB Instance
- Obtaining Parameters in a Specified Parameter Template
- Deleting a Parameter Template
-
Backup and Restoration
- Setting an Automated Backup Policy
- Setting a Cross-Region Backup Policy
- Obtaining an Automated Backup Policy
- Querying Information About a Cross-Region Backup Policy
- Creating a Manual Backup
- Obtaining Details About Backups
- Querying Details About Cross-Region Backups
- Querying Details About DB Instances for Which Cross-Region Backups Are Created
- Obtaining the Link for Downloading a Backup File
- Deleting a Manual Backup
- Querying the Restoration Time Range
- Querying the Restoration Time Range of a Cross-Region Backup
- Restoring Data to a New DB Instance
- Restoring Data to an Existing or Original DB Instance
- Restoring Tables to a Specified Point in Time (MySQL)
- Log Information Queries
-
Database and Account Management (MySQL)
- Precautions
- Creating a Database
- Querying Details About a Database
- Querying Details About Databases
- Querying Authorized Databases of a Specified User
- Deleting a Database
- Creating a Database Account
- Querying Details About a Database User
- Querying Details About Database Users
- Querying Authorized Users of a Specified Database
- Deleting a Database Account
- Configuring a Password for a Database Account
- Authorizing a Database Account
- Revoking Permissions of a Database Account
- Resetting the Password for User Root
- Obtaining Task Information
- Appendix
- Change History
-
User Guide (ME-Abu Dhabi Region)
- General Reference
Copied.
Installing and Uninstalling an Extension on the RDS Console
Scenarios
RDS allows you to install and uninstall extensions on the console.
RDS for PostgreSQL extensions only take effect on the databases you created the extensions for. To use an extension on databases, it has to be created separately for each database.
Prerequisites
Before installing or uninstalling extensions, ensure that there are databases in your instance. For details about how to log in to a DB instance, see Connecting to an RDS for PostgreSQL Instance Through DAS (Recommended).
Precautions
- plpgsql is a built-in extension and cannot be uninstalled.
- Logical replication plugins, such as decoderbufs and wal2json, can be used as-is. There is no installation required.
- Some extensions depend on the shared_preload_libraries parameter. They can be installed only after related libraries are loaded.
- pg_cron is only available to RDS for PostgreSQL 12 (12.11.0 and later), 13, and later versions. Before using this extension, change the value of cron.database_name to the name of the database this extension is used for (only one database is supported), and change the value of cron.use_background_workers to on.
- pltcl is not supported for RDS for PostgreSQL 13.2. To use this extension, upgrade your instance to the latest minor version.
- Installing or uninstalling some extensions will cause their dependent extensions and tables to be installed or uninstalled synchronously. For example, when you install or uninstall postgis, postgis_sfcgal will be installed or uninstalled at the same time.
- Some extensions cannot be upgraded after a minor version upgrade. To upgrade them, uninstall them first and install them again.
Modifying the shared_preload_libraries Parameter
Some extensions require corresponding parameter values to be loaded before the extensions can be installed.
You can modify the shared_preload_libraries parameter to load parameter values in batches or load each required parameter value independently before installing an extension.
- Log in to the management console.
- Click
 in the upper left corner and select a region.
 - Click
 in the upper left corner of the page and choose Databases > Relational Database Service.
 - On the Instances page, click the instance name.
- In the navigation pane, choose Plugins.
- On the Plugins page, click
 next to Loaded shared_preload_libraries parameter values to view the loaded parameter values.
 - Click Modify Parameter Values.
Figure 1 Viewing loaded parameter values

- Select the parameter values to be loaded from the drop-down list box and click OK.
Figure 2 Selecting parameter values to be loaded

- In the displayed dialog box, click OK.
 NOTE:
NOTE:
- The modified parameter values take effect only after the instance is rebooted. If your instance has read replicas, the parameter values for the read replicas are also modified. You also need to reboot the read replicas.
- To ensure security and O&M functions of RDS for PostgreSQL, the following parameter values are loaded by default and cannot be deleted:
- passwordcheck.so
- pg_stat_statements
- pg_sql_history
- pgaudit
- You can also load each parameter value independently before installing an extension.
Figure 3 Loading a parameter value

Installing and Uninstalling an Extension
- Log in to the management console.
- Click in the upper left corner and select a region.
- Click in the upper left corner of the page and choose Databases > Relational Database Service.
- On the Instances page, click the instance name.
- In the navigation pane, choose Plugins.
- In the Database drop-down list above the extension list, select the database where the extension is to be installed.
- Locate the extension to be installed and click Install in the Operation column.
Figure 4 Installing an extension

- After a minor version upgrade, click Update next to the extension to be updated.
- To uninstall an extension, click Uninstall.
Figure 5 Uninstalling an extension
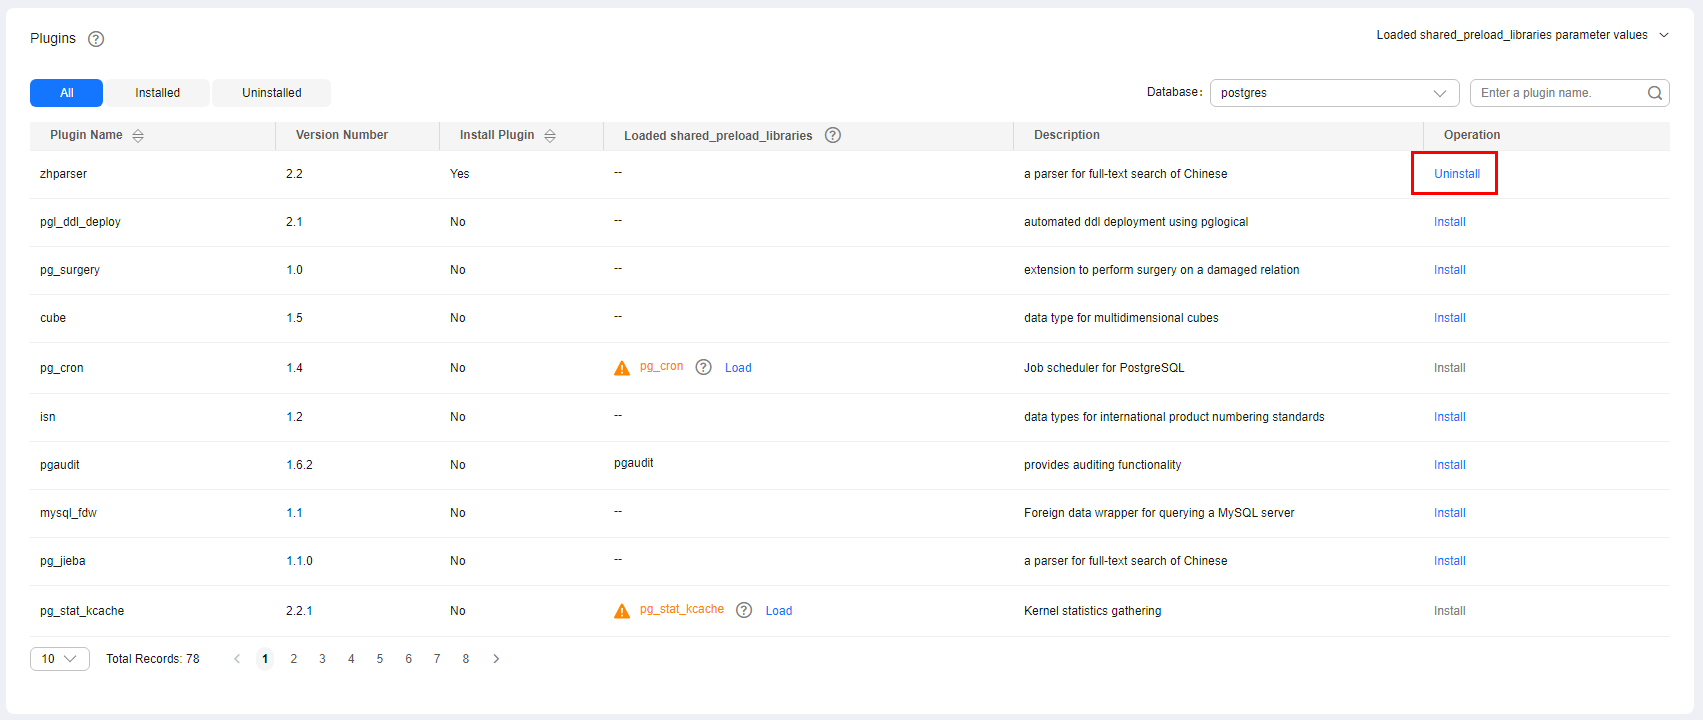
Feedback
Was this page helpful?
Provide feedbackThank you very much for your feedback. We will continue working to improve the documentation.See the reply and handling status in My Cloud VOC.
For any further questions, feel free to contact us through the chatbot.
Chatbot


