
Uploading Application Data to an MRS Cluster
Data sources processed by an MRS cluster are usually from the OBS or HDFS file system in the cluster. You can browse, manage, and use OBS data on the MRS console or using the OBS client. Alternatively, you can import OBS data to the HDFS file system in the cluster for processing.
Generally, you are advised to store service data in the OBS file system. When data in the OBS file system is being migrated to the HDFS file system, file transfer speeds generally decrease as file size increases. Therefore, it is recommended that you import data from OBS to the HDFS file system only when there is a small amount of data.
Video Tutorial
This video shows how to import data to the HDFS file system of an MRS cluster.
The UI may vary depending on the version. This tutorial is for reference only.
Uploading Local Data to OBS
- Log in to the OBS console.
- Choose Parallel File Systems > Create Parallel File System.
- Enter the file system name, for example, mrs-demotest.
Set other parameters as required. For details, see Creating a Parallel File System.
Figure 1 Creating an OBS parallel file system
- Click Create Now.
- In the parallel file system list on the OBS console, click the file system name to go to its details page.
- In the navigation pane on the left, choose Files. Create different folders based on service requirements and upload data to the folders.
For example, create the following folders:
- program: Upload the program package for running to this folder.
- input: Upload the input data to this folder.
- output: Job running results will be written to this folder.
Uploading Local Data on a Cluster Node to HDFS
Use the HDFS client to upload the local program or service data on a node in the MRS cluster to HDFS.
- Install an MRS cluster client.
For details, see Installing an MRS Cluster Client.
The MRS cluster comes with a client installed for job submission by default, which can also be used directly. In MRS 3.x or later, the default client installation path is /opt/Bigdata/client on the Master node. In versions earlier than MRS 3.x, the default client installation path is /opt/client on the Master node.
- Log in to the node where the client is located as the MRS cluster client installation user.
For details, see Logging In to an MRS Cluster Node.
- Run the following command to go to the client installation directory and load the environment variables:
source /opt/Bigdata/client/bigdata_env
- For a cluster with Kerberos authentication enabled (security mode), run the following command to authenticate the user (the user who logs in for the first time needs to change the password). Skip this step for a cluster in normal mode.
Ensure that you have created a user with the HDFS operation permissions in the MRS cluster. For details, see Creating an MRS Cluster User.
kinit Username of the service user who has the HDFS operation permissions
- Run the following command to create a folder in HDFS:
hdfs dfs -mkdir /tmp/mydir
- Upload the local file on the node to the target folder in HDFS.
For example, run the following command to upload the /tmp/testAccess.txt file on the node to the /tmp/mydir folder in HDFS:
hdfs dfs -put /tmp/testAccess.txt /tmp/mydir
Importing Data from OBS to HDFS
After an MRS cluster is created, import files from an OBS parallel file system to the HDFS in the cluster using the management console.
- Log in to the MRS console.
- On the Active Clusters page displayed by default, click the name of the target cluster to go to the cluster information page.
If the MRS cluster is a security-mode cluster with Kerberos authentication enabled, synchronize IAM users first. (On the Dashboard tab page of the cluster details page, click Synchronize on the right of IAM User Sync to synchronize IAM users.) After synchronizing IAM users for the first time, you are advised to wait for 5 minutes before performing subsequent operations.
- Click Files to go to the file management page.
- Select HDFS File List.
Figure 2 HDFS file list

- Go to the directory where the data to be imported is stored.
Click Create to create a folder directory or select an existing folder in HDFS.
- Click Import Data and configure the HDFS and OBS paths correctly.
When configuring the OBS or HDFS path, click Browse, select a file directory, and click OK.Figure 3 Importing data

- OBS path description:
- The path must start with obs://.
- Files or programs encrypted by KMS cannot be imported.
- An empty folder cannot be imported.
- The directory and file name can contain letters, digits, hyphens (-), and underscores (_), but cannot contain the following special characters: ;|&>,<'$*?\
- The directory and file name cannot start or end with a space, but can contain spaces between them.
- The OBS full path contains a maximum of 255 characters.
- HDFS path description:
- The directory and file name can contain letters, digits, hyphens (-), and underscores (_), but cannot contain the following special characters: ;|&>,<'$*?\:
- The directory and file name cannot start or end with a space, but can contain spaces between them.
- The HDFS full path contains a maximum of 255 characters.
- OBS path description:
- Click OK.
You can view the file upload progress on the File Operation Records page. The system generates a DistCp job for processing the data import operation. You can also view the job execution status on the page.
Exporting Data from HDFS to OBS
After an MRS cluster is created, export specified files from the HDFS in the cluster to the OBS using the management console.
- Log in to the MRS console.
- On the Active Clusters page displayed by default, click the name of the target cluster to enter the cluster details page.
If the MRS cluster is a security-mode cluster with Kerberos authentication enabled, synchronize IAM users first. (On the Dashboard tab page of the cluster details page, click Synchronize on the right of IAM User Sync to synchronize IAM users.) After synchronizing IAM users for the first time, you are advised to wait for 5 minutes before performing subsequent operations.
- Click Files to go to the file management page.
- Select HDFS File List.
- Go to the data storage directory.
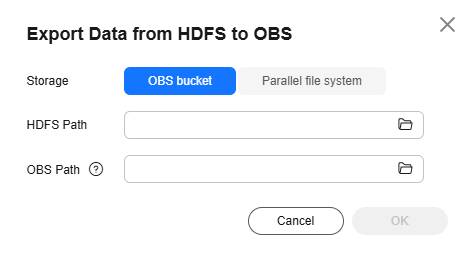
- Click Export Data and configure the OBS and HDFS paths. When configuring the OBS or HDFS path, click Browse, select a file directory, and click OK.
Figure 4 Exporting data
When a folder is exported to OBS, a label file named folder name_$folder$ is added under the OBS path. Ensure that the exported folder is not empty. If the exported folder is empty, OBS cannot display the folder and only generates a file named folder name_$folder$.
- Click OK.
You can view the file upload progress on the File Operation Records page. The system generates a DistCp job for processing the data import operation. You can also view the job execution status on the page.
Feedback
Was this page helpful?
Provide feedbackThank you very much for your feedback. We will continue working to improve the documentation.See the reply and handling status in My Cloud VOC.
For any further questions, feel free to contact us through the chatbot.
Chatbot


