Configuring the Missing ModelArts Studio (MaaS) Permissions
Users working with MaaS services might face problems like wrong or incomplete permission setups, which trigger alerts on the MaaS console. These errors can block key features and harm the overall experience. If you are unsure how to fix these permission-related warnings, refer to this guide for clear steps. Addressing missing permissions quickly ensures smoother service performance and avoids disruptions caused by insufficient access.
Prerequisites
A permission error message is displayed on the MaaS console.
Billing
Authorization is free. But using data storage, importing models, or deploying services may incur fees because they rely on OBS and SWR. For details, see Billing Overview.
Scenario 1: Adding Dependency Authorization
Access to MaaS features requires authorization from OBS and SWR. Authenticate with OBS and SWR to enable data storage, model import, and service deployment.
A message appears at the top of the ModelArts Studio (MaaS) console if dependency authorization has not been configured, prompting you to configure it.
Tenant user: Click Authorize access to go to the System Management > Permission Management page on the ModelArts console and add dependency service permissions. For details, see Configuring Agency Authorization for MaaS.
IAM user: Contact the administrator.

Scenario 2: Adding Missing Permissions Using the Tenant Account
A permission error message appears at the top of the ModelArts Studio (MaaS) console if necessary permissions are not granted.

You can click View missing permissions in the pop-up prompt. In the Service Permissions Missing dialog box, select Existing authorization or New authorization as required, and click OK.
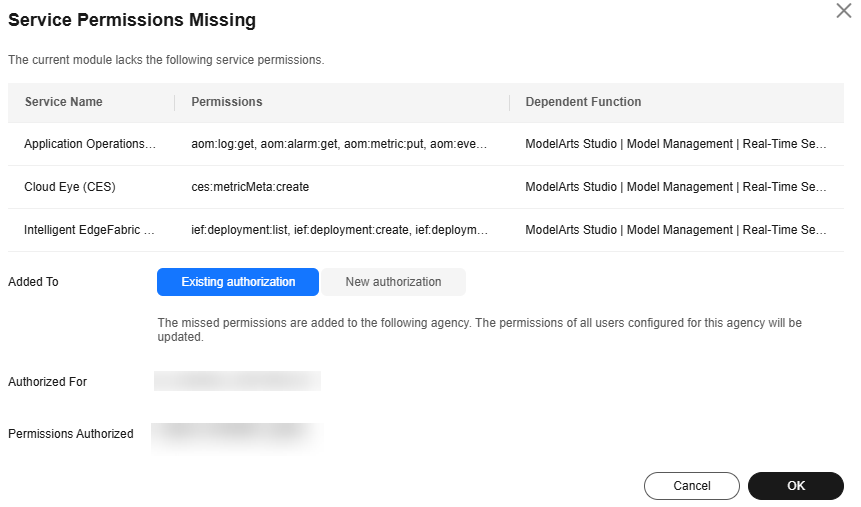
Scenario 3: Adding Missing Permissions Using an IAM Account
The ModelArts Studio (MaaS) console will display an Access Denied dialog box if you lack necessary permissions. Create a custom policy, assign it to the target user group, review any missing service permissions, and contact your administrator to configure the necessary permissions.
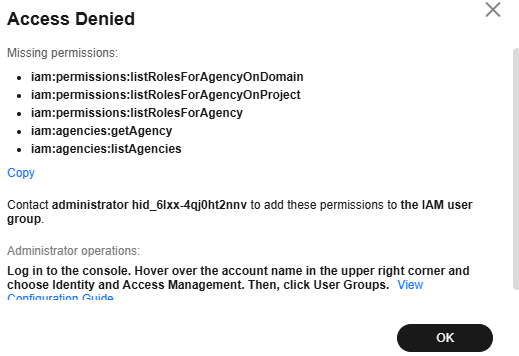
For details about the missing permissions, see Table 1. For details, see Actions.
|
Permission |
Description |
|---|---|
|
iam:permissions:listRolesForAgencyOnDomain |
Querying permissions of an agency for a global service project |
|
iam:permissions:listRolesForAgencyOnProject |
Querying permissions of an agency for a region-specific project |
|
iam:permissions:listRolesForAgency |
Querying all permissions of an agency |
|
iam:agencies:getAgency |
Querying agency details |
|
iam:agencies:listAgencies |
Querying agencies in specified conditions |
- Create a custom policy.
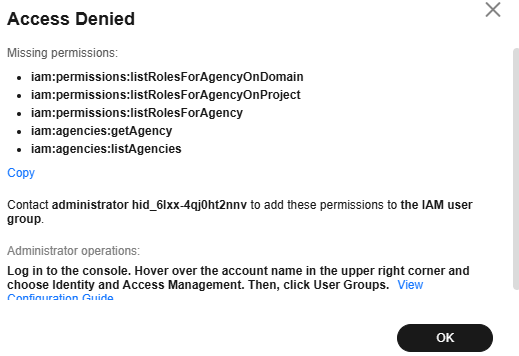
- In the Access Denied dialog box, click Copy as the IAM user to save the missing permissions and click OK.
Figure 5 Access Denied
- Log in to the IAM console as an administrator. In the navigation pane, choose Permissions > Policies/Roles.
- On the Policies/Roles page, click Create Custom Policy in the upper right corner.
- On the Create Custom Policy page, configure parameters and click OK.
Figure 6 Creating a custom policy
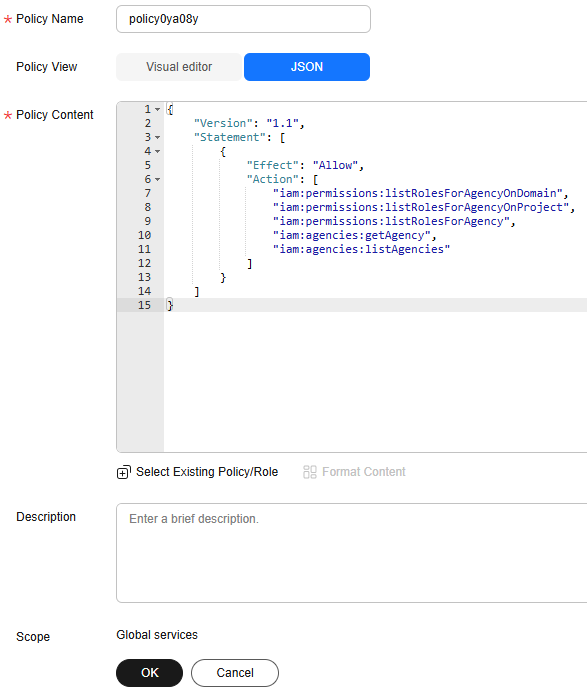
Table 2 Parameters for creating a custom policy Parameter
Description
Example
Policy Name
Enter a policy name.
policykl631g
Policy View
Click JSON.
JSON
Policy Content
Paste the permission policy saved in Step 1.a in [] of the Statement parameter and click Format Content to format the content.
{
    "Version": "1.1",
    "Statement": [
        {
            "Effect": "Allow",
            "Action": [
                "iam:permissions:listRolesForAgencyOnDomain",
                "iam:permissions:listRolesForAgencyOnProject",
                "iam:permissions:listRolesForAgency",
                "iam:agencies:getAgency",
                "iam:agencies:listAgencies"
            ]
        }
    ]
}
Description
Enter a policy description.
N/A
Scope
Use the default value Global services.
Global services
- In the Access Denied dialog box, click Copy as the IAM user to save the missing permissions and click OK.
- Add the custom policy as an administrator to the user group where the IAM user belongs to.
- Check the user group that the IAM user belongs to.
- In the navigation pane of the IAM console, choose Users.
- On the Users page, click the username for which the permission error is reported.
- In the User Groups tab, check the user group that the IAM user belongs to.
Figure 7 User Groups

- Add the custom policy to the user group where the IAM user belongs to.
- In the navigation pane of the IAM console, choose User Groups.
- On the right of the user group where the IAM user belongs, click Authorize in the Operation column.
Figure 8 Authorize

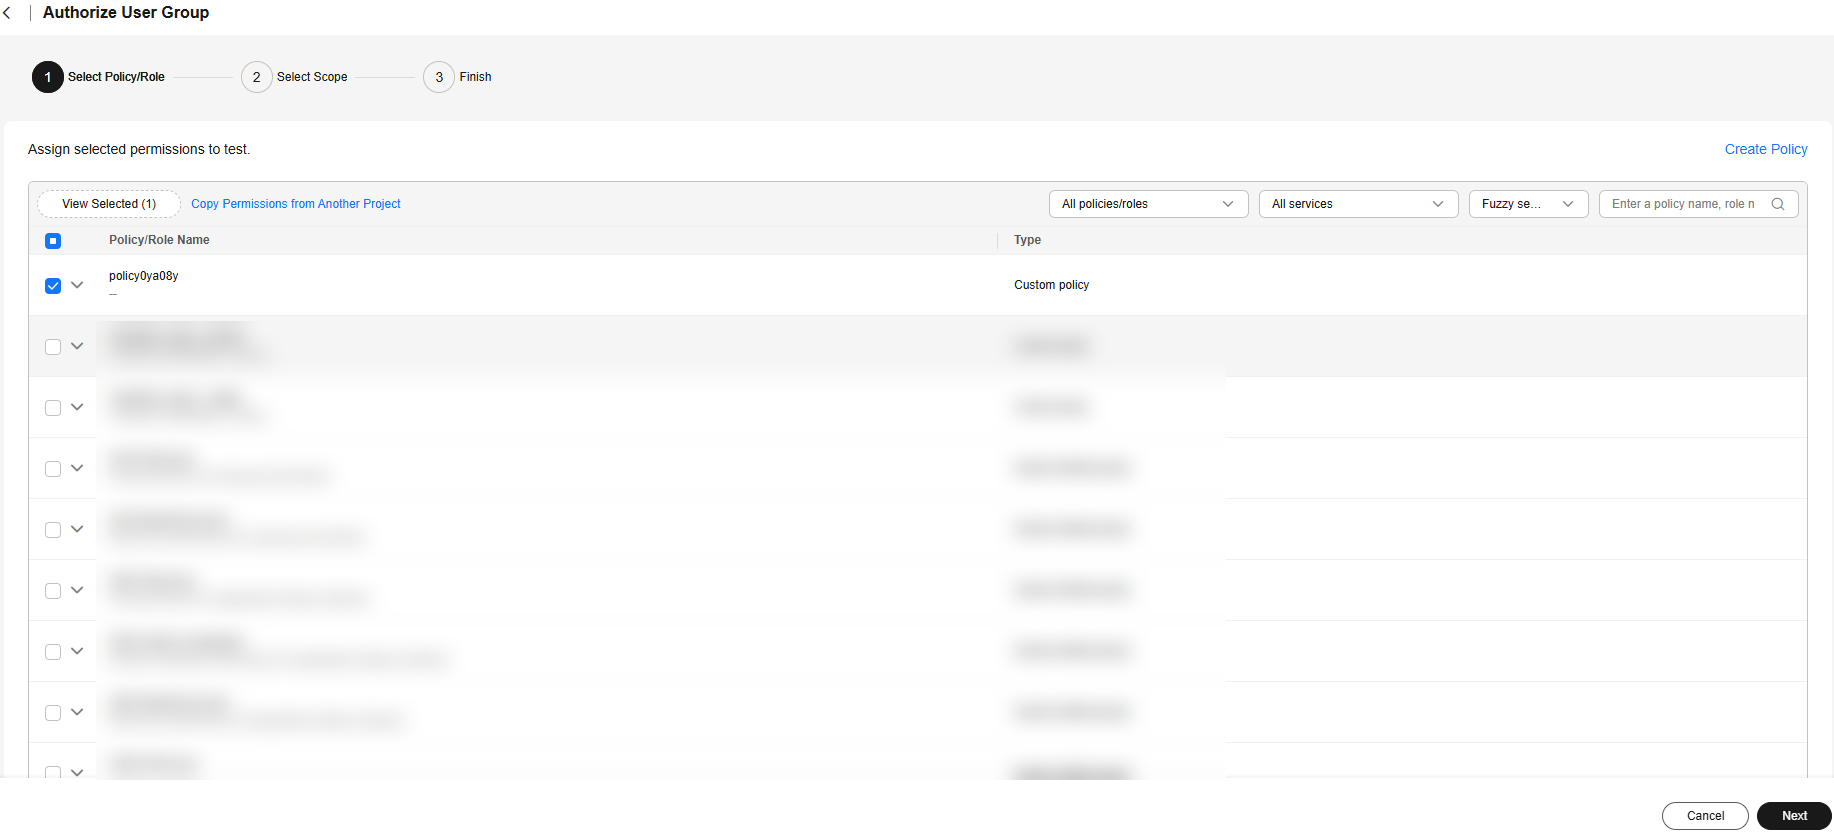
- On the displayed page, select the policy created in step 1, click Next, select the authorization scope as required, and click OK.
Figure 9 Authorization page
- In the Information dialog box, read the information carefully and click OK.
- Check the user group that the IAM user belongs to.
- Log in to the ModelArts Studio (MaaS) console as the IAM user and check whether the Access Denied dialog box disappears.
- If the dialog box disappears, the permission configuration is successful and you can use MaaS.
- If the Service Permissions Missing dialog box is displayed, go to the next step.
- Review and configure the missing service permissions.
- Log in to the ModelArts Studio (MaaS) console as the IAM user and click View missing permissions in the upper part of the page. In the Service Permissions Missing dialog box, view the missing service permissions.
Figure 10 Service permissions missing
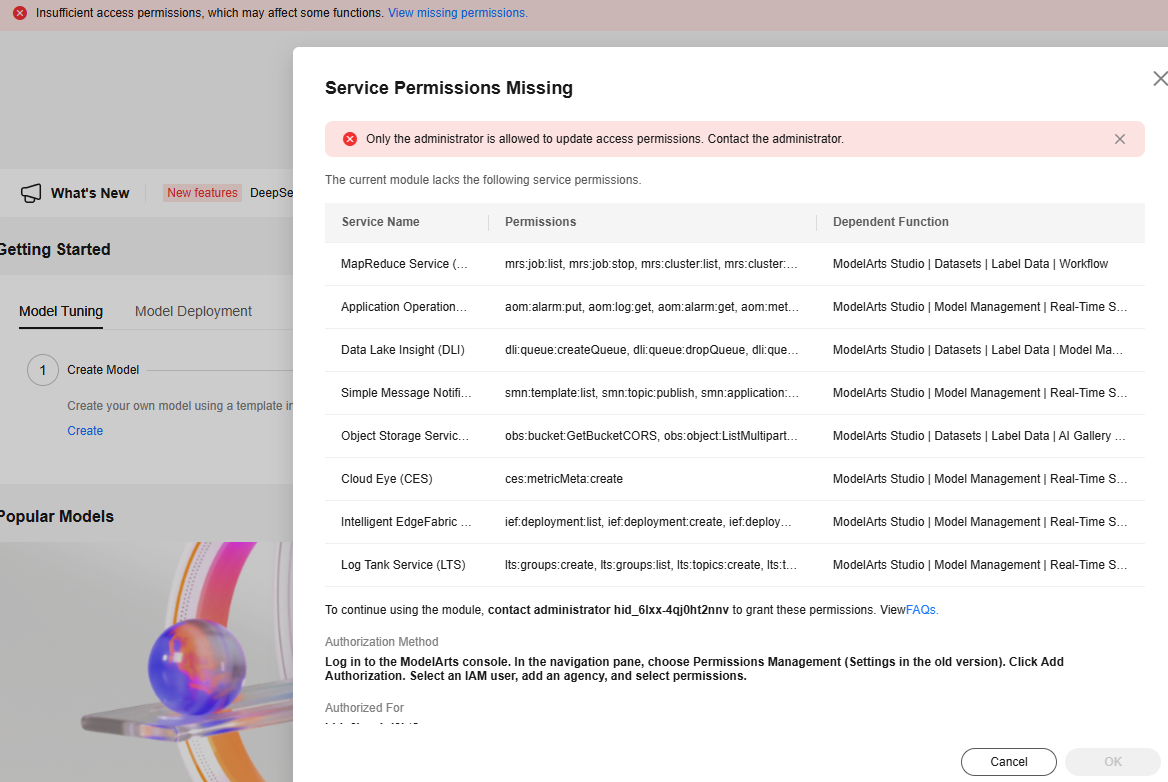
- Contact the administrator to configure the missing service permissions. For details, see Configuring Agency Authorization for MaaS.
- Log in to the ModelArts Studio (MaaS) console as the IAM user and click View missing permissions in the upper part of the page. In the Service Permissions Missing dialog box, view the missing service permissions.
FAQs
- How do I obtain access keys (AK/SK)?
You will need to obtain an access key if you are using access key authentication to access certain functions like accessing model services. For details, see How Do I Obtain an Access Key?
- How do I delete an agency?
You need to delete the agency on the IAM console. For details, see Deleting or Modifying Agencies.
Feedback
Was this page helpful?
Provide feedbackThank you very much for your feedback. We will continue working to improve the documentation.See the reply and handling status in My Cloud VOC.
For any further questions, feel free to contact us through the chatbot.
Chatbot


