
User Management
A system administrator can manage users in all departments. A department administrator can manage users in their own departments.
Adding a User

- The number of added users cannot exceed the value of Users specified during purchase.
- An added user is in the Not activated state. The state changes to Normal after the user logs in to KooDrive.
- Sign in to the KooDrive service plane as an administrator.
Only a HUAWEI ID can be used to log in to the KooDrive service plane.
- Click Console on the top of the page.
- In the navigation pane, choose Organization Management. The department list and user list are displayed.
- In the department list, select the department to which you want to add a user. Click Create User above the user list. In the displayed Create User dialog box, set parameters by referring to Table 1.
Table 1 Adding a user Parameter
Description
Example Value
Username
Name of a user. Enter up to 20 characters.
zhangsan_01
Account
Account set by the system administrator for the member. Enter the first part of the account and select an organization domain name.
zhangsan01@ldb.huaweiapaas.com
Mobile Number
Mobile number of the member. This parameter is required only when the email address of the member is not specified.
-
Email Address
Email address of the member. This parameter is required only when the mobile number of the member is not specified.
-
Set Password
Password set by the administrator for the member. Option: Generate automatically or Set now.
Generate automatically: The system will send the password to the specified email address or mobile number.
A custom password must meet the following requirements:- Contains at least eight characters.
- Contains both letters and digits, and does not contain spaces.
- Does not contain three consecutive identical characters. NOTE:
The member needs to change the password upon the first sign-in.
abcde001
Dept
Select the department to which the user belongs from the drop-down list. If you select the level-1 department, the created user is a direct user of this department.NOTE:When a department administrator creates a user in the department, this parameter cannot be modified.
-
Role
Two roles are provided: common user and department administrator. For details about the role permissions, see Permissions Management.
-
Allocate Individual Space
Whether to allocate an individual space to a user when the user is created.
-
Space Size (GB)
When Allocate Individual Space is enabled, the default individual space size is displayed. You can change the size.
-
- Click OK. The user information is then displayed under the corresponding department.
Batch Importing Users
- Sign in to the KooDrive service plane as a system administrator.
Only a HUAWEI ID can be used to log in to the KooDrive service plane.
- Click Console on the top of the page.
- In the navigation pane, choose Organization Management. The department list and user list are displayed.
- Click Batch Import above the user list.
- Click Download to download the CSV file template.
- Complete the user information and upload the file.
- Click OK to batch import users. You can view the imported users in the user list.
Allocating an Individual Space to a User
When no space is allocated to a user during user creation, Allocate Space is displayed.
- Sign in to the KooDrive service plane as a system administrator.
Only a HUAWEI ID can be used to log in to the KooDrive service plane.
- Click Console on the top of the page.
- In the navigation pane, choose Organization Management. The department list and user list are displayed.
- Select the department to which the target user belongs and enter the username in the search box of the user list. Fuzzy search is supported.
- In the search result list, click Allocate Space in the Operation column.
- In the Allocate Space dialog box, enable the individual space and set the size of the individual space.
- After the allocation is complete, click OK.
- The individual space cannot exceed the available space of the enterprise.
- The first allocated individual space cannot be 0 GB.
Changing the Size of the Individual Space of a User
- Sign in to the KooDrive service plane as a system administrator.
Only a HUAWEI ID can be used to log in to the KooDrive service plane.
- Click Console on the top of the page.
- In the navigation pane, choose Organization Management. The department list and user list are displayed.
- Select the department to which the target user belongs and enter the username in the search box of the user list. Fuzzy search is supported.
- In the search result list, click Set Space in the Operation column.
- In the Set Space dialog box, change the size of the individual space and click OK.
- In this scenario, the individual space cannot be disabled.
- The individual space cannot exceed the available space of the enterprise.
- The new individual space size cannot be smaller than the used individual space size.
Changing a User Password
- You are advised to change the account password periodically for security purposes. To change the password, you need to enter the old password.
- A system administrator cannot change the password of their own account. A department administrator or common user can change the password of their own account.
- Sign in to the KooDrive service plane as a system administrator.
Only a HUAWEI ID can be used to log in to the KooDrive service plane.
- Move the cursor to the username in the upper right corner and select Change Password from the drop-down list. On the Reset Password page, enter the old password and a new password.
Modifying the Role of a User
- Sign in to the KooDrive service plane as a system administrator.
Only a HUAWEI ID can be used to log in to the KooDrive service plane.
- Click Console on the top of the page.
- In the navigation pane, choose Organization Management. The department list and user list are displayed.
- Select the department to which the target user belongs and enter the username in the search box of the user list. Fuzzy search is supported.
- In the search result list, choose More > Set Role in the Operation column.
- In the Set Role dialog box, change the role of the user. The role can be department administrator or common user.
- A system administrator can manage roles of users under all departments.
- A department administrator can manage roles of users, excluding themselves, in the department.
- A disabled common user cannot be set as a department administrator. In this case, the Set Role button is unavailable.
- A disabled department administrator can be set as a common user.
- After the modification is complete, click OK.
Changing the Department to Which a User Belongs
- The department to which a department administrator or system administrator belongs cannot be changed.
- Batch department changes are not allowed.
- Sign in to the KooDrive service plane as a system administrator.
Only a HUAWEI ID can be used to log in to the KooDrive service plane.
- Click Console on the top of the page.
- In the navigation pane, choose Organization Management. The department list and user list are displayed.
- Select the department to which the target user belongs and enter the username in the search box of the user list. Fuzzy search is supported.
- In the search result list, choose More > Change Dept in the Operation column.
- In the Change Dept dialog box, select the new department to which the user belongs and click OK.
Resetting the Password for a User
- A system administrator can reset the passwords of users, excluding themselves, in all departments.
- A department administrator can reset the passwords of users, excluding themselves, in the department.
- Sign in to the KooDrive service plane as a system administrator.
Only a HUAWEI ID can be used to log in to the KooDrive service plane.
- Click Console on the top of the page.
- In the navigation pane, choose Organization Management. The department list and user list are displayed.
- Select the department to which the target user belongs and enter the username in the search box of the user list. Fuzzy search is supported.
- In the search result list, choose More > Reset Password in the Operation column.
- In the Reset Password dialog box, select Generate automatically or Set manually. If you select Set manually, enter the new password. Then click OK. A custom password must meet the following requirements:
- Contains at least eight characters.
- Contains both letters and digits, and does not contain spaces.
Disabling a User
- Only users in the Normal state can be disabled.
- A department administrator cannot disable themselves or other administrators under the same department.
- You can disable users one by one or in batches.
- Disabled users cannot use the individual space nor sign in to the KooDrive service plane.
- Sign in to the KooDrive service plane as a system administrator.
Only a HUAWEI ID can be used to log in to the KooDrive service plane.
- Click Console on the top of the page.
- In the navigation pane, choose Organization Management. The department list and user list are displayed.
- Disable users.
- Disabling a user
- Select the department to which the target user belongs and enter the username in the search box of the user list. Fuzzy search is supported.
- In the search result list, choose More > Disable User in the Operation column.
- In the Disable User dialog box, read the impact of disabling the user and click OK to disable the user.
- Disabling users
- Select the target users in the user list of a department and click Disable User.
- In the Disable User dialog box, read the impact of disabling the users and click OK to disable the users.
- Disabling a user
Deleting a User
- You can delete one or more users.
- Spaces allocated to deleted users are reclaimed to the enterprise storage size.
- Only users in the Disabled or Not activated state can be deleted.
- Sign in to the KooDrive service plane as a system administrator.
Only a HUAWEI ID can be used to log in to the KooDrive service plane.
- Click Console on the top of the page.
- In the navigation pane, choose Organization Management. The department list and user list are displayed.
- Delete users.
- Deleting a user
- Select the department to which the target user belongs and enter the username in the search box of the user list. Fuzzy search is supported.
- In the search result list, choose More > Delete User in the Operation column.
- If files exist in the space of the user, the Delete User dialog box is displayed. Read the impact of the deletion, enter DELETE in the text box, select I have read and accept the terms above, and click OK to delete the user. Figure 1 Forcible deletion warning
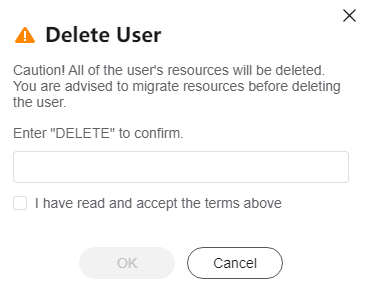
Spaces allocated to the deleted user are reclaimed to the enterprise storage size.
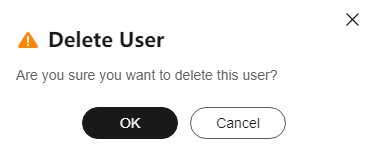
- If no space is allocated to the user or no file exists in the space, a dialog box is displayed. Click OK to delete the user. Figure 2 Deletion warning
- If files exist in the space of the user, the Delete User dialog box is displayed. Read the impact of the deletion, enter DELETE in the text box, select I have read and accept the terms above, and click OK to delete the user.
- Deleting users
- Select the target users in the user list of a department and click Delete User.
- If files exist in the space of the selected users, the Delete User dialog box is displayed. Read the impact of the deletion, enter DELETE in the text box, select I have read and accept the terms above, and click OK to delete the users. Figure 3 Forcible batch deletion warning
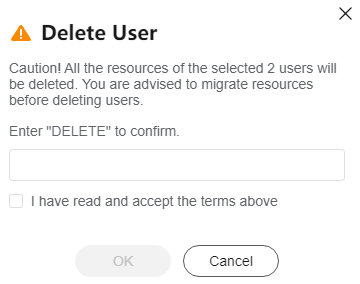
Spaces allocated to deleted users are reclaimed to the enterprise storage size.
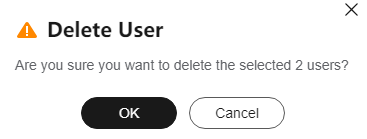
- If no space is allocated to the users or no file exists in the space, a dialog box is displayed. Click OK to delete the users. Figure 4 Batch deletion warning
- If files exist in the space of the selected users, the Delete User dialog box is displayed. Read the impact of the deletion, enter DELETE in the text box, select I have read and accept the terms above, and click OK to delete the users.
- Select the target users in the user list of a department and click Delete User.
- Deleting a user
Transferring Resources and Deleting Users
The Transfer and Delete button is available for users in the Disabled or Not activated state.
- Sign in to the KooDrive service plane as a system administrator.
Only a HUAWEI ID can be used to log in to the KooDrive service plane.
- Click Console on the top of the page.
- In the navigation pane, choose Organization Management. The department list and user list are displayed.
- In the user list, select the target users and click Transfer and Delete above the user list, or locate a user and choose More > Transfer and Delete in the Operation column.
- In the displayed dialog box, select a recipient. You can enter a username or select a recipient from the organization. If you select a recipient from the organization, you can search for the recipient in the user list and department list. Figure 5 Transferring resources and deleting users
 If a user does not have resources, click OK in the displayed dialog box to delete the user directly.Figure 6 Deleting users directly (no resources to be transferred)
- In the Ongoing Tasks window in the lower right corner of the page, view the status of the transfer and deletion task. You can click
 to minimize the window and click
  to clear completed tasks. You can view the transfer completion notification in the Message Center. For details, see Message Management.
Feedback
Was this page helpful?
Provide feedbackThank you very much for your feedback. We will continue working to improve the documentation.See the reply and handling status in My Cloud VOC.
For any further questions, feel free to contact us through the chatbot.
Chatbot


