Reclaiming a Public Zone
Scenarios
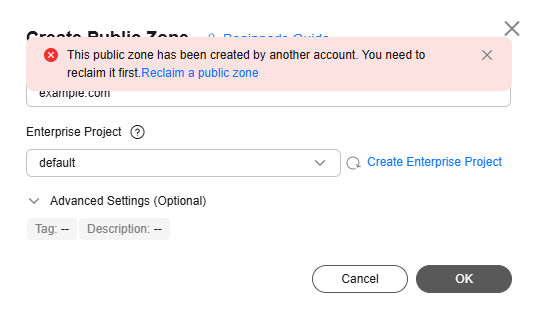
Assume that you are the owner of a domain name and you are creating a public zone for your domain name on the DNS console. If "This public zone has been created by another account. You need to reclaim the public zone first." is displayed when you are creating a public zone, as shown in the following figure, you can reclaim the public zone.

Feature Description
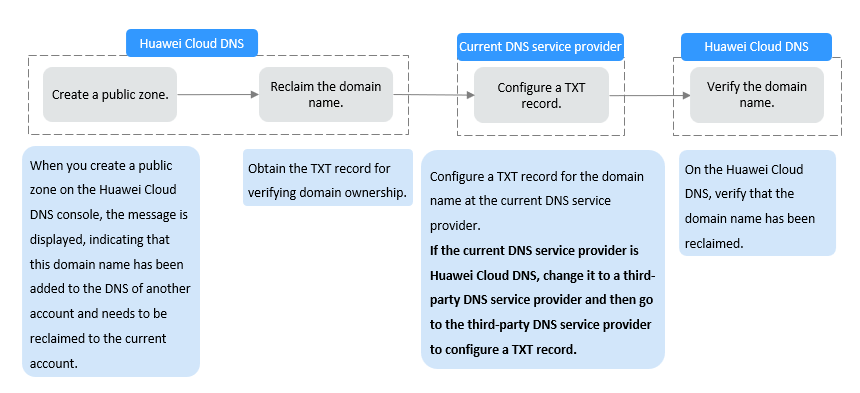
When you reclaim a public zone for a domain name, the DNS console will first generate a TXT record. You need to add this TXT record on your current DNS service provider's platform and then verify the TXT record on the DNS console. The DNS console will request the TXT record over the Internet. If the TXT record value is returned, you are the domain name owner and your public zone will be reclaimed automatically.

- If a public zone is reclaimed, all record sets added to it before will be deleted.
- If DNS resolution is abnormal due to incorrect public zone reclaim operations, you are liable for the risks and consequences.
Product Concepts
Process Flow

Procedure
- Obtain the TXT record.
- Go to the Public Zones page.
- Add the TXT record for verification.
The following operations are performed on Alibaba Cloud which is the example DNS service provider. The operations are for reference only. For details, see "Add DNS Records" in the Alibaba Cloud documentation.
- Log in to the Alibaba Cloud console.
- In the service list in the upper left corner of the console, choose Domain Name and Websites to go to its DNS console.
- In the navigation pane, choose Public DNS Resolution > Authoritative DNS Resolution.
- In the domain name list, click the target domain name in the Domain Name column.
If the target domain name does not exist in the list, click Add Domain Name.
- Add a TXT record for the domain name.
- Confirm the configuration and submit your request.
If the status of the record becomes Normal, the TXT record is added.
- Verify the TXT record.
Go back to the dialog box shown in 1.e and click Verify.
The DNS console will verify the TXT record. If the verification is successful, a public zone will be created for your domain name.
Feedback
Was this page helpful?
Provide feedbackThank you very much for your feedback. We will continue working to improve the documentation.See the reply and handling status in My Cloud VOC.
For any further questions, feel free to contact us through the chatbot.
Chatbot


