
Using IAM Identity Policies to Grant Access to DNS
System-defined permissions in Identity Policy-based Authorization provided by Identity and Access Management (IAM) let you control access to DNS. With IAM, you can:
- Create IAM users for personnel based on your enterprise's organizational structure. Each IAM user has their own identity credentials for accessing DNS resources.
- Grant users only the permissions required to perform a given task based on their job responsibilities.
- Entrust a Huawei Cloud account or a cloud service to perform efficient O&M on your DNS resources.
If your Huawei Cloud account meets your permissions requirements, you can skip this topic.
Figure 1 shows the process flow of identity policy-based authorization.
Prerequisites
Before granting permissions, learn about system-defined permissions in Identity Policy-based Authorization. To grant permissions for other services, learn about all system-defined policies/roles supported by IAM.
Process Flow
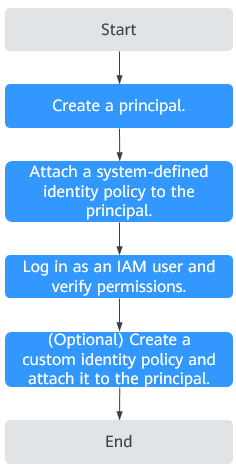
- On the IAM console, create an IAM user or create a user group.
- Attach a system-defined identity policy to the user or user group.
Assign the permissions defined in the system-defined identity policy DNSReadOnlyAccessPolicy to the user or group, or attach the system-defined identity policy to it.
- Log in as the IAM user and verify permissions.
In the authorized region, perform the following operations:
- Choose Service List > Domain Name Service > Private Zones. Then click Create Private Zone. If a message appears, indicating that you have insufficient permissions to perform the operation, the DNSReadOnlyAccessPolicy policy is in effect
- Choose any other service from Service List. If a message appears, indicating that you have insufficient permissions to access the service, the DNSReadOnlyAccessPolicy policy is in effect.
Example Custom Identity Policies
You can create custom identity policies to supplement system-defined identity policies. For details about actions supported in custom identity policies, see "Identity Policy-Based Authorization" in the Domain Name Service API Reference.
To create a custom identity policy, choose either visual editor or JSON.
- Visual editor: Select cloud services, actions, resources, and request conditions. This does not require knowledge of policy syntax.
- JSON: Create a JSON policy or edit an existing one.
For details, see Creating a Custom Identity Policy and Attaching It to a Principal.
When creating a custom identity policy, use the Resource element to specify the resources the policy applies to and use the Condition element (service-specific condition keys) to control when the policy is in effect. For details about the supported resource types and condition keys, see "Identity Policy-based Authorization" in the Domain Name Service API Reference. The following are examples of custom identity policies.
- Example 1: Grant the permissions to create and delete zones.
{ "Version": "5.0", "Statement": [ { "Effect": "Allow", "Action": [ "dns:zone:create", "dns:zone:delete" ] } ] } - Example 2: Create a custom identity policy that contains multiple actions.
A custom identity policy can contain the actions of one or multiple services. The following is an example policy containing multiple actions:
{
    "Version": "5.0",
    "Statement": [
        {
            "Effect": "Allow",
            "Action": [
                "dns:zone:create",
                "dns:recordset:create"
            ]
        },
        {
            "Effect": "Deny",
            "Action": [
                "dns:zone:delete",
                "dns:recordset:delete"
            ]
        },
        {
            "Effect": "Allow",
            "Action": [
                "vpc:vpcs:get",
                "vpc:vpcs:list"
            ]
        }
    ]
}
Feedback
Was this page helpful?
Provide feedbackThank you very much for your feedback. We will continue working to improve the documentation.See the reply and handling status in My Cloud VOC.
For any further questions, feel free to contact us through the chatbot.
Chatbot


