
Este conteúdo foi traduzido por máquina para sua conveniência e a Huawei Cloud não pode garantir que o conteúdo foi traduzido com precisão. Para exibir o conteúdo original, use o link no canto superior direito para mudar para a página em inglês.
Central de ajuda/ Document Database Service/ Guia de usuário/ Modificações de instâncias/ Alteração de nós de instância de cluster/ Adição de nós de instância de cluster
Atualizado em 2025-08-07 GMT+08:00
Adição de nós de instância de cluster
À medida que os dados de serviço aumentam, o número de nós de banco de dados atuais não pode atender aos requisitos de serviço. Nesse caso, você pode adicionar mais nós à instância.
Precauções
- Para adicionar nós, o status da instância deve ser Available, Deleting backup ou Checking restoration.
- Os nós não podem ser adicionados a uma instância de BD que está sendo feita o backup.
- Uma instância de BD não pode ser excluída enquanto os nós estão sendo adicionados.
- Um nó de instância pode ser adicionado em 5 minutos. O tempo necessário depende do número de nós a serem adicionados.
- A adição de nós não afeta os serviços de cluster.
- Ao adicionar um nó shard para uma instância de BD de cluster, verifique se a classe de nó é maior ou igual à classe mais alta de um shard na instância.
Detalhes de preços
- Uma instância de pagamento por uso ainda é cobrada por hora depois que novos nós são adicionados.
- Se você adicionar nós a uma instância anual/mensal, você vai pagar a diferença de preço ou obter um reembolso.
- Para obter detalhes, consulte Detalhes de preços do produto.
Adição de nós dds mongos
- Faça logon no console de gerenciamento.
- Clique em
 no canto superior esquerdo e selecione uma região e um projeto.
 - Clique em
 no canto superior esquerdo da página e escolha Databases > Document Database Service.
 - Na página Instances, clique no nome da instância de cluster.
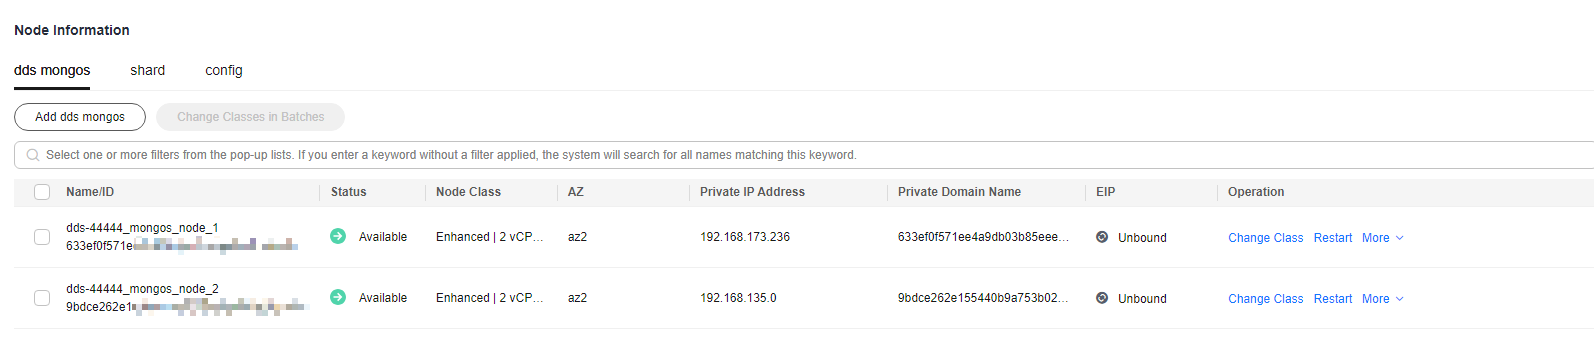
- Na guia dds mongos, na área Node Information, clique em Add dds mongos. Figura 1 Informações do nó
- Na página exibida, especifique Node Class, Nodes e Parameter Template e clique em Next. Figura 2 Adição de nós dds mongos
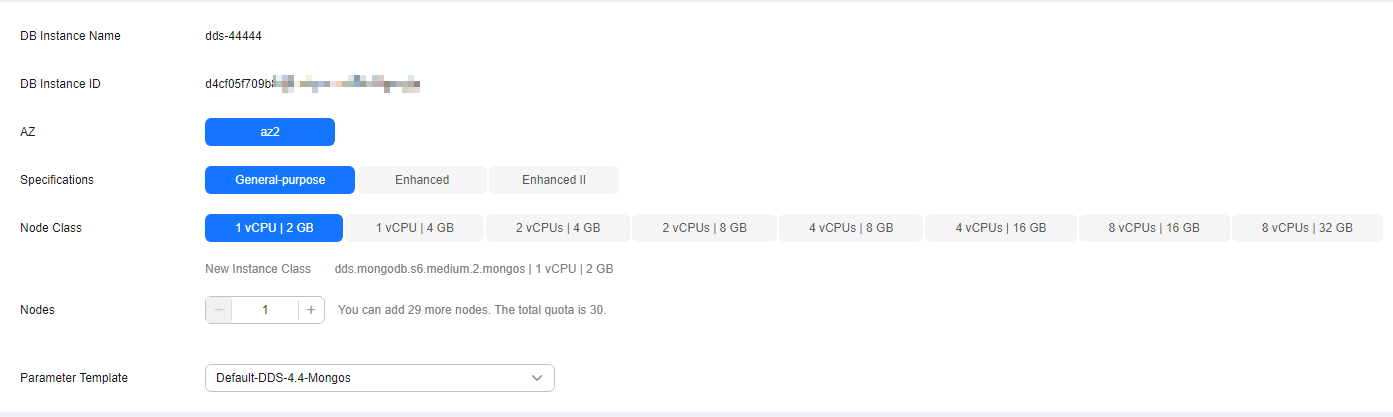
Uma instância de cluster do Community Edition oferece suporte a até 32 nós dds mongos.
- Na página exibida, confirme as informações de configuração do nó.
- Anual/mensal
- Se você precisar modificar suas configurações, clique em Previous para voltar à página para especificar detalhes.
- Se você não precisar modificar suas configurações, clique em Submit para acessar a página de pagamento e concluir o pagamento.
- Pagamento por uso
- Se você precisar modificar suas configurações, clique em Previous para voltar à página para especificar detalhes.
- Se você não precisar modificar suas configurações, clique em Submit para adicionar os nós.
- Anual/mensal
- Veja os resultados.
- Este processo leva cerca de 10 a 15 minutos. Durante esse tempo, o status da instância de BD na lista de instâncias é Adding node.
- No canto superior direito da lista de instâncias de BD, clique em
 para atualizar a lista. O status da instância muda para Available.
 - Na guia dds mongos, na área Node Information, visualize as informações sobre o nó que você adicionou.
- Se os nós dds mongos não forem adicionados, você pode revertê-los em lotes ou excluí-los um por um. Para obter detalhes, consulte a seção Reversão de nós de instância de cluster.
Adição de nós shard
- Faça logon no console de gerenciamento.
- Clique em
 no canto superior esquerdo e selecione uma região e um projeto.
 - Clique em
 no canto superior esquerdo da página e escolha Databases > Document Database Service.
 - Na página Instances, clique no nome da instância de cluster.
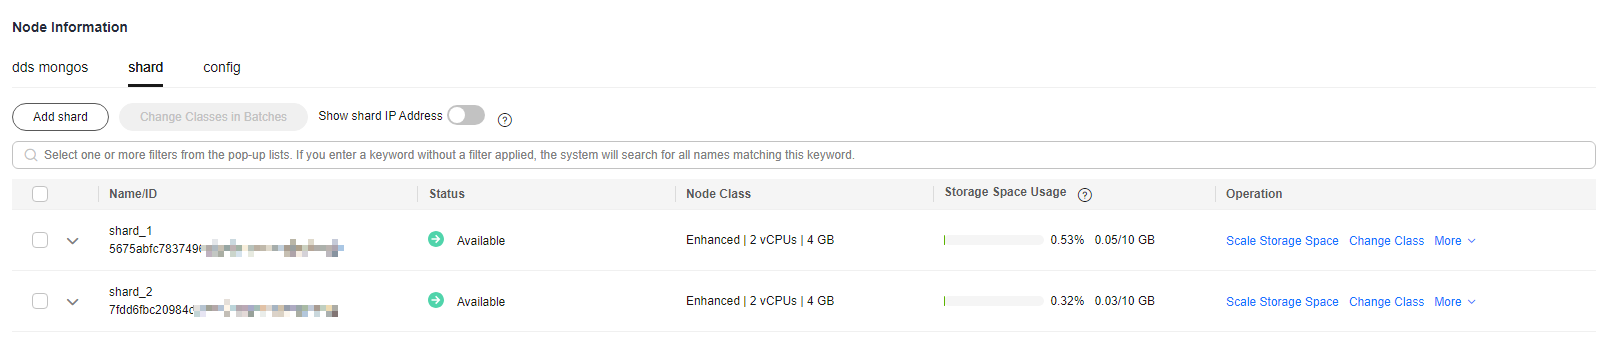
- Na guia shard na área Node Information, clique em Add shard. Figura 3 Informações do nó
- Especifique Node Class, Storage Space, Nodes e Parameter Template e clique em Next. Figura 4 Adição de nós shard
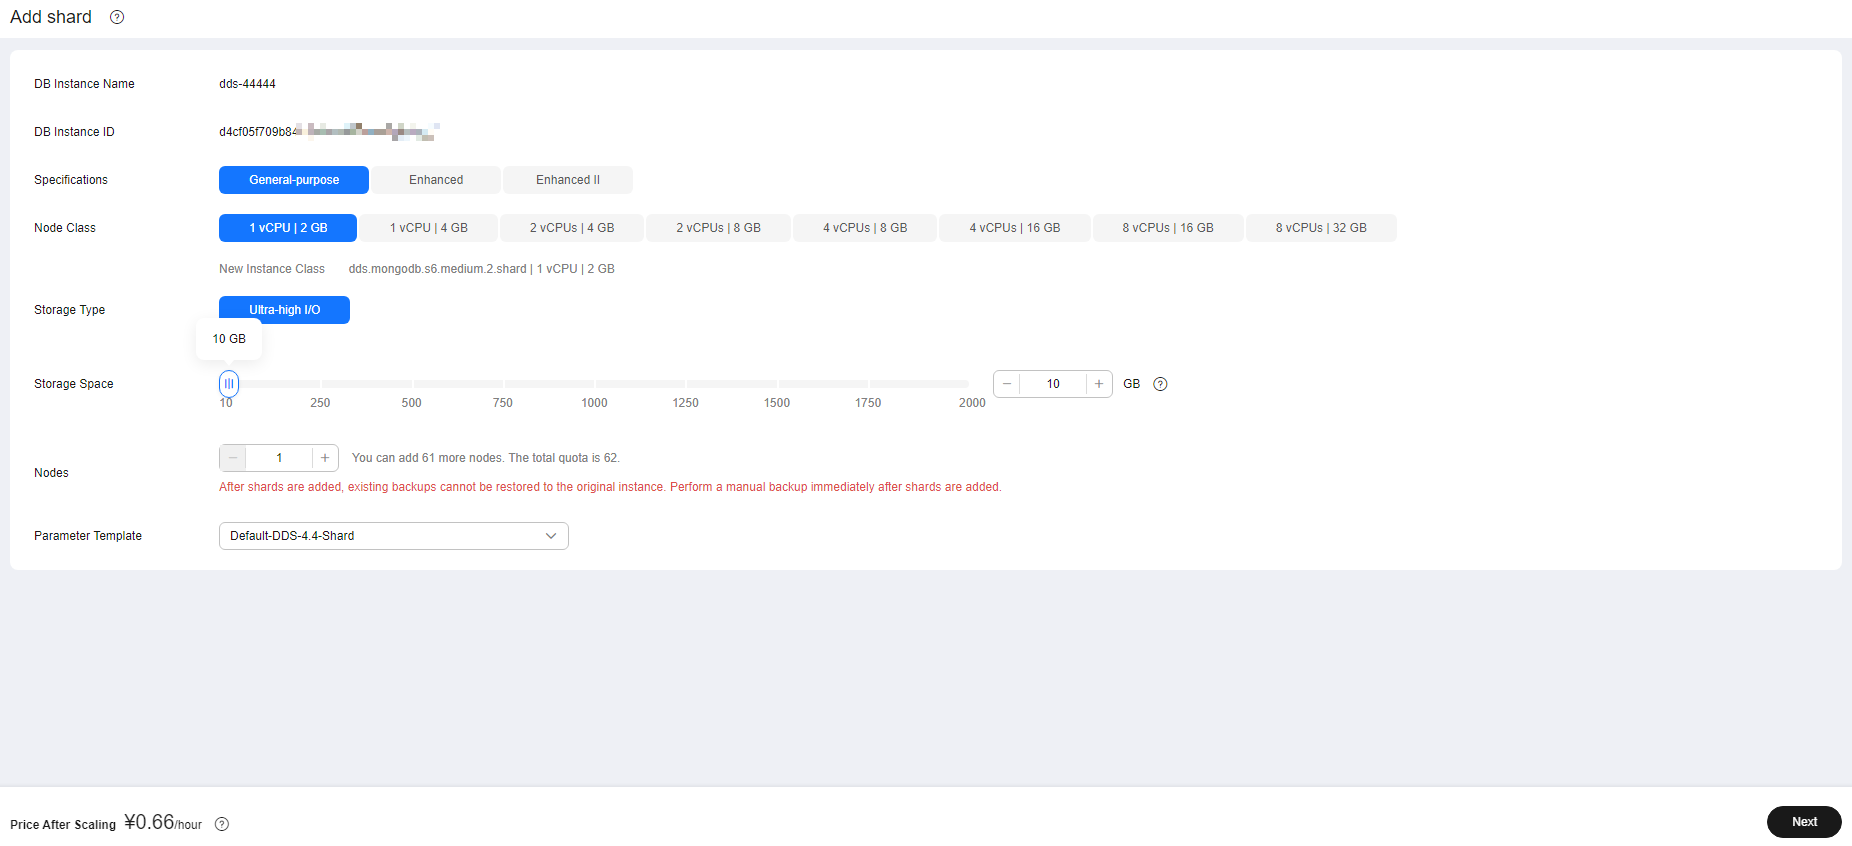
- O espaço de armazenamento que você solicitou incluirá a sobrecarga do sistema necessária para inode, bloco reservado e operação do banco de dados. O espaço de armazenamento deve ser um múltiplo de 10.
- Uma instância de cluster de Community Edition suporta até 32 nós shard.
- Na página exibida, confirme as informações de configuração do nó.
- Anual/mensal
- Se você precisar modificar suas configurações, clique em Previous para voltar à página para especificar detalhes.
- Se você não precisar modificar suas configurações, clique em Submit para acessar a página de pagamento e concluir o pagamento.
- Pagamento por uso
- Se você precisar modificar suas configurações, clique em Previous para voltar à página para especificar detalhes.
- Se você não precisar modificar suas configurações, clique em Submit para adicionar os nós.
- Anual/mensal
- Veja os resultados.
- Este processo leva cerca de 10 a 15 minutos. Durante esse tempo, o status da instância de BD na lista de instâncias é Adding node.
- No canto superior direito da lista de instâncias de BD, clique em
 para atualizar a lista. O status da instância muda para Available.
 - Na guia shard na área Node Information, visualize as informações sobre o nó que você adicionou.
- Se a adição de shard falhar, você poderá reverter a operação em lotes ou excluir shards um por um. Para mais detalhes, consulte Reversão de nós de instância de cluster.
Tópico principal: Alteração de nós de instância de cluster
Feedback
Esta página foi útil?
Deixar um comentário Obrigado por seus comentários. Estamos trabalhando para melhorar a documentação.
O sistema está ocupado. Tente novamente mais tarde.


