
Ativação de endereços IP de nós shard e config
Uma instância de cluster para Community Edition consiste em nós dds mongos, shard e config. Quando seus serviços precisarem ler e gravar dados de e para bancos de dados, conecte-se ao nó dds mongos. Em determinados cenários (por exemplo, migração de dados e sincronização entre clusters), você precisa ler dados do nó shard ou config e precisará obter o endereço IP do nó correspondente.
Esta seção descreve como obter os endereços IP dos nós shard e config.
Antes de começar
- Se você precisar usar essa função, escolha Service Tickets > Create Service Ticket no canto superior direito do console de gerenciamento e envie a solicitação.
- DDS oferece suporte a instâncias de cluster de Community Edition 3.4, 4.0 e 4.2.
- O DDS cria dois endereços de conexão para os nós primário e secundário em um grupo de shard ou grupo de config.
- O tipo de rede do endereço de conexão é o mesmo que o do nó dds mongos atual.
- Uma vez que os endereços de conexão são atribuídos aos seus nós, eles não podem ser alterados ou excluídos.
- Se o IPv6 estiver ativado em uma sub-rede, você não poderá ativar os endereços IP dos nós shard e config para instâncias de banco de dados criadas usando a sub-rede.
- Depois de ativar o endereço de conexão, você pode se conectar a uma instância usando o Mongo Shell.
Ativar endereço IP de shard
- O botão para mostrar o endereço IP do shard só pode ser ativado. Ele não pode ser desativado ou modificado.
- Quando o endereço IP do shard estiver ativado, o DDS aplicará automaticamente os endereços de conexão para todos os nós shard na instância atual.
- Depois que o endereço IP de shard for ativado e novos nós shard forem adicionados, você precisará localizar manualmente um nó shard recém-adicionado e escolha More > Show shard IP Address na coluna Operation para mostrar o endereço IP do shard.
- Depois que o endereço IP do shard é ativado, o usuário do banco de dados sharduser é criado. Para obter detalhes sobre como redefinir a senha, consulte Redefinir a senha do usuário sharduser.
- Faça logon no console de gerenciamento.
- Clique em
 no canto superior esquerdo e selecione uma região e um projeto.
 - Clique em
 no canto superior esquerdo da página e escolha Databases > Document Database Service.
 - Na página Instances, clique no nome da instância. A página Basic Information é exibida.
- Na área Node Information, clique na guia shard. Figura 1 Nós shard

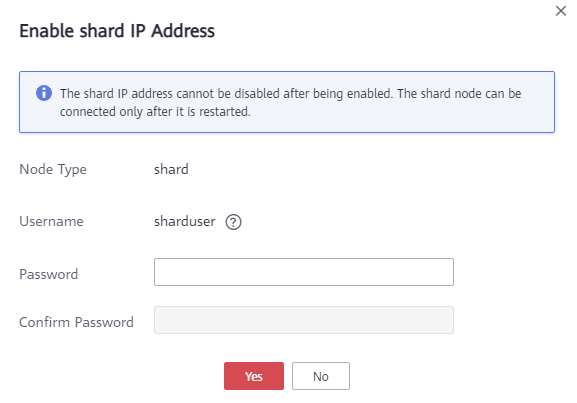
- Clique em Show shard IP Address. Na caixa de diálogo exibida, insira e confirme a senha para conexão com o nó. Figura 2 Ativar endereço IP de shard
Depois que o endereço IP de shard estiver ativado, reinicie o nó shard correspondente para que a configuração entre em vigor.
Na área Node Information, localize a linha que contém o nó shard e clique em Restart na coluna Operation para reiniciar o nó shard.
Figura 3 Reiniciar um nó shard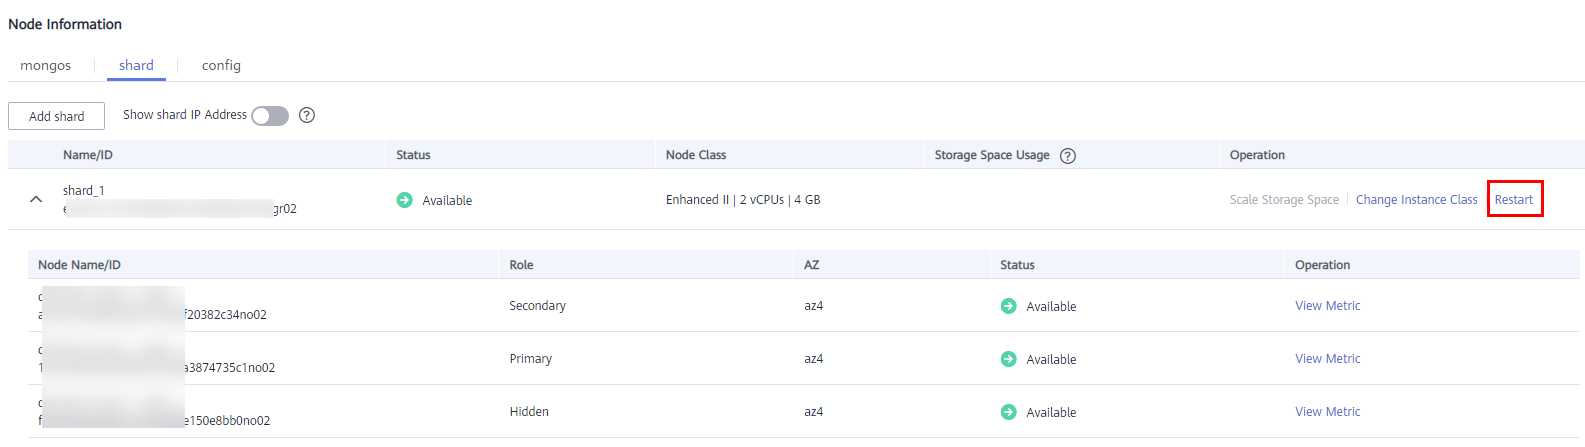
- Visualize o endereço IP privado do nó shard. Depois que o endereço IP de shard estiver ativado, você poderá clicar em
 ao lado de um nó shard na página atual para expandir a lista suspensa do nó ou clicar em Connections no painel de navegação à esquerda e obter o endereço IP privado. Figura 4 Endereços IP privados de nós shard
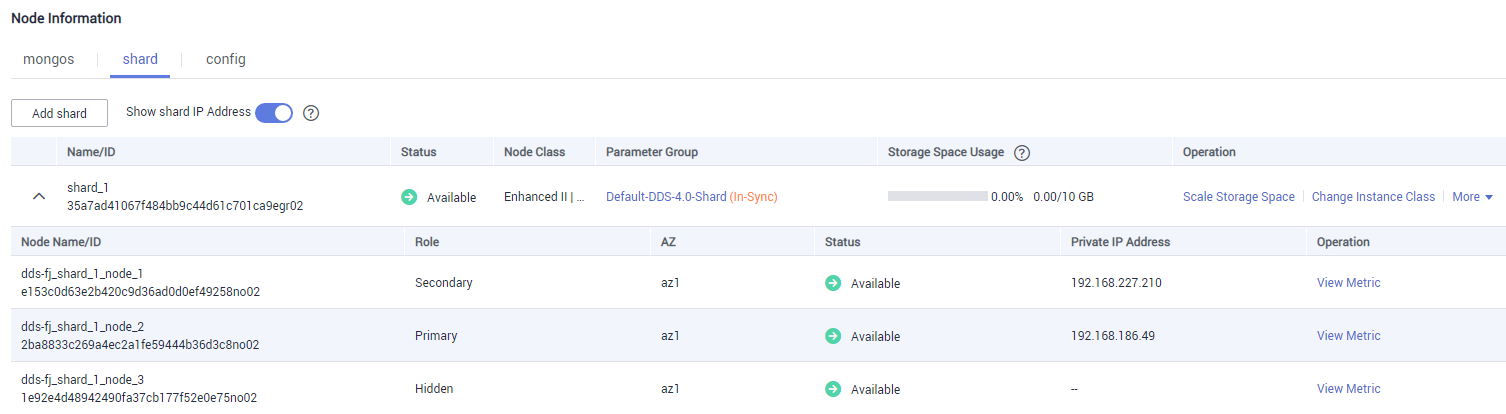
O endereço de conexão do nó shard atual é o seguinte:
mongodb://sharduser:<password>@192.168.xx.xx:8637,192.168.xx.xx:8637/test?authSource=admin&replicaSet=shard_?
- sharduser é o nome de usuário do nó shard atual.
- **** é a senha do nó atual.
- 192.168.xx.xx e 192.168.xx.xx são os endereços IP privados dos nós shard primário e secundário.
- 8637 é a porta do nó shard e não pode ser alterada.
- shard_? é o nome do nó shard a ser conectado, por exemplo, shard_1.
Redefinir a senha do usuário sharduser
Esta função está disponível somente após o endereço IP de shard estar ativado.
- Faça logon no console de gerenciamento.
- Clique em
 no canto superior esquerdo e selecione uma região e um projeto.
 - Clique em
 no canto superior esquerdo da página e escolha Databases > Document Database Service.
 - Na página Instances, clique no nome da instância. A página Basic Information é exibida.
- Na área Node Information, clique na guia shard. Figura 5 Nós shard

- Clique em Reset Password. Figura 6 Redefinição de uma senha
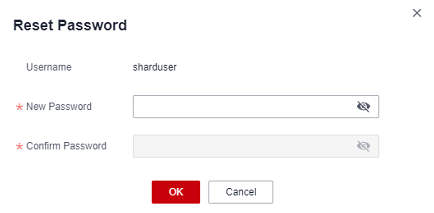
- Digite a nova senha e clique em OK.
Ativar endereço IP de config
- O botão para mostrar o endereço IP de config só pode ser ativado. Ele não pode ser desativado ou modificado.
- Uma vez que o endereço IP de config está ativado, o DDS aplica-se automaticamente para endereços de conexão para todos os nós config na instância atual.
- Depois que o endereço IP de config é ativado, o usuário do banco de dados csuser é criado. Para obter detalhes sobre como redefinir a senha, consulte Redefinir a senha do usuário csuser.
- Faça logon no console de gerenciamento.
- Clique em
 no canto superior esquerdo e selecione uma região e um projeto.
 - Clique em
 no canto superior esquerdo da página e escolha Databases > Document Database Service.
 - No painel de navegação esquerdo, escolha Instances. Na lista de instâncias, clique no nome da instância para ir para a página Basic Information.
- Na área Node Information, clique na guia config. Figura 7 Nós config

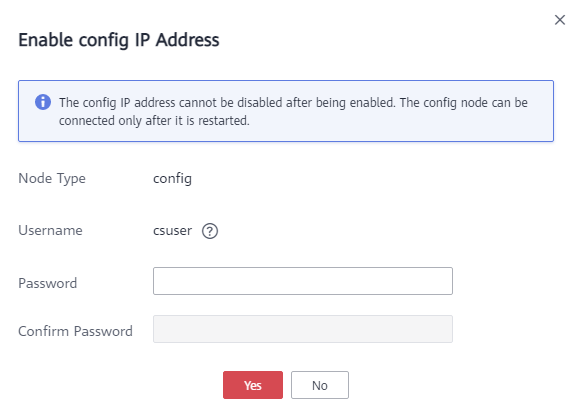
- Clique em Show config IP Address. Na caixa de diálogo exibida, insira e confirme a senha para conexão com o nó. Figura 8 Ativar endereço IP de config
Depois que o endereço IP de config é ativado, o nó config correspondente precisa ser reiniciado para que a configuração entre em vigor.
Na área Node Information, localize a linha que contém o nó de configuração e clique em Restart na coluna Operation para reiniciar o nó config.
Figura 9 Reiniciar um nó config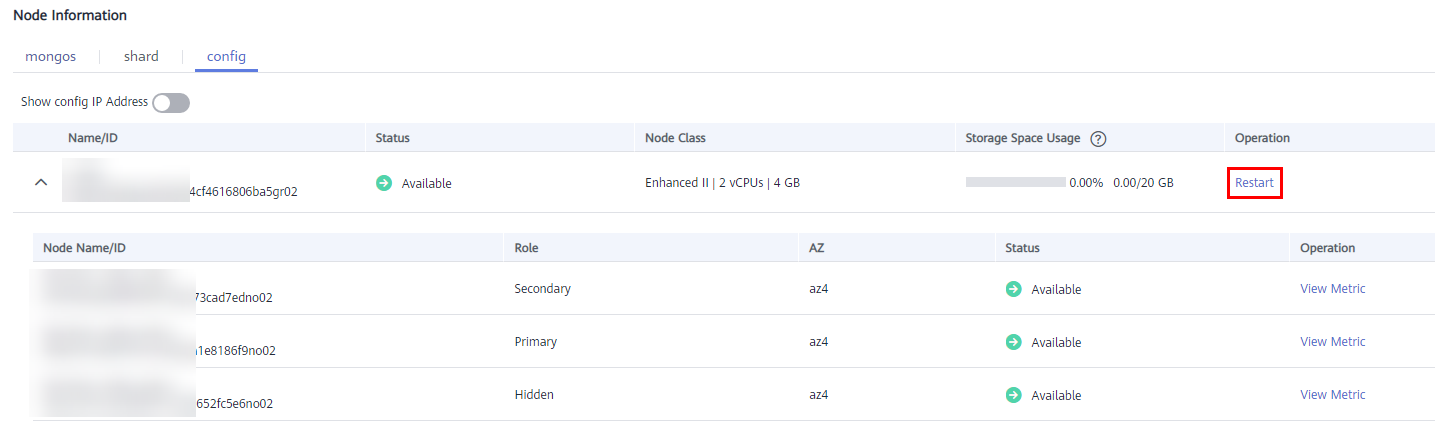
- Visualize o endereço IP privado do nó config. Depois que o endereço IP de config estiver ativado, você pode clicar em
 ao lado do nó na página atual para expandir a lista suspensa de nó ou clicar em Connections no painel de navegação à esquerda e obter o endereço IP privado. Figura 10 Endereços IP privados dos nós config
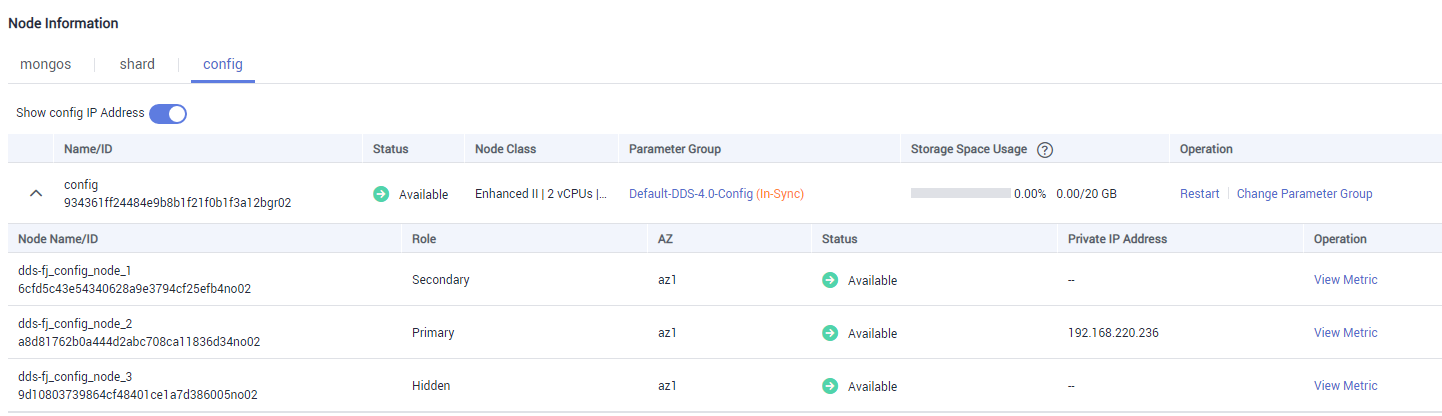
O endereço de conexão do nó config atual é o seguinte:
mongodb://csuser:<password>@192.168.xx.xx:8636/test?authSource=admin
- csuser é o nome de usuário do nó config atual.
- **** é a senha do nó atual.
- 192.168.xx.xx é o endereço IP privado do nó config principal.
- 8636 é a porta do nó config e não pode ser alterada.
Redefinir a senha do usuário csuser
Esta função está disponível somente depois que o endereço IP de config é ativado.
- Faça logon no console de gerenciamento.
- Clique em
 no canto superior esquerdo e selecione uma região e um projeto.
 - Clique em
 no canto superior esquerdo da página e escolha Databases > Document Database Service.
 - Na página Instances, clique no nome da instância. A página Basic Information é exibida.
- Na área Node Information, clique na guia config. Figura 11 Nós config

- Clique em Reset Password. Figura 12 Redefinição de uma senha
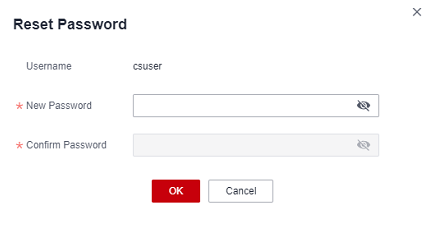
- Digite a nova senha e clique em OK.
Operações de acompanhamento
Depois que os endereços de conexão dos nós shard ou config estiverem ativados, você poderá se conectar aos nós shard ou config usando MongoShell. O procedimento é semelhante ao de conexão a um nó dds mongos. Para obter detalhes, consulte Conexão a uma instância de cluster usando o Mongo Shell.


