Cluster Autoscaler
Description
Cluster Autoscaler is a plug-in for elastic scaling of ModelArts resource pools in a cluster. It can be used to scale in or out node pools based on user-defined rules.
Constraints
- This plug-in is supported only for nodes in a pay-per-use or yearly/monthly Lite Cluster resource pool.
- If the resource specifications are sold out or the underlying capacity is insufficient, the scale-out will fail.
- This plug-in is not supported for Lite Cluster resource pools purchased by rack.
- This plug-in uses the global agency permissions to perform operations on resource pools. If the global agency includes blacklist policies related to resource pool operations, delete the blacklist first. To do so, perform the following steps:
- Log in to the ModelArts console. In the navigation pane on the left, choose Permission Management. Locate the target authorization and obtain the content in the Authorization Content column, which is the name of the agency granted to the current user.
Figure 1 Authorization content

- Go to the IAM console. In the navigation pane on the left, choose Agencies. Locate the obtained agency and click Modify in the Operation column.
Figure 2 IAM agency

- Click the Permissions tab.
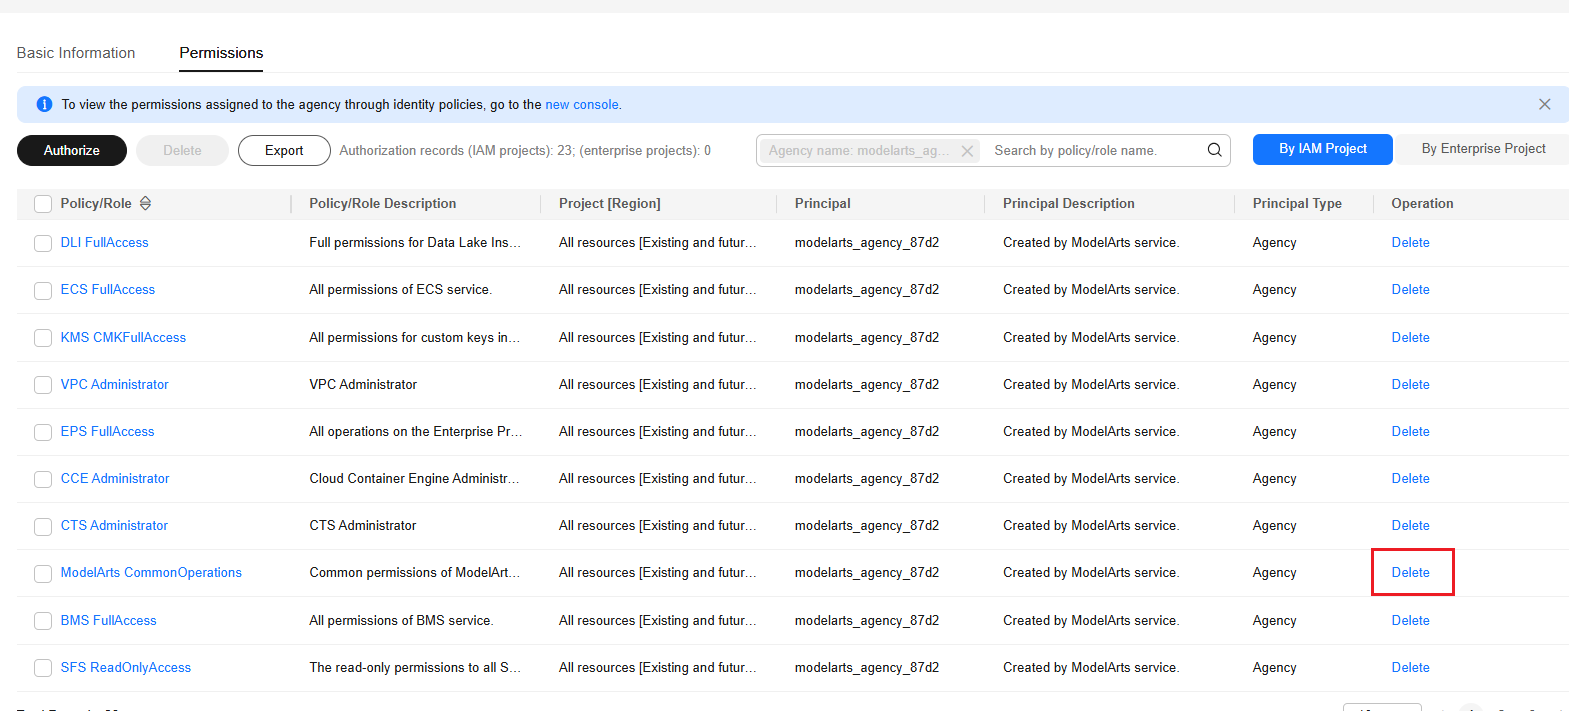
- Locate ModelArts CommonOperations and click Delete in the Operation column. In the displayed dialog box, click OK.
Figure 3 Deleting the ModelArts CommonOperations permission

- Log in to the ModelArts console. In the navigation pane on the left, choose Permission Management. Locate the target authorization and obtain the content in the Authorization Content column, which is the name of the agency granted to the current user.
Installing a Plug-in
- Log in to the ModelArts console. In the navigation pane on the left, choose Lite Cluster under Resource Management.
- Click the resource pool name to access its details page.
- In the navigation pane on the left, choose Plug-ins.
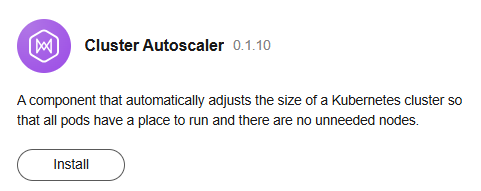
- Locate the plug-in to be installed and click Install.

If Cluster Autoscaler is not manually installed in a newly created resource pool, however, it is displayed as installed in the plug-in list. This indicates that Cluster Autoscaler has been installed in the CCE cluster used by the newly created resource pool. In this case, uninstall Cluster Autoscaler and reinstall it.
Figure 4 Installing a plug-in
- In the displayed dialog box, configure the parameters.
- Read "Usage Notes" and select I have read and understand the preceding information.
- Click OK.
Configuring Auto Scaling Policies for a Node Pool
After you install Cluster Autoscaler, you need to configure auto scaling policies for node pools.
Only pay-per-use nodes can be added.

Configured nodes may be deleted and cannot be restored if automatic scale-in is performed. Exercise caution.
- On the resource pool details page, choose Node Pool Management from the left.
- Locate the target node pool and click AS Configuration in the Operation column.
- In the displayed dialog box, configure the node pool scaling policy.
- Auto Scale-Out
If this function is enabled, the node pool can be automatically scaled out. Each node pool can have a maximum of six scale-out rules.
Table 2 Auto scale-out parameters Parameter
Description
Custom Scale-out Rules
Click Add Rule. In the dialog box displayed, set the following parameters:
Set Rule Type to Period or Metric Trigger. Each node pool can have a maximum of six scale-out rules, including five periodic scale-out rules and one metric-triggered scale-out rule. A periodic scale-out rule cannot be added repeatedly. You can add only one metric-triggered scale-out rule.
For details, see Table 3.
Max. Nodes
The node pool will not be scaled out if the number of nodes hits the configured maximum. If the number of nodes in a node pool plus the expected number of nodes to be added exceeds the upper limit, the scale-out will not be triggered. This is to ensure the atomicity of scale-out.
Table 3 Scale-out rule types Rule Type
Description
Periodic
Automatically adds nodes to the node pool in a specified period of time, optimizing resource allocation and reducing costs.
- Trigger Time: Specify a time as required. This time indicates the local time of where the node is deployed.
- New Nodes: Set the number of nodes to be added to a node pool during elastic scaling.
Metric Trigger
Dynamically adds nodes to the node pool based on the NPU usage, improving task execution efficiency.
- Trigger: Currently, only NPU usage-triggered scale-out is supported. When the NPU usage of a node is low, the system may migrate tasks to the node or adjust the number of nodes to better match the requirements.
NPU usage = Resource requested by the pod in the node pool/Allocatable resources of the node pod (Node Allocatable)
The value must be greater than the scale-in percentage configured in Autoscaler.
- Action
- Customization: Customize the number of nodes to be added during auto scaling.
- Automatic calculation: When the trigger condition is met, nodes are automatically added and the usage is restored to a value lower than the threshold.
Number of nodes to be added = Resource requested by the pod in the node pool/(Allocatable resources of a single node x Number of target nodes) - Current number of nodes + 1
- Auto Scale-In
Once enabled, the system checks the resource status of the entire cluster. If it confirms that workload pods can be scheduled and run properly, it automatically chooses nodes for scale-in.
Table 4 Auto scale-in parameters Parameter
Description
Min. Nodes
The node pool will not be scaled in if the number of nodes hits the configured minimum.
You must set the minimum number of nodes (minCount) in the node pool for scale-in. Otherwise, the auto scale-in will fail.
Cooldown Period (Min)
The cooldown period for starting scale-in evaluation again after auto scale-out is triggered
- Auto Scale-Out
- Click OK.
Configuring Metric-Triggered Auto Scaling
When you configure an auto scaling policy for a node pool, if metric ma_node_pool_allocate_card_util is used as the scaling policy, you need to complete the following configurations.
- Install the cloud native plug-in, select local storage, and enable custom metric collection. For details, see Creating an HPA Policy with Custom Metrics.
- Create external APIServices and use kubectl apply to apply the configurations to the Kubernetes cluster.
a. Log in to the CCE console. Go to the shell page of the cluster by clicking the CLI tool in the upper right corner.
b. Create the external.yaml file and save the YAML content below to the file.
c. Run the kubectl apply -f external.yaml command.apiVersion: apiregistration.k8s.io/v1 kind: APIService metadata: labels: app: external-metrics-apiserver release: cceaddon-prometheus name: v1beta1.external.metrics.k8s.io spec: group: external.metrics.k8s.io groupPriorityMinimum: 100 insecureSkipTLSVerify: true service: name: custom-metrics-apiserver namespace: monitoring port: 443 version: v1beta1 versionPriority: 100 - Add custom external metrics of the Prometheus plug-in. For details, see Step 3: Modify the Configuration File.
- Log in to the CCE console and click the cluster name to access its details page. In the navigation pane on the left, choose ConfigMaps and Secrets and switch to the monitoring namespace.
- Update user-adapter-config. You can modify the rules field in user-adapter-config to convert the metrics exposed by Prometheus to metrics that can be associated with HPA.
Add the following example rules:
apiVersion: v1
kind: ConfigMap
metadata:
  name: user-adapter-config
  namespace: monitoring
data:
  config.yaml: |
    rules: []
    ...
#The following content is the added content.
    externalRules:
    - seriesQuery: '{__name__="ma_node_allocate_card_util",pool_id!=""}'
      metricsQuery: avg(<<.Series>>{<<.LabelMatchers>>}) by (pool_id,node_pool)
      resources:
        overrides:
            pool_id:
                resource: namespace
      name:
        as: ma_node_pool_allocate_card_util
- On the CCE console, choose Clusters from the navigation pane.
- Click the cluster name. Then, in the navigation pane on the left, choose Workload. Switch to the monitoring namespace. Locate the custom-metrics-apiserver instance and choose More > Redeploy next to the workload.
- After the redeployment is complete, you can use the CLI tool on the CCE console to view the current metric values. The command is shown below. In the command, pool_id indicates the resource pool ID, and node_pool indicates the node pool name. When querying the default node pool, leave this parameter blank.
kubectl get --raw /apis/external.metrics.k8s.io/v1beta1/namespaces/{{pool_id}}/ma_node_pool_allocate_card_util?labelSelector=node_pool={{node_pool_name}}
Components
|
Component |
Description |
Resource Type |
|---|---|---|
|
nodescaler-controller-manager |
Manage auto scaling of resource pools. |
Deployment |
Related Operations
For details, see Viewing the Lite Cluster Plug-in on the Resource Pool Details Page.
Change History
|
Plug-in Version |
New Feature |
|---|---|
|
7.3.0 |
Supported custom deployment specifications. |
|
0.1.20 |
Supported auto scale-out at a scheduled time, scale-out based on the NPU allocation rate, and auto scale-in based on the load of idle nodes. |
Feedback
Was this page helpful?
Provide feedbackThank you very much for your feedback. We will continue working to improve the documentation.See the reply and handling status in My Cloud VOC.
For any further questions, feel free to contact us through the chatbot.
Chatbot


