
Using AOM to Monitor Cloud Services
Cloud service monitoring displays service instance statuses and metric usage in graphs such as line graphs and digit graphs. You can view the following services on the Cloud Service Monitoring page: FunctionGraph, Object Storage Service (OBS), Elastic IP (EIP), Elastic Load Balance (ELB), NAT Gateway, and Relational Database Service (RDS).
Constraints
To use cloud service monitoring, enable this function in Menu Settings. For details, see Configuring AOM Menus.
Viewing Cloud Service Monitoring Information
- Log in to the AOM 2.0 console.
- In the navigation pane, choose Infrastructure Monitoring > Cloud Service Monitoring.
- Select a cloud service from the cloud service list. In the right pane, view all instances, related enterprise projects, and environments of the cloud service.
- If Connect Now is displayed on the right, the cloud service has not been connected to AOM. Click Connect Now or click Connect Cloud Service in the upper right corner of the page. After a cloud service is connected, you can monitor it.
- Before connecting a cloud service, select an enterprise project. If you have selected an enterprise project on the global settings page, skip this step. If no enterprise project has been selected on the global settings page, select one from the drop-down list here.
Figure 1 Viewing cloud service information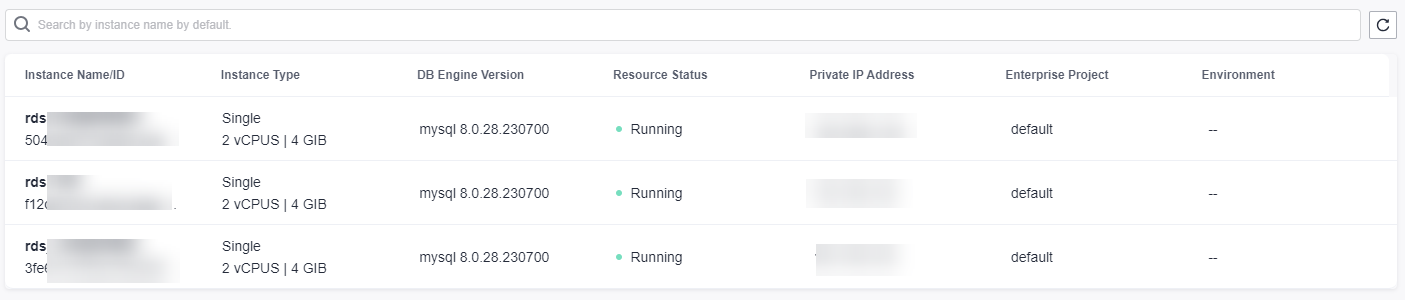
- In the upper right corner of the cloud service instance list, set filter criteria or search for cloud service instances by instance name or ID.
- Click
 in the upper right corner to obtain the latest information about all instances of the cloud service in real time.
- Click an instance name. On the displayed page, monitor its metric graphs.
- In the upper right corner of the page, set different statistical periods to view data.
- Set a time range to view the metrics that are reported. There are two methods to set a time range:
Method 1: Use a predefined time label, such as Last hour or Last 6 hours. You can select a time range as required.
Method 2: Specify the start time and end time (max. 30 days).
- Set the interval for refreshing information. Click
 and select a value from the drop-down list, such as Refresh manually or 1 minute auto refresh.
- Set a time range to view the metrics that are reported. There are two methods to set a time range:
- Enter a metric name in the search box so that you can quickly view required information.
- In the upper right corner of a metric card, choose
 > Full Screen. The card is displayed in full screen.
 - In the upper right corner of a metric card, choose
 > Refresh. If you are in full screen mode, choose
  > Refresh.
 - In the upper right corner of the page, click View Resource Details to go to the corresponding console and view more information.
- In the upper right corner of the page, set different statistical periods to view data.
Feedback
Was this page helpful?
Provide feedbackThank you very much for your feedback. We will continue working to improve the documentation.See the reply and handling status in My Cloud VOC.
For any further questions, feel free to contact us through the chatbot.
Chatbot


