
Error Message "XHR failed" Is Displayed During VS Code's Connection to a Remote Notebook Instance
Symptom
Error message "XHR failed" is displayed when VS Code is used to connect to a remote notebook instance.
Possible Cause
The network may be faulty, and the VS Code Server cannot be automatically downloaded. In this case, manually install the VS Code Server.
Solution
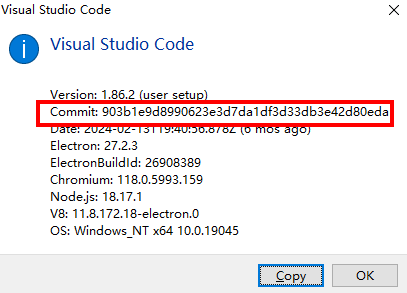
- Open VS Code, choose Help > About, and record the commit ID.
- Check the system architecture of the image used for creating the notebook instance. You can open the terminal on the notebook instance and run the uname -m command to view the system architecture.
- Download the VS Code Server of the required version based on the commit ID and the image architecture of the notebook instance.

If error message "Not Found" is displayed during the download, download another version of VS Code and install it locally. Currently, Vscode-1.86.2 is recommended.
- If the instance architecture is x86_64, visit the following URL (manually change the commit ID and delete the angle brackets), and download the vscode-server-linux-x64.tar.gz file.
https://update.code.visualstudio.com/commit:<Commit ID>/server-linux-x64/stable
- If the instance architecture is AArch, visit the URL below (manually change the commit ID and delete the angle brackets), and download the vscode-server-linux-arm64.tar.gz file. After the file is downloaded, rename it vscode-server-linux-x64.tar.gz.
https://update.code.visualstudio.com/commit:<Commit ID>/server-linux-arm64/stable
For example, if the commit ID is 863d2581ecda6849923a2118d93a088b0745d9d6 and the OS architecture is x86_64, the URL should be:
https://update.code.visualstudio.com/commit:863d2581ecda6849923a2118d93a088b0745d9d6/server-linux-x64/stable
- If the instance architecture is x86_64, visit the following URL (manually change the commit ID and delete the angle brackets), and download the vscode-server-linux-x64.tar.gz file.
- Upload vscode-server-linux-x64.tar.gz to the /home/ma-user/work directory of the ModelArts instance.

Run the following command on the notebook terminal and specify the commit ID. (Delete the angle brackets.)
commitId=<Commit ID>
mkdir -p /home/ma-user/.vscode-server/bin/$commitId
tar -zxvf vscode-server-linux-x64.tar.gz -C /home/ma-user/.vscode-server/bin/$commitId  --strip=1
chmod 750 -R /home/ma-user/.vscode-server/bin/$commitId
- Close VS Code and open it again on the notebook instance list page. (You need to close the local VS Code. An error may be reported if multiple processes are running.)
Feedback
Was this page helpful?
Provide feedbackThank you very much for your feedback. We will continue working to improve the documentation.See the reply and handling status in My Cloud VOC.
For any further questions, feel free to contact us through the chatbot.
Chatbot


