
Scaling Your Website Dynamically
-
Auto Scaling (AS) adjusts compute resources based on service requirements and the policies you configure.
-
You can specify AS configurations and policies based on service requirements. These configurations and policies free you from having to repeatedly adjust resources to keep up with service changes, and help you reduce resource and labor costs.
-
Assume that your e-Commerce website runs on ECS ecs-c9b4 in Huawei Cloud. You plan to launch a big promotion at 00:00 on a certain day. To respond to the demand spike during the promotion, you can take the following measures.
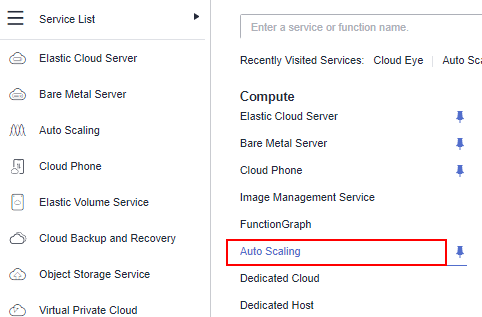
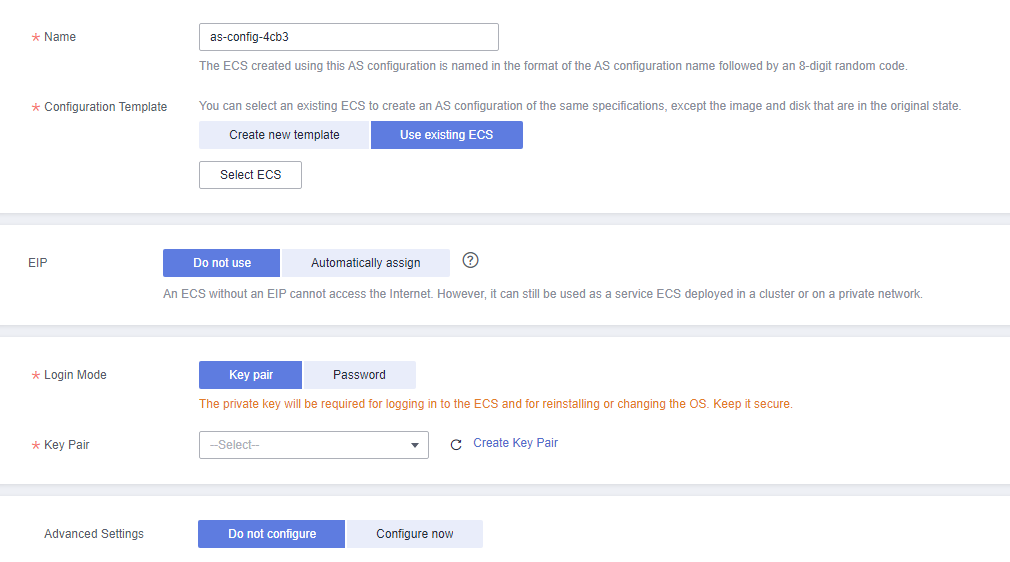
Step 1: Create an AS Configuration
1. Log in to the management console.
2. Choose Service List > Compute > Auto Scaling.
3. Click Create AS Configuration.
4. Configure parameters and click Create Now.

Note
1. Set Configuration Template to Use existing ECS and select ECS ecs-c9b4. You can also create AS configuration from scratch.
2. Select Key pair for Login Mode. You can also log in to an ECS using a password.
3. Advanced Settings is optional. You can inject user data as text or file.
1
Accessing Auto Scaling
2
Creating an AS configuration

View Image
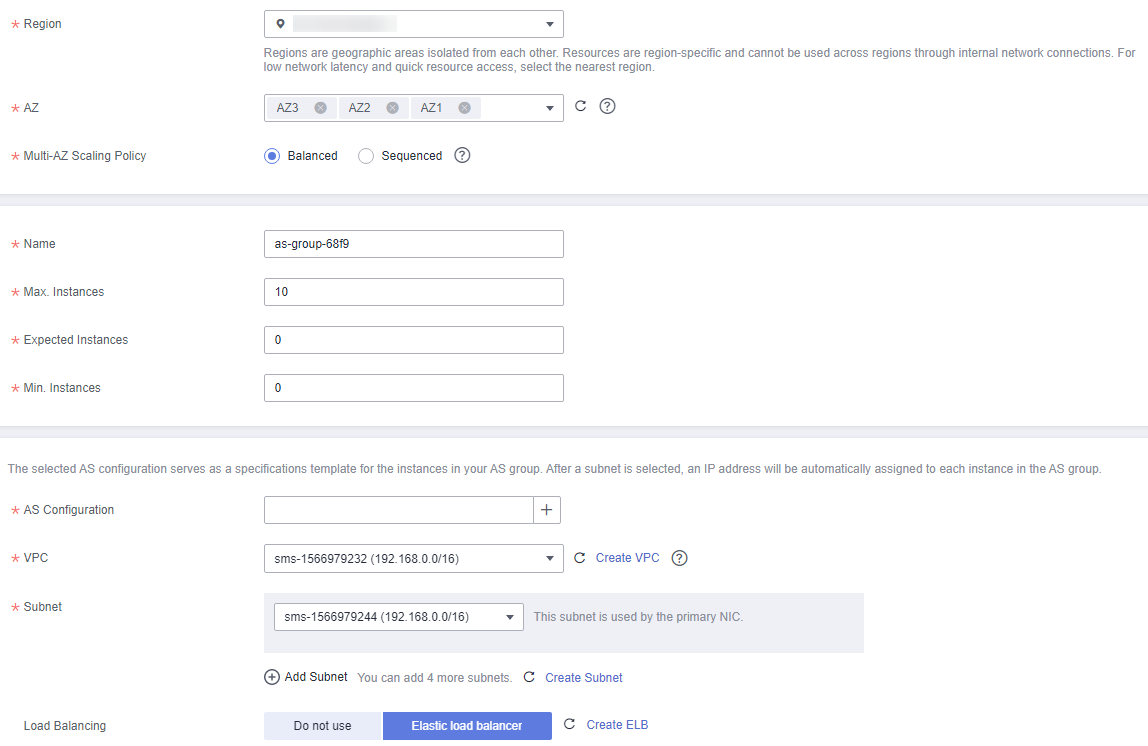
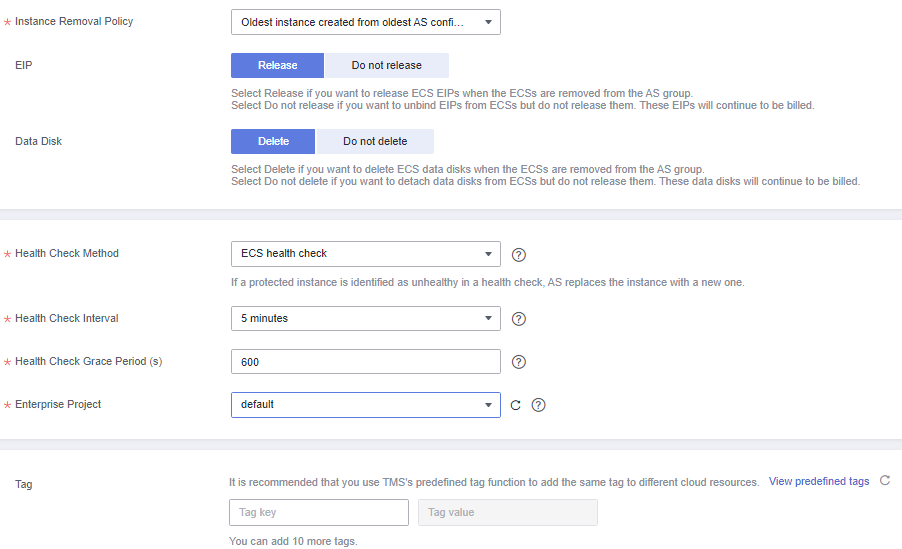
Step 2: Create an AS Group
1. On the Instance Scaling page, click Create AS Group.
2. Configure parameters and click Now.
Note
1. When specifying AZ, ensure that the AZ where ECS ecs-c9b4 resides is selected.
2. Set both Min. Instances and Expected Instances to 0 and Max. Instances to 10.
3. Select the AS configuration you created.
4. Select the VPC where ECS ecs-c9b4 resides.
5. Select Elastic load balancer for Load Balancing. Access traffic will be automatically distributed to all available ECSs in the AS group.
6. Select ECS health check for Health Check Method.
1
Creating an AS group (1)
2
Creating an AS group (2)
View Image
Step 3: Add an AS Policy
1. On the AS Groups page, locate the created AS group and click View AS Policy.
2. Click Add AS Policy to add an AS policy for the AS group.
Note
You can also click the AS group name, click the AS Policies tab, and then click Add AS Policy.
1
Viewing the AS policy

2
Adding an AS policy

View Image
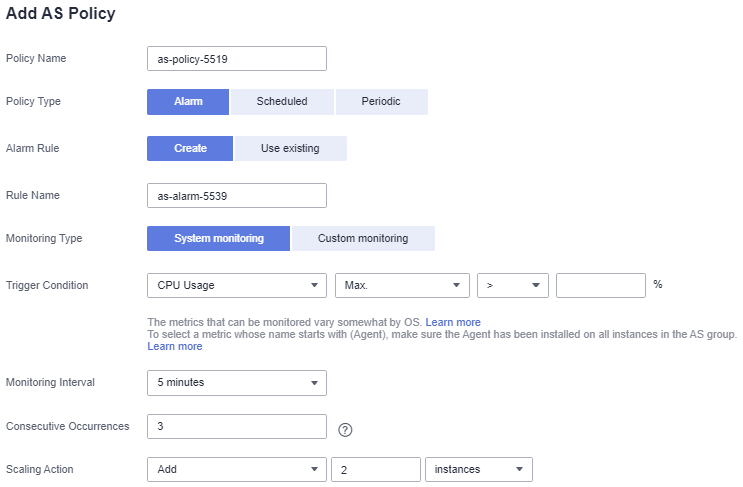
Step 4: Configure AS Policy Parameters
1. Select Alarm for Policy Type.
2. Set Trigger Condition to Max. CPU Usage > 90%.
3. Set Scaling Action to Add 2 instances.
4. Retain the default setting for Cooldown Period.
5. Click OK.
1
Configuring AS policy parameters
View Image
Step 5: Manually Add Instances to the AS Group
1. Click the name of the created AS group and click the Instances tab.
2. Click Add, select the instances to be added, and click OK.
Note
You can add instances to an AS group only if the AS group is enabled and has no ongoing scaling action, and the number of current instances is less than the maximum number of instances.
1
Manually adding instances to an AS group

View Image
Step 6: View Monitoring Data
View monitoring data of the AS group. The figure on the right suggests that:
1. The AS group contained no instance after it was created. After Expected Instances was changed to 2, a scaling action was triggered and two ECSs were added to the AS group.
2. The CPU usage stayed stable.
AS monitors CPU usage in real time and performs scaling actions based on the policy you configured. This helps you save money by increasing and decreasing compute capacity as needed.
1
Viewing monitoring data

View Image
Feedback
Was this page helpful?
Provide feedbackThank you very much for your feedback. We will continue working to improve the documentation.See the reply and handling status in My Cloud VOC.
For any further questions, feel free to contact us through the chatbot.
Chatbot


