
Using a Dedicated Load Balancer at Layer 7 to Transfer Client IP Addresses
Scenarios
When you are using ELB to distribute traffic, you may need to obtain the real IP addresses of clients for further analysis, especially in typical service scenarios such as security, data analysis, user behavior analysis, and troubleshooting. However, when you are using HTTP and HTTPS listeners of a load balancer to forward traffic, client IP addresses are translated when passing through the load balancer. This section describes how to obtain client IP addresses.
Constraints
- If you are using a NAT gateway, you cannot obtain the IP addresses of the clients.
- If the client is a container, you can obtain only the IP address of the node where the container is located, but cannot obtain the IP address of the container.
Transferring Client IP Addresses
- Transfer Client IP Address is enabled by default for HTTP and HTTPS listeners of dedicated load balancers, which means that client IP addresses can be placed in the X-Forwarded-For header and transferred to backend servers.
- You can configure the backend servers to ensure that they can correctly parse the X-Forwarded-For header to obtain client IP addresses.
The X-Forwarded-For header is in the following format:
X-Forwarded-For: <client-IP-address>, <proxy-server-1-IP-address>, <proxy-server-2-IP-address>, ...
The first IP address included in the X-Forwarded-For header is the client IP address.
Preparations
- There is a dedicated load balancer with an EIP bound to it. If there is no such resource, you can buy one and bind an IPv4 EIP to the load balancer.
- There is an HTTP backend server group with an ECS (ECS01) running in it. The ECS hosts an application.
Step 1: Enable Transfer Client IP Address for a Layer 7 Listener
Transfer Client IP Address is enabled by default for HTTP and HTTPS listeners of dedicated load balancers, which means that client IP addresses can be placed in the X-Forwarded-For header and transferred to the backend servers.
Step 2: Configure Backend Servers
Configure the servers based on the backend server type to ensure that they can parse the X-Forwarded-For header.
For example, if CentOS 7.5 is used as the OS, run the following command to install the software:
- Run the following commands to download the Nginx source code package and install http_realip_module:
yum -y install gcc pcre pcre-devel zlib zlib-devel openssl openssl-devel
wget http://nginx.org/download/nginx-1.17.0.tar.gz
tar zxvf nginx-1.17.0.tar.gz
cd nginx-1.17.0
./configure --prefix=/path/server/nginx --with-http_stub_status_module --without-http-cache --with-http_ssl_module --with-http_realip_module
make
make install
- Run the following command to open the nginx.conf file:
vi /path/server/nginx/conf/nginx.conf
- Press i to enter the editing mode.
- Modify the server configuration block as follows:
set_real_ip_from 192.168.0.0/16;
real_ip_header X-Forwarded-For;
Figure 1 Adding information

You need to enter the CIDR block of the proxy server as the value of set_real_ip_from. For dedicated load balancers, enter the CIDR block of its backend subnet.
- Run the following command to modify the HTTP configuration block and, configure access logs for Nginx servers, and transfer the client request information in the X-Forwarded-For header to the access log through http_x_forwarded_for:
http {
      log_format main '$remote_addr- $remote_user [$time_local] "$request" '
                      '$status $body_bytes_sent "http_referer" '
                      '"$http_user_agent" "$http_x_forwarded_for"';
      }
Figure 2 Configuring the access log
- Start Nginx.
/path/server/nginx/sbin/nginx
In the following operations, the Tomcat installation path is /usr/tomcat/tomcat8/.
- Log in to a server on which Tomcat is installed.
- Check whether Tomcat is running properly.
ps -ef|grep tomcat
netstat -anpt|grep java
Figure 3 Tomcat running properly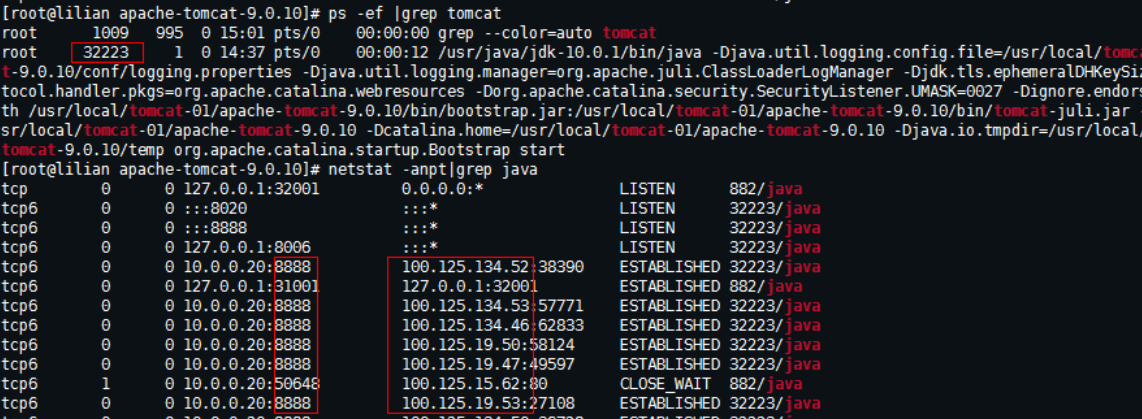
- Modify className="org.apache.catalina.valves.AccessLogValve" in the server.xml file as follows:
- Run the following command to open the server.xml file:
vim /usr/tomcat/tomcat8/conf/server.xml
- Modify the file as follows:
<Valve className="org.apache.catalina.valves.AccessLogValve" directory="logs"
prefix="localhost_access_log." suffix=".txt"
pattern="%{X-FORWARDED-FOR}i %l %u %t %r %s %b %D %q %{User-Agent}i %T" resolveHosts="false" />
Figure 4 Example configuration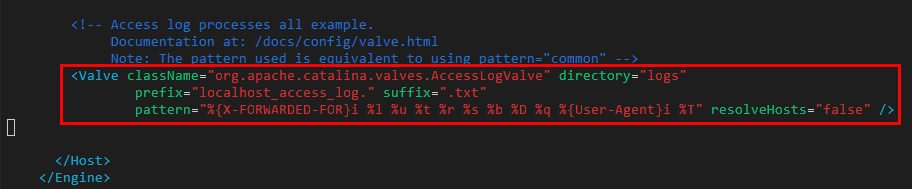
- Run the following command to open the server.xml file:
- Restart the Tomcat service.
cd /usr/tomcat/tomcat8/bin && sh shutdown.sh && sh startup.sh
/usr/tomcat/tomcat8/ is where Tomcat is installed. Change it based on site requirements.
Figure 5 Restarting the Tomcat service
- View the latest logs.
As highlighted in the following figure, IP addresses shown in the red box are the client IP addresses.
cd /usr/tomcat/tomcat8/logs/
cat localhost_access_log.2021-11-29.txt
In this command, localhost_access_log.2021-11-29.txt indicates the log path of the current day. Change it based on site requirements.
Figure 6 Checking the client IP addresses
The following uses Windows Server 2012 with IIS7 as an example to describe how to obtain the client IP address.
- Download and install IIS.
- Download the F5XForwardedFor.dll plug-in and copy the plug-ins in the x86 and x64 directories to a directory for which IIS has the access permission, for example, C:\F5XForwardedFor2008.
- Open Internet Information Services (IIS) Manager and choose Modules > Configure Native Modules.
Figure 7 Selecting Modules
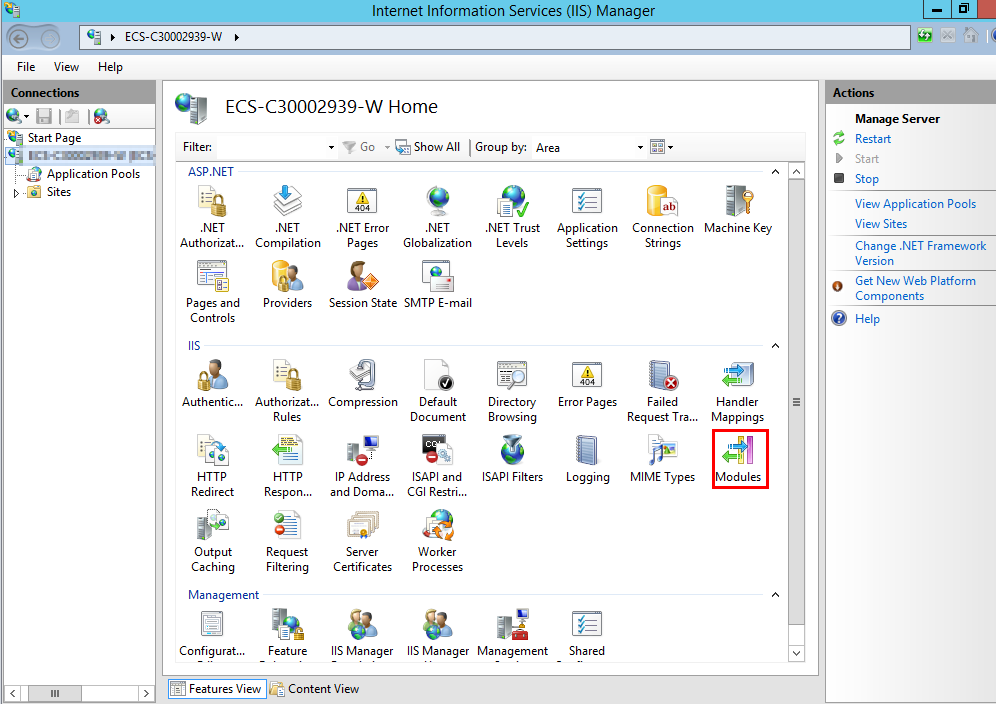 Figure 8 Configure Native Modules
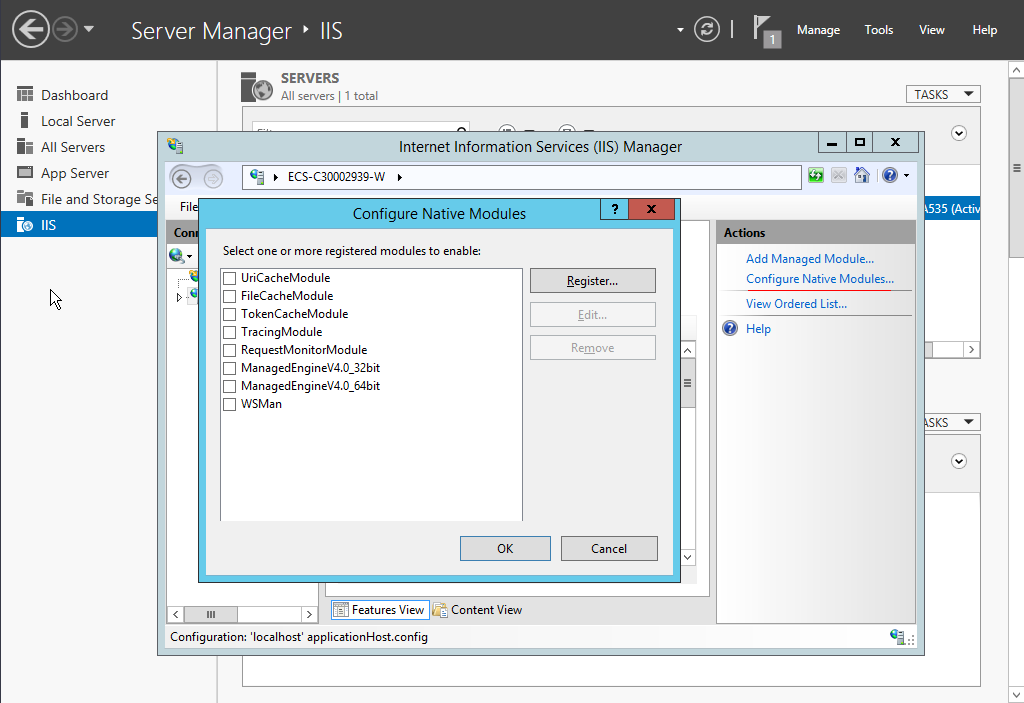
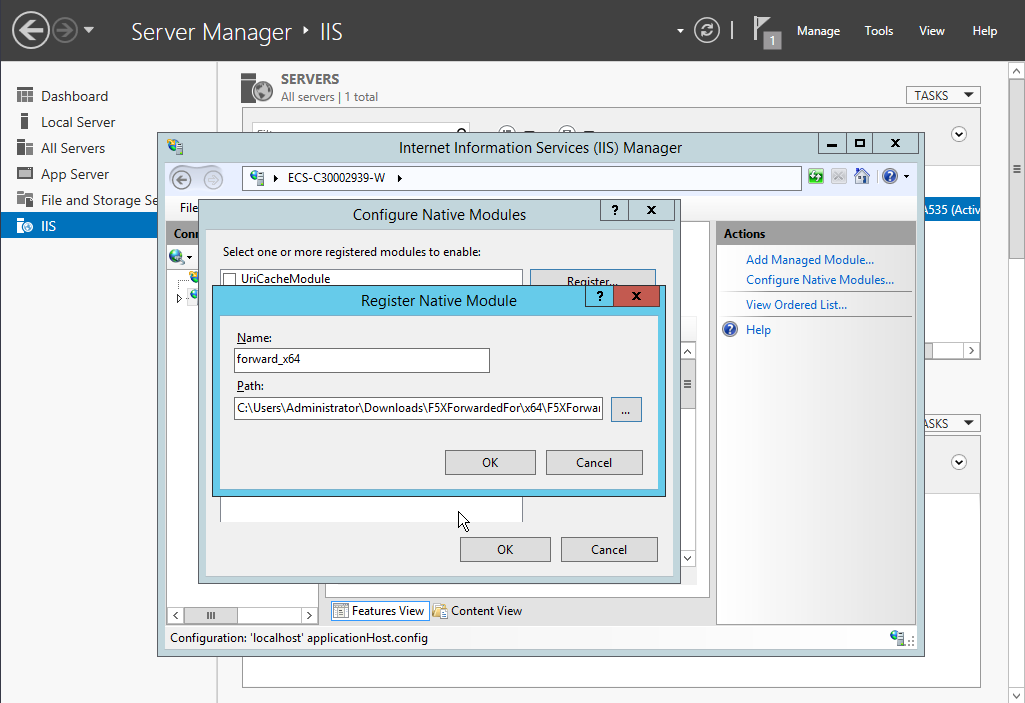
- Click Register to register the x86 and x64 plug-ins.
Figure 9 Registering plug-ins
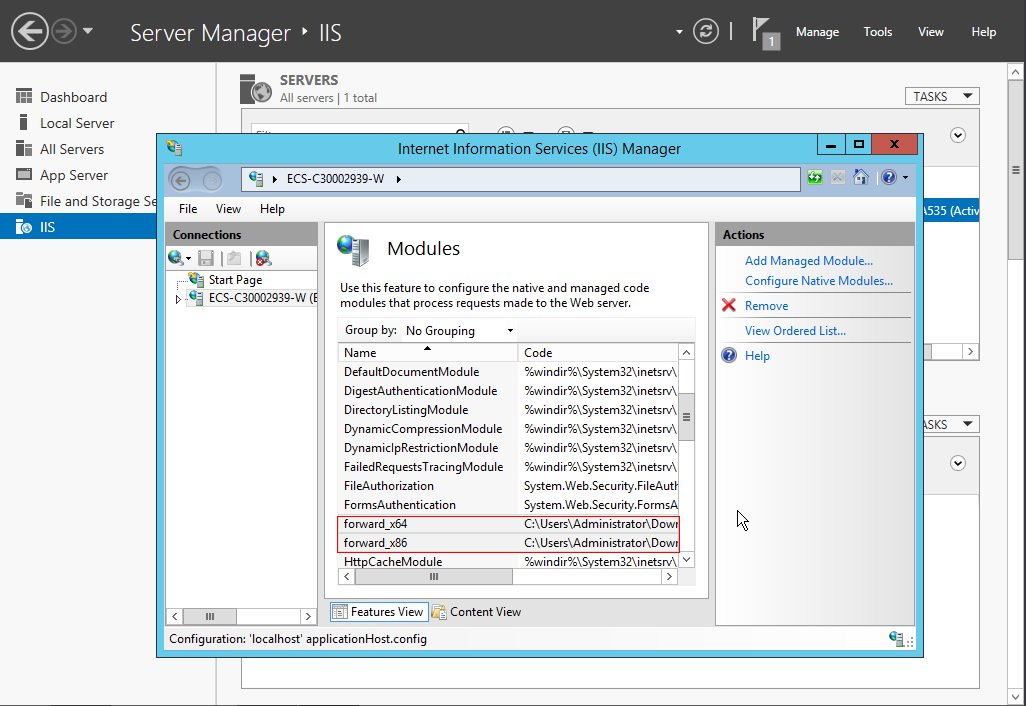
- In the Modules dialog box, verify that the registered plug-ins are displayed in the list.
Figure 10 Confirming the registration
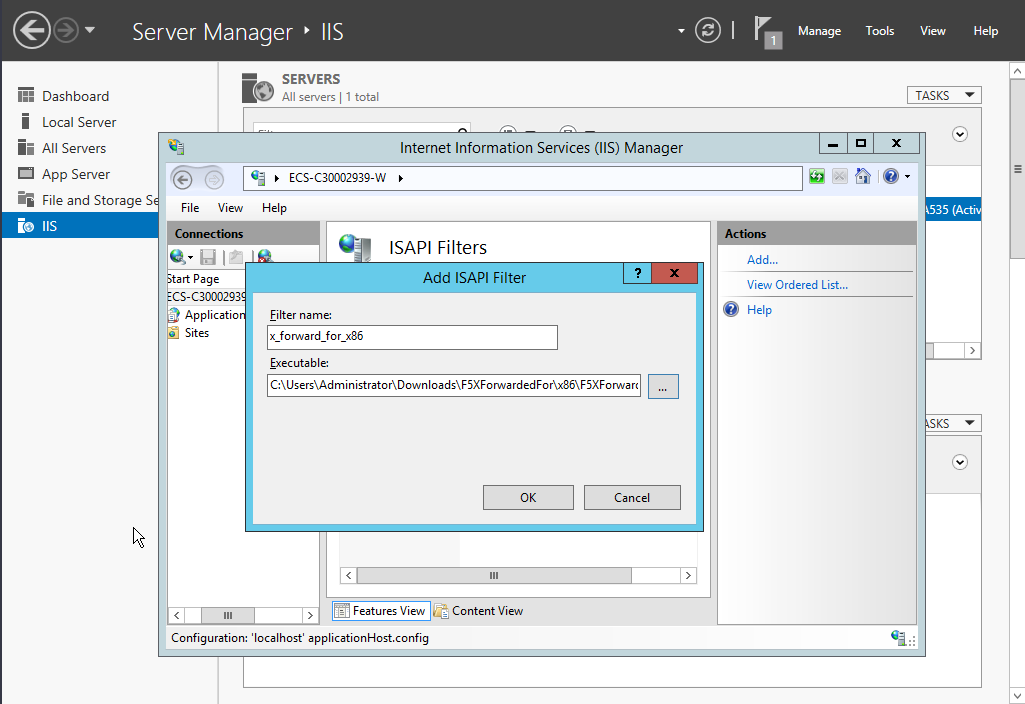
- Select ISAPI Filters on the Internet Information Services (IIS) Manager homepage and authorize two plug-ins to run ISAPI and CGI extensions.
Figure 11 Adding authorization
- Select ISAPI and CGI Restrictions to set the execution permission for the two plug-ins.
Figure 12 Allowing the plug-ins to execute

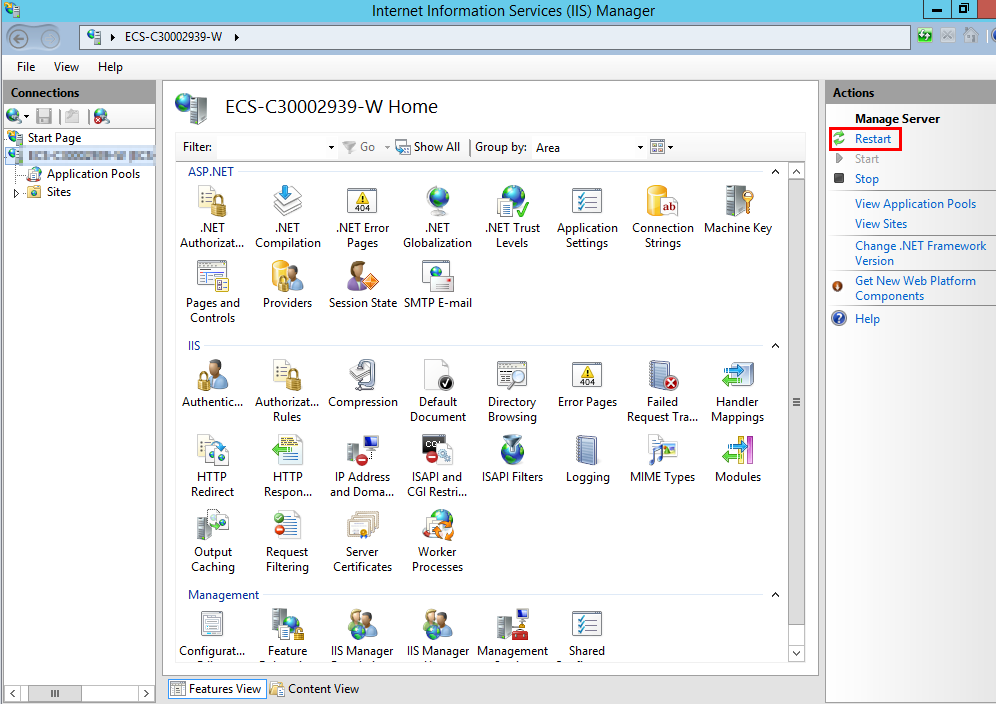
- Click Restart on the homepage to restart IIS. The configuration will take effect after the restart.
Figure 13 Restarting IIS
Step 3: Verify Transferring Client IP Addresses to the Backend Server
Run the following command to view the access logs of a Nginx server and check the client IP address:
cat /path/server/nginx/logs/access.log
In the logs, the first IP addresses in the $http_x_forwarded_for header are the client IP addresses.

Feedback
Was this page helpful?
Provide feedbackThank you very much for your feedback. We will continue working to improve the documentation.See the reply and handling status in My Cloud VOC.
For any further questions, feel free to contact us through the chatbot.
Chatbot


