Upgrading a CAE Component After Uploading a Software Package Built Using the Pipeline to a CodeArts Release Repo
Creating a Build Task
- Go to the CodeArts console and click Access Service in the upper right corner.
- Choose Services > Build.
Figure 1 Selecting a service

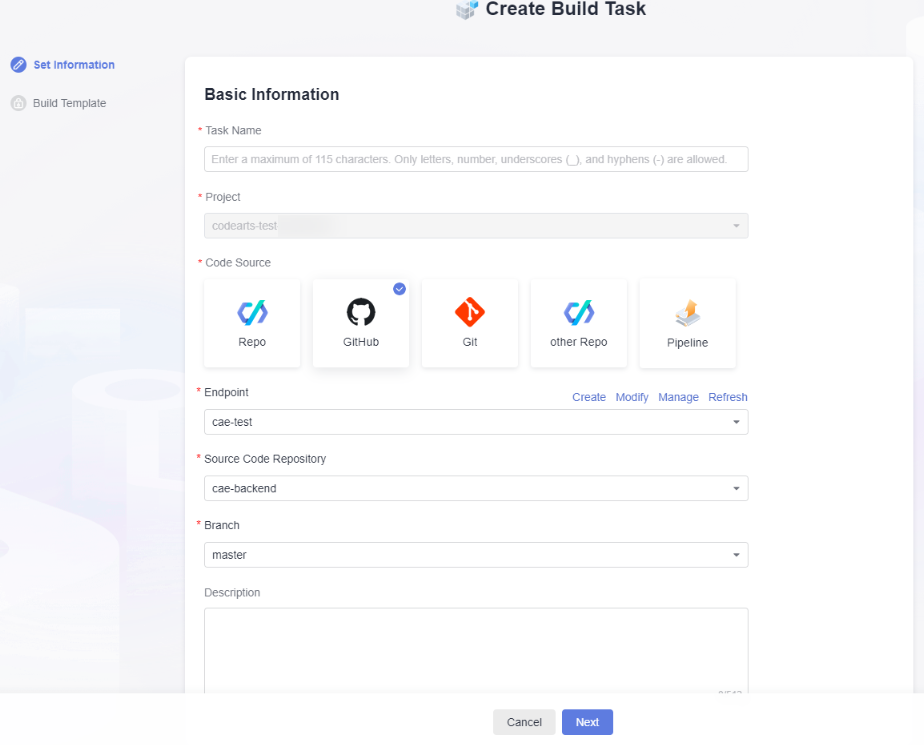
- On the Build page, click Create Task. In the Basic Information area, set Task Name, Project, Code Source, Endpoint, Source Code Repository, and Branch, and click Next.
Figure 2 Creating a task
 Figure 3 Configuring basic information
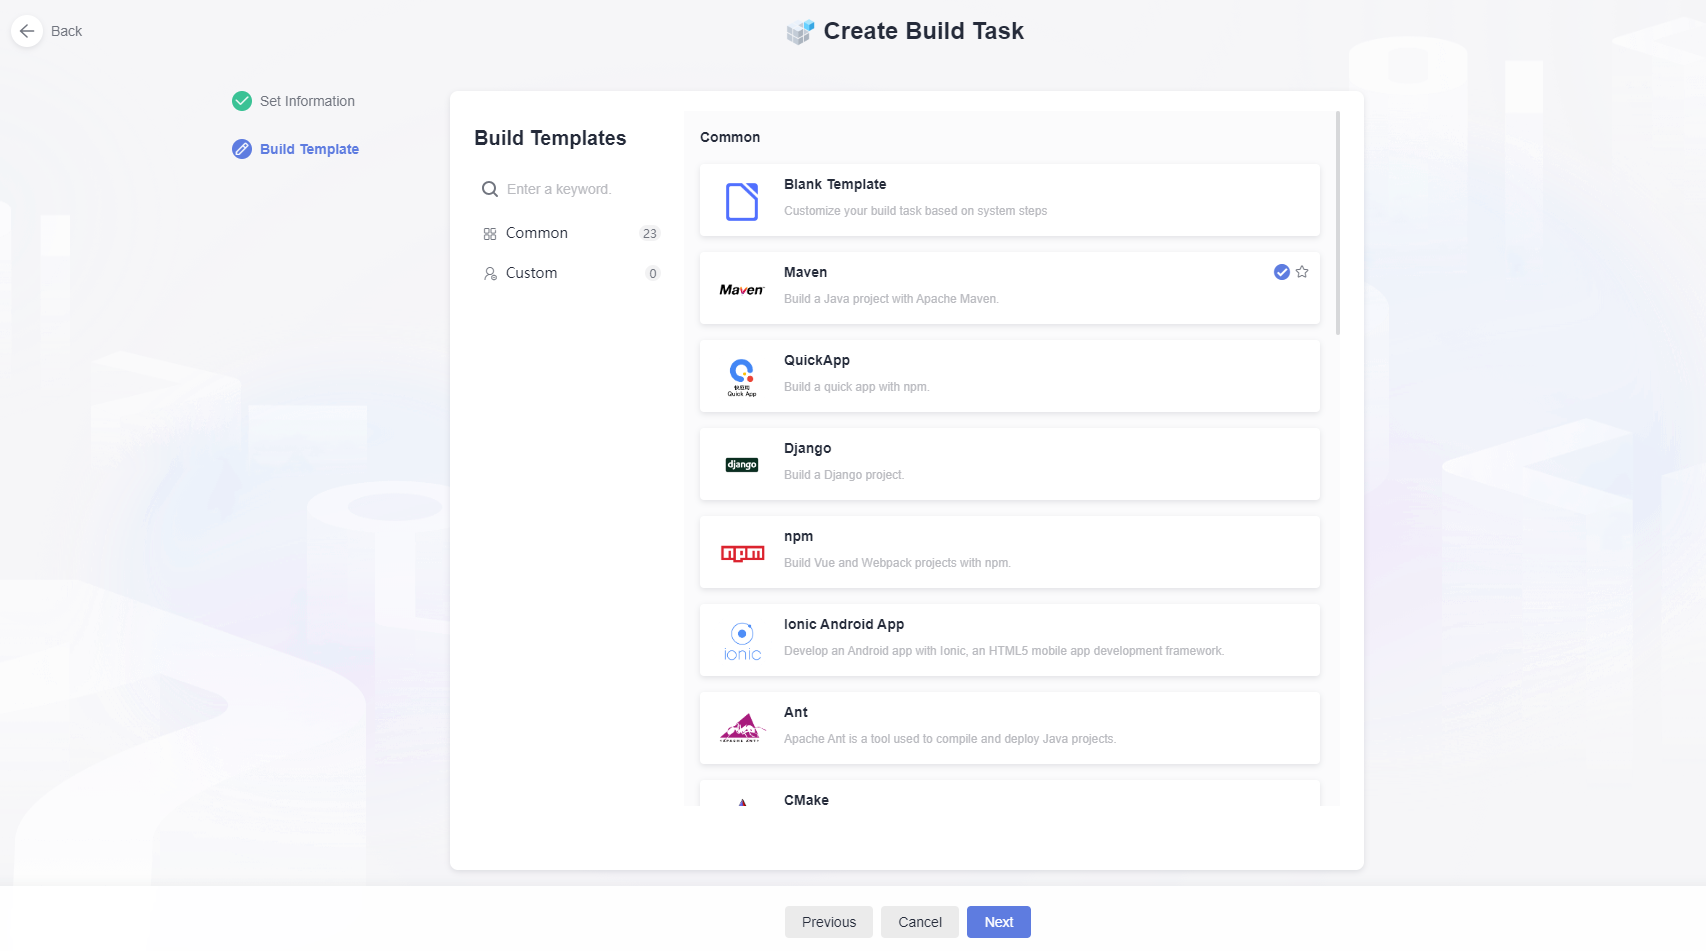
- Select a template for build and click Next. In this example, Java code is used. Therefore, select the Maven template.
Figure 4 Selecting a build template
- On the Parameters page, click Custom Parameters > Create Parameter and enable Runtime Settings.
- Name: Enter release_version.
- Value: Use the timestamp variable ${TIMESTAMP}.
Figure 5 Adding a custom parameter
- On the Build Actions page, select Upload Software Package to Release Repository and set Version to ${release_version} as the directory where the software package is stored.
Enter a name of the package, which is stored in the release repo, and click Create and Run.
Figure 6 Uploading a software package
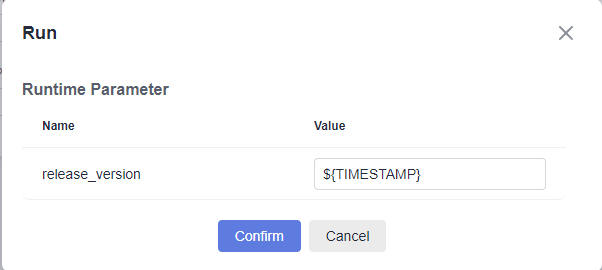
- Confirm the runtime parameter and click Confirm.
Figure 7 Configuring the runtime parameter
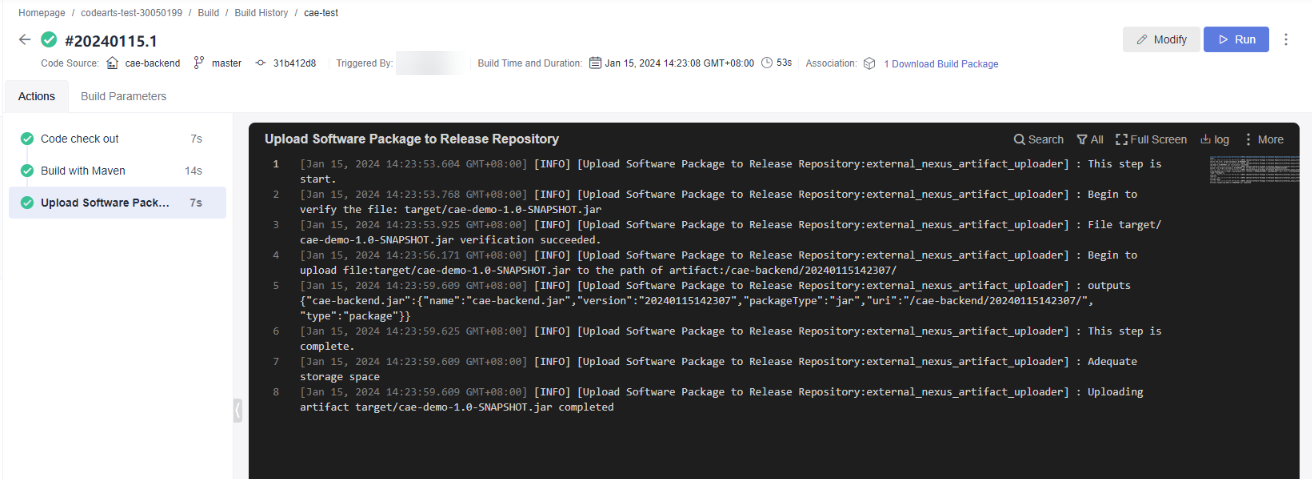
- View the build log. The build is successful and the software package is uploaded to the release repo.
Figure 8 Viewing the build log
- Choose Artifact > Release Repos to view the uploaded software package. The directory structure is as follows: Project name-Package name-Build timestamp-Software package name.
Creating a Pipeline to Upgrade CAE Components
Create a CodeArts pipeline.
- Go to the CodeArts homepage.
- Choose Services > Pipeline. On the Pipeline page, click Create Pipeline.
Figure 10 Selecting a pipeline
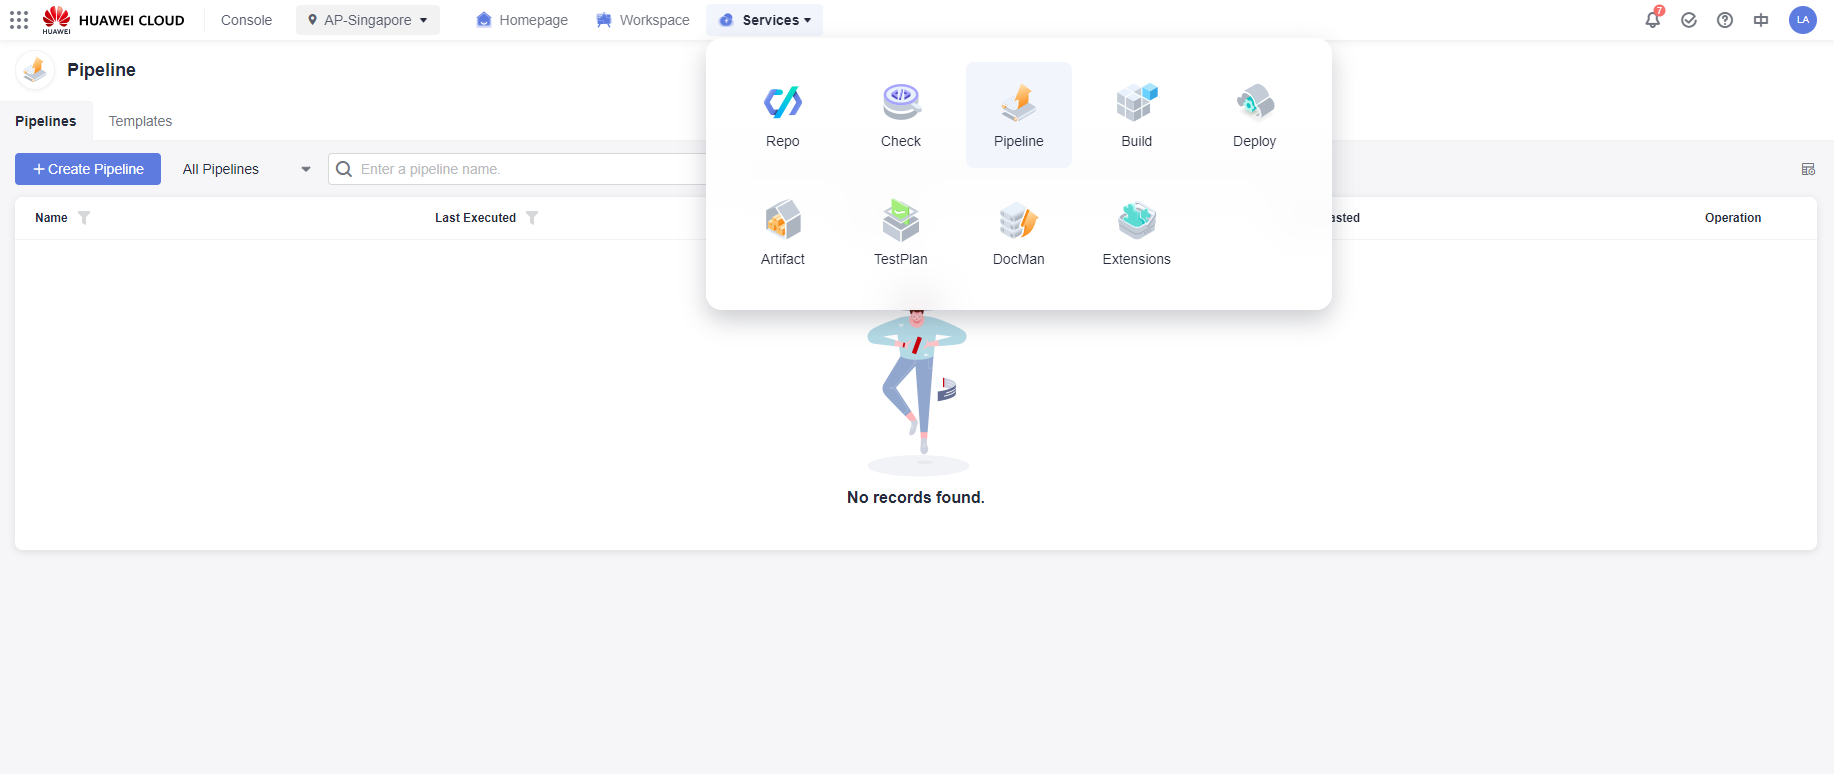 Figure 11 Creating a pipeline
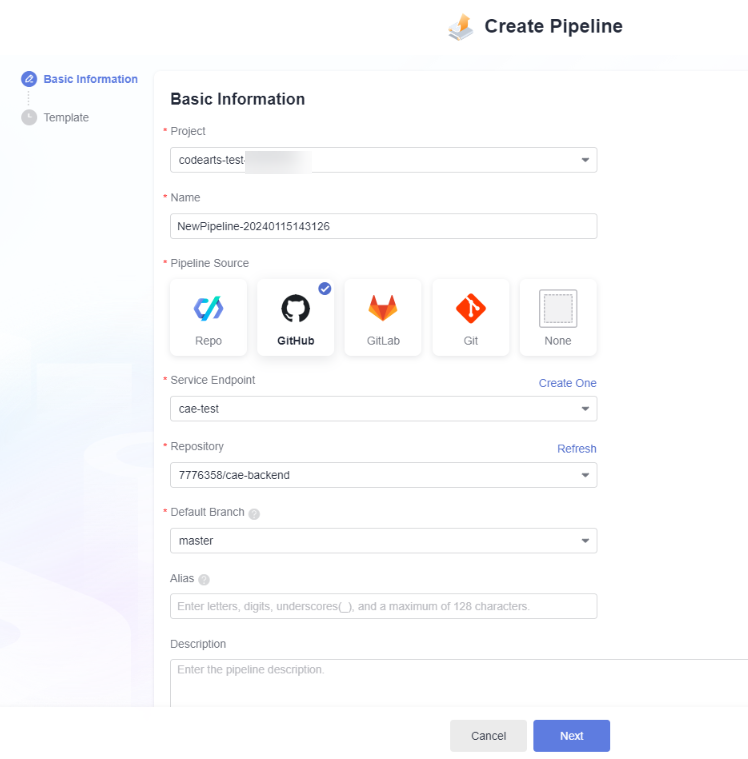
- On the Create Pipeline page, set Name, Pipeline Source, Repository, and Default Branch, and click Next.
Figure 12 Configuring basic pipeline information
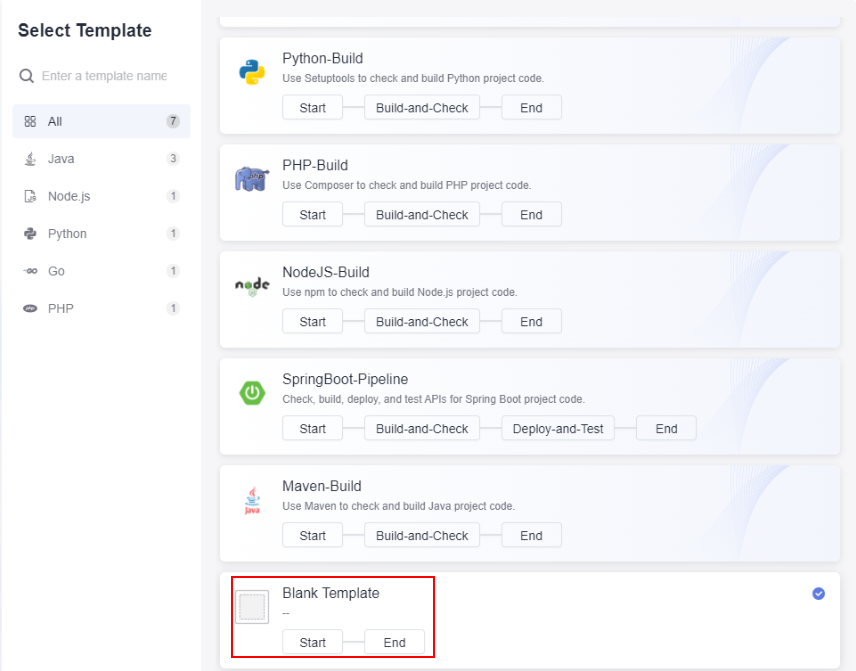
- In Template, choose All > Blank Template and click OK.
Figure 13 Selecting a template
- On the Task Orchestration page, click Stage. Click
 and change the names of stages 1 and 2 to Build and Deploy, respectively.
Figure 14 Creating a stage
- Create a build job.
- In the Build stage, click Job.
- On the NewJob page, click Build > Build > Add.
Figure 15 Creating a task
 Figure 16 Adding a build job
- Select the created build job and repository, set release_version as the pipeline parameter, and click OK.
- On the NewJob page, click Build > Build > Add.
- In the Deploy stage, click Job.
- Enter CAE in the search box and click
 . Select the CAE Release extension and click Add.
Figure 17 Selecting an extension
- Configure the extension parameters and click OK.
- Region: Select a region for deployment, which is the same as the CodeArts region.
- Environment: Select the environment to which the component belongs.
- Application: Select the application to which the component belongs.
- Component: Select the component to be upgraded. (You need to select a component that is deployed using the software package in CAE.)
- Component Source: Select Software packages.
- Runtime System: Select the runtime system corresponding to the software package.
- Software Package Repository: Select CodeArts Artifact.
- Software Package Address: See Parameters.
Figure 18 Configuring the extension parameters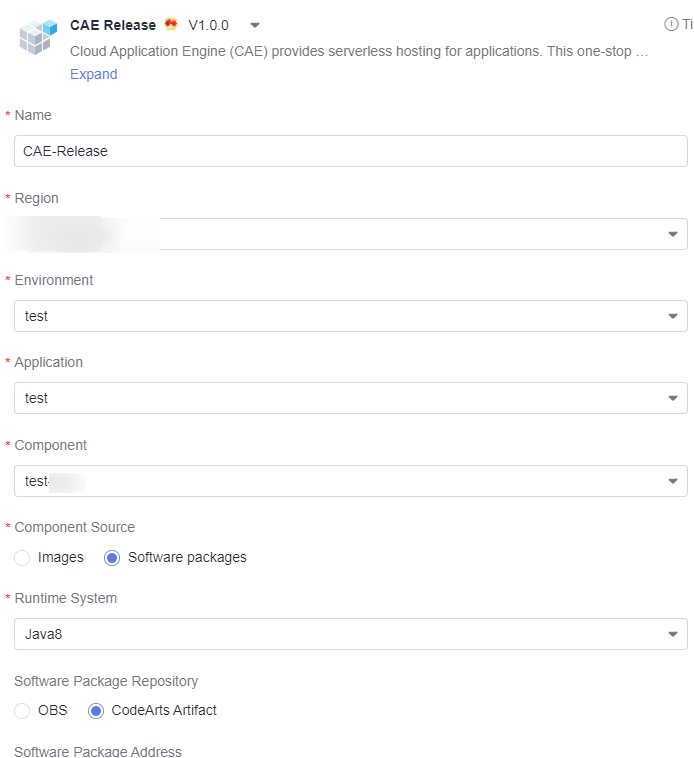
- Enter CAE in the search box and click
- In the Build stage, click Job.
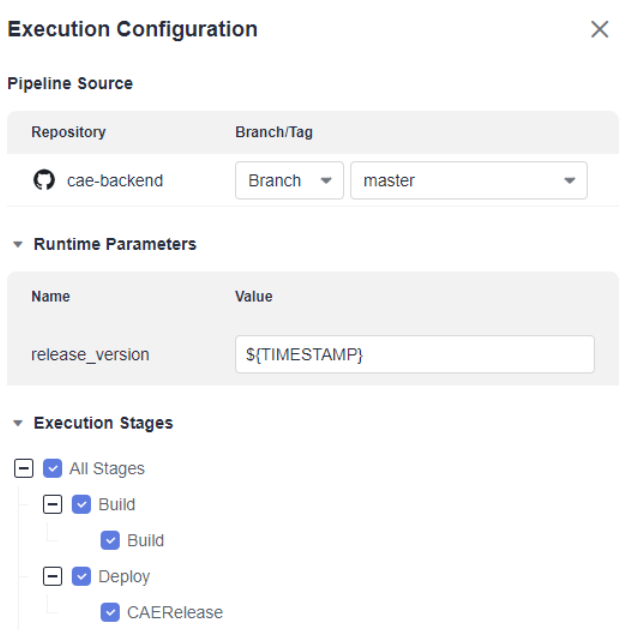
- Click Save and Run. On the Execution Configuration page, confirm the configurations and click Run.
Figure 19 Running a task
 Figure 20 Confirming the configurations
- View the pipeline execution result.
Figure 21 Viewing the pipeline execution result

- Log in to CAE and check the component status. If Upgraded is displayed in the Last Change Status/Time column, the component has been upgraded using the CodeArts pipeline.
Parameters
|
Parameter |
Mandatory |
Type |
Description |
|---|---|---|---|
|
release_version |
Yes |
String |
Release version number. Use the timestamp variable ${TIMESTAMP}. |
|
Software Package Address |
Yes |
String |
Release repo address to which the built software package is uploaded. For example, if you copy the download address https://devrepo.devcloud.cn-east-3.huawei.com/DevRepoServer/v1/files/download?filename=39d25a3cc6ee48678533020abcfbf941/cae-backend/20231028200733/cae-backend.jar in Figure 9 and change the release version number 20231028200733 of the software package to ${release_version}, this value is https://devrepo.devcloud.cn-east-3.huawei.com/DevRepoServer/v1/files/download?filename=39d25a3cc6ee48678533020abcfbf941/cae-backend/${release_version}/cae-backend.jar. |
Feedback
Was this page helpful?
Provide feedbackThank you very much for your feedback. We will continue working to improve the documentation.See the reply and handling status in My Cloud VOC.
For any further questions, feel free to contact us through the chatbot.
Chatbot


