Using the Git Client
Background
Before using the Git client, you need to understand the workflow and master basic operations, such as installing Git, creating and cloning repositories, adding, committing, and pushing changes, creating, updating, and merging branches, creating tags, and replacing local changes.
Prerequisites
You have installed the Git client.
Usage Process
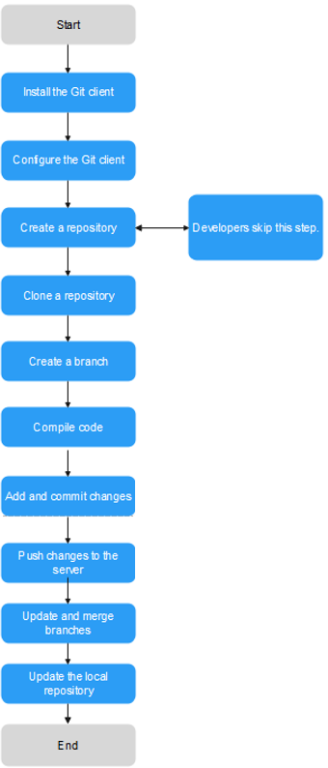
The following figure shows the basic process of using the Git client.

|
Procedure |
Description |
|---|---|
|
Install the Git client |
Install the Git client for your operating system.
|
|
Create a repository |
Create and open a new folder, and run the following command: git init A Git repository is created. |
|
Clone a repository |
Run the following command to create a clone of a local repository: git clone /path/to/repository If the repository is on a remote server, run the following command: git clone username@host:/path/to/repository |
|
Local repository structure |
There are three components in a local repository: working directory, index, and HEAD.
|
|
Add and commit changes |
Run the following command to add the changes to the index: git add <filename> git add * Run the following command to commit the changes: git commit -m "<commit_message>" The changes are committed to the HEAD but not to the remote repository. |
|
Push changes |
The changes are in the HEAD of the local repository. Run the following command to push the changes to the remote repository: git push origin master You can replace master with any other branch to be pushed. If you have not cloned an existing repository, run the following command to connect the local repository to a remote server before the push: git remote add origin <server> Then push the changes to the added server. |
|
Create a branch |
Branches enable you to develop features separately. When a repository is created, the master branch is the main branch by default. Develop features on other branches and then merge them to the main branch after the development.
|
|
Update and merge branches |
|
|
Create a tag |
You are advised to create tags for releases. For example, run the following command to create a tag named 1.0.0: git tag 1.0.0 1b2e1d63ff 1b2e1d63ff is the first 10 characters of the commit ID to be tagged. Run the following command to obtain the commit ID: git log You can enter the first several characters of the commit ID as long as it can distinguish the commit from others. |
|
Replace local changes |
Run the following command to replace the unwanted local changes: git checkout -- <filename> The files in the working directory are replaced by the latest content in the HEAD. Changes added to the index and new files are not affected. To discard all local changes and commits, fetch the latest commit from the server and reset the local main branch to the commit. git fetch origin git reset --hard origin/master |
Feedback
Was this page helpful?
Provide feedbackThank you very much for your feedback. We will continue working to improve the documentation.See the reply and handling status in My Cloud VOC.
For any further questions, feel free to contact us through the chatbot.
Chatbot


