
Importing and Exporting Object Data in Applications
You can export the object data in the current system to migrate and back up data. For example, you can migrate the old data to another environment or account for object consistency and compatibility. In this way, data can be migrated between different accounts or environments, avoiding repeated development and incompatible development.
Exporting Object Data
- Log in to the Huawei Cloud Astro Zero console and click Access Homepage. The application development page is displayed.
- In the upper left corner of the page, click
 and choose Environments > Environment Configuration.
 - Choose Maintenance from the main menu.
- In the navigation pane, choose Application Maintenance > Data Export.
- On the displayed page, click New and set parameters as required. Figure 1 Configuring data export

Table 1 Parameters Parameter
Description
Task Name
Name of the batch data export task.
Export Method
Select a data export mode. Ordinary and Template are available. The default value is Ordinary.
If you want to export the same objects, select Template to avoid repeatedly selecting the same objects during each export. That is, you can create a template in the template area and select the corresponding template to export the same objects.
Export File Encoding
File encoding format, which can be UTF-8 or GBK.
Pre Script
The script to be executed before the exported ZIP package is imported, to clear specified data.
Post Script
The script to be executed after the exported ZIP package is imported, to process specified data.
Mode
Execution times of the export task.
- Once: Data is exported once immediately or at a specified time.
- Multiple times (based on frequency): Data is exported regularly at a specified interval from a given time point.
- By Cron Expression: Data is exported based on the configured Cron expression. A Cron expression is a time-based syntax used to specify the execution time, frequency, and interval of a scheduled task. A Cron expression consists of six fields: second, minute, hour, date, month, and day of the week. For details on the values for each field, see Table 2.
Export Data Immediately
Whether to export data immediately. This parameter is available only when Mode is set to Once.
First Export Time
Time when the export will be executed for the first time. This parameter is available only when Mode is set to Once but Export Data Immediately is set to False, or when Mode is set to Multiple times (based on frequency).
Execute Frequency
Export time unit. This parameter is available only when Mode is set to Multi Times.
Unit
Export time unit. This parameter is available only when Mode is set to Multiple times (based on frequency).
By Cron Expression
If Mode is set to By Cron Expression, you need to set the Cron expression.
Example:
Description                           Expression
Execute at 6:00 every day                     0 0 6 * * ?
Execute at 0:00, 6:00, and 12:00 daily   0 0 0,6,12 * * ?
Execute at 2:00 every Saturday                0 0 2 ? * SAT
Trigger at 10:20 AM from Monday to Friday        0 20 10 ? * MON-FRI
Table 2 Cron expression field values Field
Allowed Value
Allowed Special Character
Second
0–59
Not supported
Minute
0–59
* /
Hour
0–23
- * /
Date
1–31
- * ? /
Month
1–12
JAN-DEC - * /
Day of Week
1–7
SUN-SAT - * ? /
Table 3 Supported special characters in a cron expression Character
Description
Example
,
Used to specify additional values.
1,3,4,7,8.
*
Used to select all values within a field.
If the Minute field is set to *, an event is triggered every minute.
?
Used to match any value of a field. However, it can be used only in the Date and Day of week fields because the two fields affect each other.
To trigger a scheduled task on the 20th day of each month, regardless of the day of week, use the following format: 13 13 15 20 *?
The 20th day is specified in the Date field, the last character of the Day of week field can only be a question mark (?) instead of an asterisk (*). If the last character is *, it indicates that the event is triggered on any day of a week, which is exclusive with the 20th day of the date field. In this case, the expression is incorrect.
-
Used to specify ranges.
For the Hour field, the value ranges from 8 to 10, indicating that the incident is triggered every hour from 8:00 to 10:00.
/
Used to specify increments. An incident is triggered from the specified time and at a fixed interval.
In the Hour field, */3 is equivalent to "every three hours". That is, an incident is triggered at the following time points in a day: 0, 3, 6, 9, 12, 15, 18, and 21.
- Set the export conditions and data, and click Export.
- If Export Method is set to Ordinary, select the data category to export.
- All objects: All objects will be exported.
- Standard objects: Only standard objects will be exported.
- Custom objects: Only custom objects will be exported.
- Include setup data: This option is displayed only when data, not metadata, is exported. This indicates the objects used by function modules of the platform, such as flows and scripts.
Table 4 System objects Object
Description
Package
Stores basic information about software packages.
PackageContent
Stores component information about software packages.
PackageInstall
Stores package installation information.
PackageVersion
Stores package version information.
Profile
Profiles.
ServicePermission
Service permission credential table.
PermissionSet
Stores permission sets.
Connector
Stores connector information.
Tab, Menu
Application menu table.
SysParameter
System parameter table.
CustomError
Stores custom error codes.
CustomResource
Main table of multi-language resources.
CustomResourceValue
Subtable of multi-language resources.
CustomTranslation
Translation table.
Application
Application table.
Service
BO table.
ApplicationComponent
Application component table.
ServiceItem
BO component table.
URLMap
Stores custom API information.
- Include profile data: This item is displayed only when data, not metadata, is exported. It indicates that profile-related objects, including profiles, extended permission sets, and service permission credentials will be exported.
- Custom: The objects you specify will be exported.
- If Export Method is set to Template, create a template or select an existing template.
If you select multiple objects, you can configure public fields as filtering conditions. When the export task status is completed, you can click
 to download the file.
- The data file will be available for 48 hours. Download it before it expires.
- You can view the results or errors of data export tasks by choosing Global Elements > Scheduled Tasks > Execution History.
- If Export Method is set to Ordinary, select the data category to export.
Importing Object Data
Compress the data exported from Exporting Object Data into a .zip package. Ensure that a table with the same name as the to-be-imported data file already exists in the environment. You can import the metadata or manually define the table in the environment.
- Log in to the Huawei Cloud Astro Zero console and click Access Homepage. The application development page is displayed.
- In the upper left corner of the page, click and choose Environments > Environment Configuration.
- Choose Maintenance from the main menu.
- In the navigation pane, choose Application Maintenance > Data Import > Data Import.
- Click New, set the import type, drag the .zip file to be imported, and click Import. When importing the object data, you also need to set whether the import record ID is empty.
- Records have no IDs: The system will automatically generate an ID for each data record imported.
- Records have IDs: Each data record is checked based on its ID. If an ID already exists in the table, the original data record is updated. If an ID does not exist in the table, a new data record is created.
- In the displayed dialog box, click the confirm button.
Wait for one minute and then click
 in the Operation column. The import status will be updated. If the data import fails, view the failure cause in the email sent to you or on the import details page.
 You can view the results or errors of data import tasks by choosing Global Elements > Scheduled Tasks > Execution History.
Importing Object Data Using a Template
Create a data import template in Huawei Cloud Astro Zero, download the template, and edit data in it. Then import data with the template and process the data using a predefined script. Before importing data, ensure that the data table to be imported exists in Huawei Cloud Astro Zero.
- Create a data processing script, for example BulkInsert, and enable it.
- Create an empty script BulkInsert by referring to Creating a Blank Script.
- In the script editor, enter the following code: Compile the BulkInsert script with input parameters name and number. This script prepares input fields for importing data with a template.
import * as context from 'context'; import * as db from 'db'; import * as sys from 'sys'; @useObject(['Namespace__Class__CST']) @action.object({ type: "params" }) export class ActionInput { @action.param({ type: 'Struct', isCollection: true, label: 'BatchRec' }) records: BatchRec[]; } @action.object({ type: "params", label: "BatchRec" }) export class BatchRec { @action.param({ type: 'String', label: 'name' }) name: string; @action.param({ type: 'String', label: 'age' }) number: string; } @action.object({ type: "params" }) export class ActionOutput { @action.param({ type: 'String', label: 'resMessage' }) resMessage: string; } @useObject(['Namespace__Class__CST']) @action.object({ type: "method" }) export class ActionDemo { @action.method({ label: 'insert_to_multi', description: 'insert_to_multi', input: 'ActionInput', output: 'ActionOutput' }) public insert_to_multi(input: ActionInput): ActionOutput { let out = new ActionOutput(); try { if (input.records.length < 1) { return out }; let recsInsert = [] for (let i = 0; i < input.records.length; i++) { var recOne = { name: input.records[i].name || 'yes', Namespace__number__CST: input.records[i].number } recsInsert.push(recOne) } console.log('recsInsert = ', recsInsert) if (recsInsert.length < 1) { return } let objMulti = db.object('Namespace__Class__CST'); let ret = objMulti.batchInsert(recsInsert); out.resMessage = "success" } catch (error) { context.setError(error.name, error.message) } return out; } } - Set input parameters and run the script.
{
	"records": [{
                "name": "20th Class 1",
		"number": "201"
	}]
}
If the output parameters are as follows, the running script meets the expectation.
{ "resMessage": "success" } - Click
 in the upper part of the script editor to activate the script.
- Log in to the Huawei Cloud Astro Zero console and click Access Homepage. The application development page is displayed.
- In the upper left corner of the page, click and choose Environments > Environment Configuration.
- Choose Maintenance from the main menu.
- Create a data import template.
- In the navigation pane, choose Application Maintenance > Data Import > Data Import Templates.
- On the data import template page, click Create.
- Configure parameters. If the script cannot be found, check whether the script is activated. Figure 2 Creating a template

Table 5 Parameters Area
Parameter
Description
Basic information
Name
Name of the data import template. The naming requirements are as follows:
- Value: 1–64 characters.
- Start with a letter and can contain only letters, digits, and underscores (_). Do not end with an underscore (_).
Script
Select the data processing script defined in 1.
Description
Description of the data import template.
Excel mapping
Name
Name of the input parameter variable output to the script. The value must be the same as the input parameter variable name in the script.
Column
Columns in the Excel template are defined in sequence, for example, A, B, and C.
Header
The column name in the first line of the Excel template.
Operation
Copy or delete the item.
- Click Save.
- Return to the data import template page, click
 in the row where the template is located and download the template to a local directory. Then, fill data in the template and save it. Figure 3 Filling data
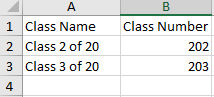
- Click
 in the row where the template is located, drag the Excel file recorded in the previous step, and click the button for importing the modified data. Figure 4 Importing data
- In the displayed dialog box, click the confirm button.
- Choose Application Maintenance > Data Import > Data Import. After the status of the import task changes to completed, view the import result on the data tab page of the object. Figure 5 Viewing the import result

Creating Object Data in Batches
- Log in to the Huawei Cloud Astro Zero console and click Access Homepage. The application development page is displayed.
- In the upper left corner of the page, click and choose Environments > Environment Configuration.
- Choose Maintenance from the main menu.
- In the navigation pane, choose Application Maintenance > Data Import > Data Import.
- On the data import page, click New.
- Set Import Type to Records have no IDs, and click Download Template, as shown in Figure 6.
- On the page for download templates, specify Category and click Download to download the template to the local host.
- Decompress the ZIP package, and edit data using the obtained Excel file, as shown in Figure 7.
- Compress the edited data into a ZIP package and import the data. For details, see Importing Object Data.


Feedback
Was this page helpful?
Provide feedbackThank you very much for your feedback. We will continue working to improve the documentation.See the reply and handling status in My Cloud VOC.
For any further questions, feel free to contact us through the chatbot.
Chatbot


