Why Did the Component Controller Fail to Be Installed?
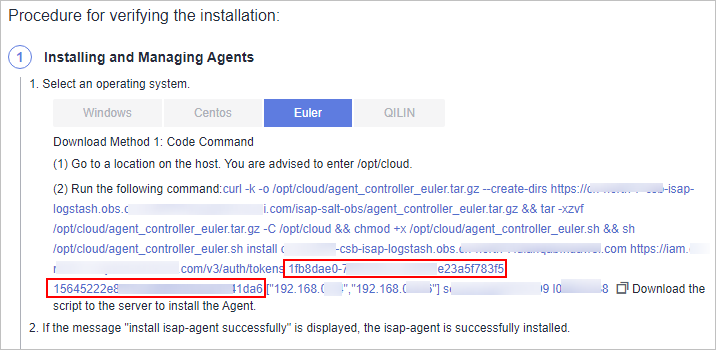
A component controller (isap-agent) needs to be installed on ECSs for security data collection. If the installation fails, you can fix the fault by following the instructions provided in this section.
For details about common commands used during troubleshooting, see Which Commands Are Commonly Used for the Component Controller?
Possible Cause 1: The Network Between the ECS Where You Want to Install isap-agent and the OBS Bucket Storing the Agent Is Disconnected

Solution
- (Optional) Method 1: Connect the ECS to OBS.
- (Optional) Method 2: Manually download the installation script and installation package to the local PC, and upload the installation package to the /opt/cloud directory on the server.
- Log in to the OBS management console.
- In the navigation pane on the left, choose Buckets. On the displayed page, click the name of the target bucket.
- On the displayed details page, download the installation script and installation package.
- Use a remote management tool, such as SecureFX or WinSCP, to log in to the server.
- Upload the installation package to the /opt/cloud directory on the server.
Possible Cause 2: Insufficient Disk Space on the ECS

Solution
Clear the disk to reserve sufficient space.
Possible cause 3: Failed to Obtain IAM Tokens
If information shown in the following figure is displayed in the log, the call to obtain the IAM token failed.

- Check whether the IAM account or username in the command is correct.
Figure 4 Username and password of an IAM user

- If any of them or both of them are incorrect, run the installation command with correct information again.
- If they are correct, go to 2.
- Run the vim /etc/salt/iam_token.txt command to check whether the /etc/salt/iam_token.txt file exists.
- If the information shown in the following figure is displayed, the directory exists. Go to 3.
Figure 5 Checking files

- If a message is displayed indicating that the file does not exist, contact technical support.
- If the information shown in the following figure is displayed, the directory exists. Go to 3.
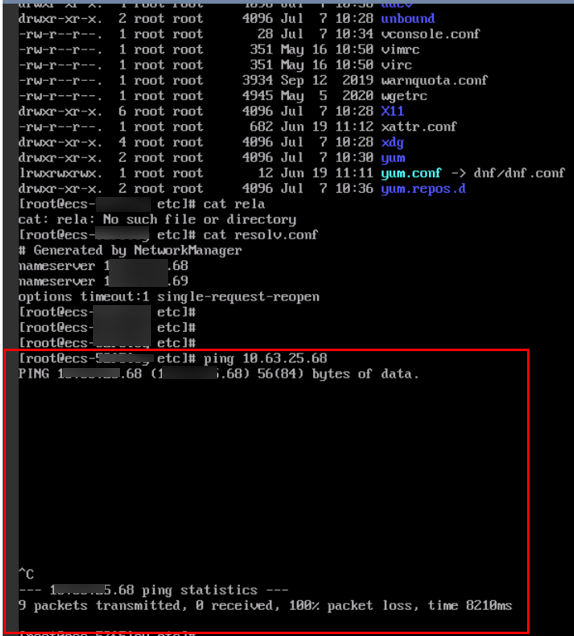
- Run a ping command to check whether the server is reachable. If it is unreachable, enable the communication.
Figure 6 Checking the network

Possible Cause 4: Failed to Verify the Workspace ID

- Log in to the SecMaster console.
- In the navigation pane on the left, choose Workspaces. In the workspace list, click the name of the target workspace.
- In the navigation pane on the left, choose . On the displayed page, click the target node.
- Check workspace ID and project ID in the command output.
Figure 8 Parameters on the console

- Check whether the workspace ID and project ID in the command are the same as those in the file in 4.
Figure 9 Parameter information in the command

- Use a valid workspace ID and project ID to run the command again.
Possible Cause 5: isap-agent Installed Repeatedly When isap-agent Has Already Been Installed

- (Optional) Method 1: Deregister the node on the management console.
- Log in to the SecMaster management console.
- In the navigation pane on the left, choose Workspaces. In the workspace list, click the name of the target workspace.
- In the navigation pane on the left, choose . On the displayed Nodes tab, locate the row that contains the target node and click Deregister in the Operation column.
- In the displayed dialog box, click OK.
- (Optional) Method 2: Run a script command to uninstall component controller isap-agent.
- Use a remote management tool, such as SecureFX or WinSCP, to log in to the server.
- Run the sh /opt/cloud/agent_controller_euler.sh uninstall command to uninstall the component controller.
- Check whether the uninstallation is complete.
- Use a remote management tool, such as SecureFX or WinSCP, to log in to the server.
- (Optional) Method 1: Run the ls -a /opt/cloud/ command to view the files in the /opt/cloud directory. If the information shown in the following figure is displayed (including only the script file), the uninstallation is complete.
Figure 11 Script file

- (Optional) Method 2: Run the salt-minion --version command. If the following information is displayed, the uninstallation is complete.
Figure 12 Checking isap-agent details


It takes some time to deregister a node. Do not install the Agent until you confirm that the node has been deregistered.
Possible Cause 6: Disconnected Network Between ECS and DNS
During the isap-agent installation, the message "Could not resolve host:*******" is displayed.

The installation failed because the network between the ECS and DNS was disconnected.

Solution
In the VPC the ECS belongs to, enter the correct DNS resolution address. For details, see How Do I Change the DNS Server Address of an ECS?
Possible Cause 7: The Workspace Does Not Exist or the Account Lacks Permission.
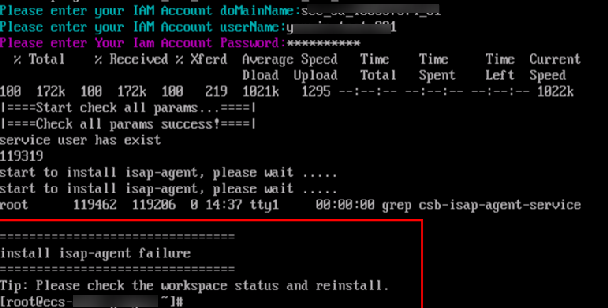
During the isap-agent installation, the following information is displayed:
install isap-agent failureTip: Please check the workspace status and reinstall

Solution
- Check whether the workspace has been created.
- Check whether the SecMaster machine-machine account that has the minimum permission is correctly configured.
For details, see Creating a Non-administrator IAM User.
Possible Cause 8: Disk Not Partitioned
During the isap-agent installation, the message "The directory space of /opt is too small" is displayed.

Solution
- Run the following command on the installation page:
sh /opt/cloud/isap-agent/action/agent_controller_linux.sh partition
For details, see Partitioning a Disk.
- Reinstall isap-agent.
For details, see Installing the Component Controller.
Feedback
Was this page helpful?
Provide feedbackThank you very much for your feedback. We will continue working to improve the documentation.See the reply and handling status in My Cloud VOC.
For any further questions, feel free to contact us through the chatbot.
Chatbot


