
Configuring a FunctionGraph Backend for a Dedicated Gateway
Scenario
In modern software development, an API gateway bridges the frontend and backend. By connecting various backend services such as HTTP, FunctionGraph, and Mock, it simplifies integration and improves efficiency. This section shows how to create a FunctionGraph function and use it as an API backend for seamless integration.
Notes and Constraints
FunctionGraph backends can be set only if FunctionGraph has been deployed in the current environment.
Resource Planning
|
Resource |
Quantity |
|---|---|
|
FunctionGraph |
1 |
|
Dedicated API gateway |
1 |
General Procedure
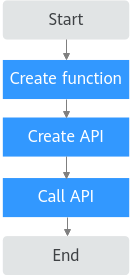
Implementation Procedure
Creating a function
- Log in to the FunctionGraph console.
- In the navigation pane on the left, choose Functions > Function List.
- Click Create Function and create a function based on the following table.
Table 2 Configuring the function Parameter
Description
Create With
Select Create from scratch.
Function Type
Type of the function. Default: Event function.
Region
Select the same region as that of APIG.
Function Name
Set this name as planned. It is recommended that you enter a name based on naming rules to facilitate search.
Enterprise Project
If your enterprise has multiple projects, you are advised to select the corresponding project to implement logical isolation of resources. default is selected by default.
Agency
An agency that delegates FunctionGraph to access other cloud services. For this example, select Use no agency.
Runtime
Python 3.9 is used as an example.
- Click Create Function. After the function is created, check whether the function is displayed in the function list.
- Go to the function details page and copy the following code to index.py on the Code tab.
# -*- coding:utf-8 -*- import json def handler (event, context): return { "statusCode": 200, "body": json.dumps("Hello from FunctionGraph"), "headers": { "Content-Type": "application/json" } } - Click Test and configure a test event.
- Select API Gateway (Dedicated) from the Event Templates drop-down list, modify the test event as required, and save the test template.
- Click Test. If the execution result is Execution successful, the test is successful.
Creating an API
- Go to the APIG console.
- Select a gateway in the upper part of the navigation pane. Ensure that the gateway and the created function are in the same region.
- In the navigation pane, choose API Management > APIs.
- Click Create API > Create API and configure frontend information based on the following table.
Table 3 Frontend configuration Parameter
Description
API Name
Set this name as planned. It is recommended that you enter a name based on naming rules to facilitate search.
Group
Group to which the API belongs. The default value is DEFAULT.
URL
Method: Request method of the API. Default: GET.
Protocol: Request protocol of the API. Default: HTTPS.
Subdomain Name: The system automatically allocates a subdomain name to each API group for internal testing. The subdomain name can be accessed 1,000 times a day.
Path: Path for requesting the API. In this example, enter /fg.
Gateway Response
Gateway response returned when an API request fails. You are advised to adjust the response based on service requirements.
default is selected by default.
Authentication Mode
API authentication mode. Select None. This mode is insecure and is not recommended. In actual services, you are advised to use more secure authentication modes, such as App or IAM authentication, to improve API security.
- After configuring the frontend, click Next.
- On the backend configuration page, set Backend Type to FunctionGraph.
- Configure the backend information according to the following table.
Table 4 Parameters for configuring a FunctionGraph backend Parameter
Description
Function Name
Automatically displayed when you select a function.
Function URN
Identifier of the function.
Click Select to add the created function.
Version/Alias
Version or alias of the function. Choose Version > latest.
Network Architecture
Function network architecture. Select V2.
Invocation Mode
Invocation mode of the function. You can select Synchronous or Asynchronous. In this example, select Synchronous.
Timeout (ms)
Backend request timeout. Range: 1–60,000 ms. The default value is 5,000 ms.
- Click Finish. After the API is created, check whether it is displayed in the API list.
- On the APIs page, click Debug to debug the created API. Click Debug again.
If 200 OK is displayed in the response, the API is called successfully. Otherwise, rectify the fault by referring to Error Codes.
- On the APIs page, click Publish Latest Version to publish the API.
The RELEASE environment is selected by default. Click OK. When the exclamation mark in the upper left of the Publish button disappears, the publishing is successful.
Calling the API
Use the API test tool to call the API. If Hello from FunctionGraph is returned, the API is successfully called.

Feedback
Was this page helpful?
Provide feedbackThank you very much for your feedback. We will continue working to improve the documentation.See the reply and handling status in My Cloud VOC.
For any further questions, feel free to contact us through the chatbot.
Chatbot


