
Configuring Public Access
To access a RocketMQ instance over a public network, enable public access and configure EIPs for the instance. If you no longer need public access to the instance, disable it.
Prerequisites
You can change the public access setting only when the RocketMQ instance is in the Running state.
Enabling Public Access
- Log in to the management console.
- Click
 in the upper left corner to select a region.

Select the region where your RocketMQ instance is located.
- Click
 and choose Application > Distributed Message Service for RocketMQ to open the console of DMS for RocketMQ.
 - Click a RocketMQ instance to go to the instance details page.
- Click
 next to Public Access.
 - Click
 to enable public access. For Elastic IP Address, select an EIP for each broker. Then click
  .
.
Only IPv4 EIPs can be bound to RocketMQ instances.
Figure 1 Enabling public access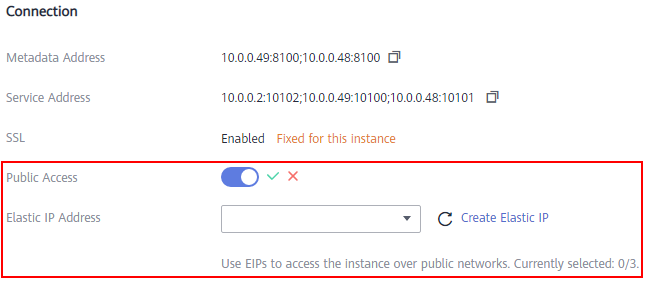
After public access is enabled, Metadata Address (Public) and Service Address (Public) will be displayed.
Figure 2 Public access addresses
After public access is enabled, modify security group rules as listed in Table 1 before attempting to access the RocketMQ instance.
Disabling Public Access
- Log in to the management console.
- Click in the upper left corner to select a region.
Select the region where your RocketMQ instance is located.
- Click and choose Application > Distributed Message Service for RocketMQ to open the console of DMS for RocketMQ.
- Click a RocketMQ instance to go to the instance details page.
- Click next to Public Access.
- Click
 and then to disable public access.
After public access is disabled, modify security group rules as listed in Table 2 before attempting to access the RocketMQ instance.
and then to disable public access.
After public access is disabled, modify security group rules as listed in Table 2 before attempting to access the RocketMQ instance.
Feedback
Was this page helpful?
Provide feedbackThank you very much for your feedback. We will continue working to improve the documentation.See the reply and handling status in My Cloud VOC.
For any further questions, feel free to contact us through the chatbot.
Chatbot


