
Updated on 2022-02-22 GMT+08:00
Viewing a Public IP Address
Scenarios
This topic describes how to view a public IP address.

- Anti-DDoS automatically enables the protection by default.
- You are not allowed to disable Anti-DDoS after it has been enabled.
Prerequisites
- You have obtained a username and password for logging in to the management console.
Procedure
- Log in to the management console.
- Click
 in the upper left corner of the management console and select the region and project.
 - Click
 . Under Security, choose Anti-DDoS.
 - On the Public IP Addresses tab, view all protected public IP addresses. Table 1 describes the parameters.
Figure 1 Viewing a public IP address
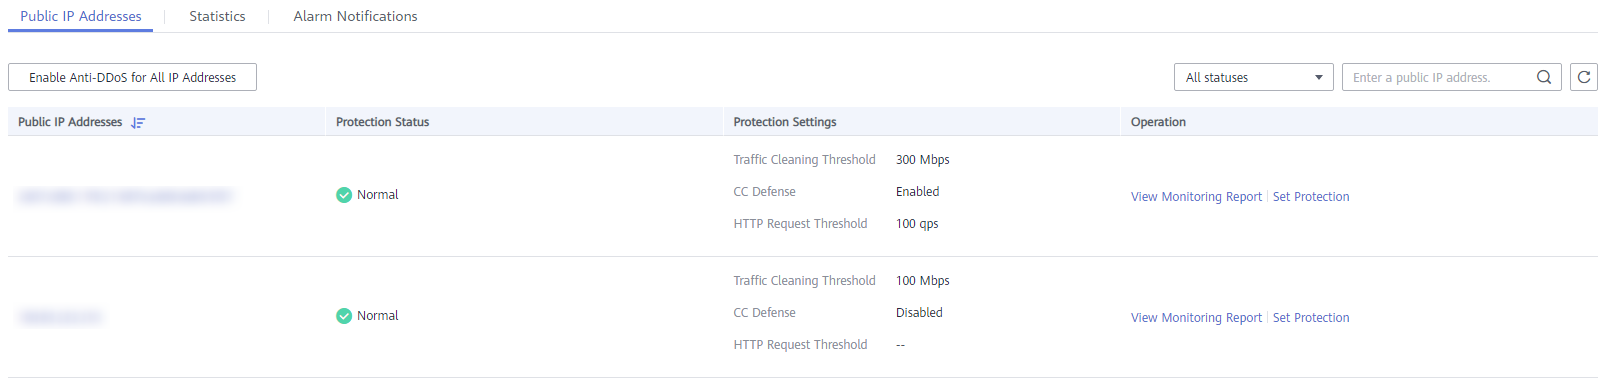

- Click Enable Anti-DDoS for All IP Addresses to enable the protection for all unprotected IP addresses in the current region.
- After the default Anti-DDoS protection settings are enabled, traffic is scrubbed when its volume reaches 120 Mbit/s. You can modify Anti-DDoS protection settings according to Configuring an Anti-DDoS Protection Policy.
- Anti-DDoS provides a 300 Mbit/s mitigation capacity against DDoS attacks. Traffic from the attacked public IP address will be routed to the black hole.
- The All statuses drop-down box enables you to specify a status so that only public IP addresses of the selected status are displayed.
- Enter a public IP address or a keyword of a public IP address in the search box and click
 or
or  to search for the desired public IP address.
Table 1 Parameter description Parameter
Description
Public IP Address
Public IP address protected by Anti-DDoS
NOTE:If Anti-DDoS is enabled for a public IP address, you can click the IP address to go to its Monitoring Report page.
Protection Status
Protection status of a public IP address. The values are:
- Normal
- Configuring
- Disabled
- Cleaning
- Black hole
Feedback
Was this page helpful?
Provide feedbackThank you very much for your feedback. We will continue working to improve the documentation.See the reply and handling status in My Cloud VOC.
The system is busy. Please try again later.
For any further questions, feel free to contact us through the chatbot.
Chatbot


