
ALM-12034 Periodical Backup Failure
Description
The system executes the periodic backup task every 60 minutes. This alarm is generated when a periodical backup task fails to be executed. This alarm is cleared when the next backup task is executed successfully.
Attribute
|
Alarm ID |
Alarm Severity |
Auto Clear |
|---|---|---|
|
12034 |
Major |
Yes |
Parameters
|
Name |
Meaning |
|---|---|
|
Source |
Specifies the cluster or system for which the alarm is generated. |
|
ServiceName |
Specifies the service for which the alarm is generated. |
|
RoleName |
Specifies the role for which the alarm is generated. |
|
HostName |
Specifies the host for which the alarm is generated. |
|
TaskName |
Specifies the task. |
Impact on the System
The periodic backup task failed, resulting in no available backup packages during the time period when the backup failed. When a system exception occurs and you need to use the backup package to restore data, no backup package is available during the failure period. As a result, data during the failure period cannot be restored.
Possible Causes
The alarm cause depends on the task details. Handle the alarm according to the logs and alarm details.
Procedure
Check whether the disk space is sufficient.
- In the FusionInsight Manager portal, click O&M > Alarm > Alarms.
- In the alarm list, click
 in the row where the alarm is located and obtain TaskName from Location.
 - Log in to the active node of the cluster as the root user and check the backup and restoration logs in /var/log/Bigdata/controller/backup/.
For details about how to log in to a cluster node, see Logging In to an MRS Cluster Node.
cd /var/log/Bigdata/controller/backup/
Run the ll command to view the log name. The following is an example of the command output:
[root@xxx backup]#ll
total 4476
-rw------- 1 omm wheel    4205 Jun 10 14:14 backupplugin_ctl.log
-rw------- 1 omm wheel  158640 Jun 11 00:02 backupplugin.log
-rw------- 1 omm wheel 4405518 Jun 11 10:28 controller_backup.log
Run the following command to check the backup and restoration logs:
vi Log file nameCheck whether the log file contains information similar to the following:
Upload backup files to *** file failed, error info: ***
- On FusionInsight Manager, choose O&M > Backup and Restoration > Backup Management. Locate the backup task based on TaskName, click Configure in the Operation column, and check whether all configuration items are correctly configured.
- Choose More > Back Up Now to start the backup task and check whether the backup task is successfully executed.
- After 2 minutes, check whether the alarm is cleared.
- If yes, no further action is required.
- If no, go to Step 7.
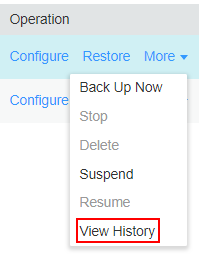
- Choose More > View History in the Operation column. In the displayed dialog box view the task details.
Figure 1 View History
- In the displayed dialog box and click
 to check whether the following message is displayed: Failed to backup xx due to insufficient disk space, move the data in the /srv/BigData/LocalBackup directory to other directories.
- Choose Backup Path > View and obtain the Backup Path.
- Log in to the node as user root and run the following command to view the node mounting details.
df -h
- Check whether the available space of the node to which the backup path is mounted is less than 20 GB.
- Check whether there are many backup packages in the backup directory.
- Remove the backup package from the backup directory or delete the backup package to ensure that the available space of the node to which the backup directory is mounted is greater than 20 GB.
- After the problem is resolved, perform the backup task again and check whether the backup task execution is successful.
- After 2 minutes, check whether the alarm is cleared.
- If yes, no further action is required.
- If no, go to Step 16.
Collect fault information.
- On the FusionInsight Manager portal, choose O&M > Log > Download.
- Select Controller from the Service and click OK.
- Click
 in the upper right corner, and set Start Date and End Date for log collection to 10 minutes ahead of and after the alarm generation time, respectively. Then, click Download.
 - Contact the O&M personnel and send the collected log information.
Alarm Clearing
After the fault is rectified, the system automatically clears this alarm.
Related Information
None
Feedback
Was this page helpful?
Provide feedbackThank you very much for your feedback. We will continue working to improve the documentation.See the reply and handling status in My Cloud VOC.
For any further questions, feel free to contact us through the chatbot.
Chatbot


