

Managing Files

Multi-level directories are supported when you create a file, rename a file, create a directory, or create a submodule. Separate multi-level directories with slashes (/), for example, java/com.
CodeArts Repo allows you to edit and compare files, and trace file changes.
When you access the repository details page, the system directs you to the Files tab under the Code tab. As shown in the following figure, the left part shows the file list of the main branch, and the right part shows the repository name (file details of the branch or tag version) and history (branches or tag versions).

Managing the File List
The file list is on the left of the Files tab page of the repository. The file list provides the following functions:
- Click a branch name to switch the branch and tag. After the branch and tag are switched, the file directory of the corresponding version is displayed.
- Click
 to display the search box. You can search for files in the file list.
- Click
 to perform the following operations, or move the cursor to the folder name and click
  to perform the following operations in the folder.
 - Creating a file
Creating a file on the CodeArts Repo console is to create a file and run the add, commit, and push commands. A commit record is generated.
On the Create File page, enter the file name, select the target template type, select the encoding type, enter the file content and commit information, and click OK. The Commit Message field is equivalent to the -m message in git commit and can be used to view associated work items.
- Creating a directory
Creating a directory on the CodeArts Repo console is to create a folder structure and run the add, commit, and push commands. A commit record is generated.
A .gitkeep file is created at the bottom of the directory by default because Git does not allow a commit of an empty folder.
On the Create Directory page, enter the catalog name and commit information, and click OK.
- Create a submodule
- Uploading a file
Uploading a file on the CodeArts Repo console is to create a file and run the add, commit, and push commands. A commit record is generated.
On the Upload File page, select the target file to be uploaded, enter the commit information, and click OK.
- Creating a file
- Move the cursor to the file name and click
 to change the file name.
 Renaming a file on the CodeArts Repo console is to change a file name and run the add, commit, and push commands. A commit record is generated.
- You can click a file name to display the file content on the right of the page. You can modify the file content, trace file modification records, view historical records, and compare the file content.
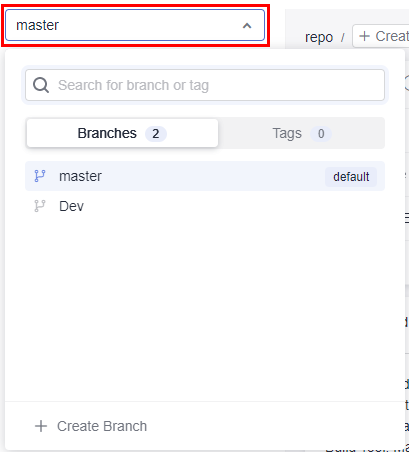
Repository Name Tab Page: Viewing File Details of a Branch or Tag Version
By default, the repository name tab page displays file details of the master branch.

It contains the following fields:
- File: name of a file or folder.
- Commit message: message of the last commit to the file or folder (-m in the commit command). You can click the message to display the commit record.
- Creator: creator of the last commit to the file or folder.
- Update time: last update time of the file or folder.

Commit messages are required for the edit and delete operations. These operations are similar to -m in the git commit command and can be used to view associated work items.
History Tab: Viewing the Commit History of a Branch or Tag Version
The History tab page displays the commit history of a branch or tag version.

On this page, you can perform the following operations on the commit history:
- Click a commit name to go to the commit details page.
- Click
 to extend the following functions:
 - Create Branch: You can create a branch for this commit based on the commit ID.
- Create Tag: You can create a tag for this commit.
- Cherry-Pick: Use the commit as the latest commit to overwrite a branch. It is used to retrieve a version.
- Revert: undoing this commit
- Browse Code.
Managing Repository Files
You can click a file name to manage the file. The functions are as follows:
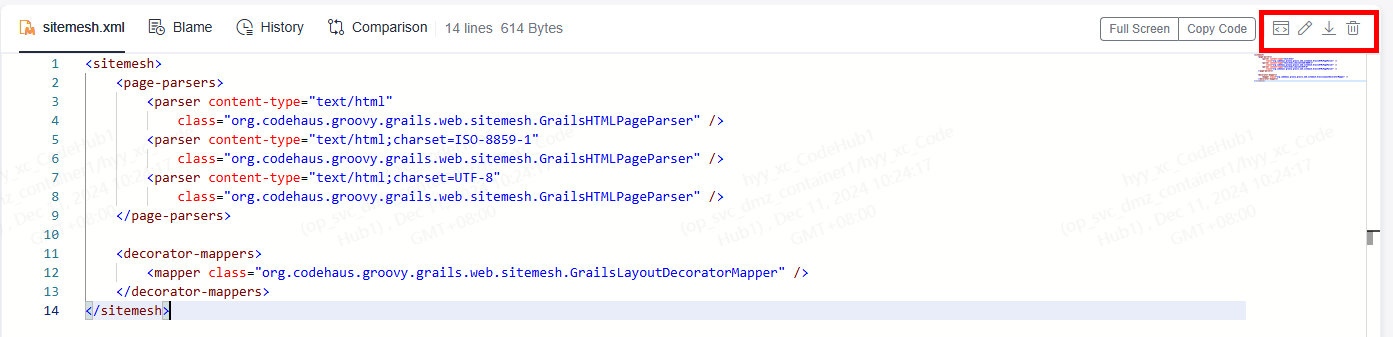
When you maximize the browser window, the functions in the drop-down menu shown in the preceding figure are displayed in tile mode.
- File name: View the detailed content of the file.
Table 1 Screen description Screen Function
Function Description
File Capacity
Indicates the capacity of the file.
Full Screen
Full screen to view the file content
Copy Code
Copy the file content to the clipboard.
Open Raw
You can view the original data of the file.
Edit
Edit the file online.
Download
Download the file to the local PC.
Remove
Delete a file.
File content
The email content is displayed.
Add review comments (
 )
)Click this icon to add a review comment. A maximum of 5,000 review comments can be added for a single merge request.
- Blame: View the change history of a file and trace operations.
On this tab page, a modifier corresponds to their modified content. You can click the file name to view the commit details.
- History: View the commit history of the file.
On this page, you can perform the following operations on the commit history:
- Click a commit name to go to the commit details page.
 provides the following functions:
 - Create Branch: You can create a branch for this commit based on the branch, tag, or commit ID.
- Create Tag: You can create a tag for this commit.
- Cherry-Pick: Use the commit as the latest commit to overwrite a branch. It is used to retrieve a version.
- Revert: undoing this commit
- Browse Code.
- Comparison: compares the committed differences.
The differences compared on the CodeArts Repo console are displayed in a better way than those on the Git Bash client. You can select different commit batches on the GUI for difference comparison.
The comparison result shows the impact of merging from the left repository version to the right repository version on the files in the right repository. If you want to know the differences between the two file versions, you can adjust the left and right positions, compare them again, and learn all the differences based on the two results.
Downloading a Directory File
Repository members with the download permission can download the code file directory on the Code tab page, as shown in the following figure.

What is your overall rating for this page?
Thank you very much for your feedback. We will continue working to improve the documentation.See the reply and handling status in My Cloud VOC.
For any further questions, feel free to contact us through the chatbot.
Chatbot


