Pay-per-Use to Yearly/Monthly
If you want to use a pay-per-use RocketMQ instance for a long time, you can change the billing mode to yearly/monthly to reduce costs. If you change the billing mode from pay-per-use to yearly/monthly, a new order is generated. The yearly/monthly resource takes effect immediately when you make the payment.
Assume that you bought a pay-per-use RocketMQ instance on Apr 18, 2023, 15:29:16, and you changed the instance's billing mode to yearly/monthly on Apr 18, 2023, 16:30:30 (a change-to-yearly/monthly order generated). After you paid the order, the RocketMQ instance immediately entered the yearly/monthly billing mode. On the Billing Center > Bills page, three bills are generated as follows:
- Pay-per-use: Apr 18, 2023, 15:00:00 to Apr 18, 2023, 16:00:00. Fees are generated for the period from 15:29:16 to 16:00:00.
- Pay-per-use: Apr 18, 2023, 16:00:00 to Apr 18, 2023, 17:00:00. Fees are generated for the period from 16:00:00 to 16:30:30.
- Yearly/Monthly: Apr 18, 2023, 16:30:30
Constraints
When a RocketMQ instance's billing mode changes, the billing mode of the EVS disks bound to the instance also changes.
Prerequisites
- The billing mode of the RocketMQ instance is pay-per-use.
- The RocketMQ instance is in the Running state.
Procedure
- Log in to the RocketMQ instance console.
- Use one of the following methods to change the billing mode from pay-per-use to yearly/monthly:
- Select one or more RocketMQ instances and click Change to Yearly/Monthly Billing in the upper left corner of the instance list. In the displayed Change to Yearly/Monthly dialog box, click OK.
- In the row that contains the target RocketMQ instance, choose More > Change to Yearly/Monthly Billing.
- Click the desired RocketMQ instance to go to the instance details page. Choose
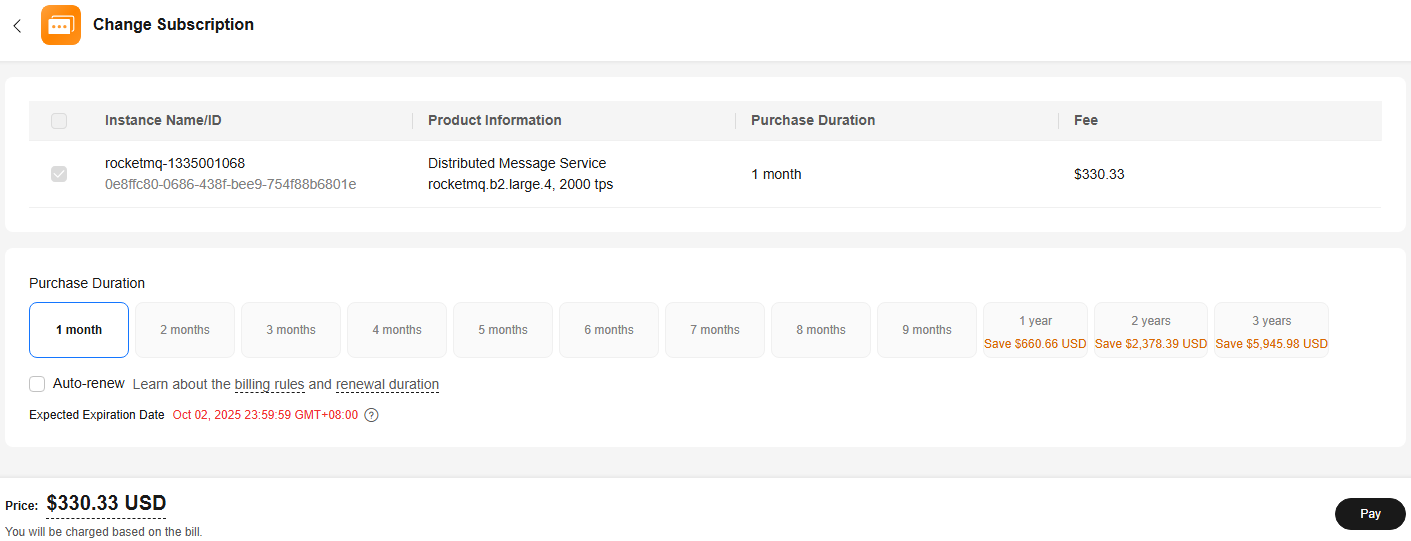
 > Change to Yearly/Monthly Billing in the upper right corner to go to the Change Subscription page.
- Select the required usage duration, determine whether to enable Auto-Renew, confirm the expected expiration date and price, and click Pay.
Figure 1 From pay-per-use to yearly/monthly

- Select a payment method and make your payment. Once the order is paid, the billing mode of the instance becomes yearly/monthly.
Feedback
Was this page helpful?
Provide feedbackThank you very much for your feedback. We will continue working to improve the documentation.See the reply and handling status in My Cloud VOC.
For any further questions, feel free to contact us through the chatbot.
Chatbot


